Transcription
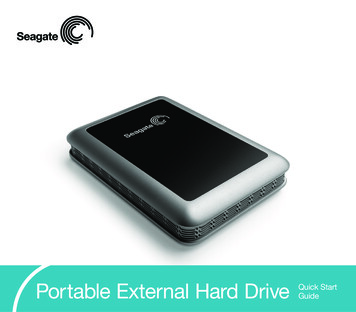
Portable External Hard DriveQuick StartGuide
Contents Seagate external hard drivewith a USB 2.0 interface USB 2.0 ‘Y’ cable Quick Start Guide Seagate Extra Value CDRequirementsWindows WindowsWindowsWindowsWindowsXP2000 ProMe98SEMacintoshYour new Seagate portable hard drive enablesyou to easily add disc space to your laptopor desktop system, and the convenient sizeenables you to take the drive with you. Plus,connecting it couldn’t be easier—in most cases,you can just plug it in. You will be ready to gowithin seconds!2Quick Start Guide Macintosh System 9.2.2(or later) or Mac OS X
SetupYour Portable External Hard Drivecomes with a special USB cable.This cable is shaped like the letter‘Y’ with one USB connector onone end of the cable and twoconnectors at the other end of thecable. This cable supplies powerto the drive and handles the datagoing between the drive and yourcomputer—this means you don’thave any other cables to connect.Note: If your computer does not supplyenough power to the drive through theone USB “Data Power” connector, plugin the unused connector on the ‘Y’ cableto another USB port on your computer(or a powered USB hub). This additionalconnection may be needed to provideadditional power to the drive and is onlyrequired if connecting the “Data Power”connector alone does not power upthe drive.C0433Power Data1. Connect one end of theUSB ‘Y’ cable to your Portabledrive and the connector endlabelled “Data Power” to anyone of the USB ports on yourcomputer. The drive does nothave a power switch, so ifyour computer is powered on,the drive will begin spinningas soon as you connect it toyour computer.Data PowerPowerOnlyPowerOnlyC0433Power DataPowerOnlyData PowerPortable External Hard DriveUSB 1.1 connectorsonly support transferrates of 12 Mbits/sec.This is not ideal for discdrives. To take advantageof the speed of this discdrive, connect it to acomputer that supportshigh-speed USB 2.0.High-speed USB 2.0supports transfer ratesup to 480 Mbits/sec(40 times faster thanUSB 1.1).Note. A DC receptacle isavailable near the USBconnector on theportable hard drive toenable the use of anexternal DC power supply. This power supplymay be used to providenecessary power to theportable hard drive in theevent an extra USB portis not available or theUSB port(s) don’t provideenough power. See page22 for specifications.3
2. See below for Windows OSinformation, or page 7 forMacintosh OS information.These sections provideinstructions about how to: Install drivers Reformat and partition the drive Dismount the driveInstalling drivers and reformattingare steps you only need to doone time. After that, you can usethe drive by just connecting theUSB cable.Windows OSInstalling drivers for youroperating system (OS)Windows XP/2000 Pro/Meoperating systems have built-in,up-to-date drivers for a USBinterface. You don’t need to installany drivers if you are using one ofthese operating systems, but make4Quick Start Guidesure you have downloaded andinstalled the latest service packsfrom Microsoft to ensure that youhave the latest drivers availablefor your OS.Note. Certain OEM installations ofWindows Me call for a file namedUSBNTMAP.SYS while attempting toload drivers for the portable drive. Thisfile can be located on the Windows Meinstallation or recovery CD in theWIN9x\BASE2.CAB folder.Windows 98SE: When you connectthe drive to your computer,Windows 98SE displays the AddNew Hardware wizard. This meansthe wizard needs to find the USBdrivers included on the SeagateUtility Toolkit CD. Follow thesesteps to install the drivers:1. Insert the Seagate UtilityToolkit CD in your computer’sCD-ROM drive.2. Click the Next button. Thewizard displays a screen withtwo options.
3. Select the Search for the bestdriver for your device option.The wizard displays fourcheck boxes.4. Select the CD-ROM and Specifylocation options. Locate thedrivers in the Drivers USBWin98 directory.5. Click the Next button. Thewizard installs the appropriatedrivers on your computer andtells you when it has finished.6. Click the Finish button tocomplete the installation.7. Restart your computer. Yournew drive is ready to use.How to reformat and/orpartition your driveYour drive is factory-formattedfor a FAT32 file system and nofurther formatting is needed forWindows operating systems.However, if you are using Windows2000 Pro or Windows XP and youprefer to use an NTFS file system,you can reformat with eitherthe built-in Disk Managementapplication provided by Microsoft,or the Seagate DiscWizard forWindows application located inthe files directory of the SeagateExtra Value CD.Caution. Reformatting destroys all data onthe drive. Back up any data that you wantto keep before you reformat the drive.To use the DiskManagement application:1. Click Start, click Run, typecompmgmt.msc, and thenclick OK.2. In the console tree, clickDisk Management. The DiskManagement window appears.Your discs and volumesare displayed.3. Right-click on the drive you wantto reformat (or partition) and usethe options provided to reformator partition the drive.Portable External Hard Drive5
To use the DiscWizard for Windowsapplication, launch the DiscWizardfor Windows application in theFiles directory on the SeagateExtra Value CD and follow theeasy-to-use, on-screen instructions.below, and then purchase andinstall—on your Windows system—available third-party software thatallows your Windows system toread from and write to a drive thatis formatted for a Mac OS.Data-sharing betweenWindows and MacintoshsystemsCaution. Do not leave your drive in itspre-formatted FAT32, single partitioncondition if you intend to transfer databetween Mac and Windows systems.Doing so will result in data loss.Seagate does not recommendthat you use your external harddrive to share data betweenWindows and Macintoshoperating systems. This isprimarily due to all of the variablesin OS types and versions, formatsand partitions, interfaces, andthird-party connectivity softwarepackages. If you absolutely mustuse your external hard drive toshare data between Windowsand Macintosh systems, initializeyour drive (before you use it!) fora Macintosh OS, as described6Quick Start GuideDismounting your drivewith Windows OSCaution. Never physically disconnect anycable attached to the drive when the driveLED indicates disc activity—doing so willprobably result in data loss.How to dismount anddisconnect the drive1. Close all windows and quit allrunning applications that arestored on the drive or that areusing data stored on the drive.
2. Click the icon in your systemtray that represents the SafelyRemove Hardware function,and then select the Seagateexternal drive.Note. The system tray is the area in thelower right portion of your desktop nearthe clock.Windows OS displays a messagewhen it is safe to disconnect theUSB cable.Macintosh OSFormat (initialize) forMacintosh OSYour new Seagate external harddrive is factory-formatted with aFAT32 file format. Although yourMacintosh operating system mayrecognize and mount your newdrive with this format, FAT32 isnot recommended for use witha Macintosh OS. You mustformat your drive using oneof the Mac OS format typesbefore you use it with yourMacintosh operating system.Reformatting takes only a fewseconds using Apple’s Disk Utility,which comes with your Mac OS.Caution: Formatting destroys all data onthe drive. If you have data that you want tokeep, back up the data before formattingthe drive. Seagate is not responsible forlost data.How to reformat and/orpartition your drive1. Open Disk Utility, which islocated in Applications/Utilities.In Mac OS 9, this utility is namedDrive Setup.What is partitioning?Partitioning dividesthe disc into separatevolumes. It does notincrease the capacityof the drive. Creating morethan one partition can behelpful in organizing yourinformation. For example,you might want onevolume (partition) to storeyour backups and onevolume for applicationsor other information. Eachvolume receives its owndrive letter, so eachvolume appears to bea separate disc drive inWindows Explorer.2. Select the disc that you wantto reformat and/or partitionin the left column. Be sure toselect the new drive, and notan existing drive that may containdata, because reformattingand/or partitioning erases alldata on the selected drive.Portable External Hard Drive7
3. Click Partition if you want topartition your drive into multiplevolumes, or click Erase toreformat the drive as one volume.Partitioning is not required; if youselect Partition, continue to thenext step. For Erase, you’redone!4. Choose the number ofpartitions from the VolumeScheme pop-up menu. Clickeach partition and enter a name,select a format, and enter asize for each partition. (You canalso drag the partitions to changethe size.) Select the Mac OSExtended format for eachpartition unless you have aspecific need to select any otheravailable Volume Format option.5. Click Partition, and then clickPartition again. Your driveappears on your desktop with thevolume label(s) you entered in thesteps above. If you elected to8Quick Start Guidepartition the drive to create twoor more volumes, each volumewill have a drive icon and label.Sharing data betweenWindows and MacintoshsystemsSeagate does not recommend thatyou use your external hard drive toshare data between Windows andMacintosh operating systems.This is primarily due to all of thevariables in OS types and versions,formats and partitions, interfaces,and third-party connectivitysoftware packages. If you absolutelymust use your external hard driveto share data between Windowsand Macintosh systems, initializeyour drive (before you use it!) for aMacintosh OS, as described above,and then purchase and install—onyour Windows system—availablethird-party software that allows
your Windows system to readfrom and write to a drive that isformatted for a Mac OS.How to dismount anddisconnect the drive inMac OS X and Mac OS 9Caution. Do not leave your drive in itspre-formatted FAT32, single partitioncondition if you intend to transfer databetween Mac and Windows systems.Doing so will result in data loss.1. Close all windows and quitall running applications that arestored on the drive or that areusing data that is stored onthe drive.Macintosh OS interface drivers2. In Mac OS X, drag the Seagateexternal-drive icon to the trashicon in your Dock area. In MacOS 9, drag the Seagate externaldrive icon to the trash icon.Macintosh OS X and OS 9 havebuilt-in, up-to-date drivers for aUSB interface. You don’t need toinstall any drivers if you are usinga Macintosh OS.Dismounting anddisconnecting your drivewith Mac OS3. You can safely disconnectyour hard drive when the driveicon disappears from yourdesktop and the drive LEDis not lit.Caution. Dismount the drive beforedisconnecting the USB cable from thedrive. The drive will spin down when youdismount the drive. You can then disconnect the USB cable and move the drive.Portable External Hard Drive9
BounceBack ExpressNote. Included withcapacities of 100GBand above.Note. BounceBackExpress software(version 7.0 or higher)is not backwardcompatible with earlierSeagate Portable Drivemodels. You should onlyuse the software onthe CD that is providedwith the drive.Note: BounceBackExpress software doesnot support Mac OS.10BounceBack Express allows you toautomatically copy files from yourhard drive to your external drive. Itsupports Windows 2000 Pro.Before you install BounceBackExpress Disable all virus-protectionprograms. For Windows 2000 Pro or XPusers in a corporate environment,log on as a local administrator.Check with your system administrator for details. If you are backing up to anexternal device, make sure theexternal device is connected toand working properly with youroperating system. Disconnect all other externalstorage devices (for example,hard disc drives, DVD, CDR,Quick Start GuideMP3 players, memory cardreaders, and so forth) that arenot involved in the backup.Note. For detailed BounceBack Expressinstallation and usage, click the ? button onthe BounceBack ControlCenter mainmenu, or launch the BBHelp.chm file in theCMS folder on the CD.Installing BounceBackExpress software1. Insert the Seagate Disc UtilityCD. Install BounceBack Expressfrom the menu.Note. If the BounceBack ControlCenterfails to appear:Windows OS users: Double-clickthe CD icon, open the CMS folder,and then click BBSetup.exe.2. Click Install on the BounceBackExpress menu.
3. Follow the on-screen instructionsto install the software. Severalapplications are installed.4. Once the InstallShield Wizard hasstarted the installation process,several screens will be displayedin quick succession.5. On the License Agreementscreen, click I accept the termsof the license agreement toindicate that you agree to theterms of the License and tocontinue the installation.6. On the Choose DestinationLocation screen, click Next toaccept the default location forinstalling BounceBack or use theBrowse button to select anotherlocation.7. Click Yes to create the defaultfolder or your own folder name.On the Choose DestinationLocation screen, click Next tocontinue. This displays a screenshowing the installation’s SetupStatus.8. Registering your product enablesCMS to provide you with moreeffective technical support.Upgrade Info takes you to theCMS web site and providesthe latest information onBounceBack software.Register Now takes you to theCMS web site to register yourcopy of BounceBack Express.Register Later continues withthe installation.After returning from the CMSProducts registration website,click OK to continue theinstallation process.A splash screen will be displayedfor a few seconds while theBounceBack Control Centeris loaded.Portable External Hard Drive11
Configuring your first backup9. When the BounceBack ControlCenter displays, you are offered3 choices for your first backupFull System, My Documents,and Let Me Choose.Full System will setup a backupset that includes all files andfolders on your computer. Thissetting requires a backup devicebe connected to the computer.Backup Device List identifiesavailable hard drives for backupuse and allows you to selectan available device for the fullsystem backup.Backup Set Schedule allowsyou to manually launch a backupoperation or to schedule backups to be launched.Backup Sizing scans the foldersand files on the system drive anddetermines the total size of thefiles to be backed up.12Quick Start GuideNote. The size shown will start at 0 andincrement, as the size of each file in thebackup set is determined.10. The BounceBack Installationscreen will then show the estimated time it will take for yourfirst backup to run completely.Click Backup Now to continuewith the next step.Clicking Backup Later haltsthe installation process with adata set created but no backuphaving taken place. If you wantto make use of any of theadvanced settings features forthe backup, select BackupLater, and then select Settingsfrom the BounceBack ControlCenter.Note. The sooner you run your firstbackup, the sooner your data isprotected!
11. After clicking Backup Now, theBackup Scan and Backup inProgress screens display theprogress of the initial backup.Note. An option exists on this screen toallow you to view a detailed file by fileprogress as the backup process is running.If the View Detailed Progress option isclicked, the speed of the backup processwill be slowed down substantially.12. Click OK to use otherBounceBack functions—suchas associating a password witha backup device or creatingBackup Sets—or close theapplication.Subsequent backupsAfter the initial system backup, youhave a number of backup optionsincluding: Manual Backups. To run amanual backup using thedefault Backup Set, click theBounceBack icon in the systemtray and select BounceBackControlCenter and click theBackup button on theBounceBack Control Center. Auto Launch. Any time you connect a configured and supportedexternal backup device to yourcomputer, this feature scans yoursystem disk for new or modifiedfiles and automatically backsthem up to the backup device.To temporarily turn off the AutoLaunch feature, click on theBounceBack icon in the system tray,and select Disable BounceBackLauncher. Scheduled Backups. Use theSettings function from theBounceBack ControlCenter tocreate or modify Backup Setsand schedule their run times.Portable External Hard Drive13
File restoreBounceBack Express backs updata in the operating system’snative file format and uses the samedirectory structure (folders and files)as the original data. This makes iteasy to find and restore files fromthe backup drive using WindowsExplorer in Windows OS.BounceBack QuickRestore forWindows 2000 Pro and XPOlder—the file on the backupdrive unit is older than the file onyour hard drive.BounceBack QuickRestore canrestore files and folders from thebackup drive quickly and easily.Newer—the file on the backupdrive unit is newer than file onyour hard drive.The steps to restore data are asfollows:Deleted—the file on the backupdrive unit represents a file thathas been deleted on your harddrive.1. Start BounceBack ControlCenterand select Restore.2. In the left side of theBounceBack QuickRestore box,navigate to the backup that contains the file(s) you want to14restore. You will see the filedetails on the right side of thescreen.3. Note the Status information forthe files.Unchanged—the file on thebackup drive unit is the same asthe file on your hard drive.Quick Start Guide4. Click on the file(s) you want torestore.
5. Select the Restore Path: Select Restore to originallocation.6. Click the Restore button.7. Select the Restore Option youwant and click OK: Overwrite Existing Files withoutAsking Prompt before Overwriting Do Not Overwrite Existing Files8. BounceBack QuickRestore scansand verifies that the hard drivehas enough space to accept therestore. Click Continue on theStatistics screen.9. BounceBack restores the file(s)and reports under Restore Totals.Click OK to return to BounceBack.ControlCenter menu to access it.You can also find it online atwww.cmsproducts.com/support.Help documentation is also integrated within the BounceBackExpress software.Want advanced features?As a BounceBack Express user,you can upgrade to BounceBackProfessional, an extended versionof BounceBack Express, withadvanced features that provide anall-inclusive disaster-recovery andbackup solution.Additional documentationA detailed BounceBack Expressuser’s manual is included on theSeagate Disc Utility CD. Click (?)icon on BounceBackPortable External Hard Drive15
Special features includebootability, advancedrestore, synchronization,and versioning. The bootability feature createsa bootable drive image thatenables users to instantly recoverfrom a disaster by either usingthe rescue CD or by exchangingthe internal PC hard drive withthe backup drive. The advanced restore functionprovides a graphical user interface to compare and manageinformation on the source driveand backup drive, allowing usersto restore lost or corrupted data. The synchronization featureautomatically scans both thecomputer and the backup drivefor changed files, and synchronizes out-of-date versions withupdated versions of the files.16Quick Start Guide The versioning feature providesusers an innovative backupprocess that allows access toolder versions of files from anydate a backup was performed.For more information about theBounceBack Professional softwareupgrade, contact CMS or, to purchaseBounceBack Professional, visit the CMSwebsite at www.cmsproducts.com/seagate/upgrade, or call CMS ProductsSales at 714-424-5520 or 800-327-5773.
TroubleshootingProblem: My operating systemreports the capacity as much lessthan the capacity indicated on thedrive I purchased.Resolution: Disc drivemanufacturers consider 1 Gbyteto equal 1,000,000,000 bytes.However, your computer operatesat a binary level, which considers1 Gbyte to equal 230 which equals1,073,741,824 bytes. So, forexample, even though a 40-Gbytedrive stores 40 Gbytes of datawhen you think in terms of 1 Gbyteequals 1,000,000,000 bytes, yoursystem will report a lower capacitydue to the operating system’smethod of calculating the valueof each gigabyte. This meansyour operating system may reportthat your 40-Gbyte drive hasa capacity of approximately37 Gbytes, the binary equivalentof 40,000,000,000 bytes.Windows-specific problemsFirst, make sure you have thelatest Microsoft operating systemservice packs and other Windowsupdates installed on your systembefore you spend time looking fora drive problem. These servicepacks are issued to fix bugs,add drivers, and enhance thesecurity features of your system.See http://support.microsoft.comfor details about how to installservice packs and Windowsupdates in your system. ContactMicrosoft Customer Service forinformation about obtaining thesesystem enhancements if you don’thave Internet access.Problem: The drive is connectedto the USB port, but the computerdoes not recognize the drive.Resolution: Check Power.Confirm the drive has power andthat the drive LED flickers on andoff when you plug in the drive.If the light does not flicker on andPortable External Hard Drive17
off, check to ensure that the USBcable is plugged in firmly.Confirm that the USB cable isplugged in to the computer and thedrive. Remove any hubs and plugthe drive directly into the USB porton the computer.Check Device Manager toconfirm the USB host controlleris properly configured. To openDevice Manager (WindowsXP/Windows 2000 Pro), right-clickMy Computer, choose Manage,and then choose the DeviceManager icon from the tree.If the host controller is in OtherDevices, then additional driversare required for the host. Checkwith the PCI card vendor ormotherboard vendor for theappropriate drivers. USB 2.0controllers usually require aservice pack to operate properly.Windows XP added support for18Quick Start GuideUSB 2.0 in Service Pack 1;Windows 2000 Pro added supportfor USB 2.0 in Service Pack 3 andimproved the support in ServicePack 4. Windows Me does notinclude native support for USB 2.0,so you should use the latest driversprovided by the USB host adaptermanufacturer. If the USB port is onthe motherboard, you should usethe latest drivers provided by themotherboard manufacturer. If thehost controller is not seen in DeviceManager, it is probably disabled inthe computer BIOS.Check Device Manager to confirmthe USB hard drive is detectedand configured properly. If not,disconnect and reconnect thedrive using a different USB port.
If, after following the steps above,you still have a problem, contactSeagate support.Problem: The drive doesn’t operatein high-speed mode when connected with the USB cable.Problem: Drive clicks or beepswhen I plug it in and does not showup in My Computer.Resolution: Windows XP addedUSB 2.0 support with Service Pack1 or higher installed. For informationon obtaining the latest ServicePack, visit Microsoft’s supportweb site.Resolution: This error commonlyoccurs with the Portable drive if itis plugged into a USB 1.x port orinto a un-powered USB hub. Theportable drive comes with a specialUSB cord that allows the drive topull additional power from anotherUSB connector. If your drive clickswhen you plug it in then first plug inthe Power cable then plug in the“Data Power” cable.If you are using the drive witha Powered hub or with a USB 2.0port this should not benecessary.Windows 2000 Pro has a patchto support USB 2.0. Download thispatch through the Windows Updatefeature in the operating system.Service Pack 4 for Windows 2000Pro also addresses several issuesthat you might experience with USB2.0; so applying the service packmay be the best way to gain themaximum performance from yourUSB 2.0 drive. Microsoft documentnumber 319973(http://support.microsoft.com)describes how to apply theupdates. Also see MicrosoftPortable External Hard DriveNote. A DC receptacle isavailable near the USBconnector on theportable hard drive toenable the use of anexternal DC power supply. This power supplymay be used to providenecessary power to theportable hard drive in theevent an extra USB portis not available or theUSB port(s) don’t provideenough power. See page22 for specifications.19
Knowledgebase Article 260910 formore information.Macintosh-specificproblemsWindows Me does not have nativesupport for USB 2.0, so you shoulduse the latest drivers for your USBhost adapter. These drivers mustbe provided by your host adaptermanufacturer (or motherboardmanufacturer if the USB ports areon the motherboard).First make sure you have thelatest Apple operating systemsoftware updates installed on yourcomputer before you spend timelooking for a drive problem. Theseupdates are issued to fix bugs, adddrivers, and enhance the securityfeatures of your computer. To checkfor software updates using Mac OSX, open the Software Update system-preference panel and click theCheck Now button. You mustbe connected to the Internetto check for and download a software update.Windows 98SE does not havenative support for USB 2.0, so youshould use the latest drivers foryour USB host adapter. Thesedrivers must be provided by yourhost adapter manufacturer (ormotherboard manufacturer if theUSB ports are on the motherboard).You will also need drivers for yourSeagate hard drive if you are usingthe USB port in Windows 98SE(see www.seagate.com/support/kb/disc/faq/external usb drivers.html).20Quick Start Guide
Problem: The drive does notmount at all, and no error messageappears on my screen when Iconnect the drive.Resolution: Use Apple’s Disk Utilityto locate, initialize, and mount thedrive.Problem: The Macintosh OSdisplays the following messagewhen I connect the drive tomy system: “Unable to readvolume—must initialize.”Resolution: Your Mac OS doesnot recognize the drive format.Use Apple’s Disk Utility to initializethe drive with a Mac OS Extendedformat.Portable External Hard Drive21
AppendixIf you should need an external DCpower supply, please ensure itmeets the following specifications:AC input voltage:90VAC to 264VACAC input frequency:47Hz to 63HzOver-Voltage protection:YesShort Circuit Protection(current limiting):YesNominal DC voltage:5.4 VDCMax DC voltage variation fromnominal under all conditionsincluding temperature range,min to max current, and stepload variations): /- 4%Note. The max voltage at 0.0A shall be lessthan or equal to 5.62Vdc. Min voltage at1.3A shall be greater than or equal to5.18VdcStep load variation:0 to 90%Max current:1.3APower:7W typicalRipple:50mVp-p max from10Hz to 100MhzEfficiency:Better than 75% typicalTemperature range:0 C to 45 CHumidity:20% to 90%Emissions:FCC class B, EN 55022 BAgency approvals:CSA, UL, CE, FCC22Quick Start Guide
Portable External Hard Drive23
Seagate Technologywww.seagate.comCopyright 2006 Seagate Technology LLC. All rights reserved. Seagate, Seagate Technology and the Wave logoare registered trademarks of Seagate Technology LLC. DiscWizard and SeaTools are registered trademarks ortrademarks of Seagate Technology LLC. Other product names are registered trademarks or trademarks of theirowners. Seagate reserves the right to change, without notice, product offerings or specifications. One gigabyte,or GB, equals one billion bytes when referring to hard drive capacity. Accessible capacity may vary dependingon operating environment and formatting. Quantitative usage examples for various applications are for illustrativepurposes. Actual quantities will vary based on various factors, including file size, file format, features and applicationsoftware. No part of this publication may be reproduced in any form without written permission of SeagateTechnology LLC. P/N: 100412920 04/06
the drive. Portable External Hard Drive 3 USB 1.1 connectors only support transfer rates of 12 Mbits/sec. This is not ideal for disc drives. To take advantage of the speed of this disc drive, connect it to a computer that supports high-speed USB 2.0. High-speed USB 2.0 supports transfer rates up to 480 Mbits/sec (40 times faster than USB 1.1 .