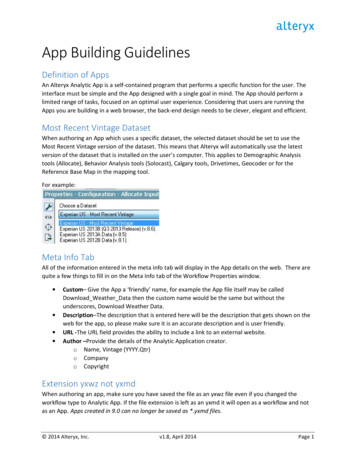
Transcription
PowerApps canvas app codingstandards and guidelinesWhite paperSummary: This technical white paper is aimed at Microsoft PowerApps makers in the enterprise. Itcontains standards for naming objects, collections, and variables, and guidelines for developingconsistent, performant, and easily maintainable apps.Writers: Todd Baginski, Pat DunnTechnical Contributors: Mehdi Slaoui Andaloussi, Alex Belikov, Casey Burke, Ian Davis, Brian Dang,Rémi Delarboulas, Aniket J. Gaud, Nick Gill, Audrie Gordon, Erik Orum Hansen, Eric Mckinney, SanthoshSudhakaran, Hubert Sui, Vanessa Welgemoed, Keith Whatling
ContentsIntroduction . 4Purpose of this white paper . 4Scope of this white paper . 4This is a living document . 4General naming conventions . 5Camel case . 5Pascal case . 5Object naming conventions . 5Screen names . 5Control names . 6Data source names. 8Code naming conventions . 10Variable names . 10Collection names . 11Organizing your objects and code . 12Using groups for organization . 12Format text feature. 12Minimizing the number of controls that you create. 13Finding the best place for your code . 13Other tips for organization. 18General coding guidelines. 19Click targets . 19Variables and collections . 19Nesting . 20Optimizing for performance . 21OnStart code . 21Concurrent function . 21Delegable calls vs. non-delegable calls . 22Using local collections . 22SQL optimization . 22Expensive calls . 232
Limiting the package size . 24Periodically republishing your apps . 24Advanced settings . 25App design. 26Using parent/child relationships for relative styling. 26Galleries . 26Forms . 27Common Data Service for Apps . 27Multiple form factors . 28Configuration values . 28Creating a hidden configuration screen. 28Storing configuration values in Common Data Service for Apps . 30Using a custom API. 30Error handling/debugging . 30Toggle controls for error handling . 30Using a canvas control as a debug panel . 31Showing debug controls to app makers. 31Documentation . 32Code comments . 32Documentation screens . 333
IntroductionMicrosoft PowerApps is a high-productivity application development platform from Microsoft. Microsoftuses this platform to build first-party applications in Microsoft Dynamics 365 for Sales, MicrosoftDynamics 365 for Service, Microsoft Dynamics 365 for Field Service, Microsoft Dynamics 365 forMarketing, and Microsoft Dynamics 365 for Talent. Enterprise customers can also use the same platformto build their own custom line-of-business applications. Individual users and teams within yourorganization can also build personal or team productivity applications without having to write very muchcode (or any).Purpose of this white paperThis white paper is targeted at the enterprise application maker (developer) who is responsible fordesigning, building, testing, deploying, and maintaining PowerApps apps in a corporate or governmentenvironment. This white paper was developed as a collaboration between the Microsoft PowerAppsteam, Microsoft IT, and industry professionals. Of course, enterprise customers are free to develop theirown standards and practices. However, we feel that adherence to these guidelines will help developersin these areas: SimplicityReadabilitySupportabilityEase of deployment and administrationPerformanceAccessibilityScope of this white paperExcept where specifically noted, all features that are mentioned in this white paper are available as ofDecember 2018. The following topics are out of scope for this white paper: PowerApps fundamentals for building applications. This white paper assumes that the readerhas a working knowledge, but not necessarily expert knowledge, of how to build a PowerAppsapp. For blogs, tutorials, training resources, and community support, dex.Microsoft Power BI and other parts of the broader Microsoft Power platform.Code outside PowerApps, such as code in Microsoft Azure App Service and Function App.General governance and Application Lifecycle Management (ALM).Environment administration. To learn about this topic, we recommend that you read theAdministering a PowerApps enterprise deployment white paper.This is a living documentThis white paper is intended to be a living document. As Microsoft Power platform capabilities andindustry standards change, so will this white paper.Microsoft is listening to customer feedback and is constantly evolving the Power platform to help youbuild better apps for your users. As a result, today’s best practice might become obsolete as newfeatures change the most efficient approaches. Check back periodically to see the latest standards andguidelines.4
Thank you to all the professionals who have contributed to this white paper by sharing your collectiveguidance and experience. Now, on to the guidance.General naming conventionsThis section describes “camel case” and “Pascal case” naming conventions. If you’re already familiarwith those terms, you can skip ahead.Camel caseYou should use camel case for controls and variables. Camel case begins with a lowercase prefix,removes all spaces from object or variable names, and capitalizes the first letter of each word after thefirst. For example, a text input control might be named txtUserEmailAddress.Pascal caseYou should use Pascal case for data sources. Pascal case is sometimes referred to as “upper camel case.”Like camel case, it removes all spaces and capitalizes the first letter of words. However, unlike camelcase, Pascal case also capitalizes the first word. For example, a common data source in PowerApps is theMicrosoft Office 365 Users connector, which is named Office365Users in your code.Object naming conventionsAs you create objects in your PowerApps apps, it’s important to use consistent naming conventions forscreens, controls, and data sources. This approach will make your apps easier to maintain, can helpimprove accessibility, and will make your code easier to read as those objects are referenced.Note: As we were preparing this white paper, we found lots of variance in the naming conventions ofdifferent organizations. One experienced maker renames her controls only if they’re referenced informulas. Several makers prefer different prefixes for their controls.This is OK! The object naming conventions in this white paper are intended as guidelines, andorganizations are free to develop their own standards. The main point is to be consistent.Screen namesScreen names should reflect the purpose of the screen, so that it’s easier to navigate through complexapps in PowerApps Studio.What’s less obvious is that screen names are read aloud by screen readers, which are needed for userswho have vision accessibility needs. Therefore, it’s imperative that you use plain language to nameyour screens, and that the names include spaces and no abbreviations. Also, we recommend that youend the name with the word “Screen,” so that the context is understood when the name is announced.Here are some good examples: 5Home ScreenThrive Help Screen
Here are some bad examples: HomeLoaderScreenEmpProfDetailsThrive HelpControl namesAll control names on the canvas should use camel case. They should begin with a three-character typedescriptor, followed by the purpose of the control. This approach helps identify the type of control andmakes it easier to build formulas and search.Here’s a good example: lblUserNameThe following table shows the abbreviations for common controls.Control namebuttoncamera controlcanvascard6Abbreviationbtncamcancrd
collectioncombo boxdatesdrop downformgallerygroupheader page shapehtml texticonimagelabelpage section shapeshapes (rectangle, circle, and so on)table datatext hptbltxttimControl names must be unique across an application. If a control is reused on multiple screens, the shortscreen name should be suffixed at the end – for example, galBottomNavMenuHS, where “HS” standsfor “Home Screen.” This approach makes it easier to reference the control in formulas across screens.Here are some bad examples: 7zipcodeNext
As the following image shows, if you consistently name your controls, your app will be much cleaner inthe navigation view, and your code will be much cleaner too.Data source namesWhen you add a data source to your application, the name can’t be changed in the PowerApps app. Thename is inherited from the source connector or data entities that are derived from the connection.Here are some examples: Name inherited from the source connector: The Office 365 Users connector is namedOffice365Users in your code.Data entities derived from the connection: A Microsoft SharePoint list that’s named Employeesis returned from the SharePoint connector. Therefore, the name of the data source in your codeis Employees. The same PowerApps app can also use the same SharePoint connector to accessa SharePoint list that’s named Contractors. In this case, the name of the data source in the codeis Contractors.For more information about connectors and connections, see the Overview of canvas-app connectorsfor PowerApps article.8
Standard action connectorsIn Standard action connectors that expose functions, such as LinkedIn, you’ll see that the data sourcename and its operations use Pascal casing (that is, UpperUpperUpper). For example, the LinkedIn datasource is named LinkedIn and has an operation named ListCompanies.Custom connectorsCustom connectors can be created by any maker in your environment. They’re used to connect tocustom application programming interfaces (APIs) such as third-party services or line-of-business APIsthat your IT department has created. Pascal casing is also recommended for the data source name andits operations. Just be aware that the custom connector name and the way that it appears in PowerAppscan differ.For example, here’s a custom connector named MS Auction Item Bid API.But when you create a connection from this connector and add it to your PowerApps app as a datasource, it appears as AuctionItemBidAPI.To discover the reason, you can look inside the OpenAPI file. There, you’ll see a title attribute thatcontains the text Auction Item Bid API.PowerApps removes all the spaces from this attribute value and uses it as the name of your data source.We recommend that you change the value of this attribute to a Pascal-cased name such asAuctionItemBidAPI and use it as the name of your custom connection. In that way, there will be noconfusion. Change this value before you import the OpenAPI file to create the custom connector.Note: If you use the Create from blank option instead of importing an existing OpenAPI file, PowerAppswill prompt you for the custom connector name. This name will be used both as the name of the custom9
connector and as the value of the title attribute inside the OpenAPI file. Once again, if you just use aPascal-cased name such as AuctionItemBidAPI, you’ll be fine.Excel DataTablesPowerApps uses DataTables in Microsoft Excel to connect to data in Excel worksheets. Keep these pointsin mind when you create Excel documents as data sources: Give your DataTables descriptive names. You’ll see the name in the PowerApps app when youwrite the code to connect to it.Use one DataTable per worksheet.Give the same name to the DataTable and worksheet.Use descriptive column names in the DataTables.Use Pascal casing. Each word of the DataTable name should begin with a capital letter (forexample, EmployeeLeaveRequests).Code naming conventionsAs you add code to your PowerApps apps, it becomes increasingly important to use consistent namingconventions for variables and collections. If variables are named correctly, you should be able to quicklydiscern the type, purpose, and scope of each.We found lots of variance in the code naming and object naming conventions of different organizations.For example, one team uses data type prefixes for its variables (such as strUserName to indicate astring), whereas another team prefixes all its variables with an underscore ( ) to group them inIntelliSense. There are also differences in the way that teams denote global variables versus contextvariables.The same guidance applies here: Have a pattern for your team, and be consistent in its usage.Variable names Be descriptive of the variable’s function. Think about what the variable is bound to and how it’sused, and then name it accordingly.Prefix your global and context variables differently.Be smart! PowerApps lets context variables and global variables share the same names. This can causeconfusion, because, by default, your formulas use context variables unless the disambiguation operatoris used. Avoid this situation by following these conventions: Prefix context variables with loc.Prefix global variables with gbl.The name after the prefix should indicate the intent/purpose of the variable. Multiple words canbe used and don’t have to be separated by any special characters (for example, spaces orunderscores), provided that the first letter of each word is capitalized.Use Camel casing. Begin your variable names with a prefix in lowercase letters, and thencapitalize the first letter of each word in the name (that is, lowerUppperUpper).Here are some good examples: 10Global variable: gblFocusedBorderColorContext variable: locSuccessMessage
Here are some bad examples: dSubrstFldshideNxtBtnttlOppCtcFVcQIdAvoid short and cryptic variable names such as EID. Use EmployeeId instead.Note: When there are many variables in an app, you can just type the prefix in the formula bar to see alist of the available variables. If you follow these guidelines to name your variables, you’ll be able to findthem very easily tin the formula bar as you develop your app. Ultimately, this approach leads to quickerapp development.Collection names Be descriptive of the collection’s contents. Think about what the collection contains and/or howit’s used, and then name it accordingly.Collections should be prefixed with col.The name after the prefix should indicate the intent or purpose of the collection. Multiple wordscan be used and don’t have to be separated by spaces or underscores, provided that the firstletter of each word is capitalized.Use Camel casing. Begin your collection names with a lowercase col prefix, and then capitalizethe first letter of each word in the name (that is, colUpperUpper).Here are some good examples: colMenuItemscolThriveAppsHere are some bad examples: orderscolltempCollectionNote: When there are many collections in the app, you can just type the prefix in the formula bar to seea list the available collections. As for variables, if you follow these guidelines to name your collections,you’ll be able to find them very easily in the formula bar as you develop your app. Ultimately, thisapproach leads to quicker app development.11
Organizing your objects and codeUsing groups for organizationAll controls on a screen should belong to a group, so that you can easily recognize their purpose, movethem around a screen or between screens, or collapse them to simplify your view. Gallery, Form, andCanvas controls are already groups, but they can also, optionally, be part of another group to helpimprove organization.Optionally, you can use the experimental enhanced Group control, which allows for nesting of groups,group-level settings, keyboard navigation, and more.Format text featureAs the complexity of a formula increases, readability and maintainability are affected. It can be verydifficult to read a large block of code that contains multiline functions. The Format text feature adds linebreaks and indentation to make your formula easier to read. As for code comments, the extra whitespace is removed from the app package that’s downloaded to the client. Therefore, there’s no need touse the Remove formatting feature before you publish your app.12
Minimizing the number of controls that you createTo minimize complexity, try to limit the number of controls in your apps. For example, instead of havingfour image controls that lie on top of each other and have different Visible property settings, use oneimage that includes logic in its Image property to show different images.Finding the best place for your codeAs the complexity of your PowerApps apps increase, it can become more difficult to find your codewhen it’s time to debug an application. A consistent pattern makes this challenge easier. Although thissection isn’t exhaustive, it provides some guidelines about the best place for your code.As general guidance, try to move your code to the “top level” as much as possible, so that it’s easier tofind in the future. Some makers like to put code in the OnStart property. This approach is fine,provided that you understand the OnStart property’s limitations, and possible perceived implicationsfor app performance. Other makers prefer to put code in the OnVisible property, because it’s easy tofind, and code reliably runs whenever the screen is visible.Code encapsulationWhenever possible, try not to distribute your code across screens, so that all the code resides on onescreen. For example, one maker built a people browser app that shows the organizational hierarchy in agallery. When a user clicks a name, the app goes to a new screen and shows the employee profile. In thiscase, the maker didn’t put the logic to load the profile in the gallery’s OnSelect property. Instead, theapp just passes any variables that are needed on the next screen as context variables in the Navigatefunction. The User Profile screen does all the work to load the user profile.Here’s the Navigate function in the gallery’s OnSelect property for this example.13
Then, in the OnVisible property of the User Profile screen, call Office365Users.UserProfileV2by using the user ID that was received from the previous screen. Subsequent code then uses the othercontext variables that were passed.Note: The previous example passes ThisItem values as context variables instead of having the nextscreen refer to the Selected property of the previous screen. This approach was used deliberately,because this app has multiple paths to the User Profile screen from other screens that include galleries.The screen is now encapsulated and can easily be reused in this app and other apps.OnStart propertyIn general, try to limit the code that you put in the OnStart property, because it’s difficult to debug. Todebug code there, you must save, close, and then reopen your PowerApps app in PowerApps Studio tomake the code run again. You can’t create context variables in this property. Think of it asApplication.OnStart, which runs only once before any screen is shown.Here are the recommended uses for OnStart:14 Screen routing: Unlike the OnVisible property, you can use the Navigate function in theOnStart property. Therefore, it can be a handy place to make routing decisions. For example,you can evaluate a parameter named mode to determine which screen to show. Impersonation or debug privileges: You can create code in the OnStart property to checkwhether the current user is on a list of email addresses and, if the user is on the list, turn on adebug mode that shows hidden screens and text input controls.
Note: You can also check Azure Active Directory (AAD) group membership to apply securitysettings to your apps. Static global variables: Use the OnStart property to create collections of error messages or setglobal style variables, such as control colors and border widths. For another approach, see theCreating a hidden configuration screen section later in this white paper.“Run once” code: By its definition, code that’s put in the OnStart property runs only once,while the app is starting but before the first screen is visible. On the other hand, code in theOnVisible property runs every time a user goes to that screen. Therefore, if you need yourcode to run only once, consider putting it in the OnStart property.Code that runs quickly: For specific guidance about the OnStart property, see the Optimizingfor performance section later in this white paper.For more information about the OnStart and OnVisible properties, watch the PowerApps OnStartand OnVisible Development Tricks video by Todd Baginski.OnVisible propertyThe OnVisible property is the place to put code that must run every time a user goes to a screen. Becareful about putting code in this property. If possible, avoid putting logic in the OnVisible propertyon the first screen of your PowerApps app. Instead, try to use inline expressions in control properties.The OnVisible property is a great place to set global or context variables. However, be careful aboutthe calls that you make to set those variables. Quick calls, such as calls to Office365Users.Profileor calls to set a static color for reuse in controls, are acceptable. However, stay away from complex logicand code that takes a long time to run.For more information about performance issues that are related to the OnVisible property, see theExpensive calls section later in this white paper.OnTimerStart propertyTimers present interesting possibilities for event-based code execution. Typically, makers hide timercontrols and set the Start property to watch a Boolean variable or control state.15
For example, if you want to have a form that lets the user switch an auto-save feature on and off, youcan create a toggle control that’s named tglAutoSave. A timer on the screen then has its Startproperty set to tglAutoSave.Value, and code in the OnTimerStart property can save the data.In the OnTimerStart property, you can also put code that uses the ClearCollect function to reloaddata at a specified refresh interval.The OnTimerStart property also supports the Navigate function. You can use it to go to anotherscreen when specific conditions are met. For example, a loader screen sets a Boolean context variablewhen all data has been loaded, and the timer then goes to a data display screen. Alternatively, you canuse this property to go to a “Session timed out” message screen after a period of inactivity.This pattern comes with two caveats: 16The timer won’t fire when you’re editing the app in PowerApps Studio. Even if AutoStart is setto true, or an expression is evaluated as true in the Start property, the OnTimerStartproperty code won’t be triggered. However, it will be triggered when you switch to PreviewMode (F5).
Before the Navigate function fires, there can be enough of a delay for additional code to runon the screen.For example, you have a timer control on a loader screen. You set the control’s Start propertyto locRedirect, a Boolean context variable, and you put the following navigation code in theOnTimerStart property.The OnVisible property of the loader screen retrieves the employee ID and setslocRedirect to false if the ID isn’t numeric (because non-numeric employee IDs are errorconditions).When locRedirect is set to true, the timer control’s OnStart code runs, but there’s a slightdelay, during which code in the OnVisible property continues to run. Therefore, do anadditional error check for the next few lines of code.OnSelect propertyCode in the OnSelect property of a control runs whenever that object is selected. Object selection canoccur through user interaction, such as the click of a button or selection of a text input control. The code17
that runs here can validate form data and show validation messages or hint text, or it can read from andwrite to your data source.Note: Avoid putting long-running code in the OnSelect property, because long-running code can givethe impression that the application has stopped responding. For more information, see the Optimizingfor performance and Expensive calls sections later in this white paper. Also consider loading indicatorsor status messages to help prevent the perception of slowness.Code that’s put in the OnSelect property will also run when the control is selected by using theSe
PowerApps canvas app coding standards and guidelines White paper Summary: This technical white paper is aimed at Microsoft PowerApps makers in the enterprise. It contains standards for naming objects, collections, and variables, and guidelines for developing consistent, performant, and e