Transcription
Business Internet Fax service from BellUser Guide
Table of contentsGetting Started . . . . . . . . . . . . . . . . . . . . . . . . . . . . . . . . . . . . . . . . . . . . . . . 3Send and receive faxes through your email management software . . . . . . . . . . . . . . . . . . 3Send a fax . . . . . . . . . . . . . . . . . . . . . . . . . . . . . . . . . . . . . . . . . . . . . . . . . . 3Receive a fax . . . . . . . . . . . . . . . . . . . . . . . . . . . . . . . . . . . . . . . . . . . . . . . . 3Internet Fax Management portal . . . . . . . . . . . . . . . . . . . . . . . . . . . . . . . . . . . . . 4How to login . . . . . . . . . . . . . . . . . . . . . . . . . . . . . . . . . . . . . . . . . . . . . . . . . 4Menu bar . . . . . . . . . . . . . . . . . . . . . . . . . . . . . . . . . . . . . . . . . . . . . . . . . . 5How to update your settings . . . . . . . . . . . . . . . . . . . . . . . . . . . . . . . . . . . . . . . . . 5Add or update your contact details . . . . . . . . . . . . . . . . . . . . . . . . . . . . . . . . . . . . . 5Select a cover page . . . . . . . . . . . . . . . . . . . . . . . . . . . . . . . . . . . . . . . . . . . . . 6Update your preferences . . . . . . . . . . . . . . . . . . . . . . . . . . . . . . . . . . . . . . . . . . 7Change your password . . . . . . . . . . . . . . . . . . . . . . . . . . . . . . . . . . . . . . . . . . . 8Fax information panel . . . . . . . . . . . . . . . . . . . . . . . . . . . . . . . . . . . . . . . . . . . . 8Features . . . . . . . . . . . . . . . . . . . . . . . . . . . . . . . . . . . . . . . . . . . . . . . . . . . 9Inbox . . . . . . . . . . . . . . . . . . . . . . . . . . . . . . . . . . . . . . . . . . . . . . . . . . . . . 9Management utilities . . . . . . . . . . . . . . . . . . . . . . . . . . . . . . . . . . . . . . . . . . 10Preview . . . . . . . . . . . . . . . . . . . . . . . . . . . . . . . . . . . . . . . . . . . . . . . . 10View Fax . . . . . . . . . . . . . . . . . . . . . . . . . . . . . . . . . . . . . . . . . . . . . . . . 10Rotate Fax . . . . . . . . . . . . . . . . . . . . . . . . . . . . . . . . . . . . . . . . . . . . . . . 11Download PDF or TIFF . . . . . . . . . . . . . . . . . . . . . . . . . . . . . . . . . . . . . . . . 11Email PDF . . . . . . . . . . . . . . . . . . . . . . . . . . . . . . . . . . . . . . . . . . . . . . . 11Add a note . . . . . . . . . . . . . . . . . . . . . . . . . . . . . . . . . . . . . . . . . . . . . . . 12Move to archive . . . . . . . . . . . . . . . . . . . . . . . . . . . . . . . . . . . . . . . . . . . . 12Delete . . . . . . . . . . . . . . . . . . . . . . . . . . . . . . . . . . . . . . . . . . . . . . . . . 12Send Fax . . . . . . . . . . . . . . . . . . . . . . . . . . . . . . . . . . . . . . . . . . . . . . . . . 12Outbox . . . . . . . . . . . . . . . . . . . . . . . . . . . . . . . . . . . . . . . . . . . . . . . . . . . 14Archive . . . . . . . . . . . . . . . . . . . . . . . . . . . . . . . . . . . . . . . . . . . . . . . . . . .15Contacts . . . . . . . . . . . . . . . . . . . . . . . . . . . . . . . . . . . . . . . . . . . . . . . . . . 16Add, update and delete fax number and email contacts . . . . . . . . . . . . . . . . . . . . . . . . . 16Import contacts . . . . . . . . . . . . . . . . . . . . . . . . . . . . . . . . . . . . . . . . . . . . . . 17Frequently asked questions . . . . . . . . . . . . . . . . . . . . . . . . . . . . . . . . . . . . . . . 18Contact us . . . . . . . . . . . . . . . . . . . . . . . . . . . . . . . . . . . . . . . . . . . . . . . . 18
Getting startedCongratulations on subscribing to Business Internet Fax service from Bell. With this service you can nowenjoy the flexibility to securely send and receive faxes anywhere in Canada and the United Sates as longas you are connected to the Internet – without being tied to a fax machine.This guide will provide you with step-by-step instructions on how to successfully send and receive faxesthrough your company’s email software and how to leverage all of the robust features available in theInternet Fax Management portal.Send and receive a fax through your email management softwareBusiness Internet Fax allows you to send and receive faxes using familiar desktop email managementsoftware such as Outlook or Netscape mail, Web-based email programs such as Hotmail , or throughthe Web-based Internet Fax Management portal.Send a faxTo send a fax through your email management software, follow the below steps: Open your email management software. Create a new email message. In the ‘To:’ field, enter the destination fax number followed by ‘@bellfax.ca’.For example: 5551234567@bellfax.ca. Type your message, and attach any documents as you would within a regular email. Select ‘Send’.Receive a faxFaxes can be sent to you at your toll-free fax number. Received faxes will appear in your email Inbox aseither a PDF or TIFF file, depending on the preference you have configured for this service. (See page 7for information about setting these preferences.)Note: A copy of every fax you send or receive in your email Inbox will also be found in the Internet FaxManagement portal Inbox.3
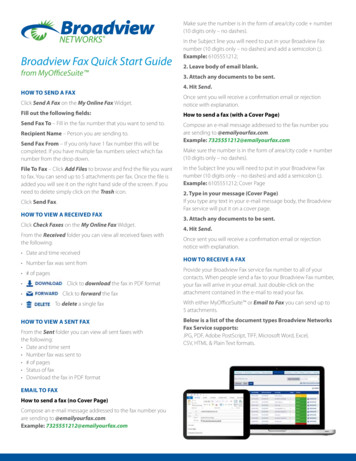
Internet Fax Management portalThe Internet Fax Management portal is a convenient online resource that allows you to send and receivefaxes, manage your account and contact information, and archive sent and received faxes.How to login: To access the Internet Fax Management portal, visit bellfax.ca. Enter your fax number and password. If you are a new subscriber refer to your welcome email toobtain your fax number and temporary password.Once you have successfully logged in, the Internet Fax Management portal will display all of the featuresavailable with your service.4
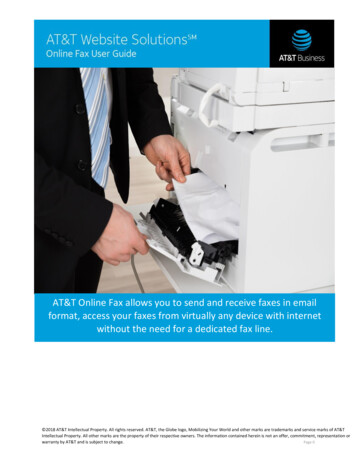
Menu BarThe menu bar provides convenient links to common pages in the Internet Fax Management portal, aswell as your Internet fax account preference settings.Below is a description of the items displayed in the menu bar:Menu Bar LinkDescriptionHomeQuick access to view your InboxGetting StartedBrings you back to the Internet Fax Management portal home pageHelpOnline resource to help you with questions you may have with this serviceSettingsManage your account settings including: password changes, accountinformation updates, fax cover page selection changes and languagepreferencesLogoutExit the Internet Fax Management portalHow to update your settingsAdd or update your contact detailsThis section allows you to add and edit your contact details that will appear on the cover letter ofyour fax.5
To update your contact details: Click on ‘Settings’. Click on ‘Contact Details’. Enter your name, company, location (address), voice number (phone number) and email signature. Click ‘Apply’ to save changes or ‘Cancel’ to abort the changes.Select a cover pageThe cover page feature allows you to choose the cover page template that will be sent with each faxtransmission.To select your cover page template: Click on ‘Settings’. Click on ‘Cover Page’. Select a cover page template (a check mark will be displayed). If required, click on the zoom feature toenlarge the view. Click ‘Apply’ to save changes or ‘Cancel’ to abort the changes.6
Update your preferencesThe preference feature allows you to choose the format of your fax attachments, as well as the languagethat you would like your application to display.To update your preferences: Click on ‘Settings’. Click on ‘Preferences’. Select your language preference via the drop down menu. Select your preferred format for viewing attachments (PDF or TIFF). All received and sent faxes are stored for 365 days. By clicking on ‘Email me a copy of allautomatically deleted faxes that have exceeded their storage period’, an email notification alongwith a copy of the stored fax will be sent to you 48 hours prior to the deletion date. If you do not wantto receive this notification, leave this box empty. Click ‘Apply’ to save changes, or ‘Cancel’ to abort the process.7
Change your passwordThis section allows you to change your existing password.To change your password: Click on ‘Settings’. Click on ‘Password’. Enter your current password in the ‘Current Password’ field. Enter a new password in the ‘New Password’ field (passwords must be 5-10 characters in length.) Enter your new password again into the ‘Confirm Password’ field. Click ‘Apply’ to save the changes or click ‘Cancel’ to abort the changes.Fax information panelMonthly usage:Indicates the number of fax pages that you have sent and received relative to yourmonthly limit.User:Displays your toll-free fax number and the primary email address associated with youraccount.8
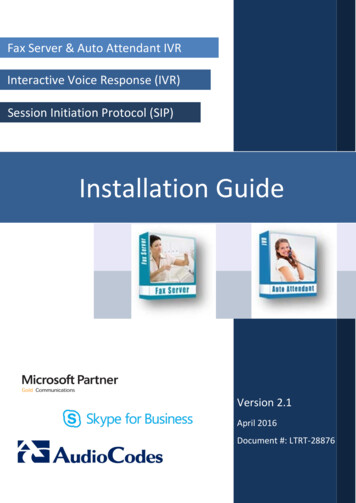
FeaturesInboxThe Inbox allows you to access and manage all received faxes.The Inbox displays the following information about the faxes you have received: Fax number Company name Total number of fax pages received Date the fax was received Management utilitiesFaxes stored in your Inbox can also be moved to the Archive folder, which offers a convenient searchfeature to help you find important faxes that you have stored. For more information about the Archivefolder, refer to page 15.9
Management utilitiesSeveral icons appear beside each fax in your Inbox. The icons below represent utilities that will help youmanage your faxes quickly and easily.PreviewThe Preview feature allows you to see a thumbnail preview of your fax. To view the fax, drag your mouseover the ‘Preview’ icon.View FaxThe View Fax feature allows you to see a full size version of your fax. To view the fax, click the ‘View Fax’icon and the contents of your fax will open in the View Fax interface.10
Rotate FaxThe rotate fax feature allows you to rotate your fax to adjust the view. Use this option if the fax youreceived is oriented poorly (for example, if it is upside-down or sideways). Clicking this icon will rotate thefax image by 90 degrees.Download a PDF or TIFFThe Download PDF or TIFF feature allows you to download your fax as a portal document format (PDF)or tagged image file format (TIFF) file on your computer from either the Inbox or the Archive folder.In both cases, the window will include a wide range of management utilities depending on the Adobe PDF Reader , or Picture and Fax Viewer you have installed on your PC. Each application will allow you tosave the image to your local PC storage folder or print its content.Email PDFThe email PDF feature allows you to email a received fax as a PDF attachment to any email address.To email a received fax as a PDF attachment: Click the ‘Email as a PDF’ icon. Enter your email recipients in the email recipients field. Type a message in the email message section. Click ‘Send’ to send your email or ‘Cancel’ to abort the process.11
Add a NoteThe Add a Note feature enables you to add or modify a note on any sent and received fax. Your noteswill not appear on the fax if you choose to forward the message.To add a note: Click on the ‘Add a Note’ icon. Type your note in the note field. Click ‘Save’ to accept your changes or ‘Cancel’ to abort the process.Move to ArchiveThe Move to Archive feature allows you to move your fax to your Archive folder. To move a fax to yourArchive folder, simply click the ‘Move to Archive’ icon.DeleteThe Delete features allow you to permanently delete the selected fax. It is important to note thatdeleting a fax removes it permanently from the Internet Fax Management portal. Please ensure youno longer need the fax since you will be unable to recover it.Send FaxSend Fax allows you to create and send a new fax message. This feature also allowsyou to upload files from your computer and send them as faxes to multiple recipients.(The maximum size of an attachment cannot exceed 2 MB.)12
To send a fax: Click the ‘Send Fax’ icon. Enter the recipient’s fax numbers in the ‘Destination Fax Number(s)’ field. You can send a faxmessage to a maximum of 20 fax numbers at one time. It is important to note that the fax numbersshould not include brackets and you do not need to include the ‘@bellfax.ca’ extension. To attach a file, click the ‘Browse’ button to select a file from your computer. A ‘Choose File’ dialogbox will open. Select a file from your computer and click ‘Open’ in the dialog box.13
To add a cover page, click the ‘Use a Cover Page’ checkbox and fill in the necessary fields of yourcover page. Click the ‘Send’ button to send your fax, or ‘Cancel’ to abort the process. A copy of your sent file willbe automatically stored in the Archives folder. If all required fields have been filled correctly, a confirmation window will appear after you click‘Send’ to indicate that your message has been queued to be faxed. Click ‘Ok’ to close the confirmation window.OutboxThe Outbox contains messages that have been queued for sending.14
Below are some important details regarding your Outbox features: You can have a maximum of 20 faxes queued at any given time. Each phone number listed in the‘Destination Fax Number’ field is counted as a separate fax in your outgoing fax queue. Should youhave more than 20 faxes to send at once, you can add more faxes as the Outbox queue empties. The speed at which the queue empties will depend on the number of pages being faxed and thecomplexity of the images within them. Faxes that are queued in the Outbox can be removed using the ‘Delete’ icon ( ) located in the righthand column. There will be five attempts made to send your fax to each recipient. You will receive either a successor failure notice via email as confirmation. Once a fax has been successfully sent, a copy of the fax willautomatically be moved from the Outbox to your Archive folder.ArchiveThe Archive folder allows you to manage your sent and received faxes. It is used for longterm fax storage and offers a convenient search feature to quickly find archived faxes.15
Below are a few important details regarding your Archive features: A copy of all faxes that have been successfully sent from either the Internet Fax Management portal oryour email account will be stored in the Archive folder. Received faxes will reside in the Internet Fax Management portal Inbox, but can be moved to theArchive folder using the ‘Move to Archive’ utility. Faxes are stored online for 365 days from the time they were received or sent by you, after which timethey will be deleted. An email will be sent to you 48 hours before a fax has reached its 365 day storagelimit to remind you that the fax will be deleted. This email will also include a PDF copy of the fax, whichcan be saved to your computer if required.ContactsThe Contacts feature allows you to create and maintain a list of frequently used faxnumbers and email contacts.Add, update and delete fax numbers and email contactsFax number contacts can be used to populate the ‘Destination Fax Number’ field when sending orreplying to a fax.To create a new fax contact: Select the ‘Contacts’ icon from the Internet Fax Management portal page.Click ‘Add New Company’.Type in contact information in the ‘Company and Fax Number Details’ form.Click the ‘Add’ button to create a new contact, or ‘Cancel’ to abort the process.16
To modify the company name of the fax contact: Select the ‘Contacts’ icon from the Internet Fax Management portal page.Click on the company name.Update the company name in the ‘Company Details’ form.Click the ‘Save’ button to save changes, or ‘Cancel’ to abort the process.To modify the contact details of the fax contact: Select the ‘Contacts’ icon from the Internet Fax Management portal page.Click on the fax number underneath the company name.Update the contact details in the ‘Fax Number Details’ form.Click the ‘Save’ button to save changes, or ‘Cancel’ to abort the process.Import ContactsYou can create a list of contacts to import into your contact list. The Import Contacts interface will allowyou to select and upload comma separated value (CSV)-formatted files from your computer.To import a contact list: Click ‘Contact Import’. Create a CSV file that includes the mandatory fields. Use the provided CSV sample file to populateyour own list of contacts. Click the ‘Browse’ button to locate the CSV file on your computer. Click ‘Ignore Duplicates’ if you want to import company or contact details that already exist in yourcontact list (this will create a duplicate) or click ‘Overwrite’ if you want the import file to overwrite thecompany and contact information in your contact list. Click the ‘Import’ button to upload your file or ‘Cancel’ to abort the process.17
Frequently asked questionsVisit bell.ca/internetfax for an updated listing of frequently asked questions.Contact usShould you have any questions, please call us at 1 877 673-2285 or email us at support@bellfax.ca.Outlook is a registered trademark of Microsoft Corporation in the United States and/or other countries. Netscape is a registered trademark of Netscape Communications Corporation. Hotmail isa trademark of Microsoft Corporation in the United States and/or other countries.
Internet Fax Management portal Send and receive a fax through your email management software Business Internet Fax allows you to send and receive faxes using familiar desktop email management software such as Outlook or Netscape mail, Web-based email programs such as Hotmail , or through the Web-based Internet Fax Management portal Send a fax