Transcription
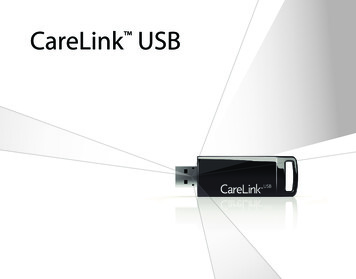
CareLink iProTMTMTherapy Management Software for DiabetesUser Guide
6026112-015 aREF MMT-7340 2017 Medtronic MiniMed, Inc. All rights reserved.iPro and CareLink are registered trademarks of Medtronic MiniMed, Inc.Ascensia BREEZE CONTOUR are registered trademarksof Ascensia Diabetes Care Holdings AG.Microsoft , Windows , Access , Excel , and Internet Explorer are registered trademarks of Microsoft Corporation.Mozilla Firefox is a registered trademark of the Mozilla Foundation.Apple , Mac , Mac OS , and Safari are registered trademarks of Apple Inc.Adobe and Reader are registered trademarks of Adobe Systems, Incorporated.Oracle and Java are trademarks of Oracle Corporation.USBGEAR is a trademark of Quality Cables USA, Inc.
ContentsChapter 1Chapter 21Introduction222223CareLink iPro Therapy Management SoftwareIntended useContraindicationsUploading Meter DataComputer system requirementsAssistance5One-time CareLink iPro software and computer setup6778910101213131314141414151515161617Register clinic and create administrative userSign inCreate user accountsSet clinic report settingsGeneral Report SettingsAnalysis Reports SettingsSetup computers for uploading data and reviewing reportsRequired settings for Windows usersRequired Internet browser settingsEnabling JavaScriptEnabling JavaScript in Internet ExplorerEnabling JavaScript in FirefoxEnabling Javascript in SafariTransport Layer Security (TLS)Enabling TLS in Internet ExplorerSetting Internet Explorer for secure browsingSetting Safari for secure browsingSetup for uploading your meter on MacSetup of LifeScan meters on MacSetup for all other meters or ComLink on MacDownload and print resourcesCareLink iPro Software — User Guide Contentsiv
Chapter 3Chapter 4Chapter 5Chapter 6Appendix A17User security advisory19Entering data into CareLink iPro software202122222223232324Opening the patient recordUploading blood glucose meter dataEntering Patient Log Sheet dataOpening the LogbookAdding Logbook entriesExcluding BG meter readingsEditing Logbook entriesRemoving Logbook entriesSorting the Logbook entries25CareLink iPro reports262627282930313132Viewing and printing patient reportsTips for successful report generationAbout reportsOptimal accuracyArea under the curve (AUC)Patient Report SettingsRestoring the default report settingsGenerating a Data Table reportExporting data to CSV file33Pattern Snapshot report343435353746Overview of the Pattern Snapshot reportGeneral statisticsObserved patterns and some possible causesObserved patternsSome possible causesSensor data graph47CareLink iPro software ongoing use484848484949505050User tasksPrinting more log sheets and other formsChanging your password or other user informationEditing patient informationMoving a patient studyModifying clinic informationAdministrator tasksModifying user accountsDeleting user accounts51TroubleshootingCareLink iPro Software — User GuideContentsv
5153Glossary57Index58Troubleshooting referenceCareLink iPro software error messagesCareLink iPro Software — User Guide Contentsvi
1IntroductionWelcome to CareLink iPro Therapy Management Software for DiabetesThank you for your trust in Medtronic products and services. This user guide provides the information that you need for setting up and using the CareLinkiPro Therapy Management Software for Diabetes. You will find a page like this at the beginning of each chapter. This page gives you a basicoverview of that chapter, and the steps you will take to complete each task.CareLink iPro Software — User GuideIntroduction 1
CareLink iPro Therapy Management SoftwareCareLink iPro Therapy Management Software for Diabetes, MMT-7340 (CareLink iPro software), is aWeb-based system designed to generate reports and store data.The iPro2 digital recorder, MMT-7741 (iPro2 recorder), collects and stores data from a glucosesensor. The data can be uploaded into CareLink iPro Therapy Management Software for Diabetes.The iPro2 recorder can collect up to seven 24 hour periods of data, after which it shuts offautomatically.Intended useCareLink iPro software is intended for use by healthcare professionals, for the purpose of analyzingand displaying uploaded data. The information may allow identification of patterns of glucose-levelexcursions above and below a desired range, facilitating therapy adjustments, which may minimizethese excursions.ContraindicationsNone known.Uploading Meter DataYou can upload data to CareLink iPro software from a number of blood glucose meters. You willneed a meter cable that is supplied by the meter manufacturer. Meter cables are not supplied aspart of the iPro2 system. If you use a meter that is not compatible with CareLink iPro software, youcan manually enter the BG meter readings into CareLink iPro software. You can find a list ofcompatible meters on www.carelinkipro.com.Computer system requirementsComputers running CareLink iPro software must have the following software installed. Operating system:-Microsoft Windows 7 Ultimate, 32-bit or 64-bit-Microsoft Windows 8 Enterprise, 32-bit or 64-bit, from the desktop only-Microsoft Windows 8.1 Enterprise, 32-bit or 64-bit, from the desktop only-Microsoft Windows 10 Home, 32-bit or 64-bit, from the desktop only-Mac OS 10.10 (Yosemite)-Mac OS 10.11 (El Capitan)-Mac OS 10.12 (Sierra)Internet browser:CareLink iPro Software — User GuideIntroduction 2
NOTE: On Windows 8 and 8.1, from the Start screen, click the Desktop tile and make sureyou are viewing the desktop before you open your browser.-On Windows only: Microsoft Internet Explorer 8, 9, 10, or 11, 32-bit or 64-bit-Mozilla Firefox 38 or later-On Mac OS only: Apple Safari 8, 9, or 10 Adobe Reader 5.0 or greater Display: 1024x768 resolution (minimum)Depending on the brand and model of blood glucose meter you have, you may need a serial(COM) port for uploader to communicate with the meter. (Windows only) USB device drivers for meters that use a USB cable to connect to the computerfor uploading data. For more information, see the instructions provided by the metermanufacturer.NOTE: Some meter manufacturers may not provide a USB device driver for uploading toWindows 7, 8, 8.1, and 10 (32-bit and 64-bit). If your computer is running one of theseoperating systems, you may need to use the meter's manufacturer's serial cable.CareLink iPro software does not support USB uploads for all meters. (Mac OS only) Serial port driver for uploading blood glucose meters. For details, see Setup foruploading your meter on Mac on page 15.Computers running CareLink iPro software must also be compliant with IEC 60950-1 or an equivalentsafety standard.AssistanceIf you need help, contact one of the following resources:CareLink iPro Software — User GuideIntroduction 3
SupportContact information24 Hour HelpLine, Advanced Software Support800 646 4633Monday through Friday, 5 a.m. to 5 p.m. (PST)818 576 5555Medtronic Diabetes Websitewww.medtronicdiabetes.comCareLink iPro Software — User GuideIntroduction 4
2One-time CareLink iPro software andcomputer setupKey Notes: Do not connect the Dock to the computer until specifically told to do so in this procedure. Ifyou connect the Dock before the CareLink uploader application is installed, it may prevent theiPro2 Dock driver from installing properly. You may need to perform a setup task on each computer that will be used for uploading sensordata from an iPro2 recorder. Usernames for CareLink iPro software must be unique among all clinics in the system, not justyour clinic. Choose at least two people to be administrative users. One of them should complete theCareLink iPro software setup for the clinic.CareLink iPro Software — User GuideOne-time CareLink iPro software and computer setup5
Register clinic and create administrative userWhen you access CareLink iPro software for the first time, you will be guided through a process toregister your clinic and create an administrative user. The administrative user is the person who willcreate, add, and delete user accounts for the rest of the clinic's staff.TMNOTE: Initially choose one person to be the first administrator for your clinic, and register yourclinic one time only using the Register Clinic link. After the initial registration, it is a good ideato give administrative privileges to at least two users to ensure administrative access at alltimes.CAUTION: Do not create more than one clinic account for your clinic. If each user registersanother clinic, then the patient records will be divided into separate clinic accounts and will notbe accessible to all users.1On the computer, open your Internet browser and go to http://www.carelinkipro.com.NOTE: On Windows 8 and 8.1, from the Start screen, click the Desktop tile and make sureyou are viewing the desktop before you open your browser.If you have any trouble accessing the CareLink iPro software, check your web browser settingsto verify that JavaScript and Transport Layer Security 1.2 are enabled. See Required Internetbrowser settings on page 13 for additional information. If you still cannot access the website,check with your network administrator to find out if your Internet access is restricted.2If necessary, click Change country/language, and follow the on-screen instructions.3Click the Register Clinic link near the bottom of the screen and follow the on-screeninstructions.4When prompted, enter the identifying information for your clinic, and click Continue.CareLink iPro Software — User GuideOne-time CareLink iPro software and computer setup6
5When prompted, enter the identifying information for your administrative user account (alsoknown as Admin), and click Continue.You will sign in with this Admin user account to create user accounts for other users at theclinic.6Click Finish to return to the Sign-in screen.Sign in1Go to http://www.carelinkipro.com. If you just registered the clinic, you will already be at thisweb site.2Enter your username and password, and click Sign in.The Home tab for your clinic appears. The clinic name and clinic ID will be at the top of thescreen. The clinic ID is randomly generated by the system. Your clinic’s Patient List will be inthe middle of the screen, showing one sample patient record. There will be no other patientslisted until you have conducted studies using an iPro2 recorder.If you want to sign out of CareLink iPro software, click Sign out near the top right corner ofyour screen.Create user accountsEach staff member who might upload data from an iPro2 recorder or a blood glucose meter, enterLogbook data, review, or print reports, will need a CareLink iPro software user account.CareLink iPro Software — User GuideOne-time CareLink iPro software and computer setup7
Any user with administrative privileges, also known as an Admin user, can add and delete useraccounts. An Admin user can also access a user account to change the password or otherinformation in the user account.It is a good idea to give administrative privileges to at least two users. Having two Admin usersmeans that the clinic does not have to rely on only one person for things like setting up new useraccounts, or removing users when they no longer need access. As staff changes at a clinic, makesure that two or more staff members have administrative privileges.1Get a list of names and email addresses for staff members who need CareLink iPro softwareuser accounts.2In the Clinic Settings tab, click Users. The existing user accounts are displayed.If you are not logged in as an Admin user, you will not see the Users tab.3Click the Create new user button. The Create New User screen appears.4Enter the required information about the user.5If you want this user to have permission to manage user accounts, select the AdministrativePrivileges check box.Important: Always make sure that at least two people have administrative privileges. If anAdmin user leaves the clinic, add a new one.6Click Save.NOTE: Usernames for CareLink iPro software must be unique among all clinics in thesystem, not just your clinic. If the username you entered is not available, the systeminforms you that you must try a different username.7Make a note of the username and password so that you can provide them to the user. He orshe will need this information to sign in and select a new password.Repeat this procedure for each user account that you need to create.Set clinic report settingsThe Clinic Report Settings are the default settings for each new patient record. They are like atemplate for new patient records.xxxx xxxx xxxxxx xxxxxxxxxxx xxxxxxxxxxxx xxxxx xxxxxxxxxxxxxxxxxxxxxxxxxxxxxxxx xxxx xxxxxx xxxx xxxxxxxxxxxx xxxxxxxxxxxx xxxxx xxxxxxxxxxxxxxxxxxxx xxxx xxxxxxxxxxxxxxxxxxxxxxxxxx xxxx xxxxxxxxxxxxxxxxxxxxxxxxxx xxxx xxxxxxxxxxxxxxxx xxxxxxxxxxxxx xxxxxxxxxxxxxxx xxxxxxx xxxxxxxxx xxxxxxx xxxxCareLink iPro Software — User GuideOne-time CareLink iPro software and computer setup8
NOTE: Changing the Clinic Report Settings does not affect any existing patient studies orreports.If a particular patient has unique needs, you will be able to override these settings later for individualpatients as needed.1Click the Clinic Settings tab. The Report Settings for the clinic are displayed.If you do not see the Clinic Settings tab, click the Home tab. You should now see the ClinicSettings tab.2In Report Settings, set the General Report Settings and the Analysis Reports Settings.For more information about these settings, see the following two sections, or click the help iconin CareLink iPro software for each section.3When you are finished, click Save.The clinic settings take effect for all new patients added to the system after you change thesettings. Previously added patients and previously generated reports are not affected.For more details about how to set different report settings for a particular patient, see PatientReport Settings on page 30.General Report SettingsThe General Report Settings determine how glucose and time information will be displayed inpatient reports. Glucose Target Range fields: Select a glucose target range to use in the reports.-For High value: Enter the glucose measurement that is considered to be the upper limitof euglycemia (target) for this patient. The system uses the High value in reports to showthe range that is above the euglycemic or glucose target range.-For Low value: Enter the glucose measurement that is considered to be the lower limit ofeuglycemia (target) for this patient. The system uses the Low value in reports to show therange that is below the euglycemic or glucose target range. Extreme Glucose Range fields: Select an extreme glucose range to use in the reports.-For Extreme High: Enter the glucose measurement that is considered to be extremehyperglycemia for this patient. The system uses the Extreme High Glucose Range in reportsto show the range that is above the high glucose range.-For Extreme Low: Enter the glucose measurement that is considered to be extremehypoglycemia for this patient. The system uses the Extreme Low Glucose Range in reportsto show the range that is below the low glucose range. Glucose Units: Select the appropriate units for reporting glucose amounts (mg/dL or mmol/L). Time Display: Select 12 hour or 24 hour time display format.CareLink iPro Software — User GuideOne-time CareLink iPro software and computer setup9
Analysis Reports SettingsThe Glucose Target Range fields specify a Before Meal and After Meal glucose target range for eachof the three meal periods. The overnight periods of Evening and Sleeping contain a single targetrange. You may enter a high value and low value for a target range according to the following rules. If you have selected mg/dL as the Glucose Units:-The format for entering the low value for the target range is xxx (for example, 123). Thelow value can range from at least 10 higher than the extreme low value to 140 mg/dL.-The format for entering the high value for the target range is xxx (for example, 123). Thehigh value can range from 80 to 20 mg/dL lower than the extreme high value. If you have selected mmol/L as the Glucose Units:-The format for entering the low value for the target range is xx.x (for example, 12.3). Thelow value can range from at least 0.6 higher than the extreme low value to 7.8 mmol/L.-The format for entering the high value for the target range is xx.x (for example, 12.3). Thehigh value can range from 4.4 to 1.1 mmol/L lower than the extreme high value.Time periods are used to identify which meal to associate with each meal marker. For example, ifthe breakfast time period is set from 6:00 a.m. to 10:00 a.m. and lunch is set from 10:00 a.m. to 3:00p.m., then a meal marker entered for 9:30 a.m. would be interpreted as a breakfast marker, and ameal marker entered for 12:30 p.m. would be interpreted as a lunch marker.The duration of each period must be at least 0.5 hours. The end time of a period can be differentfrom the start time of the next period, so gaps between periods may exist. The one exception tothis rule is that the end of Evening must be the same as the start of Sleeping.A post-meal analysis is used to generate statistics from data collected following a meal. The PostMeal Analysis window can extend up to 4.0 hours after a meal event. The duration of the analysiswindow must be at least 0.5 hours. The start time can range from 0.0 to 3.5 and the end time canrange from 0.5 to 4.0.Setup computers for uploading data and reviewing reportsCareLink iPro software needs the uploader application installed to upload patients data from theiPro2 recorder. You also need Adobe Reader installed in order to view reports.CareLink iPro Software — User GuideOne-time CareLink iPro software and computer setup10
Before you begin, please note: Some operating systems may require that you have administrative privileges for each computerin the office that will upload the installer and meters. Ask a user with administrativeprivileges, such as your network administrator, to sign into each computer to allow the softwareto be installed. You must do this for each computer that will be used to upload data from an iPro2 recorder. If the computer is running Windows 7, Windows 8, Windows 8.1, or Windows 10, see Requiredsettings for Windows users on page 12 before completing this procedure. If you are using a Mac computer, you may need to get a new cable and install a software driverso that you can upload your blood glucose meter. For details, see Setup for uploading your meteron Mac on page 15.CAUTION: Do not connect the Dock to the computer until specifically told to do so whenreviewing the on-screen instructions. If you connect the Dock before the CareLink uploader isinstalled, you may see the Window "Found New Hardware Wizard". Close the wizard screen orclick Cancel, and do not follow the instructions in the Wizard. It may prevent the iPro2 Dockdriver from installing properly.1Sign in to CareLink iPro software.2On the Home screen, a Patient list is displayed. Click to select a patient from the Patient List.It is highly recommended to choose the Sample Patient M. when installing the uploader forthe first time on each computer. If you already have a list of patients, type Sample Patient inthe Search box to find the sample patient in the Patient List, and click to select.3Click Open patient button at the bottom of the screen. The patient record is displayed on thePatient screen.4Click the Upload iPro2 button. This will direct you to the required link.NOTE: If you see a message asking you if you want to upload another study for the samplepatient, click Yes. This dialogue is to prevent multiple study uploads for the same patienton the same day. This dialogue is not relevant when installing the uploader.5Within 20 seconds you should see the "CareLink uploader installation needed " dialogue box. Clickthe Download CareLink Uploader Installer link. The Uploader installer will need to be installedone time per computer.6Choose the installation language, and click OK.7You will be prompted to allow the uploader to install on your computer, follow the on-screeninstructions to setup the CareLink uploader. Please allow time for the installation process.CareLink iPro Software — User GuideOne-time CareLink iPro software and computer setup11
-Read the License Agreement, and click "I accept the agreement" to continue.-You will be prompted to Disconnect any medical devices from the computer beforemoving forward. Confirm all medical devices are disconnected and click OK.8When the installation is complete, click Finish. This will return you to the installation dialoguebox, click the Red X in the top right corner to the close this page.9Choose the Sample, Patient M. record and click Upload iPro2 button to launch the uploader.NOTE: If you see a message asking you to upload another study for the patient, click Yes.10 You will be prompted by your browser to confirm that you want to launch the CareLinkLauncher.NOTE: The prompt will vary depending on your browser. You have the option to rememberyour preferences on the computer. Do this if you DO NOT want these security prompts tobe displayed each time the Uploader is launched, which occurs each time you click theUpload iPro2 button.11 When you have confirmed the Uploader launched successfully, click the Home tab to close thesample patient record. The computer is now ready for you to upload patient data.12 Repeat this process on each computer that may be used to upload sensor data from an iPro2recorder.13 On each computer that will be used to view reports only, make sure that Adobe Reader isinstalled. If Adobe Reader is not installed, go to http://www.adobe.com/reader to download andinstall Adobe Reader, so that you will be able to open and view reports.Required settings for Windows usersIf your computer is running the Windows operating system, there are some additional steps tofollow in order to prepare your computer for uploading device data.1Make sure that User Account Control is enabled. By default, User Account Control is alreadyenabled, so it is likely that you do not have to enable it. For details, please see the Microsoftdocumentation.2Close Internet Explorer.3If you are using the Windows 7 operating system:a. Navigate to Start All Programs.b. Right-click on the Internet Explorer menu item.If you are using the Windows 8 or Windows 8.1 operating system:a. From the Start screen, click the Desktop tile and make sure you are viewing the desktop.b. Right-click on the Internet Explorer icon in the task bar.c. In the menu that appears, right-click again on Internet Explorer.CareLink iPro Software — User GuideOne-time CareLink iPro software and computer setup12
If you are using the Windows 10 operating system:a. Navigate to Start All Apps Windows Accessories.b. Right-click on the Internet Explorer menu item.4Select Run as Administrator.5When the User Account Control window is displayed, click Allow or Yes.NOTE: If you are not logged in as an administrator on your computer, you may be asked toenter an administrator user's password.6The system will now allow software components to be installed. Complete the proceduredescribed in Setup computers for uploading data and reviewing reports on page 10.Required Internet browser settingsOn all computers where you plan to use CareLink iPro software, your Internet browser must havethe following settings enabled: JavaScript Transport Layer Security (TLS) version 1.2 Cookies Applets ActiveXEnabling JavaScriptThe software uses JavaScript to perform some of its functions. JavaScript is enabled by default formost Internet browsers. If the JavaScript setting for your Internet browser is disabled, you need toenable this setting in order to use the system.Enabling JavaScript in Internet ExplorerTake the following steps if you need to enable JavaScript or want to check the setting.1From the Internet Explorer menu options, select Tools Internet Options. The Internet Optionspage is displayed.2Click the Security tab. The Security tab page is displayed.3Select the Internet icon and click the Custom Level button. The Security Settings page isdisplayed.4Use the scroll bar on the right of the Settings box to scroll down to Active scripting.5Underneath Active scripting, select Enable.6Click OK.CareLink iPro Software — User GuideOne-time CareLink iPro software and computer setup13
Enabling JavaScript in FirefoxTake the following steps if you need to enable JavaScript or want to check the setting.1From the Firefox menu options, select Tools Options. The Options page is displayed.2Click Content.3On the Content page, make sure that Enable JavaScript is selected.4Click OK.Enabling Javascript in SafariTake the following steps if you need to enable JavaScript or want to check the setting.1From the Safari menu options, click Preferences.2Click the Security icon. The Security page is displayed.3Select the Enable JavaScript check box.4Close the Preferences window.5Close and restart Safari.Transport Layer Security (TLS)Transport Layer Security (TLS) refers to a security protocol designed to protect your web browsersessions. The system requires your browser to be enabled for TLS version 1.2. Typically TLS is thedefault setting for most browsers with the exception of Internet Explorer. If you have any questionscontact 24 Hour HelpLine.Enabling TLS in Internet Explorer1Select Tools Internet Options from the Internet Explorer menu options.2Click Advanced.3Scroll down the list and make sure that Use TLS 1.2 is selected.4Click OK.Upgrading Internet ExplorerIf you need to upgrade your Internet Explorer to the latest version, you can go to the MicrosoftInternet Explorer website at http://www.microsoft.com.Follow the instructions provided by Microsoft to download and install the latest version of InternetExplorer.Upgrading FirefoxIf you need to upgrade your Firefox to the latest version, you can go to the Mozilla website at http://www.mozilla.com.Follow the instructions provided by Mozilla to download and install the latest version of Firefox.CareLink iPro Software — User GuideOne-time CareLink iPro software and computer setup14
Setting Internet Explorer for secure browsingTo keep your therapy management information private, always remember to log off of the systemby clicking the Log-Off hyperlink.In addition, if you want to prevent others from seeing that you visited this therapy managementwebsite, you can disable the Back button in your Internet browser. The following instructionsdescribe how to disable the Back button in Internet Explorer.NOTE: If you disable the Back button, it will be disabled for all websites that you visit.1Select Tools Internet Options from the Internet Explorer main menu.2Click the Advanced tab.3Scroll down to the Security check items.4Make sure there is a check mark in the box next to “Do not save encrypted pages to disk.” (Ifneed be, click in the box to place a check mark in it.)5Click OK.Setting Safari for secure browsingTo keep your therapy management information private, always remember to log off of the systemby clicking the Log-Off hyperlink.In addition, if you want to prevent others from seeing that you visited this therapy managementwebsite, you can enable the Private Browsing mode in Safari so that all of your activity will beremoved each time you close Safari.1In your Safari browser window, select Private Browsing under the Safari menu.A message is displayed asking if you want to turn on private browsing.2Click OK.Setup for uploading your meter on MacIf you want to upload a supported Ascensia meter (BREEZE , CONTOUR , or CONTOUR NEXT familyof products) that has a USB connector on a Mac computer, you can select your meter and completethe upload procedure. No additional setup is needed.If you want to upload any other blood glucose meter on a Mac computer, please follow theinstructions below for your meter and operating system version. After you have set up yourcomputer for uploading your meter, you do not need to complete these steps again.CareLink iPro Software — User GuideOne-time CareLink iPro software and computer setup15
NOTE: Medtronic Diabetes cannot guarantee the availability of cables, adapters, and softwaredrivers from other manufacturers. Websites of other manufacturers may change.Setup of LifeScan meters on Mac on page 16Setup for all other meters or ComLink on Mac on page 16Setup of LifeScan meters on MacThe setup for uploading your LifeScan meter depends on the version of your operating system.Please refer to the instructions for your version.Setup for LifeScan meters on Mac OS 10.10 , 10.11 or 10.121Get a serial cable from the meter manufacturer. You will need a serial cable because at the timeof this publication, the USB cable from LifeScan does not work with Mac OS 10.10, or 10.11 or10.12.2Get a USB-to-serial adapter that is compatible with your Mac operating system, such as theUSBGEAR RS-232 Serial Adapter DB-9 Male. You will need a USB-to-serial adapter because Maccomputers do not have serial ports.Important: If you have a different adapter, you should install the driver provided by theadapter manufacturer. Do not continue with these driver installation steps.3If you have the USBGEAR RS-232 Serial Adapter, click the following hyperlink to install thesoftware driver: SerialDriver v2 2 18.dmgPlease note that this website is in English only.Select the driver called FTDIUSBSerialDriver 10 4 10 5 10 6 10 7 and follow the on-screeninstructions.4When prompted, enter your Mac username and password. The username you enter must be anAdministrator on your computer.5Restart your computer when you are instructed to do so.Setup for all other meters or ComLink on Mac1Get a serial cable from the meter manufacturer. You will need a serial cable because most metermanufacturers that provide USB cables do not provide support for Macintosh computers.CareLink iPro Sof
CareLink iPro Therapy Management Software for Diabetes, MMT-7340 (CareLink iPro software), is a Web-based system designed to generate reports and store data. The iPro2 digital recorder, MMT-7741 (iPro2 recorder), collects and stores data from a glucose sensor. The data can be uploaded into CareLink iPro Therapy Management Software for Diabetes.
