Transcription
Wireless Security Camera with the Arduino YunCreated by Marc-Olivier SchwartzLast updated on 2019-05-10 06:23:57 PM UTC
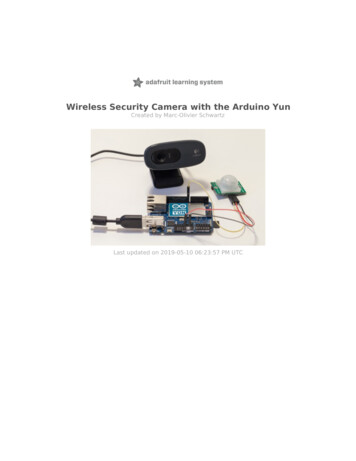
IntroductionThe Temboo service has moved away from Arduino support. The service access in this older guide will nolonger work.The following guides are more up to ecurity (https://adafru.it/CvC) for IR detection d-raspberry-pi-security-camera (https://adafru.it/ENg) for cameraEver saw these wireless security cameras that you can buy off the shelf? These are devices that you can setupsomewhere in your home or outside, connect to your WiFi network, and then access the video stream from anywhere.However, they are usually using the interface given by the manufacturer, which means you are quite limited with whatyou can do with your camera.In this project, we are going to build our own DIY version of such devices. The project is based on the Arduino Yun, towhich we are going to connect a standard USB webcam and a PIR motion detector to create some cool applications.The first application will be a modern version of standard tasks that you want for a security camera: taking pictureswhen some motion is detected. The project will store pictures taken by the USB camera on an SD card inserted intothe Yun, but that's not all. Because we are in the age of the Internet of Things, we also want these pictures to beautomatically uploaded on a secure location. And that's exactly what we are going to do by uploading the pictures toDropbox at the same time.Then, we are going to stream video coming from the camera directly on Youtube. At the end, you will have your ownvideo stream accessible from anywhere in the world so you can check what is going on in your home. This way, youcan also just share the link with your family or friends, so they can monitor your home when you are not there. Excited?Let's dive in! Adafruit rity-camera-arduino-yunPage 3 of 16
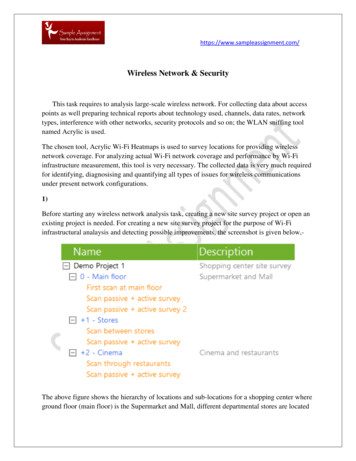
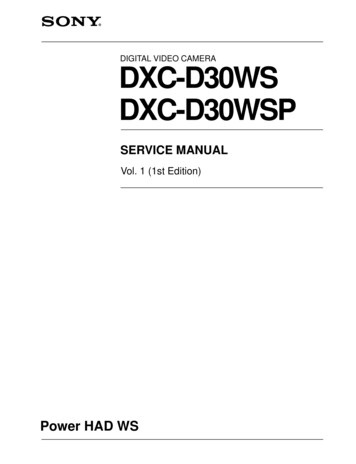
ConnectionsThe Temboo service has moved away from Arduino support. The service access in this older guide will nolonger work.Let's see how to configure the hardware part of the project. The first step is to make sure you have the right hardwarecomponents. You need an Arduino Yun, a USB webcam, a PIR motion sensor, and a microSD card.For the USB camera, you can choose any webcam that is compatible with the UVC protocol. Most of the recentwebcams are compatible. I choose a Logitech C270 that can take pictures up to 720p resolution. You can find a list ofcompatible cameras here:http://en.wikipedia.org/wiki/List of USB video class devices (https://adafru.it/dfm)The first step is to insert the SD card in the Arduino Yun board:Then, connect the camera to the USB port of the Yun: Adafruit rity-camera-arduino-yunPage 4 of 16
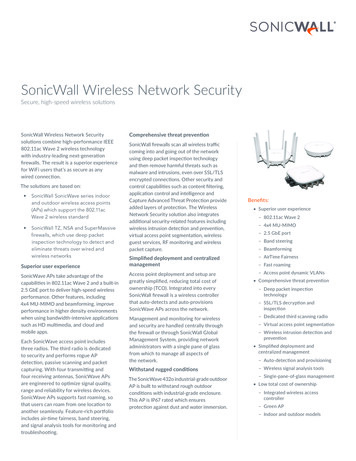
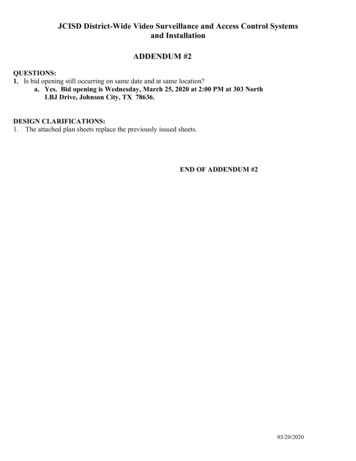
Finally, connect the motion sensor to the Yun. Simply connect the VCC pin to the Yun 5V pin, GND to GND, and theSIG pin to the Yun pin number 8:Finally, just connect the project to your computer via the microUSB port, and you're good to go! Adafruit rity-camera-arduino-yunPage 5 of 16
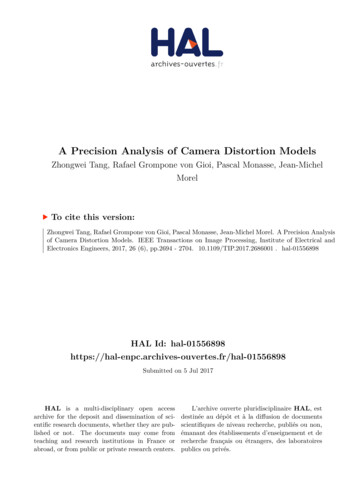
Setting up your Temboo & DropboxaccountsThe Temboo service has moved away from Arduino support. The service access in this older guide will nolonger work.Before we can build exciting applications with our hardware, we need to setup some accounts on the web services weare going to use.The first one is Temboo, where you will need to have an account. Temboo will basically make the interface betweenthe Arduino Yun and Dropbox. Just go over to:https://www.temboo.com/ (https://adafru.it/dcd)You will be prompted to create an account, and then your first app. Write down the name of your account, the name ofthe app and your app API key, you will need them later. There is also one more thing you need from the Temboowebsite: the Temboo Python SDK, that we will use later to upload pictures on Dropbox. You can get it at:https://www.temboo.com/python (https://adafru.it/dfn)Once downloaded, simply extract the folder on the microSD card. Then, you need a Dropbox account. Go over to theDropbox website to do so:https://www.dropbox.com/home (https://adafru.it/dfo)Once the account is created, you need to create an App so the Yun can upload pictures to your Dropbox folder. Tocreate an app, you need to go to the developers section of Dropbox:https://www.dropbox.com/developers/apps (https://adafru.it/dfp)Then, click on “Create app”, and choose which type of app you want to create (Dropbox API app for our project):Then, select "Files and datastores":What you need to get now is all the keys relative to your Dropbox app, so you can enter them later in the software ofour project. You will need the App Key and App Secret at this point, which are displayed on the same page as yourapp. Adafruit rity-camera-arduino-yunPage 6 of 16
The next data we need to get is the Token Key & Token Secret key. To get them, the first step is to go to theInitialiseOAuth Choreo on the Temboo /OAuth/InitializeOAuth/ (https://adafru.it/djg)Here, you will need to enter the App Key and App Secret. That will generate some additional information, like acallback ID, and a temporary token secret. You'll also be asked to visit a link to Dropbox to confirm the authentification.Finally, go to the FinalizeOAuth page to finish the process. You'll be asked to enter your App Key, App Secret, callbackID and temporary token OAuth/FinalizeOAuth/ (https://adafru.it/djh)After that step, you'll be given your final Token Key and Token Secret. Write them down, you'll need them later.You will also need to have a Google account to stream videos on Youtube. Simply create one at:https://accounts.google.com/ (https://adafru.it/dfq) Adafruit rity-camera-arduino-yunPage 7 of 16
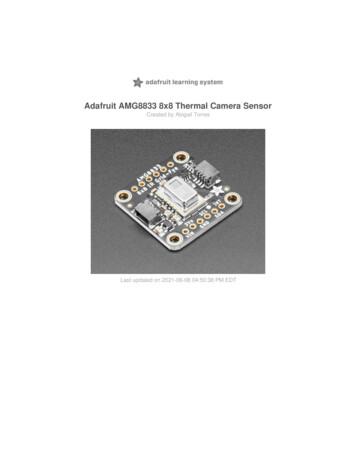
Setting up your ArduinoYunThe Temboo service has moved away from Arduino support. The service access in this older guide will nolonger work.Before we can write the software for our project, we need to install some more software on your Arduino Yun. We arealso going to test the USB camera to see if the drivers are working correctly. In the rest of the project, I will assumethat your Yun is already setup and connected to your local WiFi network.First, the UVC drivers. To install them, you need to connect to your Yun via SSH. Simply open a terminal, and type:ssh root@yourYunName.localWhere you need to insert the correct name of your Arduino Yun, that you set when you first used the Yun. You will alsobe prompted to enter your password. If the connection is successful, you should see some ASCII art:We can now install the required packages. Start with an update of the package manager:opkg updateThen, install the UVC drivers:opkg install kmod-video-uvcAnd the python-openssl package:opkg install python-opensslWe also need the fswebcam utility that we will use to take pictures from the terminal:opkg install fswebcamFor the last part of the project, we are also going to need the mjpg streaming library. You can get it with: Adafruit rity-camera-arduino-yunPage 8 of 16
opkg install mjpg-streamerWe are now ready to test the webcam. Make sure that the SD card is mounted into the Yun, and go over to the SDcard folder with:cd /mnt/sda1To test the camera and take a picture, it is really easy. Simply type:fswebcam test.pngYou should see some information being displayed, along with some errors, but don't worry about them. The importantthing is to see these lines:--- Opening /dev/video0.Trying source module v4l2./dev/video0 opened.To check that the picture was correctly taken, remove the SD card from the Yun and read it using your computer. Youshould see the picture appearing at the root of the SD card:Simply open it to make sure it was correctly taken and that it is not corrupted. If the picture looks good, you can goover to the next section and start building cool applications with the project! Adafruit rity-camera-arduino-yunPage 9 of 16
Upload pictures toDropboxThe Temboo service has moved away from Arduino support. The service access in this older guide will nolonger work.What we want to achieve in this first application is to take a picture whenever some motion is detected by the PIRmotion sensor. And when that happens, store this picture locally on the SD card, and upload it to Dropbox. To do so,the code will be composed of two parts. The first one is a Python script that will connect to Dropbox, take a picture onthe SD card, and then upload this picture to Dropbox. The reason to use Python for this part is that it is much easier toupload files to Dropbox using Python than directly from the Arduino sketch. The second part of the code will be theArduino sketch itself, which will basically call the Python script to take pictures via the Bridge library of the Yun.Let's first code the Python script. It starts by including the required libraries from the Temboo Python SDK:from temboo.core.session import TembooSessionfrom temboo.Library.Dropbox.FilesAndMetadata import UploadFileThe Python script will also take the name of the picture we want to upload as an argument:with open(str(sys.argv[1]), "rb") as image file:encoded string base64.b64encode(image file.read())Remember these Temboo credentials that you created earlier ? That's where you need to enter them:session TembooSession('yourTembooName', 'yourTembooApp', 'yourTembooKey')We can then create the correct Dropbox library to upload files, called a "Choreo" on Temboo:uploadFileChoreo UploadFile(session)uploadFileInputs uploadFileChoreo.new input set()It's now the time to enter all the informations about your Dropbox account, like your app Key, app Secret, AccessToken an Access Token Secret:uploadFileInputs.set AppSecret("appSecret")uploadFileInputs.set AccessToken("accessToken")uploadFileInputs.set FileName(str(sys.argv[1]))uploadFileInputs.set puts.set AppKey("appKey")uploadFileInputs.set FileContents(encoded string)uploadFileInputs.set Root("sandbox")And finally, upload the file on Dropbox:uploadFileResults uploadFileChoreo.execute with results(uploadFileInputs) Adafruit rity-camera-arduino-yunPage 10 of 16
You can now save this code in a file named upload picture.py. Note that all the files are available on the GitHubrepository of the ino-yun-camera (https://adafru.it/dfr)We'll now work on the Arduino sketch. The sketch starts by including the required libraries:#include Bridge.h #include Process.h We also have to declare a process, that we are going to use to call functions on the Linux machine of the Yun (forexample the fswebcam utility we used before):Process picture;We are also going to build a filename for each picture the project will take, that will be stored in a string:String filename;We also declare the pin on which the PIR motion sensor is connected:int pir pin 8;And the path of the SD card on the Yun:String path "/mnt/sda1/";Because we need to call functions on the Linux machine of the Yun, we have to start the Bridge:Bridge.begin();Then, in the loop() part of the sketch, we check if some motion was detected by the PIR sensor:if (digitalRead(pir pin) true) {If this is the case, we build a unique filename for the picture, with the date at which the picture was taken: Adafruit rity-camera-arduino-yunPage 11 of 16
filename "";picture.runShellCommand("date %s");while(picture.running());while (picture.available() 0) {char c picture.read();filename c;}filename.trim();filename ".png";We then make the first call to the Linux machine of the Yun, first to take a picture with the fswebcam utility. Note thathere, we provide an extra argument with the -r command, which set the resolution. I used the maximum resolution ofmy camera, which is 720p:picture.runShellCommand("fswebcam " path filename " -r 1280x720");while(picture.running());We then make a second call to the Linux machine, this time calling the Python script with the name of the picture as anargument, which will upload the picture to Dropbox:picture.runShellCommand("python " path "upload picture.py " path filename);while(picture.running());You are now ready to test the project. Again, all the files are available on the GitHub repository of the ino-yun-camera (https://adafru.it/dfr)First, put the Python file at the root of the SD card, and put the SD card back into the Arduino Yun board. Then, uploadthe Arduino sketch to the Yun. Now, try to trigger the motion sensor, for example by waiving your hand in front of it.You should see that the webcam is being activated shortly after (for example, my webcam has a LED that turns greenwhen it is active).To check that the project is working correctly, after a while you can check the SD card, you should see that somepictures have been recorded:You can also check on your Dropbox folder, where the same pictures should have been uploaded. They should belocated in your Dropbox apps folder: Adafruit rity-camera-arduino-yunPage 12 of 16
Stream video to YoutubeThe Temboo service has moved away from Arduino support. The service access in this older guide will nolonger work.In this last part of the project, we are going to build a completely different application for our hardware: make thecamera stream video live on Youtube.
10.05.2019 · somewhere in your home or outside, connect to your WiFi network, and then access the video stream from anywhere. However, they are usually using the interface given by the manufacturer, which means you are quite limited with what you can do with your camera. In this project, we are going to build our own DIY version of such devices. The project is based on the Arduino Yun, to which we are .