Transcription
Library services and resources for knowledge buildingAdobe PhotoshopCS2 Tools & BasicsJune 2006es, University Libraries, BallStateServicUnivepportrsity,g SuniMuncniaie IndrTianagy473olo06 Anchll Rieghts R TeserveSamdu - P@bsu.einatrhd - tecttan@antpst.edbsu600e2Junu
ContentsWhat’s New in CS2. 3Overview. 4Bitmaps versus Objects. 4Mac vs PC Keyboards. 5Starting the Photoshop Application. 5On-screen image size. 5Color mode and background. 6Floating Palettes. 6The Toolbox - Displaying and working with tools. 6Using the Options Bar. 8Understanding the Selection Process. 9Toolbox Controls. 10Using the Color Picker. 10Tool Descriptions.11Creating shape layers. 13Floating Palettes. 14Workspaces. 17Note on .PSD File TypeNative Photoshop (.psd) - While creating, editing and tweaking images, it isbest to save all your files in Photoshop’s native format, which is the defaultfile format for newly created images. This encoded format (.psd) is the onlyformat that supports all available Adobe Photoshop image modes (Bitmap,Grayscale, RGB, CMYK, etc.), channels and layers. This lets you use all theprogram’s editing tools, commands and filters. It also retains all the data untilyou decide to save a copy of the file in some other format for eventual use.A file can be opened in its own format, then converted to a Photoshop (.psd)document by using the SAVE AS command under the FILE menu, then selecting PHOTOSHOP format. Using a slightly different filename will preserve theoriginal file and save the copy to Photoshop format for the working process.Mac vs PC KeyboardsThe commands given here are geared toward both Macand PC use. The key commands can be translated between PC and Mac easily: ALT key (PC) is the same asPam StantTechnical Training AnalystTechnology Training Support ServicesBracken Library, Room 318Ball State UniversityMuncie, Indiana 47306pstant@bsu.edu765 285 8154pstant.iweb.bsu.edu Copyright Ball State UniversityTechnology Training Support Servicestechtrain@bsu.edu University LibrariesJune 2006 All Rights Reservedthe Option key (Mac); CTRL Key (PC) is usually translatedto Command [apple/flower] Key (MAC).[ Macintosh/Windows: Option /ALT Command / Ctrl ]PSCS2intro-tools.indd Ball State University Libraries June 2006Page
What’s new with CS2?Timesaving file handling with Adobe BridgeSimplify file handling with Adobe Bridge, the next-generation File Browser, whereyou can process multiple camera raw images at once; resize, rate, and labelthumbnails; quickly review images in Slideshow mode; search metadata; andmore.Multiple layer controlSelect and move, group, transform, and warp objects more intuitively by clickingand dragging directly on the canvas. Easily align objects with Smart Guides.Smart ObjectsPerform nondestructive scaling, rotating, and warping of raster and vector graphics with Smart Objects. Even preserve the editability of high-resolution vectordata from Adobe Illustrator software.Spot Healing BrushEffortlessly retouch photos — including 16-bit images — in a single click with theadvanced power of the new Photoshop CS2 Spot Healing Brush.One-Click Red-Eye CorrectionInstantly neutralize red eyes with the one-click red-eye correction tool, which supports 16-bit images and lets you set pupil size and darkening level.Color Replacement BrushColor Replacement Brush replaces color of painted area with foreground coloroverlay, not repaint. The ‘Contiguous’ setting replaces colors that are contiguouswith the color immediately under the pointerBlur FiltersThe Blur filters soften a selection or an entire image, and are useful for retouching. They smooth transitions by averaging the pixels next to the hard edges ofdefined lines and shaded areas in an image. Blur filters Apply blur effects usingnew blur filters: Box Blur, Shape Blur, and Surface Blur.PSCS2intro-tools.indd Ball State University Libraries June 2006Page
Photoshop CS2Overview(Creative Suite 2)Adobe Photoshop CS2 software is the world-standard image-editing, photoretouching, and Web graphics program that lets you create high-quality digitalimages. The Photoshop CS2 program is virtually the same on either Macintoshor PC platforms. It combines a full range of selection tools, painting, drawing andediting tools, color-correction tools, and tremendous special effects capabilities.Photoshop CS2 offers more support for web graphics, a color correction brush(red eye plus), and many new painting and web support features.Along with Photoshop is the Web utility program ImageReady CS2. This is a special graphics editor that allows you to convert and optimize graphics for web useand other purposes. ImageReady provides improved optimization and animation,as well as new advanced Web layout features, and creative tools to create specialWeb design effects such as slicing, rollovers and animation.Bitmaps versus ObjectsMany image programs can be defined as “paint” programs, in which you drawa line, and the program converts this line to tiny square dots called “pixels.” Eachpixel conforms to one “bit” of data. The painting itself is called a “bitmapped image.” Some examples are PC Paintbrush, Paintshop Pro, Superpaint, PixelPaintand Color It. Other graphic applications such as Adobe Illustrator and Freehand,Canvas, CorelDraw and others are in the category called drawing programs.Drawings comprise “objects” which are independent, mathematically-definedlines and shapes. For this reason, drawing programs are sometimes referred toas “object-oriented” or “vector-based.” Photoshop has both.Painting and drawing applications have their own good and bad points. A paintprogram offers a direct approach to creating images. For example, while manyPhotoshop features are very complex, and require some time and practice to master, its basic painting tools are very simple to use. You simply draw and erase untilyou achieve the desired effect. Additionally, each of Photoshop’s basic paint toolsare fully capable of being customized. So you, in effect, have access to an infinitevariety of crayons, watercolors, pastels, colored pencils, airbrushes, etc. — all ofwhich are completely erasable.The downside of a painting program is that it is limited by its “resolution” options. Bitmaps contain a fixed number of pixels, so the resolution of an image(the number of pixels per inch) is dependent upon the size at which the image isprinted. For example, print a medium-sized image small, and the pixels becometiny, which increases the resolution, or quality of the final print. However, printthe image larger than it’s drawn, and the pixels are larger, which decreases theresolution, and generally produces a choppy or jagged picture.Some drawing tools, on the other hand, can be a bit harder to master, but make aclear, scalable graphic that has clean lines no matter how large or small you makeit. So, as a beginner’s rule of thumb, to get a good resolution on a small graphic,create it big, print it small. How big and how small are variables that will differ witheach image, and will become clearer with practice.So when is it advisable to use bitmapped graphics and when to use vector graphics? Bitmapped graphic is best for scanned photos, photographic collages andembellishments; realistic artwork that utilizes naturalistic highlights and shadows;impressionist-type artwork and images; logos and display types using soft edges,reflections, or tapering shadows; and special effects that require the use of filtersPSCS2intro-tools.indd Ball State University Libraries June 2006Page
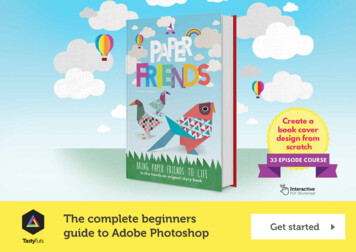
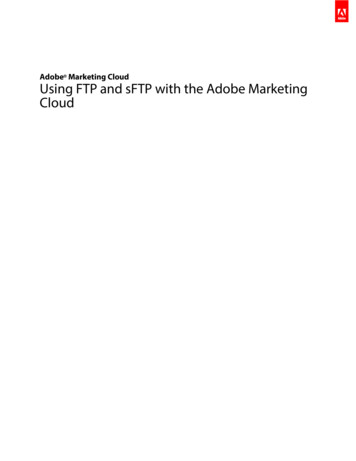
and color enhancements. Vector graphics are better for more stylized artwork, such as poster art and other high-contrast graphics; architectural plans,product designs, or other precise line drawings; business graphics, such ascharts and “infographics”; and traditional logos and text effects that requirecrisp, ultrasmooth edges, such as custom letters and symbols.Mac vs PC KeyboardsThe commands given here are geared toward PC (Windows) use, howeverthe key commands can be translated from PC to Mac easily: The ALT key ona PC is the same as the Option key on a Mac; The CTRL key on a PC isusually translated to the Command [apple/flower] key on a Mac.[ Windows ALT Mac OptionWindows CTRL Mac Command ]Starting the Photoshop ApplicationOnce you’ve opened the application by clicking on the Photoshop icon, themenu changes to the Photoshop menu, and the Toolbox and various floating palettes appear. To create a new image, select FILE then NEW from themenu bar. (FILE NEW) This opens a dialog box where you should makesome initial decisions as to the name of the file, dimensions (measurement inpixels, inches, centimeters, millimeters, points, picas, or columns), resolution,color mode (bitmap, grayscale, RGB color, CMYK color or lab color); and ifyou want the beginning file to be filled with white, or the current backgroundcolor, or transparent.Measurement: For the beginner, inches may be easiest to use. Later, youmay find that pixels or points give you a more precise measurement. Bydefault, Photoshop assigns exactly 72 points per inch and 6 picas per inch,which equates to one point per screen pixel.A seventh unit of measure, Column, is available from the Width pop-upmenu. If you want to create an image that fits exactly within a certain number of columns when it’s imported into a desktop publishing program, selectthe Column option. You can specify the width of a column and the gutterbetween columns by choosing Preferences Units and Rulers and entering values into the Column Size option boxesOn-screen image sizeUsually, the on-screen dimensions of an image depend on the entries youmake in the Width, Height and Resolution options in the New dialog box.Let’s say that both the Widthand Height values are 10inches and Resolution is 72ppi (pixels per inch), the newimage will measure 720 x 720pixels. The exception occursif you choose pixels as yourunit of measurement. In thatcase, the on-screen dimensions depend solely on theWidth and Height options, andthe Resolution value determines the size at which theimage prints.PSCS2intro-tools.indd Ball State University Libraries June 2006Page
Color mode and backgroundThe Mode pop-up menu allows you to specify the number of colors that can appearin your image. One would choose Bitmap to create a black-and white image, andGrayscale to use only gray values. RGB (red, green, blue) for the three basiccolors, CMYK (cyan, magenta, yellow, black) - the color mode commonly used forcolor separations going to a print shop - and Lab color (for luminosity) all provide access to the full range of 16 million colors, even though each has a different method for doing so. We’ll use RGB until we learn more about color modes.Other terms that will be used in regard to color are Hue - which is pure color;Saturation - is the purity of the color. Zero saturation equals gray. Brightness - isthe lightness or darkness or a color. Zero brightness equals black.Backgrounds allows you to determine or change the background type for thenew image. These choices are white, background color (assuming that the background color is something other than white), or transparent (no color at all). [Thecurrent background color at any given time is identified by looking at the background color square in the toolbox palette. See later information on the Toolboxon how to set and change these colors.] The last one, Transparent, results ina floating layer with no background image whatsoever, and can be useful whenediting one layer independently of the rest of the image.For example, transparent is very handy to use when making graphics forInternet Web pages. Once the image is finished, saved as a Photoshop document, then saved as a .GIF-type file, you can use that image on any web page,and the only background behind the image you will see is the preset backgroundof the page. This is very useful on web pages that have some sort of graphic asa repeating background.Now, name the new window, or just click OK. If you don’t name it now, it’s OKto wait until you want to save the file, when you’re again prompted to name it ifit hasn’t been named yet. The image window opens and is ready for creation.Also note the Toolbox and several floating palettes.Floating PalettesThere are a number of floating palettes. They are called “floating” because youcan click on the top bar of each and drag to move them around on the screen.These are initiated under the Photoshop menu option of Window. These palettes can be separated into individual palettes or grouped into multipurposepalettes. The Show/Hide commands for all the palettes appear directly underthe Window menu. (More later on the va
Adobe Photoshop CS2 software is the world-standard image-editing, photo-retouching, and Web graphics program that lets you create high-quality digital images. The Photoshop CS2 program is virtually the same on either Macintosh or PC platforms. It combines a