Transcription
Zoom Phones – Yealink Handset (SIP – T54W)User Guide
TABLE OF CONTENTS1.PURPOSE .32.SET UP, CONNECTIVITY AND KEY COMPONENTS.33.PHONE KEYS AND SCREEN OPTIONS .54.BASIC CALL FUNCTIONS .55.4.1Placing a call.54.2Answering a call.64.3Ending a call .64.4Redialing a call .64.5Muting and Un-muting a call .74.6Holding and Resuming a Call .74.7Transferring a call .74.8Making a conference call .94.9Forwarding a call .94.10Configuring Speed dial .94.11Set Voicemail and Accessing Voicemails .104.12Setting Status to Do Not Disturb .104.13Modify Ringtone .11OTHER USEFUL INFORMATION .11Page 2 of 12
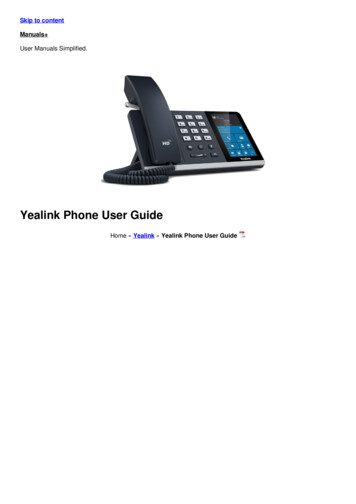
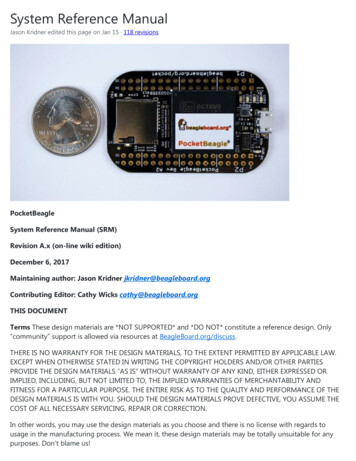
1. PURPOSEThe purpose of this guide is to familiarize the Synod users with the functioning of the Zoom Phonescompatible Yealink handsets.2. SET UP, CONNECTIVITY AND KEY COMPONENTSThe Yealink handsets will be set up and configured by the IT Team and connected to your deskspace. Below is the display of a configured handsetThe handsets will need to remain connected to a continuous power supply. The Yealink phonesshould be used with the original power adaptor (5V/2A) only.The handsets are WiFi enabled and will connect to the Corporate WiFi at the Pitt Street and CFMbuildings.Whenever the phone is connected to power and connected to WiFi, it automatically begins theinitialization process. After startup, the phone is ready for use.Key Components:Power supply adaptorPage 3 of 12
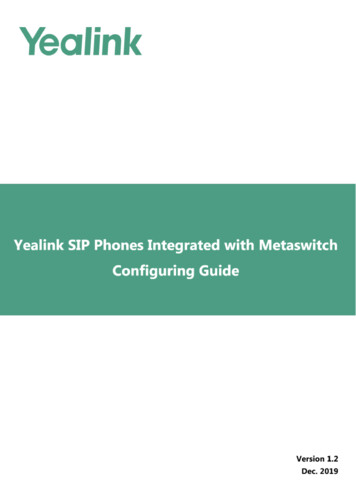
The power supply will connect to the highlighted portBase standThe base stand will be attached to the slots on the back of the phone. The angle of the screen canbe adjusted by moving the stand.Page 4 of 12
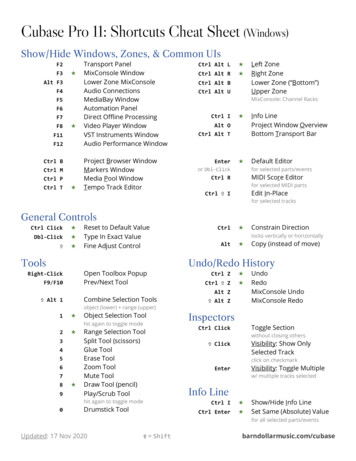
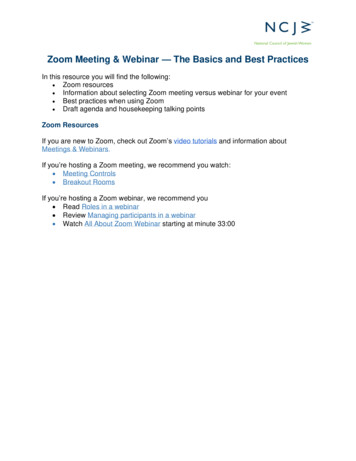
3. PHONE KEYS AND SCREEN OPTIONSPower Indicator keysLine keysSoft keysNavigation, OK andCancel keysVolume keysHeadset, mute,Message, Hold,RedialandTransfer keysSpeakerphone keysLine keys typically light up or are located next to the LED indicators to signal when a line is busyor not. You will see multiple lines on your phone if you are assigned to make and receive calls onbehalf of another user or are a member of a shared line group.The soft keys change according to the type of action initiated by the user. Access the functiondisplayed on the screen above the soft keys. The soft keys change depending on what you aredoing at the time.4. BASIC CALL FUNCTIONS4.1 Placing a callUsing the handset1. Pick up the handset2. Enter the number, and then press ‘Send’Using the speakerphonePage 5 of 12
1. With the handset on-hook, press the speaker key2. Enter the number, and then press ‘Send’Note: During a call, you can alternate between the hands-free speakerphone and handsetmodes by pressing the Speakerphone key or by picking up the handset.The outbound caller ID is set to the default company number 02 8267 4300 for individualnumbers. For Call queues, the user can choose between Call Queue number, companymain number or their personal number from within the Zoom portal.4.2 Answering a callDuring an incoming call, you will see a call notification with the caller ID name and number.The call notification on Yealink phones appear the same regardless of whether the call wasrouted through your direct phone number, main company number, or a call queue you area member of.Using the handsetPick up the handsetUsing the speakerphonePressNote: The Zoom Desktop Client and Mobile App display more detailed incoming callnotifications so you can identify calls to a direct number, company number, or callqueue.While in a call. your in-call status will be synced with the Zoom Desktop Client andMobile App. Your Zoom contacts will be able to see that you're in a call.You can reject an incoming call by pressing Reject. 4.3 Ending a callUsing the handsetHang up the handset or press End CallUsing the speakerphonePressor End Call4.4 Redialing a call Pressto enter the Placed Calls list, pressentry, and then press Pressorto select the desiredor Send.twice when the phone is idle to dial out the last dialed number.Page 6 of 12
4.5 Muting and Un-muting a call Pressto mute the microphone during a call. Pressagain to un-mute the call.4.6 Holding and Resuming a Call To Hold a call:Press or Hold soft key during an active call.To Resume the call, do one of the following:ooIf there is only one call on hold, pressor Resume soft key.If there is more than one call on hold, press or to select the desired call, andthen pressor Resume soft key.This video demonstrates how to place call on holdhttps://youtu.be/fAa 0rxwUK04.7 Transferring a callDuring a call, you can transfer the call to another contact.You can use one of three ways: Blind Transfer: Transfer a call directly to the third party without consulting.Semi-Attended Transfer: Transfer a call when receiving ring back.Attended Transfer (Consultative Transfer): Transfer a call with prior consulting.Page 7 of 12
To perform Blind Transfer1. Press the Transfer keyor Transfer soft key during a call.2. Enter the number or select a contact from the placed call list you want to transfer to orPress Directory soft key. Select the desired contact from the Directory list.3. Press the Transfer keyor Transfer soft key to complete the transfer. The transfercan also be completed by hanging up the handset.This video demonstrates how to blind transfer a callhttps://youtu.be/Zh644mVMSVsTo perform Semi-Attended/Attended Transfer1. Press the Transfer keyor Transfer soft key during a call.2. Enter the number or select a contact from the placed call list you want to transfer to orPress Directory soft key. Select the desired contact from the Directory list.3. Press the OK key or Send soft key.4. For a semi-attended transfer – when you hear the ringback tone, press the Transfer keyor Transfer soft key to finish the semi-attended transfer.5. For an attended transfer – After the contact answers the call, press the Transfer keyor Transfer soft key to finish an attended/consultative transfer.This video demonstrates how to warm transfer a callhttps://youtu.be/DdBExR2DtTQPage 8 of 12
4.8 Making a conference call1.2.3.4.5.Place a call to the first party.When the first party answers the call, select Conference soft key to place a new call.The active call is placed on hold.Dial the second party’s number.You can also select the desired contact from the search list or select a contact from theplaced call list or Directory before you enter the number.6. When the second party answers the call, select Conference soft key again to invite two theparties to join the conference.This video demonstrates how to make a conference callhttps://youtu.be/mlsL3KVzhT8Note: You can split the call into two by pressing the Split soft key.4.9 Forwarding a callTo enable call forward:1. Navigate to Menu- Features- Call Forward.2. Select the desired forward type:Always Forward - Incoming calls are forwarded unconditionally.Busy Forward - Incoming calls are forwarded when the phone is busy.No Answer Forward - Incoming calls are forwarded if not answered after a period of time.3. Enter the number you want to forward to. For No Answer Forward, pressorselect the desired ring time to wait before forwarding from the After Ring Time field.4. Press Save to accept the change.toDeactivating Call ForwardYou can deactivate call forward when you no longer want to forward your calls.5.6.7.8.Navigate to Menu- Features- Call Forward.If the forward is activated for specific lines, select the desired line.Select the desired forwarding type and select Disabled from the corresponding field.Select Save.This video demonstrates how to set up call forwardinghttps://youtu.be/3Py7G0-YE7w4.10 Configuring Speed dialTo configure a speed dial key:1. Navigate to Menu- Features- Dsskey.2. Select the desired DSS key, and then press Enter.3. Select SpeedDial from the Type field, select the desired line from the Account ID field, entera label in the Label field and then enter the number in the Value field.4. Press Save to accept the change.To use the speed dial key:Press the speed dial key to dial out the preset number.Page 9 of 12
This video demonstrates how to set up speed dial keyshttps://youtu.be/Gp8InUry1wQ4.11 Set Voicemail and Accessing VoicemailsSet up Voicemail1. Press the message button on the phone and type in your temporary password(0000) and press the # key.2. Record your name and press the # key.3. Record your message and press the # key.4. Change your voicemail password (look below for steps)Changing voicemail password:1.2.3.4.Press message buttonType in your existing password and press the # keyChoose option 5Follow prompts to change passwordChanging voicemail name:1.2.3.4.Press message buttonType in your existing password and press the # keyChoose option 5Follow prompts to record your new nameChanging your greeting:1.2.3.4.Press message buttonType in your existing password and press the # keyChoose option 6Follow prompts to record your new greetingAccessing Voicemail1. Press thekey on your phone.2. Dial your passwordThis video demonstrates how to check your voicemailhttps://youtu.be/sNEZGX5no7c4.12 Setting Status to Do Not DisturbSetting your phone to DND (Do Not Disturb) will silence the ringer and send all calls directly tovoicemail. To enable DND1. Press the DND softkey on the phoneThere is a red circle on the phone display when turned on. All calls are logged in the Call Historyas missed.This video demonstrates how to enable and disable do not disturb (DND)https://youtu.be/Azp2kmitCv4Page 10 of 12
Note: To disable DND, press the DND softkey again4.13 Modify RingtoneTo choose a new ringtone for your phone:1.2.3.4.5.Tap the Menu softkey.Select Settings Basic Settings Sound Ring Tones.If there are multiple lines assigned to your phone, select the line you wish to modify.Select the desired ringtone (highlight to sample ringtones).Tap the Save softkey.This video demonstrates how to modify your ringtonehttps://youtu.be/OeA-fcN5wg85. OTHER USEFUL INFORMATION Tutorial video on call basicsThe video demonstrates the basic functions of the T54W Yealink handsethttps://www.youtube.com/watch?v lUUl1A6wqg0 Menu StructurePage 11 of 12
Rebooting PhoneIf the phone does not function as expected, IT Helpdesk may request you to re-boot thephone. To reboot, follow the below steps.1. Navigate to Menu- Basic- Reboot2. Select OKPage 12 of 12
select the desired ring time to wait before forwarding from the After Ring Time field. 4. Press Save to accept the change. Deactivating Call Forward You can deactivate call forward when you no longer want to forward your calls. 5. Navigate to Menu- Features- Call Forward. 6. If the forward is activated for specific lines, select the desired .