Transcription
CopyrightCopyright 2019 YEALINK NETWORK TECHNOLOGY CO., LTD.Copyright 2019 Yealink Network Technology CO., LTD. All rights reserved. No parts of this publicationmay be reproduced or transmitted in any form or by any means, electronic or mechanical, photocopying,recording, or otherwise, for any purpose, without the express written permission of Yealink NetworkTechnology CO., LTD. Under the law, reproducing includes translating into another language or format.When this publication is made available on media, Yealink Network Technology CO., LTD. gives itsconsent to downloading and printing copies of the content provided in this file only for private use butnot for redistribution. No parts of this publication may be subject to alteration, modification orcommercial use. Yealink Network Technology CO., LTD. will not be liable for any damages arising fromuse of an illegally modified or altered publication.WarrantyTHE SPECIFICATIONS AND INFORMATION REGARDING THE PRODUCTS IN THIS GUIDE ARE SUBJECT TOCHANGE WITHOUT NOTICE. ALL STATEMENTS, INFORMATION, AND RECOMMENDATIONS IN THISGUIDE ARE BELIEVED TO BE ACCURATE AND PRESENTED WITHOUT WARRANTY OF ANY KIND, EXPRESSOR IMPLIED. USERS MUST TAKE FULL RESPONSIBILITY FOR THEIR APPLICATION OF PRODUCTS.YEALINK NETWORK TECHNOLOGY CO., LTD. MAKES NO WARRANTY OF ANY KIND WITH REGARD TOTHIS GUIDE, INCLUDING, BUT NOT LIMITED TO, THE IMPLIED WARRANTIES OF MERCHANTABILITY ANDFITNESS FOR A PARTICULAR PURPOSE. Yealink Network Technology CO., LTD. shall not be liable forerrors contained herein nor for incidental or consequential damages in connection with the furnishing,performance, or use of this guide.Declaration of ConformityHereby, Yealink Network Technology CO., LTD. declares that this phone is in conformitywith the essential requirements and other relevant provisions of the CE, FCC.CE Mark WarningThis device is marked with the CE mark in compliance with EC Directives 2006/95/EC and 2004/108/EC.Part 15 FCC RulesAny Changes or modifications not expressly approved by the party responsible for compliance could void the user'sauthority to operate the equipment.This device is compliant with Part 15 of the FCC Rules. Operation is subject to the following two conditions:1. This device may not cause harmful interference.2. This device must accept any interference received, including interference that may cause undesired operation.
Class B Digital Device or PeripheralNote: This equipment has been tested and found to comply with the limits for a Class B digital device, pursuant to part15 of the FCC Rules. These limits are designed to provide reasonable protection against harmful interference in aresidential installation. This equipment generates, uses and can radiate radio frequency energy and, if not installed andused in accordance with the instructions, may cause harmful interference to radio communications. However, there isno guarantee that interference will not occur in a particular installation. If this equipment does cause harmfulinterference to radio or television reception, which can be determined by turning the equipment off and on, the user isencouraged to try to correct the interference by one or more of the following measures:1. Reorient or relocate the receiving antenna.2. Increase the separation between the equipment and receiver.3. Connect the equipment into an outlet on a circuit different from that to which the receiver is connected.4. Consult the dealer or an experienced radio/TV technician for help.WEEE WarningTo avoid the potential effects on the environment and human health as a result of the presence ofhazardous substances in electrical and electronic equipment, end users of electrical and electronicequipment should understand the meaning of the crossed-out wheeled bin symbol. Do not disposeof WEEE as unsorted municipal waste and have to collect such WEEE separately.Customer FeedbackWe are striving to improve our documentation quality and we appreciate your feedback. Email youropinions and comments to DocsFeedback@yealink.com.
GNU GPL INFORMATIONYealink IP phone firmware contains third-party software under the GNU General Public License (GPL). Yealink usessoftware under the specific terms of the GPL. Please refer to the GPL for the exact terms and conditions of the license.The original GPL license, source code of components licensed under GPL and used in Yealink products can bedownloaded online: http://www.yealink.com/onepage 83.html.
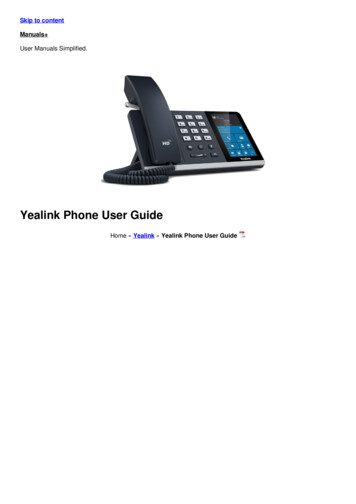
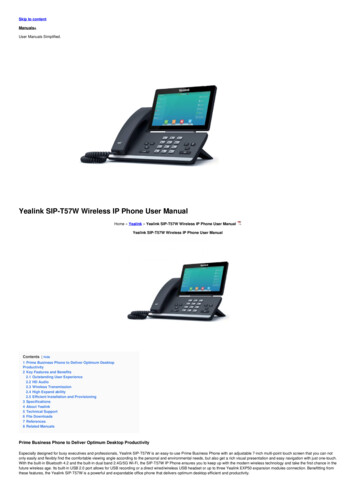
About This GuideAbout This GuideThank you for choosing the Yealink SIP IP phones. The purpose of this guide introduces how toconfigure Yealink SIP IP phones via CommPortal phone configurator.The configuration process outlined in this guide applies to the following phone models:Phone ModelFirmwareT19P-E253.80.202.1 or laterT40P54.80.202.1 or laterT27G, T29G, T40G, T41S, T42S, T46S, T48SX.82.0.1 or laterT54S/T52S70.82.0.10 or laterW60B77.81.0.16 or laterCP92078.81.0.15 or laterT58A/T58V/T56A58.83.0.15 or laterCP96073.83.0.25 or laterT57W/T54W/T53W/T53X.84.0.65 or laterW80B103.83.0.55 or laterNoteThe configuration process described in this guide takes the Yealink SIP-T42S IP phone as anexample.In This GuideTopics provided in this guide include: Chapter 1Configuration Methods Chapter 2Customizing Your Phone Chapter 3Downloading Configuration Files to Phones Chapter 4Basic Call Features Chapter 5Advanced Phone Features Chapter 6Troubleshootingv
Yealink IP Phones Configuring Guidevi
Table of ContentsTable of ContentsAbout This Guide . vIn This Guide . vTable of Contents . viiConfiguration Methods . 1Phone User Interface . 1CommPortal Phone Configurator . 1Customizing Your Phone. 3IPv4 and IPv6 Network Settings . 3Choosing IP Addressing Mode . 3Configuring a Static IPv4 Address . 4Configuring a Static IPv6 Address . 4Registering Accounts . 5SIP Session Timer . 6Configuring SIP Session Timer . 7Time & Date . 8Time Zone . 8Configuring NTP Server . 11Configuring Daylight Saving Time . 12Directory . 17Configuring the Display Priority of the Directory . 17Viewing the Directory on the Phone . 18Remote Phone Book . 18Configuring Access URL of the Remote Phone Book . 18Enabling Presenting the Caller Identity . 19Downloading the Business Group Contacts . 20Viewing Remote Phone Book on the Phone. 20Searching for a Contact in the Remote Phone Book . 21Placing a Call from Remote Phone Book . 21Search Source List in Dialing . 21Configuring Search Source List . 22Line Keys Configuration . 22Line Key Features . 23Keypad Lock . 33vii
Yealink IP Phones Configuring GuideConfiguring the Keypad Lock . 34Unlocking the Phone . 34Dial-now . 35Adding a Dial-now Rule. 35Configuring the Delay Time for Dial-now Rules . 36Configuring Live Dialpad . 37Downloading Configuration Files to Phones . 39Obtaining the Provisioning Server Address . 39Triggering the Phone to Perform Auto Provisioning . 39Power On . 40Auto Provision Now . 40Zero Touch . 41Basic Call Features . 43Do Not Disturb . 43Choosing a DND Mode . 43Activating DND in Phone Mode . 44Activating DND in Custom Mode for a Specific Account . 44Activating DND in Custom Mode for All Accounts . 44Enabling DND Key Synchronization. 44Transferring Calls . 45Performing a Blind Transfer . 45Performing a Semi-Attended/Attended Transfer . 45Local Conference Call . 46Setting Up a Local Conference Call . 46Joining Two Calls in a Conference . 46Managing Conference Participants . 47Configuring Transfer On Conference Hang up . 47Call Park and Call Retrieve . 48Configuring a Park Call Key . 48Configuring an Enhanced Park Call Key. 49Configuring a Retrieve Parked Call Key . 50Parking a Call . 50Retrieving a Call . 51Directed Pickup . 51Configuring a Directed Pickup key . 51Picking up a Call . 52Group Pickup . 52Configuring a Directed Pickup key . 52Picking up a Call for a Group . 53Advanced Phone Features . 55viii
Table of ContentsEnhanced Monitor Extension . 55Configuring an Enhanced Monitor Extension key . 55LED Indicator . 56Configuring Transfer Mode via Dsskey Feature . 56Intercom and Push-to-Talk . 57Enabling Push to Talk Mode . 57Configuring an Intercom/PTT Key . 58Using Push-to-Talk . 59Placing an Intercom Call . 59Configuring Incoming Intercom/PTT Calls. 59Multicast Paging . 60Configuring a Multicast Paging key. 60Configure a Paging List key . 61Configuring Paging List . 61Configuring a Codec for Multicast Paging . 62Configuring Multicast Listening Addresses . 63Handling Incoming Multicast Paging Calls . 63Sending RTP Stream via a Multicast Paging Key . 64Sending RTP Stream via a Paging List Key. 65DTMF . 65DTMF Keypad . 65Transmitting DTMF Digit . 66Call Jump . 66Troubleshooting . 69IP Address Issues . 69Why doesn’t the IP phone get an IP address? . 69How to solve the IP conflict problem? . 69Time and Date Issues . 69Why doesn’t the IP phone display time and date correctly? . 69Display Issues. 70Why is the LCD screen blank?. 70Why does the IP phone display “No Service”?. 70Phone Book Issues . 70What is the difference between a remote phone book and a local directory? . 70Audio Issues . 70How to increase or decrease the volume? . 70Why do I get poor sound quality during a call? . 71Wi-Fi and Bluetooth Issues . 71Why is the wireless signal strength low? . 71Why can’t I connect the Bluetooth device with the IP phone all the time? . 71Why the Bluetooth headset affects IP phone’s voice quality? . 71Firmware and Upgrading Issues . 72ix
Yealink IP Phones Configuring GuideWhy doesn’t the IP phone upgrade firmware successfully? . 72How can I verify the firmware generation and version of the phone? . 72Why doesn’t the IP phone update the configuration?. 73Resetting Issues . 73How to reset the IP phone to factory configurations? . 73Rebooting Issues . 74How to reboot the IP phone? . 74Protocols and Ports Issues . 75What communication protocols and ports do Yealink IP phones support? . 75Password Issues . 78How to restore the administrator password? . 78Power and Startup Issues. 78What will happen if I connect both PoE cable and power adapter? Which has the higherpriority? . 78Why does the IP phone have no power? . 78Why is the LCD screen black? . 78Regulatory Notices . 79Service Agreements . 79Limitations of Liability . 79Safety Instructions . 79x
Configuration MethodsConfiguration MethodsThere are two ways to configure Yealink SIP IP phones. Phone user interface: if you want to deploy a small number of phones, you can configureIP phones one by one via phone user interface. CommPortal Phone Configurator: if you want to deploy a mass of IP phones, you canconfigure IP phones via CommPortal phone configurator.Phone User InterfaceThe phone user interface is made up of keypad and LCD screen, allowing users to perform allcall operations and change basic configuration settings directly on the phone.CommPortal Phone ConfiguratorThe CommPortal Phone Configurator is an online graphical user interface for the Metaview SIPprovisioning server. You can configure the phone by using this simple and intuitive interface. Formore information, refer to: www.metaswitch.com.CommPortal Phone Configurator1
Yealink IP Phones Configuring Guide2
Customizing Your PhoneCustomizing Your PhoneIPv4 and IPv6 Network SettingsAfter your phones are connected to the wired network, the phones can obtain the IPv4 or IPv6network settings from a Dynamic Host Configuration Protocol (DHCP) server if your networksupports it.You can also configure IPv4 or IPv6 network settings manually.Choosing IP Addressing ModeYealink IP Phones support IPv4 addressing mode, IPv6 addressing mode, as well as an IPv4&IPv6dual-stack addressing mode. Choose one according to your environment.It is not applicable to W80B.To configure the IP addressing mode via CommPortal phone configurator:1.Click Network- IP Setting.2.Select IPv4, IPv6 or IPv4 & IPv6 from the Internet Port Mode(IPv4/IPv6) field.3.Click Save changes to accept the change.4.Perform auto provisioning on the phone to download above configurations. For moreinformation on how to perform auto provisioning, refer to Downloading ConfigurationFiles on page 39.3
Yealink IP Phones Configuring GuideConfiguring a Static IPv4 AddressTo configure a static IPv4 address via CommPortal phone configurator:1.Click Network- IP Setting.Make sure that the IP addressing mode is configured as IPv4 or IPv4 & IPv6.2.Select Static IP Address from the drop-down menu of Internet Port Type for IPV4.3.Enter the desired values in the Static IP Address, Subnet Mask, Gateway, Primary DNSand Secondary DNS fields respectively.4.Press the Save soft key to accept the change.5.Perform auto provisioning on the phone to download above configurations. For moreinformation on how to perform auto provisioning, refer to Downloading ConfigurationFiles on page 39.Configuring a Static IPv6 AddressIt is not applicable to W80B.To configure a static IPv6 address via CommPortal phone configurator:1.Click Network IP Setting.Make sure that the IP addressing mode is configured as IPv6 or IPv4 & IPv6.2.4Select Static IP Address from the drop-down menu of Internet Port Type for IPV6.
Customizing Your Phone3.Enter the desired values in the Static IP Address, IPv6 Prefix, Gateway, Primary DNS andSecondary DNS fields respectively.4.Click Save changes to accept the change.5.Perform auto provisioning on the phone to download above configurations. For moreinformation on how to perform auto provisioning, refer to Downloading Configuration Fileson page 39.Registering AccountsYou can register one or multiple accounts on the SIP IP phone.NoteThe SIP-T19 (P) E2, CP920 and CP960 phones only support one account at most.To register an account via CommPortal phone configurator:1.Click Line X- User.2.Enter the desired values in Directory Number and Display Name fields respectively.3.Select the desired value from the Description field.4.Depending on your selection:-If you select Use directory number, the directory number will act as the accountlabel to be displayed on the idle screen.-If you select Use extension, the extension will act as the account label to bedisplayed on the idle screen.-If you select Custom description, you can customize the label to be displayed on theidle screen in the Custom Description field.5.Click Line X- SIP Server.5
Yealink IP Phones Configuring Guide6.Enter the desired values in the SIP Server Address field. Contact your systemadministrator for more information.You can repeat steps 2 to 7 to register more accounts.7.Click Save changes to accept the change.8.Perform auto provisioning on the phone to download above configurations. For moreinformation on how to perform auto provisioning, refer to Downloading ConfigurationFiles on page 39.SIP Session TimerSIP session timers T1, T2 and T4 are SIP transaction layer timers defined in RFC 3261. Thesesession timers are configurable on IP phones.Timer T1Timer T1 is an estimate of the Round Trip Time (RTT) of transactions between a SIP client andSIP server.Timer T2Timer T2 represents the maximum retransmitting time of any SIP request message. There-transmitting and doubling of T1 will continue until the retransmitting time reaches the T2value.6
Customizing Your PhoneExample:The user registers a SIP account for the IP phone and then set the value of Timer T1, Timer T2respectively (Timer T1: 0.5, Timer T2: 4). The SIP registration request message will bere-transmitted between the IP phone and SIP server. The re-transmitting and doubling of TimerT1 (0.5) will continue until the retransmitting time reaches the Timer T2 (4). The total registrationrequest retry time will be less than 64 times of T1 (64 * 0.5 32). The re-transmitting interval insequence is: 0.5s, 1s, 2s, 4s, 4s, 4s, 4s, 4s, 4s and 4s.Timer T4Timer T4 represents that the network will take to clear messages between the SIP client andserver.Configuring SIP Session TimerTo configure SIP session timer via CommPortal phone configurator:1.Click Preference- SIP.2.Enter the desired value in the SIP Session Timer T1 field.The valid value is 0.5-10s, and the default value is 0.5s.3.Enter the desired value in the SIP Session Timer T2 field.The valid value is 2-40s, and the default value is 4s.4.Enter the desired value in the SIP Session Timer T4 field.The valid value is 2.5-60s, and the default value is 5s.5.Click Save changes to accept the change.6.Perform auto provisioning on the phone to download above configurations. For moreinformation on how to perform auto provisioning, refer to Downloading ConfigurationFiles on page 39.7
Yealink IP Phones Configuring GuideTime & DateYealink IP phones maintain a local clock. You can choose to get the time and date from SNTP(Simple Network Time Protocol) time server to have the most accurate time and set DST(Daylight Saving Time) to make better use of daylight and to conserve energy, or you can set thetime and date manually. The time and date can be displayed in several formats on the phone.Time ZoneThe following table lists the values you can use to set the time zone location.TimeTime Zone NameZoneTime Zone NameZone-12Eniwetok,Kwajalein 2Estonia(Tallinn)-11Midway Island 2Finland(Helsinki)-11Samoa 2Gaza Strip(Gaza)-10United States-Hawaii-Aleutian 2Greece(Athens)-10United States-Alaska-Aleutian 2Israel(Tel Aviv)French Polynesia 2Jordan(Amman)-9United States-Alaska Time 2Latvia(Riga)-8Canada(Vancouver,Whitehorse) 2Lebanon(Beirut)-8Mexico(Tijuana,Mexicali) 2Moldova(Kishinev)-8United States-Pacific Time 2Jerusalem-8Baja California 2Russia(Kaliningrad)-7Canada(Edmonton,Calgary) 2Bulgaria(Sofia)-7Mexico(Mazatlan,Chihuahua) 2Lithuania(Vilnius)-7United States-Mountain Time 2Cairo-7United States-MST no DST 2Istanbul-7Chihuahua,La Paz 2E.Europe-7Arizona 2Harare,Pretoria-6Guatemala 2Tripoli-6El Salvador 2Romania(Bucharest)-6Honduras 2Syria(Damascus)-6Nicaragua 2Turkey(Ankara)-6Costa Rica 2Ukraine(Kyiv, Odessa)-6Belize 3East Africa Time-9:308Time
Customizing Your PhoneTimeTime Zone NameZoneTimeTime Zone NameZone-6Canada-Manitoba(Winnipeg) 3Iraq(Baghdad)-6Chile(Easter Islands) 3Russia(Moscow)-6Guadalajara 3St.Petersburg-6Monterrey 3Kuwait,Riyadh-6Mexico(Mexico City,Acapulco) 3Nairobi-6Saskatchewan 3Minsk-6United States-Central Time 3Volgograd (RTZ 2)-5Bogota,Lima-5Quito 4Armenia(Yerevan)-5Peru 4Azerbaijan(Baku)-5Indiana (East) 4Georgia(Tbi
Thank you for choosing the Yealink SIP IP phones. The purpose of this guide introduces how to configure Yealink SIP IP phones via CommPortal phone configurator. The configuration process outlined in this guide applies to the following phone models: Phone Model Firmware T19P-E2 53.80.202.1 or later T40P 54.80.202.1 or later