Transcription
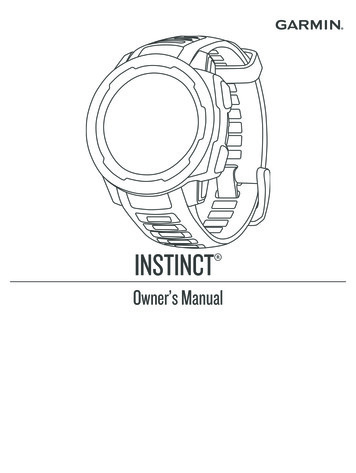
INSTINCT Owner’s Manual
2018 Garmin Ltd. or its subsidiariesAll rights reserved. Under the copyright laws, this manual may not be copied, in whole or in part, without the written consent of Garmin. Garmin reserves the right to change or improve itsproducts and to make changes in the content of this manual without obligation to notify any person or organization of such changes or improvements. Go to www.garmin.com for current updatesand supplemental information concerning the use of this product.Garmin , the Garmin logo, and ANT , Auto Lap , Auto Pause , Edge , inReach , Instinct , QuickFit , TracBack , VIRB , Virtual Partner , and Xero are trademarks of Garmin Ltd. or itssubsidiaries, registered in the USA and other countries. Garmin Connect , Garmin Explore , Garmin Express , Garmin Move IQ , tempe , and TrueUp are trademarks of Garmin Ltd. or itssubsidiaries. These trademarks may not be used without the express permission of Garmin. American Heart Association is a registered trademark of American Heart Association, Inc. Android is a trademark of Google Inc. Apple and Mac are trademarks of Apple Inc., registered in theU.S. and other countries. The Bluetooth word mark and logos are owned by the Bluetooth SIG, Inc. and any use of such marks by Garmin is under license. Advanced heartbeat analytics byFirstbeat. Windows is a registered trademark of Microsoft Corporation in the United States and other countries. Other trademarks and trade names are those of their respective owners. This product is ANT certified. Visit www.thisisant.com/directory for a list of compatible products and apps. M/N: A03603
Table of ContentsIntroduction.1Restoring a Personal Record . 7Clearing a Personal Record . 7Clearing All Personal Records . 7Buttons .1Viewing the Controls Menu . 1Viewing Widgets . 1Charging the Device . 1Pairing Your Smartphone with Your Device . 1Product Updates . 1Setting Up Garmin Express . 1Clock . 7Activities and Apps. 2Saving Your Location . 8Editing Your Saved Locations . 8Viewing the Altimeter, Barometer, and Compass . 8Projecting a Waypoint . 8Navigating to a Destination . 8Creating and Following a Course on Your Device . 8Marking and Starting Navigation to a Man OverboardLocation . 9Navigating with Sight 'N Go . 9Navigating to Your Starting Point During an Activity . 9Navigating to the Starting Point of a Saved Activity . 9Stopping Navigation . 9Calculating the Size of an Area . 9Map . 9Panning and Zooming the Map . 9Starting an Activity . 2Tips for Recording Activities . 2Stopping an Activity . 2Creating a Custom Activity . 2Indoor Activities . 2Calibrating the Treadmill Distance . 2Outdoor Activities . 2Viewing Your Ski Runs . 3Using the Metronome . 3Swimming . 3Swim Terminology . 3Stroke Types . 3Tips for Swimming Activities . 3Resting During Pool Swimming . 3Training with the Drill Log . 3Heart Rate Features . 3Wrist-based Heart Rate . 4Wearing the Device . 4Tips for Erratic Heart Rate Data . 4Viewing the Heart Rate Widget . 4Broadcasting Heart Rate Data to Garmin Devices . 4Turning Off the Wrist-based Heart Rate Monitor . 4Training. 4Setting Up Your User Profile . 4Fitness Goals . 4About Heart Rate Zones . 4Setting Your Heart Rate Zones . 4Heart Rate Zone Calculations . 5Activity Tracking . 5Auto Goal . 5Using the Move Alert . 5Sleep Tracking . 5Using Automated Sleep Tracking . 5Using Do Not Disturb Mode . 5Intensity Minutes . 5Earning Intensity Minutes . 5Garmin Move IQ Events . 5Activity Tracking Settings . 6Turning Off Activity Tracking . 6Workouts . 6Following a Workout From Garmin Connect . 6Starting a Workout . 6About the Training Calendar . 6Using Garmin Connect Training Plans . 6Interval Workouts . 6Creating an Interval Workout . 6Starting an Interval Workout . 6Stopping an Interval Workout . 6Using Virtual Partner . 7Setting a Training Target . 7Cancelling a Training Target . 7Racing a Previous Activity . 7Personal Records . 7Viewing Your Personal Records . 7Table of ContentsSetting an Alarm . 7Starting the Countdown Timer . 7Using the Stopwatch . 8Syncing the Time with GPS . 8Setting Alerts . 8Navigation. 8History . 9Using History . 9Viewing Your Time in Each Heart Rate Zone . 10Viewing Data Totals . 10Using the Odometer . 10Syncing Activities . 10Deleting History . 10Connected Features. 10Enabling Bluetooth Notifications . 10Viewing Notifications . 10Managing Notifications . 10Turning Off the Bluetooth Smartphone Connection . 10Turning On and Off Smartphone Connection Alerts . 11Locating a Lost Mobile Device . 11Garmin Connect . 11Updating the Software Using the Garmin Connect App . 11Updating the Software Using Garmin Express . 11Using Garmin Connect on Your Computer . 11Manually Syncing Data with Garmin Connect . 11Garmin Explore . 11Customizing Your Device. 11Widgets . 11Customizing the Widget Loop . 12inReach Remote . 12Using the inReach Remote . 12VIRB Remote . 12Controlling a VIRB Action Camera . 12Controlling a VIRB Action Camera During an Activity . 12Activities and App Settings . 13Customizing the Data Screens . 13Adding a Map to an Activity . 13Alerts . 13Setting an Alert . 14Auto Lap .14Marking Laps by Distance . 14Enabling Auto Pause . 14Enabling Auto Climb . 143D Speed and Distance . 14Turning On and Off the Lap Key . 14i
Using Auto Scroll . 15UltraTrac . 15Power Save Timeout Settings . 15Customizing Your Activity List . 15Removing an Activity or App . 15Customizing the Controls Menu . 15Customizing the Watch Face . 15Sensors Settings . 15Compass Settings . 15Calibrating the Compass Manually . 15Setting the North Reference . 15Altimeter Settings . 16Calibrating the Barometric Altimeter . 16Barometer Settings . 16Calibrating the Barometer . 16Map Settings . 16Navigation Settings . 16Customizing Map Features . 16Heading Settings . 16Setting Navigation Alerts . 16System Settings . 16Time Settings . 17Changing the Backlight Settings . 17Customizing the Hot Keys . 17Changing the Units of Measure . 17Viewing Device Information . 17Viewing E-label Regulatory and Compliance Information . 17Appendix. 21Data Fields . 21Wheel Size and Circumference . 23Symbol Definitions . 24Index. 25Wireless Sensors . 17Pairing Your Wireless Sensors . 17Using an Optional Bike Speed or Cadence Sensor . 17Foot Pod . 17Improving Foot Pod Calibration . 18Calibrating Your Foot Pod Manually . 18Setting Foot Pod Speed and Distance . 18tempe . 18Device Information. 18Specifications . 18Battery Life Information . 18Data Management . 18Disconnecting the USB Cable . 18Deleting Files . 18Device Maintenance . 18Device Care . 18Cleaning the Device . 19Changing the Bands . 19Troubleshooting. 19My device is in the wrong language . 19Managing Language Files . 19Is my smartphone compatible with my device? . 19My phone will not connect to the device . 19Can I use my Bluetooth sensor with my watch? . 20Restarting Your Device . 20Resetting All Default Settings . 20Acquiring Satellite Signals . 20Improving GPS Satellite Reception . 20The temperature reading is not accurate . 20Maximizing the Battery Life . 20Activity Tracking . 20My daily step count does not appear . 20My step count does not seem accurate . 20The step counts on my device and my Garmin Connectaccount don't match . 21The floors climbed amount does not seem accurate . 21My intensity minutes are flashing . 21Getting More Information . 21iiTable of Contents
IntroductionWARNINGSee the Important Safety and Product Information guide in theproduct box for product warnings and other importantinformation.Always consult your physician before you begin or modify anyexercise program.Buttons Press GPS to view additional options and functions for awidget.Charging the DeviceWARNINGThis device contains a lithium-ion battery. See the ImportantSafety and Product Information guide in the product box forproduct warnings and other important information.NOTICETo prevent corrosion, thoroughly clean and dry the contacts andthe surrounding area before charging or connecting to acomputer. Refer to the cleaning instructions (Device Care,page 18).1 Plug the small end of the USB cable into the charging port onyour device.Press to turn the backlight on and off.LIGHT Press to turn the device on.CTRL Hold to view the controls menu.GPSPress to view the activity list and start or stop an activity.Press to choose an option in a menu.Hold to view GPS coordinates and save your location.Press to return to the previous screen.BACK Hold to view the clock menu.SETPress to scroll through the widget loop and menus.DOWN Hold to view the altimeter, barometer, and compass (ABC)screen.ABCPress to scroll through the widget loop and menus.Hold to view the menu.UPMENUViewing the Controls MenuThe controls menu contains options, such as turning on do notdisturb mode, locking the keys, and turning the device off.NOTE: You can add, reorder, and remove the options in thecontrols menu (Customizing the Controls Menu, page 15).1 From any screen, hold CTRL.2 Plug the large end of the USB cable into a USB chargingport.3 Charge the device completely.Pairing Your Smartphone with Your DeviceTo use the connected features of the Instinct device, it must bepaired directly through the Garmin Connect app, instead offrom the Bluetooth settings on your smartphone.1 From the app store on your smartphone, install and open theGarmin Connect app.2 Bring your smartphone within 10 m (33 ft.) of your device.3 Press CTRL to turn on the device.The first time you turn on the device, it is in pairing mode.TIP: To manually enter pairing mode, you can hold MENU,and select Settings Pair Phone.4 Select an option to add your device to your Garmin Connectaccount: If this is the first time you are pairing a device with theGarmin Connect app, follow the on-screen instructions. If you already paired another device with the GarminConnect app, from theormenu, select GarminDevices Add Device, and follow the on-screeninstructions. Product UpdatesOn your computer, install Garmin Express (www.garmin.com/express). On your smartphone, install the Garmin Connect app.This provides easy access to these services for Garmindevices: Software updates Data uploads to Garmin Connect Product registration 2 Press UP or DOWN to scroll through the options.Viewing WidgetsYour device comes preloaded with several widgets, and moreare available when you pair your device with a smartphone. Press UP or DOWN.The device scrolls through the widget loop.IntroductionSetting Up Garmin Express1 Connect the device to your computer using a USB cable.2 Go to www.garmin.com/express.1
3 Follow the on-screen instructions.Activities and AppsYour device can be used for indoor, outdoor, athletic, and fitnessactivities. When you start an activity, the device displays andrecords sensor data. You can save activities and share themwith the Garmin Connect community.For more information about activity tracking and fitness metricaccuracy, go to garmin.com/ataccuracy.Creating a Custom Activity1 From the watch face, press GPS.2 Select Add.3 Select an option:45Starting an ActivityWhen you start an activity, GPS turns on automatically (ifrequired).1 From the watch face, press GPS.2 If this is the first time you have started an activity, select thecheckbox next to each activity to add to your favorites, andselect Done.3 Select an option: Select an activity from your favorites. Select , and select an activity from the extended activitylist.4 If the activity requires GPS signals, go outside to an area witha clear view of the sky, and wait until the device is ready.The device is ready after it establishes your heart rate,acquires GPS signals (if required), and connects to yourwireless sensors (if required).5 Press GPS to start the activity timer.The device records activity data only while the activity timer isrunning.Tips for Recording Activities Charge the device before starting an activity (Charging theDevice, page 1). Press BACK to record laps. Press UP or DOWN to view additional data pages.Stopping an Activity1 Press GPS.2 Select an option: To resume your activity, select Resume. To save the activity and return to watch mode, selectSave Done. To suspend your activity and resume it at a later time,select Resume Later. To mark a lap, select Lap. To navigate back to the starting point of your activity alongthe path you traveled, select Back to Start TracBack.NOTE: This feature is available only for activities that useGPS. To navigate back to the starting point of your activity bythe most direct path, select Back to Start Straight Line.NOTE: This feature is available only for activities that useGPS. To measure the difference between your heart rate at theend of the activity and your heart rate two minutes later,select Recovery HR, and wait while the timer countsdown. To discard the activity and return to watch mode, selectDiscard Yes.NOTE: After stopping the activity, the device saves itautomatically after 30 minutes.267 Select Copy Activity to create your custom activitystarting from one of your saved activities. Select Other to create a new custom activity.If necessary, select an activity type.Select a name or enter a custom name.Duplicate activity names include a number, for example:Bike(2).Select an option: Select an option to customize specific activity settings. Forexample, you can customize the data screens or autofeatures. Select Done to save and use the custom activity.Select Yes to add the activity to your list of favorites.Indoor ActivitiesThe Instinct device can be used for training indoors, such asrunning on an indoor track or using a stationary bike. GPS isturned off for indoor activities (Activities and App Settings,page 13).When running or walking with GPS turned off, speed, distance,and cadence are calculated using the accelerometer in thedevice. The accelerometer is self-calibrating. The accuracy ofthe speed, distance, and cadence data improves after a fewoutdoor runs or walks using GPS.TIP: Holding the handrails of the treadmill reduces accuracy.You can use an optional foot pod to record pace, distance, andcadence.When cycling with GPS turned off, speed and distance data arenot available unless you have an optional sensor that sendsspeed and distance data to the device, such as a speed orcadence sensor.Calibrating the Treadmill DistanceTo record more accurate distances for your treadmill runs, youcan calibrate the treadmill distance after you run at least 1.5 km(1 mi.) on a treadmill. If you use different treadmills, you canmanually calibrate the treadmill distance on each treadmill orafter each run.1 Start a treadmill activity (Starting an Activity, page 2).2 Run on the treadmill until your Instinct device records at least1.5 km (1 mi.).3 After you complete your run, press GPS.4 Select an option: To calibrate the treadmill distance the first time, selectSave.The device prompts you to complete the treadmillcalibration. To manually calibrate the treadmill distance after the firsttime calibration, select Calibrate & Save Yes.5 Check the treadmill display for the distance traveled, andenter the distance on your device.Outdoor ActivitiesThe Instinct device comes preloaded with outdoor activities,such as running and cycling. GPS is turned on for outdooractivities. You can add new activities based on default activities,such as walking or rowing. You can also add custom activities toyour device (Creating a Custom Activity, page 2).Activities and Apps
Viewing Your Ski RunsYour device records the details of each downhill skiing orsnowboarding run using the auto run feature. This feature isturned on by default for downhill skiing and snowboarding. Itautomatically records new ski runs based on your movement.The timer pauses when you stop moving downhill and when youare on a chairlift. The timer remains paused during the chairliftride. You can start moving downhill to restart the timer. You canview run details from the paused screen or while the timer isrunning.1 Start a skiing or snowboarding activity.2 Hold MENU.3 Select View Runs.4 Press UP and DOWN to view details of your last run, yourcurrent run, and your total runs.The run screens include time, distance traveled, maximumspeed, average speed, and total descent.Using the MetronomeThe metronome feature plays tones at a steady rhythm to helpyou improve your performance by training at a faster, slower, ormore consistent cadence.NOTE: This feature is not available for all activities.1 From the watch face, press GPS.2 Select an activity.3 Hold MENU.4 Select the activity settings.5 Select Metronome Status On.6 Select an option: Select Beats / Minute to enter a value based on thecadence you want to maintain. Select Alert Frequency to customize the frequency of thebeats. Select Sounds to customize the metronome tone andvibration.7 If necessary, select Preview to listen to the metronomefeature before you run.8 Go for a run (Starting an Activity, page 2).The metronome starts automatically.9 During your run, press UP or DOWN to view the metronomescreen.10 If necessary, hold MENU to change the metronome settings.SwimmingNOTICEThe device is intended for surface swimming. Scuba diving withthe device may damage the product and will void the warranty.NOTE: The device cannot record wrist heart rate data whileswimming.Swim TerminologyLength: One trip down the pool.Interval: One or more consecutive lengths. A new interval startsafter a rest.Stroke: A stroke is counted every time your arm wearing thedevice completes a full cycle.Swolf: Your swolf score is the sum of the time for one poollength and the number of strokes for that length. Forexample, 30 seconds plus 15 strokes equals a swolf score of45. Swolf is a measurement of swimming efficiency and, likegolf, a lower score is better.Critical swim speed (CSS): Your CSS is the theoretical speedthat you can maintain continuously without exhaustion. YouHeart Rate Featurescan use your CSS to guide your training pace and monitoryour improvement.Stroke TypesStroke type identification is available only for pool swimming.Your stroke type is identified at the end of a length. Stroke typesappear in your swimming history and in your Garmin Connectaccount. You can also select stroke type as a custom data field(Customizing the Data Screens, page 13).FreeFreestyleBackBackstrokeBreast BreaststrokeFlyButterflyMixed More than one stroke type in an intervalDrillUsed with drill logging (Training with the Drill Log, page 3)Tips for Swimming Activities Before starting a pool swimming activity, follow the on-screeninstructions to select your pool size or enter a custom size.The next time you start a pool swimming activity, the deviceuses this pool size. You can hold MENU, select the activitysettings, and select Pool Size to change the size. Press BACK to record a rest during pool swimming.The device automatically records swim intervals and lengthsfor pool swimming.Resting During Pool SwimmingThe default rest screen displays two rest timers. It also displaystime and distance for the last completed interval.NOTE: Swim data is not recorded during a rest.1 During your swim activity, press BACK to start a rest.The display reverses to white text on a black background,and the rest screen appears.2 During a rest, press UP or DOWN to view other data screens(optional).3 Press BACK, and continue swimming.4 Repeat for additional rest intervals.Training with the Drill LogThe drill log feature is available only for pool swimming. You canuse the drill log feature to manually record kick sets, one-armswimming, or any type of swimming that is not one of the
inReach VIRB Xero
