Transcription
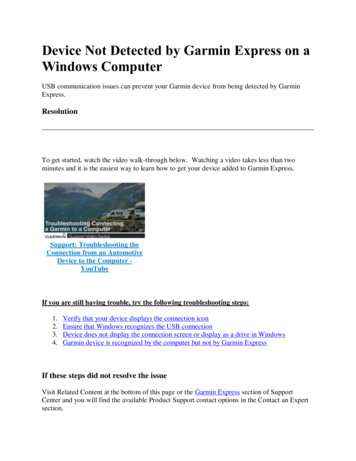
Device Not Detected by Garmin Express on aWindows ComputerUSB communication issues can prevent your Garmin device from being detected by GarminExpress.ResolutionTo get started, watch the video walk-through below. Watching a video takes less than twominutes and it is the easiest way to learn how to get your device added to Garmin Express.Support: Troubleshooting theConnection from an AutomotiveDevice to the Computer YouTubeIf you are still having trouble, try the following troubleshooting steps:1.2.3.4.Verify that your device displays the connection iconEnsure that Windows recognizes the USB connectionDevice does not display the connection screen or display as a drive in WindowsGarmin device is recognized by the computer but not by Garmin ExpressIf these steps did not resolve the issueVisit Related Content at the bottom of this page or the Garmin Express section of SupportCenter and you will find the available Product Support contact options in the Contact an Expertsection.
Verify that your device displays the connection iconMost devices will display an icon on the screen indicating that the device is communicating withyour computer.These icons vary, but some examples include:Note: If the display on the automotive device is blank or only displays a battery iconwhen connected to the computer, first charge the device while driving using the vehiclepower cable to ensure that the device has enough power to communicate with thecomputer.Back to topEnsure that Windows recognizes the USB connectionWhen a device is properly connected to a Windows computer, it will be displayed as aremovable disk or portable device.To verify that Windows detects the device:
1. Connect the Garmin device to the computer2. Press the Windows Key ( ) E3. Click This PC (Windows 10 only)Garmin devices will be listed under Devices and drives in Windows 10. In older versions ofWindows, Garmin devices will be listed under Devices with Removable Storage or PortableDevices.Windows 10Windows 7/8Back to top
Device does not display the connection screen or display as a drive in WindowsTry the steps below if your device does not display the connection screen, does not appear as adrive in Windows, or appears as an "unknown device" in the Windows Device Manager.Try a different USB cable Try a Garmin branded cable if availableIf a new cable must be purchased, ensure that the cable is aUSB Data Cable and not a USB Charging Cable.See Related Content for information about what size of USBcable your device requiresMini USB CableMicro USB CableEnsure that the USB port is working properly LaptopTry a different USB port on your computer and/or test theUSB port with a different USB deviceAvoid connecting through a USB hub, USB extension cable,keyboard, or monitorOn desktop computers, use the USB ports on the back ofyour computerDesktopConnect the USB cable directly to your Garmin device and notthe mount (if there are ports on the mount, they are for chargingonly) For more information see: Where to plug the USB cable intoon automotive devices with a powered mount
Restart the computer and try again.Note: Shutting down, pressing the power button, or closing the lidon a notebook computer may not effectively restart the computer onsome operating systems. Follow the instructions below to ensurethat the computer is completely restarted.Windows 8.1 and higher1. Right-click the Startbutton2. Click Shut down orsign out3. Click RestartWindows 71. Click the Start button2. Click next to ShutDown3. Click RestartBack to topGarmin device is recognized by the computer but not by Garmin ExpressEnsure that Garmin Express is up to date:1. Click Settingsin Garmin Express
2. Click About3. Click Check for Updates to Express4. If there is an update available, click Install Now and follow the prompts to complete theupdate.If your device has already been added to Garmin Express, try removing the device and addingit back again:1.2.3.4.5.6.7.Click HomeRight-click your deviceClick Remove from ExpressClick RemoveClick Add a DeviceWhen the device is found, click Add DeviceFollow the on-screen prompts to add your device back to ExpressUninstall and Reinstall Garmin ExpressTo uninstall Garmin Express from the computer, see the FAQ Full Uninstall of Garmin Express.Once Express has been uninstalled, the latest version can be re-downloaded it atwww.garmin.com/express.Restart the computerNote: Shutting down, pressing the power button, or closing the lid on a notebook computer may noteffectively restart the computer on some operating systems. Follow the instructions below to ensurethat the computer is completely restarted.Windows 8.1 and higher1. Right-click the StartbuttonWindows 71. Click the Start buttonMacOS/OS X1. Click the Apple icon inthe menu bar
2. Click Shut down orsign out3. Click Restart2. Click next to ShutDown3. Click Restart2. Click Restart.3. Click Restart toconfirmRegistering my New or Exchanged DeviceUsing Garmin ExpressNote: For instructions on installing Garmin Express, see How Do I Install GarminExpress?To register your device:1.Connect your Garmin device to the computerwith the appropriate USB data cable.Mini USB Cable Micro USB Cable2. Open Garmin ExpressWhen a new device is connected, a messageprompting you to add a device should appear.3.If this message does not appear, click Add aDeviceLaptopDes
4.When Express recognizes your connecteddevice, click Add DeviceIn the box on this screen, enter the emailaddress which you would like your device to beregistered under 5.If you have an existing Garmin account,it is recommended to use the sameemail address you used to create thataccount so that your device appears inyour list of registered products6. Click Next7. Enter a nickname for this device8. Click NextClick Yes or No to agree or disagree to9.anonymous data collectionThe device will now be registered to the email address entered in step 5 above.Garmin BaseCamp OverviewWith Garmin BaseCamp users can plan and manage trips, organize user data, and transferinformation between the computer and compatible devices.Additional features include: Importing and viewing maps in 2-D or 3-D (preloaded device, memory card, or downloadrequired).Creating, editing and organizing routes, tracks, waypoints and more.Viewing BirdsEye Imagery and transferring the data to a device (subscriptions required).
Creating and sharing Garmin Adventures to compatible devices.Creating and sharing geotagged photos.Viewing playback of routes, tracks and adventures.Support for geocache data from geocaching.com.BaseCamp is available for download at www.garmin.com/basecamp.Tutorial videos for BaseCamp are available in the Garmin Learning Center for both PC and Macversions: BaseCamp for PCBaseCamp for MacAdditional helpful information can be found in the FAQs linked below and within BaseCamp byclicking on Help in the Help drop-down menu.Purchasing and Downloading a New MapRegion for an Automotive DeviceGarmin offers a wide variety of maps for our products. If you are planning to travel and require anew map, follow these instructions to help you purchase and install the new map to your device.Any maps that came preloaded on your device will still be able to be used after installing the newmaps.The purchase process is quick and easy, although the installation process may take several hoursto complete, depending on the map you select and the speed of your internet connection. Oncethe installation is started, the device can be left unattended until it is complete.Note: If the purchase has already been completed and assistance is needed to install the map,see Installing a Different Map Region to an Automotive Device.What is needed: A compatible Garmin device A USB cable (see Types of USB cable used to connect automotive devices to thecomputer for assistance finding the correct cable) An SD card may be required if the map will not fit on the internal storage of the deviceo The storage space requirements can be found on the Requirements tab on thepurchase page for the map.
oFor instructions on checking the free space on the device, see Checking theamount of free space on an automotive device. A Windows or Mac computer with the Garmin Express application installed.o For assistance with installing Garmin Express, see Install Garmin Express A high-speed internet connectiono DSL, Cable, or other high speed Internet connections are recommended. Mobilebroadband (such as MiFi, AirCard, or cell phone tethering), satellite, fixedwireless, and dial-up Internet connections are not supported. A credit card for purchasing the mapTo purchase the map:1. Select the desired map from our City Navigator NT maps page.2. Click the Compatible Devices tab to make sure that the map is compatible withthe device. If the device is listed, it can be installed to the device.3. Select Download in the Version drop down box and click Add to Cart.4. Verify the order is correct and then click Check Out.5. Sign in or create a Garmin account, if prompted.6. Select the shipping address, or enter a new one, and click Continue.7. Enter the billing address and click Continue.8. Verify the order information is correct and click Continue to Payment.9. Fill in the credit card information fields and click Place Secure Order.A Confirmation screen will be displayed when the order is complete and the map is ready toinstall to the device.To install the map with Garmin Express:1. Connect the Garmin device to the computer with the appropriate USB cable.2. From the order confirmation page, click Launch Garmin Express.o Note: If Google Chrome is used to make the purchase, click OpenURL:garminexpress if prompted.3. Select the device and click Continueo If the device was not already added to Express, a window will display stating thatthe device was added to Express. If this occurs, click OK and then choosewhether or not to allow the collection of data.4. Click thedownload icon5. Read through the license agreement, then click Accept.
6. Read the important notes, then click Continue.7. Click Continue next to the Memory Card or Device.o If the size of the map exceeds the internal storage of the device, an SD card willbe required.Once the download starts, Garmin Express will display the current progress. An Installationcomplete! message will be displayed when the download is finished and the device can be safelydisconnected from the computer.If any issues are encountered with this process, visit the Garmin Express Support page fortroubleshooting assistance and options for contacting Product Support.Missing or Corrupt Voice Files on anAutomotive DeviceIf any voice files are missing or corrupt on your automotive device, you can reload and updatethem using Garmin Express.To reload or update voices:1. Download and install Garmin Express by reviewing Updating Maps And Software WithGarmin Express2. Connect the device3. Click on Tools & Content4. Click on Language Files under Optional Updates and select the desired language(s)5. Scroll down and click Install NowOnce installed, you can change the voice language on your device.To change the voice language:1.2.3.4.5.Touch SettingsTouch Language & KeyboardTouch Voice LanguageTouch the desired voice languageTouch SaveThe device will now speak the selected voice language.
1. Connect the Garmin device to the computer with the appropriate USB cable. 2. From the order confirmation page, click Launch Garmin Express. o Note: If Google Chrome is used to make the purchase, click Open URL:garminexp