Transcription
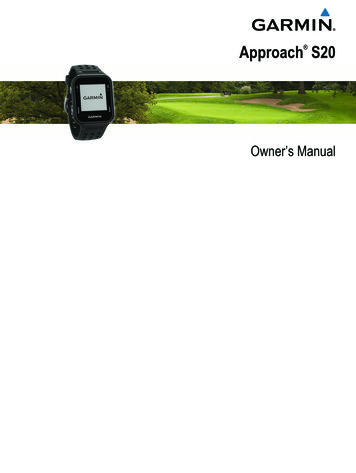
Approach S20 Owner’s Manual
2016 Garmin Ltd. or its subsidiariesAll rights reserved. Under the copyright laws, this manual may not be copied, in whole or in part, without the written consent of Garmin. Garmin reserves the right to change or improve itsproducts and to make changes in the content of this manual without obligation to notify any person or organization of such changes or improvements. Go to www.garmin.com for current updatesand supplemental information concerning the use of this product.Garmin , the Garmin logo, and Approach are trademarks of Garmin Ltd. or its subsidiaries, registered in the USA and other countries. Garmin Connect , Garmin Express , and Garmin Golf are trademarks of Garmin Ltd. or its subsidiaries. These trademarks may not be used without the express permission of Garmin. The Bluetooth word mark and logos are owned by Bluetooth SIG, Inc. and any use of such marks by Garmin is under license. Other trademarks and trade names are those of their respectiveowners.
Table of ContentsGetting Started. 1Keys . 1Turning On the Device . 1Status Icons . 1Charging the Device . 1Playing Golf. 1Hole View . 1Moving the Pin . 1Viewing Measured Shots . 2Viewing Hazards . 2Viewing Layup and Dogleg Distances . 2Using the Odometer . 2Keeping Score . 2Garmin Golf App. 2Automatic Shot Detection . 2Automatic Course Updates . 3Pairing Your Smartphone. 3Phone Notifications . 3Enabling or Disabling Notifications . 3Viewing Notifications . 3Activity Tracking . 3Enabling or Disabling Activity Tracking . 3Viewing Step Totals . 3Using the Move Alert . 3Hiding the Step Goal . 3TruSwing .3Viewing TruSwing Metrics on Your Device . 3Changing Clubs . 3Changing Handedness . 3Disconnecting Your TruSwing Device . 3Customizing Your Device . 4Setting an Alarm . 4System Settings . 4Appendix . 4Device Care . 4Cleaning the Device . 4Specifications . 4Viewing E-label Regulatory and Compliance Information . 4Index. 5Table of Contentsi
Getting StartedWARNINGSee the Important Safety and Product Information guide in theproduct box for product warnings and other importantinformation.1 Align the charger posts with the contacts on the back of thedevice, and connect the charging clipdevice.securely to theKeys2 Plug the USB cable into a USB charging port.3 Charge the device completely.4 Press to remove the charger.Playing GolfHold to turn the device on and off.Select to scroll through menus, holes, and settings.UPSelect to scroll through menus, holes, and settings.DOWNOKSelect to choose menu options and acknowledge messages.During play, select to access in-game features.Hold to turn on the backlight.Select to return to the previous menu.Before you can play golf, you must wait until the device acquiressatellite signals, which may take 30 to 60 seconds.1 Select OK.2 Select Start Round.The device locates satellites and calculates your location.3 Select a course from the list.4 Follow the on-screen instructions to complete the setup andstart a round.Hole ViewBACKTurning On the DeviceThe first time you turn on the device, you are prompted toconfigure system settings.1 Hold .2 Follow the on-screen instructions.The device shows the current hole you are playing, andautomatically transitions when you move to a new hole.NOTE: By default, the device calculates the distance to thefront, middle, and back of the green. If you know the location ofthe pin, you can set it more precisely (Moving the Pin,page 1).Status IconsBluetooth wireless signal status Battery statusCalories burnedDistance traveledSteps takenSunriseSunsetCharging the DeviceWARNINGThis device contains a lithium-ion battery. See the ImportantSafety and Product Information guide in the product box forproduct warnings and other important information.NOTICETo prevent corrosion, thoroughly clean and dry the contacts andthe surrounding area before charging or connecting to acomputer. Refer to the cleaning instructions in the appendix.Getting StartedCurrent hole number.Distance to the pin location.Distance to the back of the green.Distance to the front of the green.Approximate view of the green. The pin position is indicated with .Par for the hole.Moving the PinYou can take a closer look at the green and move the pinlocation.1 While playing golf, select OK.1
2 Select Move Flag.3 Select UP or DOWN to move the pin position.4 Select OK.Layup and dogleg distancesand the distance to reach eachlayupappear on the screen.Viewing Measured ShotsYou can use the odometer to record the time and distancetraveled.Select an option: If you are not currently playing a game, select Odometerfrom the main menu. If you are playing a game, select OK Odometer.Using the OdometerBefore the device can automatically detect and measure shots,you must enable scoring.Your device features automatic shot detection and recording.Each time you take a shot along the fairway, the device recordsyour shot distance so you can view it later.TIP: Automatic shot detection works best when you wear thedevice on your leading wrist and make good contact with theball. Putts are not detected.1 While playing golf, select OK.2 Select Measure Shot.Your last shot distance appears.NOTE: The distance automatically resets when you hit theball again, putt on the green, or move to the next hole.3 Select DOWN to view all recorded shot distances.Turning Off the Odometer1 From the main menu, select Odometer.2 Select OK.3 Select Turn Off.Viewing HazardsKeeping ScoreYou can view distances to hazards along the fairway for par 4and 5 holes. Hazards that affect shot selection are displayedindividually or in groups to help you determine the distance tolayup or carry.1 While playing golf, select OK.2 Select Hazards.When scoring is enabled, you are prompted to enter your scorewhen you are on the green. You can adjust the score manuallyat any time during a game.1 While playing golf, select OK.2 Select Scorecard.3 Select UP or DOWN to select a hole, and select OK.4 Select UP or DOWN to set the score, and select OK.Resetting the Odometer1 From the main menu, select Odometer.2 Select OK.3 Select Reset.Recording Statistics The distances to the frontand backof the nearesthazard appear on the screen. The hazard typeis listed at the top of the page. The green is represented as a half circleat the top ofthe screen. The line below the green represents the centerof the fairway. Hazardsare shown below the green in approximatelocations relative to the fairway.3 Select UP or DOWN to view other hazards for the currenthole.Viewing Layup and Dogleg DistancesYou can view a list of layup and dogleg distances for par 4 and 5holes.1 While playing golf, select OK.2 Select Layups.Before you can record statistics, you must enable statisticstracking (System Settings, page 4).1 While playing golf, select OK.2 Select Scorecard.3 Set the number of strokes taken, and select OK.4 Set the number of putts taken, and select OK.5 Select an option: If your shot from the tee hit the fairway, select In Fairway. If your shot from the tee missed the fairway, select MissedLeft or Missed Right.Your statistics are recorded on your scorecard. You can viewyour scorecard using the Garmin Connect Mobile app and theGarmin Golf app.Garmin Golf AppThe Garmin Golf app allows golfers to compete with each otherat different courses. More than 41,000 courses have a weeklyleaderboard that anyone can join. You can set up a tournamentevent and invite players to compete. You can upload scorecardsfrom your compatible Garmin device to view detailed statisticsand shot analyses.The Garmin Golf app syncs your data with your Garmin Connectaccount. You can download the Garmin Golf app from the appstore on your smartphone. Automatic Shot DetectionYour Approach device features automatic shot detection andrecording. Each time you take a shot along the fairway, thedevice records your location so it can be viewed later on theGarmin Connect Mobile app and the Garmin Golf app.You must enable scoring to allow automatic shot detection(System Settings, page 4).2Garmin Golf App
TIP: Automatic shot detection works best when you make goodcontact with the ball. Putts are not detected.Automatic Course UpdatesYour Approach device features automatic course updates withGarmin Connect Mobile. When you connect your device to yoursmartphone, the golf courses you use most frequently areupdated automatically.Pairing Your SmartphoneTo get the most out of your Approach device, you should pair itwith your smartphone and complete the setup using the GarminConnect Mobile app.NOTE: Unlike other Bluetooth devices that are paired from theBluetooth settings on your mobile device, your Approach devicemust be paired directly through the Garmin Connect Mobile app.1 On your compatible smartphone, download and install thelatest version of the Garmin Connect Mobile app.2 Open the Garmin Connect Mobile app.3 Select an option to add your device to your Garmin ConnectMobile account: If this is the first device you are pairing with the GarminConnect Mobile app, follow the on-screen instructions. If you have already paired another device using theGarmin Connect Mobile app, from theormenu,select Garmin Devices Add Device, and follow the onscreen instructions.Onyour Approach device, select OK.45 On your Approach device, select Settings Bluetooth Pair Smartphone.Phone NotificationsPhone notifications require a compatible smartphone to be inrange and paired with the device. When your phone receivesmessages, it sends notifications to your device.Enabling or Disabling Notifications1 From the main menu, select Settings Bluetooth Notifications.2 Select an option: To enable notifications, select Turn On. To disable notifications, select Turn Off.Viewing Notifications1 From the main menu, select Notifications.2 Select a notification.3 Select UP or DOWN to scroll through the contents of thenotification.Activity TrackingEnabling or Disabling Activity TrackingThe activity tracking feature records your daily step count, stepgoal, distance traveled, and calories burned for each recordedday. Your calories burned includes your base metabolism plusactivity calories.You can enable or disable activity tracking at any time.1 From the main menu, select Activity Tracking.2 Select an option: To enable activity tracking features, select Turn On. To disable activity tracking features, select Turn Off.Viewing Step TotalsBefore you can view step totals, you must turn on activitytracking (Enabling or Disabling Activity Tracking, page 3).From the watch screen, select UP or DOWN to view theaccumulated step count, step goal, distance traveled, andcalories burned.Using the Move AlertBefore you can use the move alert, you must turn on activitytracking and the move alert (Enabling or Disabling ActivityTracking, page 3).Sitting for prolonged periods of time can trigger undesirablemetabolic state changes. The move alert reminds you to keepmoving. After one hour of inactivity, Move! and the move barappear. The device also beeps if audible tones are turned on(Setting the Device Tones, page 4).Go for a short walk (at least a couple of minutes) to reset themove alert.Hiding the Step GoalYou can hide the step goal from the screen.From the main menu, select Activity Tracking Goal Hide.TruSwing The TruSwing feature allows you to view swing metrics recordedfrom your TruSwing device. Go to www.garmin.com/golf topurchase a TruSwing device.Viewing TruSwing Metrics on Your DeviceBefore you can use the TruSwing feature on your Approachdevice, you must confirm your TruSwing device is securelymounted to your club. See the owner's manual for yourTruSwing device for more information.1 Turn on your TruSwing device.2 On your Approach device, select TruSwing from the mainmenu.Selecta club.34 Hit a shot.Swing measurements display on your Approach device aftereach swing.5 Select UP or DOWN to move through the recorded swingmetrics.Changing Clubs1 From the TruSwing menu on your Approach device, selectOK.2 Select Change Club.3 Select a club.Changing HandednessThe TruSwing device uses your handedness to calculate thecorrect swing analysis data. You can use your Approach deviceto change your handedness at any time.1 From the TruSwing menu on your Approach device, selectOK.2 Select Golf Swing.3 Select your handedness.Disconnecting Your TruSwing Device1 From the TruSwing menu on your Approach device, selectOK.2 Select End TruSwing.Pairing Your Smartphone3
Customizing Your DeviceSetting an Alarm1 From the main menu, select Alarm.2 Select an option: To set a new alarm, select Turn On, and follow the onscreen instructions. To edit an existing alarm, select Edit Alarm, and followthe on-screen instructions. To turn off the alarm, select Turn Off.System SettingsFrom the main menu, select Settings.Color Theme: Sets the color theme for the screen (Setting theColor Theme, page 4).User Profile: Sets the user profile for gender, birth year, height,and weight (Setting Up Your User Profile, page 4).Bluetooth: Enables Bluetooth technology and displays settingsfor notifications.Tones: Turns audible tones on or off (Setting the Device Tones,page 4).Stat. Tracking: Enables detailed statistics tracking while playinggolf.Club Tracking: Enables you to track the clubs used and set thedriver distance.Scoring: Enables scoring.Time: Sets the time.Language: Sets the device language.NOTE: Changing the text language does not change thelanguage of user-entered data or map data.Units: Sets the unit of measure for distance.Software Update: Updates the device software when updatesare available.NOTE: You must connect to Garmin Connect Mobile toreceive software updates.Setting the Color Theme1 From the main menu, select Settings Color Theme.2 Select an option: To show a dark background with light text, select Dark. To show a light background with dark text, select Light.Setting Up Your User ProfileYou can update your gender, birth year, height, and weightsettings. The device uses this information to calculate accurateactivity tracking settings.1 From the main menu, select Settings User Profile.2 Select an option to adjust your profile settings.Setting the Device Tones1 From the main menu, select Settings Tones.2 Select an option: To enable or disable tones when pressing keys, selectKey Tones. To enable or disable tones for alerts, select Alert Tones.AppendixDevice CareNOTICEAvoid extreme shock and harsh treatment, because it candegrade the life of the product.Avoid pressing the keys under water.Do not use a sharp object to clean the device.Avoid chemical cleaners, solvents, and insect repellents that candamage plastic components and finishes.Thoroughly rinse the device with fresh water after exposure tochlorine, salt water, sunscreen, cosmetics, alcohol, or otherharsh chemicals. Prolonged exposure to these substances candamage the case.Do not store the device where prolonged exposure to extremetemperatures can occur, because it can cause permanentdamage.Cleaning the DeviceNOTICEEven small amounts of sweat or moisture can cause corrosionof the electrical contacts when connected to a charger.Corrosion can prevent charging and data transfer.1 Wipe the device using a cloth dampened with a milddetergent solution.2 Wipe it dry.After cleaning, allow the device to dry completely.TIP: For more information, go to www.garmin.com/fitandcare.SpecificationsBattery typeRechargeable lithium-ionBattery lifeWatch only: up to 8 wk.Playing golf: up to 15 hr.NOTE: The actual battery life of a fully chargedbattery depends on how much time you use GPS,the backlight, and power save mode. Exposure toextremely cold temperatures also reduces batterylife.Operatingtemperature rangeFrom -20º to 60ºC (from -4º to 140ºF)Chargingtemperature rangeFrom 5º to 40ºC (from 40º to 104ºF)Water rating5 ATM1Wireless frequency/ 2.4 GHz @ 0.7 dBm nominalprotocolViewing E-label Regulatory and ComplianceInformationThe label for this device is provided electronically. The e-labelmay provide regulatory information, such as identificationnumbers provided by the FCC or regional compliance markings,as well as applicable product and licensing information.1 Select OK to view the main menu.2 Select About.1 *The device withstands pressure equivalent to a depth of 50 m. For moreinformation, go to www.garmin.com/waterrating.4Customizing Your Device
IndexAactivity tracking 3alarms 4applications 2smartphone 3Bbattery 4charging 1Bluetooth technology 1, 3Ccharging 1cleaning the device 4Connect IQ 3courseplaying 1selecting 1customizing the device 4Ddatastoring 2transferring 2dogleg 2GGarmin Connect 2, 3green view, pin location 1Hhazards 2history, sending to computer 2Iicons 1Kkeys 1, 4Llayup 2Mmeasurements 3measuring a shot 2Nnotifications 3Oodometer 2Ppairing, smartphone 3Sscorecard 2screen, settings 4settings 1smartphone 2pairing 3specifications 4statistics 2storing data 2swing analysis 3system settings 4Ttones 4Uuser profile 1, 4Wwater rating 4Index5
support.garmin.comMay 2020GUID-5EF210B5-1650-4237-8669-78F8672C0B93 v3
Open the Garmin Connect Mobile app. 3. Select an option to add your device to your Garmin Connect Mobile account: If this is the first device you are pairing with the Garmin Connect Mobile app, follow the on-screen instructions. If you have already paired another device using the Garmin Connect Mobile app, from the or menu,