Transcription
REALGRAIN 2PLUG-INUSER'S GUIDEBY IMAGENOMIC2013
Realgrain 2 Plug-in User's GuideRealgrain 2 Plug-in User's GuideUpdated July 12, 2013Contact Imagenomic at http://www.imagenomic.com/contactCopyright 2004-2013 Imagenomic, LLC. All rights reserved2Copyright 2004-2013 Imagenomic LLC. All rights reserved.All product and company names referenced herein are trademarks of their respective owners.
TABLE OF CONTENTSIntroduction . 5Technical Support . 5Installation . 7Requirements . 8Running Realgrain Plug-In. 9Installing License Key . 9Key Features . 11Adding grain . 12Adjusting tone. 12Adjusting color . 12B&W conversion . 12Split-Toning . 12Basic Use . 13Adding grain . 14Default Setting . 14Using Predefined Presets . 15Filter Preview. 16Preview window navigation controls . 17Navigator Window . 17Advanced Use. 19Fine-Tuning graininess . 20Filter controls . 20Grain Style . 21Grain Intensity . 21Tonal Range . 21Grain Balance . 21Grain Size . 21Adjusting tone. 22Adjusting Color . 23B&W conversion . 24Tint/toning . 25Copyright 2004-2006 Imagenomic LLC. All rights reserved.All product and company names referenced herein are trademarks of their respective owners.3
Realgrain 2 Plug-in User's GuideSaving settings to create new filter presets. 26Undo/Redo filter operation. 27Multiple Previews and Bracketing . 27Multiple Previews . 27Bracketing . 29Resizing Realgrain Plug-in Window . 30Photoshop Action And Scripting Support . 30Keyboard and mouse controls . 314Copyright 2004-2013 Imagenomic LLC. All rights reserved.All product and company names referenced herein are trademarks of their respective owners.
IntroductionINTRODUCTIONIf you long for the darkroom age, the soft, warm graininess of the silver halide film,or you seek to infuse that fuzzy, retro look or perhaps enhance your digital photosby simulating the greater range and texture of traditional film media, thenRealgrain is the plugin for you.Realgrain features versatile methods for simulating the grain patterns, the color andthe tonal response of different films and different scan resolutions to convey a trulyfilm-like image effect.Because Realgrain enables you to automatically adjust the grain size based on thephysical image dimensions, it can dynamically render accurate grain patterns forvarying image sizes.Realgrain's controls for grain balance, tonal and color fine-tuning enable you togenerate superior output quality and picture vibrancy, and are simple and easy-touse for a truly intuitive workflow experience. Realgrain also features a toning toolkitfor simulating traditional B&W toning effects such as Sepia, Platinum and others.Plus, Realgrain comes with a comprehensive precision preset library for mostpopular color and B&W films enabling a wide range of out-of-box film effectoptions. You can also capture your own signature workflow through custom presetstailored to your specific requirements and individual photographs.TECHNICAL SUPPORTTechnical support is available via Imagenomic’s website athttp://www.imagenomic.com/support
Realgrain 2 Plug-in User's GuideTHIS PAGE IS MOSTLY BLANK6Copyright 2004-2013 Imagenomic LLC. All rights reserved.All product and company names referenced herein are trademarks of their respective owners.
InstallationINSTALLATION REQUIREMENTS MODIFYING REALGRAIN PLUG-IN INSTALLATION INSTALLING LICENSE KEY RUNNING REALGRAIN PLUG-INCopyright 2004-2006 Imagenomic LLC. All rights reserved.All product and company names referenced herein are trademarks of their respective owners.7
Realgrain 2 Plug-in User's GuideREQUIREMENTSRealgrain Plug-In works with both 8-bit and 16-bit images and is compatible withAdobe Photoshop CS5/CS6/CC and Adobe Photoshop Elements 8/9/10/11.The following are the minimum system requirements:8 Microsoft Windows XP/7/81GB free RAM100MB free hard drive space1280x800 screen resolution Mac OS X 10.6.x/10.7.x/10.8.x1GB free RAM100MB free hard drive space1280x800 screen resolutionCopyright 2004-2013 Imagenomic LLC. All rights reserved.All product and company names referenced herein are trademarks of their respective owners.
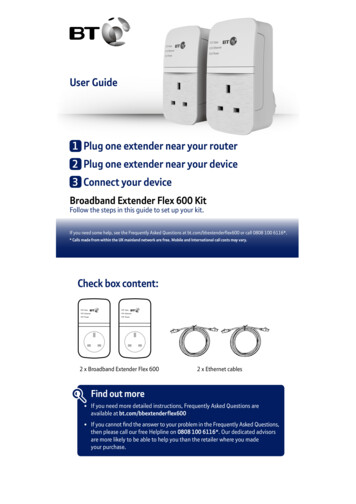
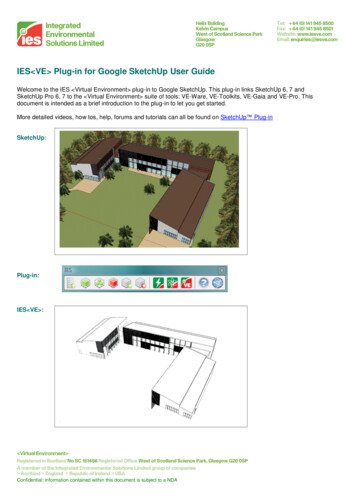
InstallationRUNNING REALGRAIN PLUG-INFor Adobe Photoshop and Adobe Photoshop Elements click on the Filter menu andselect Imagenomic RealgrainFigure 1: Running Realgrain Pug-in from Adobe Photoshop CCINSTALLING LICENSE KEYTo install the license key open the "About Realgrain" window by clicking on the"About" button and click on the "Install License" button. The "License KeyInstallation" window will show where you can enter your license information.Copyright 2004-2006 Imagenomic LLC. All rights reserved.All product and company names referenced herein are trademarks of their respective owners.9
Realgrain 2 Plug-in User's GuideFigure 2: License Key Installation window10Copyright 2004-2013 Imagenomic LLC. All rights reserved.All product and company names referenced herein are trademarks of their respective owners.
Key FeaturesKEY FEATURES ADDING GRAIN ADJUSTING TONE ADJUSTING COLOR B&W CONVERSION TONING IMAGESCopyright 2004-2006 Imagenomic LLC. All rights reserved.All product and company names referenced herein are trademarks of their respective owners.11
Realgrain 2 Plug-in User's GuideADDING GRAINRealgrain features versatile methods for simulating the grain patterns of differentfilms and scan resolutions to convey a truly film-like image effect. You can addluminance or color grain adjusted by the tonal range, balanced by the brightnessand colors and by grain size.ADJUSTING TONERealgrain features intuitive tone adjustment tools including the Tone AdjustmentCurve display. For quick results, you can use built-in tone presets or manually finetune the settings for brightness and contrast in the highlights, midtones andshadows.ADJUSTING COLORYou can adjust the hue, saturation and brightness separately for spectral colorranges.B&W CONVERSIONYou can convert your images into Black&White and use the color mixers to fine-tuneeach color contribution to the resulting tone.SPLIT-TONINGThe toning toolkit enables simulation of traditional B&W toning effects such asSepia, Platinum and others, as well as split-toning effects.12Copyright 2004-2013 Imagenomic LLC. All rights reserved.All product and company names referenced herein are trademarks of their respective owners.
Basic UseBASIC USE DEFAULT SETTING USING PRESETS PREVIEW AND CONTROLSCopyright 2004-2006 Imagenomic LLC. All rights reserved.All product and company names referenced herein are trademarks of their respective owners.13
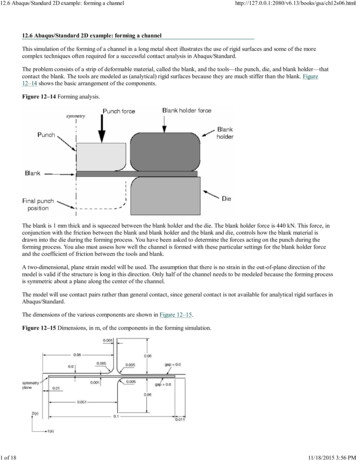
Realgrain 2 Plug-in User's GuideADDING GRAINDefault SettingWhen you start Realgrain Plug-in for the first time, the filter is set to the "Default"setting. The main preview window will automatically display a copy of your imageprocessed at the "Default/Reset" setting. The “Default/Reset” setting resets allcontrol settings to their respective zero (0) or other default position. You can furtheradjust it using the many controls. You can examine the result, which will beautomatically rendered in the preview area, by using the zoom, split-screen andpanning tools as well as compare with the original by using click (and hold) with theleft mouse button in the preview area.Figure 3: Realgrain Default/Reset preset14Copyright 2004-2013 Imagenomic LLC. All rights reserved.All product and company names referenced herein are trademarks of their respective owners.
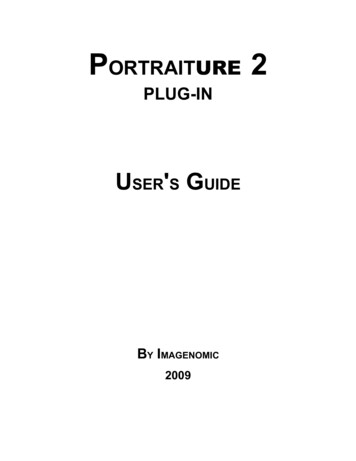
Basic UseUsing Predefined PresetsIn addition to the "Default/Reset" setting, Realgrain provides a comprehensiveprecision preset library for most popular color and B&W films, split toning, grain andother effects enabling a wide range of out-of-box options. These presets areorganized into various groups corresponding to film or effect types, such as ColorFilms, B&W Films, Grain Effects, Split Toning and Other Effects. Each of these groupscontains the respective presets for particular category. For example, for simulatingFujicolor Press 400 film, you would select the film type from the Preset combo box,Color Films group. Generally on start-up, Realgrain will default to the last used filtersettings.Figure 4: Realgrain predefined preset Kodak T-Max P3200Copyright 2004-2006 Imagenomic LLC. All rights reserved.All product and company names referenced herein are trademarks of their respective owners.15
Realgrain 2 Plug-in User's GuideFILTER PREVIEWThe preview window displays a processed copy of the image. Realgrain updates thevisible part of this preview in real-time when you apply a filter setting or modify anyindividual parameter. Once the filtering operation is completed you can click (andhold) on the processed image with the left mouse button to view the originalimage or to use panning. To zoom, you can use the [-]/[ ] buttons located under thepreview window. The zoom value can vary from 10% to 800%.When zooming out, the processing speed can degrade as the preview will have tohandle larger number of pixels. To speed up the preview update, you can choose“Fast Preview” which may slightly affect the preview accuracy. Choosing “Accurate”will show the exact result of the final processing.In addition you can view the image in a horizontal or vertical split mode withoriginal (top or left window section) and processed (bottom or right windowsection) copies both visible in the main window area. Analogous to the single viewmode, you can click to pan or to see the original image.Figure 5: Filter Preview in vertical split mode zoomed at 50%16Copyright 2004-2013 Imagenomic LLC. All rights reserved.All product and company names referenced herein are trademarks of their respective owners.
Basic UsePreview window navigation controlsIn addition to mouse panning, you can use mouse wheel to scroll vertically and Ctrlwheel to scroll horizontally. You can also zoom using the Alt-Wheel. Zoom-in can bealso activated with Ctrl-click and zoom-out with Alt-click. Right-click on the previewimage area will display context pop-up menu with zoom, display mode and toolselection.NAVIGATOR WINDOWThe Navigator window allows navigating the image by dragging the red squarecursor or by clicking on a different area of the image. The corresponding area of theimage is then displayed in the main preview window.Figure 6: Navigator windowCopyright 2004-2006 Imagenomic LLC. All rights reserved.All product and company names referenced herein are trademarks of their respective owners.17
Realgrain 2 Plug-in User's GuideTHIS PAGE IS MOSTLY BLANK18Copyright 2004-2013 Imagenomic LLC. All rights reserved.All product and company names referenced herein are trademarks of their respective owners.
Advanced UseADVANCED USE FINE-TUNING GRAININESS ADJUSTING TONE ADJUSTING COLOR B&W CONVERSION SPLIT-TONING MULTIPLE PREVIEWS AND BRACKETING PHOTOSHOP ACTION AND SCRIPTING SUPPORT KEYBOARD AND MOUSE CONTROLSCopyright 2004-2006 Imagenomic LLC. All rights reserved.All product and company names referenced herein are trademarks of their respective owners.19
Realgrain 2 Plug-in User's GuideFINE-TUNING GRAININESSFilter controlsRealgrain provides a number of presets that simulate the different kinds of filmsand effects that reflect the unique grain patterns, texture and warmth of eachindividual film. In addition, Realgrain filter control sets provide a wide range of finetuning for achieving your desired effects. The controls are grouped into fivefunctional sets - “Grain Style”,“Grain Intensity”,“Tonal Range”,“Grain Balance” and“Grain Size” - to enable an intuitive and effective workflow. Each set is explained inmore detail in the following sections.Figure 7: Grain controls20Copyright 2004-2013 Imagenomic LLC. All rights reserved.All product and company names referenced herein are trademarks of their respective owners.
Advanced UseGrain StyleYou can choose between two settings for Film Grain and Digital Noise to emulatethe respective effects of film-like grains vs. the sensor noise of a digital camera.Grain IntensityYou can set the degree of graininess, grain density or distortion separately forluminance (i.e. B&W grains) and color grains.Tonal RangeYou can adjust the graininess by tonal range separately for Shadows, Midtones andHighlights. Typically, most of the films result in grainier midtones rather thanshadows or highlights. Therefore, you can achieve film-like grain across the entiretonal range.Grain BalanceYou can also balance the graininess for three parameter pairs – Dark&Light forluminance (B&W) grain, and Green&Red and Yellow&Blue for the color grain. Forexample, by setting positive values for Dark&Light you can brighten up the imageby inducing lighter grain. Similarly, by adjusting the Green&Red or Yellow&Blue youcan change the image tint by inducing more of a particular color grain.Grain SizeGrain size is defined differently for Film Grain and Digital Noise.For the Film Grain, if the “Auto Resolution and Image Blur” is checked, Realgrainautomatically calculates the grain size based on the selected film format and thedimensions of the image. Furthermore, to achieve even more film-like perceptionthe amount of blur is also determined pro grammatically based on the specifiedgrain intensity in addition to the film format and image dimensions. You can choosebetween 35mm and 120 film formats.For example, if the image is 16MPixel at 4992X3328 and the selected film format is35mm, Realgrain would calculate the “scanning” resolution that would have resultedin the 16MPixel image and scale the grain size accordingly to 3600dpi. Thus, basedon your initial desired film format and the image dimensions, Realgrain emulatesgrain size that would have resulted from a physical scan from 35mm frame or otherfilm format at the given resolution.Alternatively, you may manually set custom resolution between 1800dpi and7200dpi and image blur value between 0 and 40.For adjusting the spatial characteristics of the Digital Noise, you can use Fine,Medium or Large grain size controls.Copyright 2004-2006 Imagenomic LLC. All rights reserved.All product and company names referenced herein are trademarks of their respective owners.21
Realgrain 2 Plug-in User's GuideADJUSTING TONERealgrain provides several tone adjusting controls and predefined presets. You canalso view and fine-tune your settings using the Tone Adjustment Curve.Figure 8: Tone controlsYou have the option of selecting a pre-defined curve type –such as Linear, MediumContrast, Strong Contrast etc. or to define your own tone curve using the manycontrols. You can adjust the brightness and contrast separately for Shadows,Midtones and Highlights and observe the changes to the tone curve. Additionally,you can baseline Grey level using the Mid Point controls in the curve display area.The Tone Curve preview also features a Luminosity Histogram.22Copyright 2004-2013 Imagenomic LLC. All rights reserved.All product and company names referenced herein are trademarks of their respective owners.
Advanced UseUsing the Tone Adjustment Balance slider, you can adjust contrast and brightnessbetween two extreme settings – for Luminance only or for all three Color channels(RGB) together. The negative values are for tone adjustment using mostlyLuminance while positive values are for tone adjustment using mostly Colors.ADJUSTING COLORRealgrain provides several controls for adjusting spectral colors. You can adjust hue,saturation, and brightness for values between -100 and 100 per color range. Youcan also use the master saturation and hue sliders for adjusting the saturation andhue levels for all color ranges.Figure 9: Color controlsCopyright 2004-2006 Imagenomic LLC. All rights reserved.All product and company names referenced herein are trademarks of their respective owners.23
Realgrain 2 Plug-in User's GuideB&W CONVERSIONRealgrain enables flexible controls for Black&White conversion.Figure 10: B&W conversion controlsAs a default method, it de-saturates the image to remove the color information. Theadditional controls allow for specifying each color's contribution to the resultingtone.Each of the “Color Balance” controls set the relative amount of each respective colorin the resulting Grey tone. For example, positive values for the Reds increase theamount of Reds at the expense of all other colors thus keeping the overallbrightness at the same level.24Copyright 2004-2013 Imagenomic LLC. All rights reserved.All product and company names referenced herein are trademarks of their respective owners.
Advanced UseIn contrast, the “Color Response” controls set the degree of sensitivity for theconversion of each particular color range. For example, positive values for the Redsresult in lighter Greys for the Reds without affecting the brightness for other colorranges.Realgrain also features a versatile Color Filter simulation tool for B&W photography.You can select from pre-defined list of presets or manually adjust the filter hue anddensity.TINT/TONINGThe toning toolkit enables the simulation of traditional B&W toning effects such asSepia, Platinum and others, as well as split-toning effects. Realgrain providescontrols for toning strength and Green&Red and Yellow&Blue balance.Figure 11: Tint/Toning controlsFor the split-toning effects, the color toning can be specified separately for Shadowsand Highlights, or for a single tone effect you can check the “Same Toner forShadows and Highlights” to equalize the values for both tonal ranges. Using thesplit-toner balance you can baseline the Shadows/Highlights by operating the Midpoint slider.Copyright 2004-2006 Imagenomic LLC. All rights reserved.All product and company names referenced herein are trademarks of their respective owners.25
Realgrain 2 Plug-in User's GuideAlthough the toning effects are intended to colorize B&W images, you can also usethese controls to add or correct tint in color images.SAVING SETTINGS TO CREATE NEW FILTER PRESETSYou can create your own custom presets by using the "Save" button. You canchoose to save the custom settings from each or any combination of the threecontrol sets. Custom Presets can be saved in Groups (e.g. for specific clients orassignments) and can be annoted with additional details.Figure 12: Save, Delete, Undo and Redo buttonsFigure 13: Save Custom Filter Settings window26Copyright 2004-2013 Imagenomic LLC. All rights reserved.All product and company names referenced herein are trademarks of their respective owners.
Advanced UseUNDO/REDO FILTER OPERATIONYou can revert or re-apply the last settings used by clicking the “Undo.” and“Redo.” button controls next to the preset combo-box or by using CTRL Z orCTRL Y keyboard combinations respectively. These controls can be also accessedby right-clicking on a slider control.MULTIPLE PREVIEWS AND BRACKETINGMultiple PreviewsThe Realgrain preview feature provides a mechanism for opening multiple previewwindows, up to 100 for the same image file. This allows you to compare differentfilter settings by simply switching between preview tabs. The filter settings will beautomatically set to their respective values for each preview. To create a preview,right-click on the "Preview" title and select "Add Preview". To close a preview, select"Close Preview" and the current preview will be closed. You can also "Close OtherPreviews" which will close all other previews and keep only current preview.Figure 14: Preview pop up menuCopyright 2004-2006 Imagenomic LLC. All rights reserved.All product and company names referenced herein are trademarks of their respective owners.27
Realgrain 2 Plug-in User's GuideAlternatively, you can add a new preview by clicking on the “Add Preview” buttonon the top of the preview window.Figure 15: Two preview tabs28Copyright 2004-2013 Imagenomic LLC. All rights reserved.All product and company names referenced herein are trademarks of their respective owners.
Advanced UseBracketingIn addition to creating custom multiple previews, Realgrain provides an automatedbracketing feature for quickly generating a preset series of previews. For eachoriginal setting, the bracketing creates the selected number of previews with thespecified bracketing interval.To bracket or to set up a bracketing preset, click on the "Bracketing" button. You canchoose to replace already open previews or add the new previews to the existingtabs.Figure 16: Parameter Bracketing windowOnce the preset is created, it will appear in the same menu selection. When usingbracketing, you can view the name of the respective bracketing parameter and itsabsolute value on the preview tabs. A tab will also reflect custom changes made tothe bracketing parameters values for a given preview. In addition, the mouse rollover of any inactive preview tab will display a tool tip that would specify theparameter value differences relative to the parameter values of the currently openpreview. Bracketing can be also activated by right-clicking on respective slidercontrols in the Filter section.Copyright 2004-2006 Imagenomic LLC. All rights reserved.All product and company names referenced herein are trademarks of their respective owners.29
Realgrain 2 Plug-in User's GuideFigure 18: Bracketing Parameter Name and values in preview tabs and Right-click pop up menu withbracketing optionsRESIZING REALGRAIN PLUG-IN WINDOWThe Realgrain Plug-in window can be resized by dragging the lower-right corner ofthe window. You can adjust the size of the window to better fit your screenresolution and processor speed. You can click the "OK" button to remember thecurrent size or "Cancel" to restore the previous size.PHOTOSHOP ACTION AND SCRIPTING SUPPORTRealgrain Plug-in provides full action and scripting support within Photoshop. Therecorded actions contain all Realgrain Plug-in adjustable parameters includinggraininess, tone, and color parameters.30Copyright 2004-2013 Imagenomic LLC. All rights reserved.All product and company names referenced herein are trademarks of their respective owners.
Advanced UseKEYBOARD AND MOUSE CONTROLSSectionPreview windowSlidersPlug-in windowWindowsMacDescriptionSpace ClickSpace ClickPanningCTRL ClickCommand ClickZoom inALT ClickOption ClickZoom outCtrl PlusCommand PlusZoom InCtrl MinusCommand MinusZoom OutCtrl 0Command 0Zoom to 10%Ctrl Alt 0Command Option 0Zoom to 100%Mouse wheelMouse wheelVertical scrollCtrl Mouse wheelCommand MousewheelHorizontal scrollAlt Mouse wheelOption Mouse wheelZoomRight ClickRight ClickContext menuCtrl NCommand NNew PreviewAlt [Option [Previous PreviewAlt ]Option ]Next PreviewAlt Option First PreviewAlt Option Last PreviewCtrl Alt FCommand Option FFull Preview modeCtrl Alt VCommand Option VVertical split preview modeCtrl Alt HCommand Option RHorizontal split previewUp/Down keysUp/Down keysIncrease/Decrease by 1Shift Up/Down keysShift Up/Down keysIncrease/Decrease by 10Tab/Shift TabTab/Shift TabChange slidersRight ClickRight ClickContext menuMouse wheelMouse wheelIncrease/Decrease by 1Shift Mouse wheelShift Mouse wheelIncrease/Decrease by 10Ctrl ZCommand ZUndoCtrl YCommand YRedoCtrl SCommand SSave Current SettingsAltOptionSwitch between Canceland ResetCopyright 2004-2006 Imagenomic LLC. All rights reserved.All product and company names referenced herein are trademarks of their respective owners.31
Jul 12, 2013 · Realgrain 2 Plug-in User's Guide . 12 . ADDING GRAIN . Realgrain features versatile methods for simulating the grain patterns of different films and scan resolutions to convey a truly film-like image effect. You can add luminance or color grain adjusted by the tonal range, balanced by th