Transcription
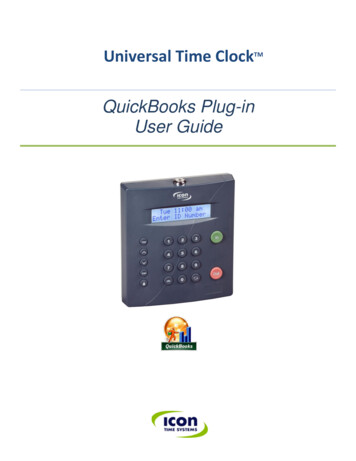
Universal Time ClockTMQuickBooks Plug-inUser Guide
Table of ContentsTable of Contents .2Chapter 1: Getting Started .3Support and Troubleshooting . 3System Requirements . 3Installing the QuickBooks Plug-in . 3QuickBooks Plug-in Menu Options . 4Connecting Your Universal Time ClockTM to QuickBooks . 5Chapter 2: Linking Employees and Employee Synchronization .6Accessing the Time Clock Employee Synchronization Screen . 6Advanced Employee Maintenance Screen. 7Synchronizing Your Employees . 8Exporting Existing Employees from QuickBooks into the Time Clock . 8Manually Exporting a QuickBooks Employee to the Time Clock . 10Importing Existing Employees from the Time Clock into QuickBooks . 10Linking an Existing Employee in QuickBooks with an Existing Employee in the Time Clock . 11Removing a Link between QuickBooks and the Time Clock . 11Saving Your Changes . 11Chapter 3: Importing Employee Hours from the Universal Time ClockTM to QuickBooks . 12Verify the Hours Were Imported into QuickBooks Correctly . 13Troubleshooting and How-to’s . 14How to Create a Payroll Item in QuickBooks . 14Setting Up a Regular Time Pay Item . 14Setting Up an Overtime Pay Item . 15How to Assign a Static IP Address in Your Time Clock . 15How to Handle Multiple Departments per Employee in QuickBooks . 16Copyright 2009 Icon Time Systems, Inc. All rights reserved.Reproduction of this document in whole or in part is strictly prohibited. This document may contain typographical or copy errors.TMUniversal Time Clock , Icon Time Systems, the Icon Time Systems logo, and all other Icon Time Systems product names mentionedin this document are registered trademarks Icon Time Systems.All other products, brand names, or company names mentioned in this document are properties and trademarks or registeredtrademarks of their respective companies.2 Page
Chapter 1: Getting StartedCongratulations on the purchase of your Universal Time Clock TM from Icon Time Systems! Your purchase includes a freesoftware plug-in for QuickBooks that makes importing employee payroll hours easier than ever.This User Guide will instruct you on setting up the QuickBooks Plug-in for importing of employee hours, properlyexporting employees from QuickBooks into your Universal Time ClockTM , and importing employees from the employeetime clock into QuickBooks .For instructions on setting your employee time clock preferences please refer to the Universal Employee Time ClockUser Guide. You can access this User Guide from the QuickBooks Plug-in menu in your QuickBooks File menu.Support and TroubleshootingFor your convenience, troubleshooting tips and how-to’s can be found on page 14 of this User Guide. In addition, ourtechnical support site lists more troubleshooting tips and how-to’s to assist you with the QuickBooks Plug-in and youremployee time clock. You can reach this site at www.support.icontime.com .Upon product registration you receive a complimentary 30-day trial of our Gold Technical Support Plan which includesunlimited telephone support, troubleshooting and remote assistance. For those subscribers of our technical supportplans, your dedicated support team can be reached Monday through Friday from 7:30am to 4:30pm (pacific coast time)at (800) 847-2232 option 1.System Requirements-Windows Based PCOperating Systems – Windows 2000, XP, Vista or Win7 (32 or 64 bit)QuickBooks PRO or QuickBooks Premier (2006 and above) – must be installed and setupRTC-1000 2.0, SB-100 PRO 2.0 Universal Time ClockorRTC-1000, SB-100 PRO Universal Time Clock with Customize Pack UpgradeAn established connection to the computer running QuickBooks (Direct connection, network, VPN, or Internet)Installing the QuickBooks Plug-inInstalling the QuickBooks Plug-in is simple and can be completed in just a few steps.NOTE: If the QuickBooks program is open on your computer, you must close it before beginning installation.1. Download the QuickBooks Plug-in file to your Windows desktop from the link on our website:www.icontime.com/QuickBooks plug-in2. Double-click on the QuickBooks Import.exe file to begin the installation.3. Follow the installation wizard to complete the installation.4. Log into your QuickBooks program using your QuickBooks’ Administrator account.VISTA AND WIN7 USERS: If your computer is running Windows Vista or Windows 7Operating Systems you must run QuickBooks as an Administrator during theapplication certificate process. Follow the instructions below for running QuickBooks as an Administrator.i.Using your mouse pointer, Right-click on the QuickBooks icon that youtypically use to open the QuickBooks application.ii.Select Run as administrator from the menu, shown to the right.3 Page
iii.You must then log in to QuickBooks as the Admin.5. An Application Certificate screen should appear as shown in Figure 1.Choose both of the following options: Select ‘Yes, whenever the company file is open’ Select the ‘Allow this application to access personal data ’checkboxFigure 1 Application Certificate ScreenFigure 2 Access Confirmation Window6. When the Access Confirmation window appears, Figure 2, select Done to allow the time clock to access theQuickBooks database.VISTA AND WIN7 USERS: Before using the QuickBooks Plug-in you must close the QuickBooks program down Open QuickBooks again by double-clicking on the QuickBooks shortcut, do not run as Administrator. Log in to QuickBooks using the Admin account.QuickBooks Plug-in Menu OptionsThe QuickBooks Plug-in has now been installed. Byselecting the File drop-down menu from QuickBooks you can now access the Icon Time SystemsQuickBooks Plug-in menu; see below for a descriptionof the menu options.a. Go To My Time Clock - Takes you directly tothe Universal Time ClockTM Home pagethrough your default Web browser.b. Import Time - Allows you to transferemployee hours from the Universal TimeClockTM into QuickBooks .c. Time Clock Preferences - Takes you directly tothe employee time clock Preference Settings.Figure 3 QuickBooks Plug-in Menud. Synchronize Employees - Allows you toOptionssynchronize your QuickBooks employee datawith the employee data in the time clock including: adding employees from QuickBooks into the time clock,importing time clock employees into QuickBooks and data synchronization.e. User Guide - This option allows you to quickly access this User Guide for your convenience.4 Page
Connecting Your Universal Time ClockTM to QuickBooks To begin using the Universal Time ClockTM QuickBooks Plug-in, you must first link the time clock to QuickBooks .1. From the QuickBooks menu select File and the Icon Time SystemsQuickBooks Plug-in menu, Figure 3.2. Select Go To My Time Clock.3. Enter in the time clock’s IP address, to connect to the time clock.4. Enter the Username and Password used to access your time clock, Figure 4.5. Select the Login button to continue.Figure 4 Log In to Time ClockTMNOTE: We recommend that you set a Static IP Address on your Universal Time Clock .If the dynamic IP address used to connect to the time clock changes, you will have to enter in a new IP Address toconnect again.For instructions on programming a Static IP Address into the time clock, go to page 15 in the Troubleshooting section ofthis User Manual.6. The Application Certificate window may appear again. Select the option ‘Yes, whenever the company file is open’ Click Continue7. Click Done in the Access Confirmation window, Figure 5. This will log you into yourUniversal Time Clock’sTM Home page.Figure 5 Access Confirmation5 Page
Chapter 2: Linking Employees and Employee SynchronizationIn order to import employee hours into QuickBooks , the employees in QuickBooks must be synchronized with theemployees in the time clock. Synchronization is done through the Time Clock Employee Synchronization screen and theAdvanced Employee Maintenance screen.Accessing the Time Clock Employee Synchronization ScreenAll synchronization/linking of employees must be done through the TimeClock Employee Synchronization screen. Access this screen by followingthe instructions below.1. From QuickBooks , go to the Icon Time Systems QuickBooks Plugin menu and select the Synchronize Employees option, as shownin Figure 6.2. In the Log In to Time Clock screen, enter the correct IP address,Username, and Password.3. Select the Login button to log into your time clock.Figure 6 Synchronize EmployeesThe Time Clock Synchronization screen will appear, see Figure 7 below for a description of the menu options.Pin Number that hasbeen/will beassigned to theemployeeDisplays theAdvanced EmployeeMaintenance ScreenList of Employees setup in QuickBooks Print list ofemployeesTakes you to theindividual employeestatus screen.Figure 7 Time Clock SynchronizationSets the applicationto automaticallysynchronizeemployees inQuickBooks withthe time clockSynchronization Status Icon The Import Status of each employee can easily be identified by the icon to the left ofthe employee name on the employee synchronization screen as shown on the following page.SynchronizationStatus ColumnSynchronizationStatus IconFigure 8 Import Status6 Page
Employees marked with a green check have been successfully synchronized/linked between QuickBooks and the time clock.Employees marked with the green arrows icon indicate that the employee name was found in both the timeclock and in QuickBooks and the two records will be linked.Employees marked with the green plus will be added to the time clock.Employees marked with the yellow warning icon will be added to the time clock, however the employee hasnot been set up in the method that we recommend. Typically this is caused by an overtime 1 or 2 payrollitem not being assigned or not set up correctly.Employees marked with the red x cannot be synchronized with the time clock due to an error.Synchronization Status Column The blue status column next to the Employee PIN number tells you the status ofeach employee and whether there are any issues with that particular employee being linked with the employee timeclock.Checkbox The checkbox next to each employee name allows you to mark an employee to be added or synchronizedwith the employee time clock. If an employee is not checked off then they will not be synchronized or added.Additional Menu Options Additional menu options can be found byusing your mouse pointer and Right clicking in the Time Clock EmployeeSynchronization window, as shown in Figure 9.ooooSync Status This option will display the employee status.Select All Choosing this option will mark all employees to besynchronized with the time clock.Select None Selecting this option will un-mark all employees from Figure 9 Additional Menu Optionsbeing synchronized with the time clock.Refresh This option downloads any new information from the time clock and QuickBooks and repopulates thelist.Advanced Employee Maintenance ScreenThe Advanced Employee Maintenance screen allows you to view the employees; on the time clock, in QuickBooks , andlinked employees in both the time clock and QuickBooks . Using the Advanced Employee Maintenance screen you canalso link/unlink employees in the time clock from employees in QuickBooks , add employees from QuickBooks to thetime clock, and add employees from the time clock to QuickBooks .Access this screen by clicking on the Advanced button from the Time Clock Employee Synchronization screen.7 Page
QuickBooks Employees is a listof employees in QuickBooks that have not been linked withthe time clockTime Clock Employees is a list ofemployees and their ID numbersthat are in the time
Your purchase includes a free software plug-in for QuickBooks that makes importing employee payroll hours easier than ever. This User Guide will instruct you on setting up the QuickBooks Plug-in for importing of employee hours, properly exporting employees from QuickBooks into your Universal Time ClockTM , and importing employees from the employee time clock into QuickBooks . For .