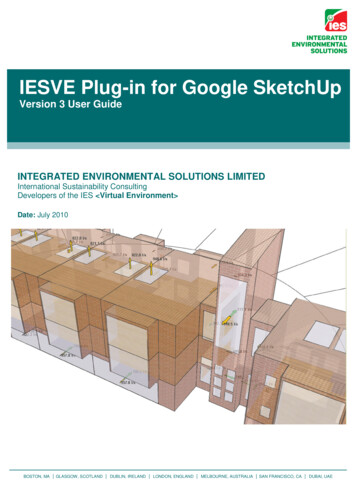
Transcription
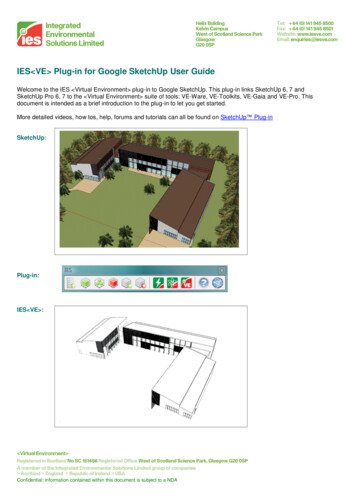
IES VE Plug-in for Google SketchUp User GuideWelcome to the IES Virtual Environment plug-in to Google SketchUp. This plug-in links SketchUp 6, 7 andSketchUp Pro 6, 7 to the Virtual Environment suite of tools: VE-Ware, VE-Toolkits, VE-Gaia and VE-Pro. Thisdocument is intended as a brief introduction to the plug-in to let you get started.More detailed videos, how tos, help, forums and tutorials can all be found on SketchUp Plug-inSketchUp:Plug-in:IES VE :Confidential: information contained within this document is subject to a NDA
Plug-in ToolbarThe plug-in appears as a toolbar in SketchUp. The toolbar has 11 features which will be describe in more detailbelow:SelectGroupsSet ect aRoomSet RoomPropertiesVEToolkitsVE-WareLaunch VE HelpIES WebsiteSet Building Properties:Set data for the entire buildingLocation is important for building performance analysis because location and climate dictate the performance of thebuilding. Set the location by clicking Select Location from the dialog. This opens the VE Location Browser:Confidential: information contained within this document is subject to a NDA
The VE Location browser allows you to choose major cities throughout the world. The browser has three levels:Continent [Africa, Antarctica, Asia etc]; Country / State / Territory [UK, Arizona, Manitoba etc]; then City [London,Phoenix, Winnipeg etc]. Select a location closest to your project. The local carbon fuel mix and weather data isderived by selecting the location. The resource fuel mix translates into the carbon emissions factor per fuel type forthe project that is used to determine the carbon footprint.Once the location is selected, the latitude and longitude will be updated automatically, if you would like a more exactlatitude and longitude, you can use Google Earth (It will be explained later in the guide)Within the Set Building Properties dialog, you will also need to set the Building’s Constructions, Building Type andBuilding HVAC Service.Confidential: information contained within this document is subject to a NDA
Building ConstructionsConstructions:Building Type:HVAC Service:What constructions are used in your building? What glazing types do you wish to use?What is the principle function of the building you are designing?How is you building heated and cooled?Building TypeConfidential: information contained within this document is subject to a NDAHVAC Service
Select Groups:Define the attributes of group(s):When you have components or groups in your model, you need to go into the ‘Select Components’ or ‘SelectGroups’. You need to identify if the specific group(s) or component(s) will be analyze as Room (part), Room (whole),Shade, Door, Window, or Excluded.Room: Objects will be part of the model used for thermal analysis.Users are encouraged to use Room (whole) when the group contains all the surfaces that comprise the volume ofthe room(s). All surfaces in groups defined as Room (part) will be analysed together to identify rooms and thisprocess may take longer to complete.Shade: Objects defined as Shade are treated as shading surfaces within the model and therefore taking into accountfor shading analysis, not for thermal analysis.Excluded: All objects are per default excluded from exporting and will not appear within the export of analysismodel.Door: Group or component will be translated as door into VE-Pro.Window: Group or component will be translated as window into VE-Pro. Note that the group or component will needto have a material opacity between 1-99 in order to translate as window in VE-Pro.Confidential: information contained within this document is subject to a NDA
Identify Rooms & Set Room Properties:Find all rooms in the model & set data for individual roomsIdentify rooms is used to find all the bounded rooms in the model. Bounded rooms are geometrical surfaces thatfully enclose a space or volume. The simplest form of this would be that a cube needs six sides to fully enclose theroom. A non-bounded box (or selected surfaces) will be treated as Shading Surfaces.NOTE: Shading devices will be used by the VE to shade the building. Examples of shading devices are overhangs orbrise soleil. Surrounding buildings will also shade your building.Set room properties; this dialog helps you set the constructions, type of use and HVAC system for the room(s) thatyou have selected. (Rooms can be selected from the list or by using the Select a Room button)Use the SAVE Icon to save Room Names. Sort rooms and floors by clicking on the “Floor” and “Room” columnheadings.If construction set or HVAC service are not defined, it will inherited the constructions and HVAC system from thebuilding properties that was previously defined.Confidential: information contained within this document is subject to a NDA
Select a room:Left click when the VE Room properties dialog is open to select rooms you want to edit.Right click to get further options:Display Properties Room: Room Name Selection of this menu item opens the room properties menu for the selected room:Confidential: information contained within this document is subject to a NDA
Insert FloorsInsert floors is useful to split a single massing volume into single or multiple floors. One floor is drawn as a default tostart, click on ‘Identify Rooms’, after the room has been found, right-click on the room, select ‘Insert Floors’. Select‘Check to insert as many Storeys as will fit’, floors will be inserted based on the overall height of the volumeautomatically.Toggle all Room names visibilitySelection of this menu item toggles the display of the room names on and off:Confidential: information contained within this document is subject to a NDA
Toggle VE Model shadingThe Virtual Environment has a convention to describe zones that will be modelled as thermal zones, and surfacesthat will be modelled as shading surfaces. Thermal zones are enclosed volumes, traditionally coloured blue in the Virtual Environment . Shaded surfaces are non-enclosed volumes, or single surfaces, traditionally coloured yellowin the Virtual Environment To be able to identify these entities in SketchUp the Toggle VE Model shading menushows the SketchUp Model in the traditional colours of a VE Model:The blue zones are thermal zones; these will be included in the energy calculations; the yellow zones are shadingsurfaces. The two types shown on this drawing are the parapet walls and the adjacent building. The parapet iscreated as a single surface, the adjacent building has no floor (shown below):Confidential: information contained within this document is subject to a NDA
Virtual Environment suite tools: (VE-Ware, VE-Toolkits, VE-Pro)Click these buttons to link to VE-Ware, VE-Toolkits, or VE-Pro.VE-Ware[more info: VE-Ware] a FREE tool that provides the ability to analyze a model in terms of:Hourly, yearly energy simulation that utilizes the climate files for your location.Comparing to the Architecture 2030 challenge targets. The baseline for this benchmark is theCommercial Buildings Energy Consumption Survey (CBECS) (http://www.eia.doe.gov/emeu/cbecs),which is developed and maintained by the Dept. Energy Information Administration ml)Local/Regional Carbon Calculation that looks at the climate file location and then cross-referencing thatwith a snapshot of the e-Grid database, which provides the resource fuel mix for utilities throughout theUS. The resource fuel mix translates into the carbon emissions factor per fuel type for the project that isused to determine the carbon footprint.VE-Toolkits[more info: VE-Toolkits] Through a reduced number of inputs (thermal characteristics), you are able to translate your designmodel from Google SketchUp and/or Autodesk Revit into an analysis model, providing the ability for anumber of analysis cyclesThere are two levels in the toolkits: Sustainability Toolkits, and LEED toolkits.Sustainability Toolkits: Overview tab and a Sustainability tab. The types of analysis that can be done inthe Overview tab include Climate Metrics, Climate Index, Natural Resources, Building Metrics, andMaterials Review. The Sustainability tab includes analysis such as Building Loads, Yearly EnergyConsumption, Daylighting Levels at the floor plan, Shading/Solar studies, Water Review, and Low/ZeroCarbon Technologies.LEED Toolkits:include Daylighting, Thermal Comfort, Water Review, and Low/Zero CarbonTechnologies.VE-Pro[more info: VE-Pro] The VE is an integrated building performance analysis platform providing the ability to do numerous typesof analysis from a central modelThe VE is comprised of a collection of analysis modules that can work together, in groups and in somecases individually.The VE modules shape a robust and comprehensive analysis tool that provides the ability to customizealmost every parameter to refine the analysis.Confidential: information contained within this document is subject to a NDA
Help / IES VE Website:Click to access the Help files, or to access the IES website [www.iesve.com]Definitions Floors, roofs, walls:Ground Floor Slab: horizontal surface that is not in contact with a room belowRoof: horizontal surface that is not in contact with any room aboveUpper floors: horizontal surface that is in contact with a room aboveExterior Wall: vertical surface that is not in contact with any adjacent roomInterior Wall: vertical surface that is in contact with an adjacent roomExterior Window: a window on an exterior wallInterior Window: a window on an interior wall or floorSkylights: a window on a roofDefinitions Windows / holes / doors:Door: a face drawn on another surface; opacity 100.Window: a face drawn on another surface with an opacity setting from 1-99.Hole: a face “cut-out” or deleted from another surface; or an opacity of 0NOTE: Exterior holes are treated as windows by the Virtual Environment suite of tools.Confidential: information contained within this document is subject to a NDA
Using Google Earth to set location and Terrain:Google Earth can be used to set the Latitude and Longitude of the SketchUp model, as well as using the terrain aspart of your topographical surface for analysis. Firstly you need to install the Google Earth plug-in into SketchUp.(http://www.SketchUp.com/index.php?id 408)Once installed follow the steps below!Step 1: Open Google EarthStep 2: Navigate to the building locationStep 3: Get the current view from SketchUp.Step 4: Open Set Building properties [Latitude andLongitude will have updated]Note: you will need to add the City name.Confidential: information contained within this document is subject to a NDA
Step 5: If you would like to translate your terrain aspart of the topographical surface. In the Layers dialog,turn on the Layer ‘Google Earth Terrain’ and turn off‘Google Earth Snapshot’, you will should see the actualterrain.Step 6: Go to the ‘Select Groups’ dialog, and select‘Shade’ with the Google Earth Terrain.Step 7: Click on ‘Identify Rooms’, and your terrain willtranslate as shading surfaces for your model.Confidential: information contained within this document is subject to a NDA
Common drawing issues:Not all of my zones/buildings have been identified [Part 1 – Simple Cube]:More often than not the cause of this is the surfaces that make up your building or room have not bounded the space.Let’s explain this using the simplest of room shapes – the cube. Let’s approach the drawing in two ways and *forget*to completely enclose the cube:Step 1: Draw a rectangleStep 2: Use Push/Pull to create a cubeStep 3: Identify Rooms: SUCCESS!!Diagnosis: Blue surfaces indicate zones [In the VirtualEnvironment or via Toggle VE Shading]Step 1: Draw a rectangleStep 2: Use Push/Pull to create walls (but delete roof)Step 3: Identify Rooms: FAILURE!!Diagnosis Yellow surfaces indicate shading surfaces [Inthe Virtual Environment or via Toggle VE Shading]Confidential: information contained within this document is subject to a NDA
Not all of my zones/buildings have been identified [Part 2 – Google Warehouse models]:Again more often than not the cause of this is the surfaces that make up your building or room have not bounded thespace. Let’s explain this time by using some Google Warehouse models and then using the Virtual Environment todiagnose the problem.Step 1: Open Google Warehouse modelStep 2: Identify Rooms: Partial Success!!Step 3: Open VE or select or via Toggle VE Shading,blue is a zone yellow a shading deviceDiagnosis: Spin the model and look at the base – there isno face here bounding the buildingNOTE: if all you need to model is the lower building and the tall building is only required for shading than thisapproach is correct!!No rooms in model: If a user only creates non-bounded rooms it is possible that no rooms will be created, the userwill see the message and advice below:Confidential: information contained within this document is subject to a NDA
Welcome to the IES Virtual Environment plug-in to Google SketchUp. This plug-in links SketchUp 6, 7 and SketchUp Pro 6, 7 to the Virtual Environment suite of tools: VE-Ware, VE-Toolkits, VE-Gaia and VE-Pro. This document is intended as a brief introduction to the plug-in to let you get started. More detailed videos, how tos, help, forums .