Transcription
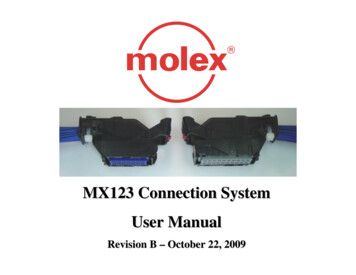
MX123 Connection SystemUser ManualRevision B – October 22, 2009
Table of Contents Section 1:Section 2:Section 3:Section 4:Section 5:Section 6:Section 7:Section 8:Section 9:Section 10:Section 11:Product IntroductionProduct SummaryHarness Assembly InstructionsConnector Mating InstructionsService InstructionsElectrical Continuity CheckingTool Ordering InformationRevision HistoryFilesAppendix A - Document Change HistoryAppendix B - Cleaning InstructionsMX123 Connection System User Manual - AS-34566-001 Rev B2
Section 1: Product IntroductionThe Molex MX123 Connection System is a sealed system consisting of aheader/controller, mating connectors, and terminals with the followingconfiguration options:A.B.C.D.80-Ckt (80) 0.64mm terminals73-Ckt (72) 0.64mm and (1) 2.8mm terminals56-Ckt (56) 0.64mm terminals49-Ckt (48) 0.64mm and (1) 2.8mm terminalsHIGHLIGHTS: This system has multiple keying options.Ground blade engages before signal pins contact.Connector is friendly to “blind-mate” conditions.Connector provides temporary retention to the header before the cam assistlever arm is activated. Cam assist lever arm remains in pre-lock position until the harnessconnector is in pre-lock position on the header/controller. CPA remains in pre-lock position until cam assist lever arm is locked closed. Available with molded-in grommet seal plugs for harness customization.MX123 Connection System User Manual - AS-34566-001 Rev B3
Section 2: Product Summary: 73/80-CktLeverDress Cover(Shipped Separately)Connector PositionAssurance (CPA)Grommet CapGrommet SealConnector HousingSlidesTerminal PositionAssurance (TPA)Perimeter SealMX123 Connection System User Manual - AS-34566-001 Rev B4
Section 2: Product Summary: 49/56-Ckt49/56-Ckt Exploded ViewLeverDress Cover(Shipped Separately)Connector PositionAssurance (CPA)Grommet CapGrommet SealConnector HousingSlidesTerminal PositionAssurance (TPA)Perimeter SealMX123 Connection System User Manual - AS-34566-001 Rev B5
Section 2: Product SummaryMX64 Receptacle TerminalOrientation TabCorrect Orientation90 MisorientationLock-out180 MisorientationLock-outOrientation of receptacle terminal during insertion to grommet capMX123 Connection System User Manual - AS-34566-001 Rev B6
Section 2: Product SummaryMX64 Receptacle TerminalTerminal Grip Code “A”:22 GA. WireTerminal Grip Code “B”:18/20 GA. WireGrip CodesVisibly Bigger!MX123 Connection System User Manual - AS-34566-001 Rev B7
Section 2: Product Summary2.80mm Receptacle Terminal(Yazaki Terminal and Cable Seal)7116-4152-02 Yazaki 2.8mm RCPT TERM Tin 14 Cable SealOrientation TabsCorrect Orientation90 MisorientationLock-out180 MisorientationLock-outOrientation of receptacle terminal during insertion to grommet capMX123 Connection System User Manual - AS-34566-001 Rev B8
Section 2: Product SummaryGrommet Seal Plug – FeaturesMolex Part 34586-0001Rectangular head for ease ofremoval from grommet sealcover.Shoulder area providesforward stop.Rectangular cross-section toprevent mis-orientation intothe grommet seal cover.Lock tabs to provide sealplug retention togrommet seal cover.Sealing surfaceMX123 Connection System User Manual - AS-34566-001 Rev B9
Section 2: Product Summary73/80-Ckt “As Shipped”49/56-Ckt “As Shipped”Harness connectorassembly shipped with TPA& lever in pre-lock position.Lever will remain in pre-lockuntil mated withheader/controller, or a forceover 190N is achieved.If lever moves freely frompre-lock position withoutbeing mated toHeader/Controller:Do Not Use Connector!Dress Cover ShippedSeparately.MX123 Connection System User Manual - AS-34566-001 Rev B10
Section 3: Harness Assembly InstructionsA.TPA shown in “As Shipped” position TPA to remain in pre-lock position (as shipped) until all terminals are loaded(Figs. 3-1 and 3-2). TPA is not to be removed from connector!Fig. 3-1Fig. 3-25.0mmTYP.Section ViewViews of TPA in “Pre-Lock” PositionMX123 Connection System User Manual - AS-34566-001 Rev B11
Section 3: Harness Assembly InstructionsB. Connector Circuit LocationsWIRE BUNDLE 44423432242214180 way MolexWire tie WIRE BUNDLE 373 way MolexWire tie WIRE BUNDLE 56 way Molex152943Wire tie area56-CktWIRE BUNDLESIDE SHOWNMX123 Connection System User Manual - AS-34566-001 Rev B12
Section 3: Harness Assembly InstructionsC. Terminal Installation For ease of assembly, it is recommended that when populating theconnector, wires be populated in the following manner (see Fig 3-3): 1) Fullypopulate down Column 1 and then 2) continue on to Column 2 and so forthuntil the entire connector is populated. Refer to Fig 3-4 for proper terminalorientation.Fig. 3-4Fig. 3-3Column1Column20.64mm OrientationAlign terminal orientation tabwith slot in grommet capopening to install the terminalOrientation TabMX123 Connection System User Manual - AS-34566-001 Rev B13
Section 3: Harness Assembly InstructionsC. Terminal Installation (continued) With TPA still in pre-lock position, orient terminal to rear of connector. Grip the wire (Fig. 3-5) and insert terminal through appropriate circuitopening (Fig. 3-6). If resistance is encountered, retract the terminal andadjust the angle of insertion. Continue inserting the terminal until it stopsand locks up on the lock finger with an audible click. Tug slightly on wire toensure terminal is locked.Fig. 33-5Fig. 33-6MX123 Connection System User Manual - AS-34566-001 Rev B14
Section 3: Harness Assembly InstructionsD. Wire Dressing Method After inserting a terminal, bend the wire as close to the grommet cap aspossible and position as shown below. Continue populating terminals asnecessary.123456MX123 Connection System User Manual - AS-34566-001 Rev B15
Section 3: Harness Assembly InstructionsE. Grommet Seal Cover - Knockout Patterns* Molded-in or single grommet seal plugs are used to seal unused circuit locations.NOTE! Molded-in grommet seal plug knockout patterns will vary based onapplication specific circuit locations. Single grommet seal plugs may still need tobe used to seal circuits without molded-in seal plugs.Cavities Open For CircuitsMolded-in grommet seal plugsMX123 Connection System User Manual - AS-34566-001 Rev B16
Section 3: Harness Assembly InstructionsF. Grommet Seal Plug Installation Step 1: Orient seal plug to theopening in the grommet cap. Plugshould not be installed whenrotated 90 degrees from properorientation. Step 2: Hold head of seal plugsecurely to prevent rotationduring assembly. Step 3: Push seal plug until itlocks into position into thegrommet cap. Step 4: Verify that seal plugshoulder is flush with grommetcap as shown in cavities 33 and53.MX123 Connection System User Manual - AS-34566-001 Rev B17
Section 3: Harness Assembly InstructionsG. TPA - Seating With the terminals fully installed, the TPA can be seated into its final lockposition by applying an even force to both ends (Fig. 3-7) until it comes to astop (Fig. 3-8). If the TPA resists, it may be detecting a partially installedterminal. Pull the TPA back into its pre-lock position and make sure allterminals are fully seated. Upon completion, the TPA can be seated.Fig. 3-7Fig. 3-8MX123 Connection System User Manual - AS-34566-001 Rev B18
Section 3: Harness Assembly InstructionsH. Wire Bundle Dressing After seating the TPA, insert a tie-wrap around the connector (Fig. 3-9) andaround the wire bundle as shown (Fig. 3-10). While clasping the wire bundle and connector firmly, tighten the tie-wrapsecurely around the bundle using an appropriate tie-wrap gun to meet thespecifications listed in Table 1 (next page) and shown in Fig. 3-11 and Fig. 312 (next page).Fig. 3-9Fig. 3-10MX123 Connection System User Manual - AS-34566-001 Rev B19
Section 3: Harness Assembly InstructionsH. Wire Bundle Dressing (continued)Table 1: Dress Cover part numbersFig. 3-11GM Part No.Molex Part No.DescriptionHeight (H)Width (W)1258267634565-000373/80 Ckt 44 mm 24 mm1258267934575-000349/56 Ckt 43 mm 24 mmFig. 3-12HWWire Bundle Height and Width SpecificationsMX123 Connection System User Manual - AS-34566-001 Rev B20
Section 3: Harness Assembly InstructionsI. Dress Cover Installation After tie-wrapping the wire bundle, install dress cover by inserting the frontof the dress cover into the connector housing (Fig. 3-13) and pushing theopposite end (Fig. 3-14) until it snaps into position. Fully seated dress coverand TPA can be verified by ensuring MAX. height dimension (Fig. 3-14).Fig. 3-13Fig. 3-1447.8mmMAX.Top of dress cover to bottomof fully seated TPAStep 1: Insert front end into housing.Step 2: Press down to lock position.MX123 Connection System User Manual - AS-34566-001 Rev B21
Section 4: Connector Mating InstructionsA. Harness Connector To Header/Controller Color Identification The harness connector TPA will be color-coded to match the appropriatecontroller header (Fig. 4-1).Fig. 4-1TPAHeader/ControllerMX123 Connection System User Manual - AS-34566-001 Rev B22
Section 4: Connector Mating InstructionsB. Harness Connector to Header/Controller Installation Into Pre-Lock Correctly orient the harness connector (align keying features) onto thecontroller connector (Fig. 4-2). Grip the top of the harness connector andevenly push the connector downward until the lever moves slightly forward(Fig. 4-3).Fig. 4-2Fig. 4-3AlignKeyingFeaturesAlign Keying FeaturesMX123 Connection System User Manual - AS-34566-001 Rev B23
Section 4: Connector Mating Instructions Caution!Installing the harnessconnector at an extremeangle (see fig 4- 4 ) mayresult in seal “scooping”creating an environmentfor fluid ingress.Damage to the header, orconnector is possible ifexcessive force is used.Fig. 4- 4MX123 Connection System User Manual - AS-34566-001 Rev B24
Section 4: Connector Mating InstructionsC. Harness Connector to Header/Controller Mating To Final Lock To begin mating the harness connector to the header/controller, place thepalm of your hand on the face of the lever. Push back the connector levertowards the wire bundle to engage the harness connector to the controllerheader (Fig. 4- 5). Mating force should be smooth and continuous. If not,remove the connector and repeat step B. Continue to rotate the lever arm (Fig. 4- 6).Fig. 4-5Fig. 4-6MX123 Connection System User Manual - AS-34566-001 Rev B25
Section 4: Connector Mating InstructionsC. Harness Connector to Header/Controller Mating To Final Lock (continued) Continue to rotate the lever until you hear the primary latch click into final lockover dress cover primary latch (Fig. 4-7a and 4-7b).Fig. 4-7aFig. 4-7bDress Cover Primary LatchPrimary Latch EngagedMX123 Connection System User Manual - AS-34566-001 Rev B26
Section 4: Connector Mating InstructionsD. Connector Position Assurance (CPA) Fig. 4-8With the harness connector lever arm in its latched position, the CPA cannow be engaged. Push the CPA toward the wire bundle (Fig. 4- 8) until itclicks into its final locked position (Fig. 4-9).Fig. 4- 9MX123 Connection System User Manual - AS-34566-001 Rev B27
Section 5: Service InstructionsNOTE: For soiled or in-service ECM’s, please refer to Section 11 (Appendix B):Cleaning Instructions prior to commencing the following procedures.A. Harness Connector Removal From Module To un-mate the harness connector from the header/controller, push the CPAaway from the wire bundle. Depress the primary latch on the top of theharness connector so the lever arm releases from the harness connector(Fig. 5-1).Primary LatchFig. 5-1MX123 Connection System User Manual - AS-34566-001 Rev B28
Section 5: Service InstructionsA. Harness Connector Removal From Module (continued) Push the top of the mate lever arm away from wire bundle using the palm ofyour hand (Fig. 5-2). Continue to rotate the lever until the connector lifts into pre-lock (Fig. 5-3).The lever MUST be in the pre-lock position or the connector can not be easilyremoved from the module. The lever must be fully forward for the harnessconnector to be in pre-lock position.Fig. 5-2Fig. 5-3MX123 Connection System User Manual - AS-34566-001 Rev B29
Section 5: Service InstructionsA. Harness Connector Removal From Module (continued) While pushing forward on the lever, grip the back of the harness and evenlypull straight upwards and away from the module (Fig. 5-4).Fig. 5-412MX123 Connection System User Manual - AS-34566-001 Rev B30
Section 5: Service InstructionsB. Dress Cover Removal With the harness connector removed from header/controller (Fig. 5-5),unlatch the dress cover latch features on each side of the dress cover guide(Fig. 5-6). A small screwdriver or similar tool can be used to release thelatches.Fig. 5-5Fig. 5-6Latch Featureon each sideMX123 Connection System User Manual - AS-34566-001 Rev B31
Section 5: Service InstructionsB. Dress Cover Removal (continued) Fig. 5-7With the dress cover latch features unlatched, insert your finger into dresscover (Fig. 5-7) and pull up and away from the wire bundle. The dress covercan be completely removed at this point (Fig. 5-8).Fig. 5-8MX123 Connection System User Manual - AS-34566-001 Rev B32
Section 5: Service InstructionsC. Tie-Wrap Removal The tie-wrap can now be removed from the wire bundle (Fig. 5-9) for easieraccess to the wire to be serviced. The tie-wrap MUST be cut under the wiredress tab to prevent damage to the wires!Fig. 5-9Do not cut near wires!MX123 Connection System User Manual - AS-34566-001 Rev B33
Section 5: Service InstructionsD. TPA Servicing TPA should never be removed from the connector. Step 1: Insert a small (2.0mm maximum) flat blade screwdriver into the TPAservice hole at one end of the connector (Fig. 5-10) and pry up. The TPA willstop when it reaches its pre-lock position for terminal servicing. Step 2: On the other end of the TPA, repeat Step 1 (Fig. 5-11) until the TPAreaches its pre-lock position at both ends of the harness connector. Approximate TPA travel will be 5.0mm (See Figs. 5-12 and 5-13 on next page).Fig. 5-10Fig. 5-111 2Step 1: Pry up TPAStep 2: Pry up opposite end of TPAMX123 Connection System User Manual - AS-34566-001 Rev B34
Section 5: Service InstructionsD. TPA Servicing (continued)Fig. 5-12Fig. 5-135.0mm5.0mmViews of TPA in “Pre-Lock” PositionMX123 Connection System User Manual - AS-34566-001 Rev B35
Section 5: Service InstructionsE. MX64 Receptacle Terminal Removal Ensure TPA is in pre-lock position! Holding the 0.64mm service tool (Fig. 14: Molex part no. 63813-1400 or alternate GM partno. J-38125-213) between middle finger and thumb, with index finger on top of the tool,insert the tip of the tool into the terminal service hole adjacent to the terminal to beserviced (Fig. 5-15). After first pushing the wire/terminal forward, use your index finger to push the servicetool (Fig. 5-15) until a large amount of resistance is felt. This wedges the service toolbetween the terminal and the lock finger, therefore deflecting the lock finger. (Fig. 5-16).Fig. 5-14Fig. 5-16Fig. 5-15Service ToolLock FingerReceptacle TerminalMX123 Connection System User Manual - AS-34566-001 Rev B36
Section 5: Service InstructionsE. MX64 Receptacle Terminal Removal (continued) Fig. 5-17a shows proper insertion of the service tool. Avoid inserting theservice tool into the terminal opening (Fig. 5-17b) as this may damage theterminal.Fig. 5-17aFig. 5-17bWRONG!Proper InsertionIncorrect InsertionMX123 Connection System User Manual - AS-34566-001 Rev B37
Section 5: Service InstructionsE. MX64 Receptacle Terminal Removal (continued) Once the terminal lock finger has been disengaged, transfer middle finger andthumb to connector housing, while maintaining index finger pressure on thetool. Pull on the wire to remove the terminal (Fig. 5-18). If the terminal resists,the service tool may not be fully engaged. Repeat the servicing instructions,starting at page 33. Do not use excessive force. Excessive force can damage the lock finger. Donot apply any lateral force. The lock finger is displaced by linear insertionalone.Fig. 55-18MX123 Connection System User Manual - AS-34566-001 Rev B38
Section 5: Service InstructionsF. MX64 Grommet Seal Plug Removal Step 1. Remove dress cover to access the 0.64mm grommet seal plugs Step 2. Use needle nose pliers to hold head of 0.64mm grommet seal plugs. Step 3. Pull grommet seal plug out of back of grommet cap. Do not re-use grommet seal plug once it has been removed!HeadMX123 Connection System User Manual - AS-34566-001 Rev B39
Section 5: Service InstructionsG. 2.80mm Receptacle Terminal Removal While pushing the terminal forward, insert the 2.80mm service tool (Yazakip/n X39899-J374). Insert the tip into the terminal service opening (Fig. 5-19).Avoid inserting the service tool into the terminal opening (Fig. 5-19a). Thismay cause damage to the 2.80mm terminal.Fig. 5-19Fig. 5-19aWRONG!Proper InsertionImproper InsertionMX123 Connection System User Manual - AS-34566-001 Rev B40
Section 5: Service InstructionsG. 2.80mm Receptacle Terminal Removal (continued) Once the tool is inserted into the terminal service opening, push the servicetool (Fig. 5-20) until it wedges between the female terminal and the lock finger(Fig. 5-21).Fig. 5-20Fig. 5-21Service ToolFemale TerminalLock FingerMX123 Connection System User Manual - AS-34566-001 Rev B41
Section 5: Service InstructionsG. 2.80mm Receptacle Terminal Removal (continued) Once the terminal lock finger is disengaged, pull on the wire (Fig. 5-22) toremove the terminal. If the terminal resists, the service tool may not be fullyengaged. Push the service tool further into the service hole to ensure that ithas disengaged the terminal lock finger.Fig. 5-22MX123 Connection System User Manual - AS-34566-001 Rev B42
Section 5: Service InstructionsH. Terminal Crimping If the 0.64mm receptacle terminal needs to be replaced, a new one can behand crimped using GM Crimp Tool #XX019825 or Molex Crimp Tool #638114200.1.) Identify the wire gauge you needto crimp. Notice the rectangularshape of the terminal cavity.2.) Insert the correct terminaland press the wire-stop down.3.) Insert the wire until the wirehits the wire stop. Squeeze thehandles through the last “click”until they release.MX123 Connection System User Manual - AS-34566-001 Rev B43
Section 5: Service InstructionsI. Terminal Crimping (continued) Contact Molex for terminal sales drawings. Hand crimp instructions, striplength recommendations, and crimp height requirements are available inthe Molex Spec. Sheet for Tool #63811-4200. If the Yazaki 2.80mm receptacle terminal needs to be replaced, a new onecan be hand crimped with the appropriate cable seal using crimp tools #J38125-6 and #J-38125-7. These tools can be ordered from SPX Kent-Moore(1-800-345-2233).J. Completing Assembly of Serviced Product For steps required to complete the assembly of this product, please referto Section 3 of this manual.MX123 Connection System User Manual - AS-34566-001 Rev B44
Section 6: Electrical Continuity CheckingA. Pogo Pin Recommendation - 0.64mm Terminal Pogo Pin Specification – See next page.TPA Stop SurfaceSpherical Tip0.53 mm5.75 mmMX123 Connection System User Manual - AS-34566-001 Rev B45
Section 6: Electrical Continuity CheckingA. Pogo Pin Recommendation - 0.64mm Terminal (continued)Probe Pin Details (0.64mm terminal)Manufacturer: Lone Star IndustrialPart number: LS040RS-ELW-277-N-4.7Pin diameter: 0.020” (0.53 mm)Tip shape: SphericalTel: (915) 779-7255LS040RS-ELW-277-N-4.7POGO PINMX123 Connection System User Manual - AS-34566-001 Rev B46
Section 6: Electrical Continuity CheckingB. Pogo Pin Recommendation – 2.8mm Terminal Pogo Pin Specification – See next page.TPA Stop SurfaceSpherical Tip0.76 mm7.40 mmMX123 Connection System User Manual - AS-34566-001 Rev B47
Section 6: Electrical Continuity CheckingB. Pogo Pin Recommendation – 2.8mm Terminal (continued)Probe Pin Details (2.8mm terminal)Manufacturer: Lone Star IndustrialPart number: LS054RS-ELW314Pin diameter: 0.030” (0.76mm)Tip shape: SphericalTel: (915) 779-7255LS054RS-ELW314POGO PINMX123 Connection System User Manual - AS-34566-001 Rev B48
Section 6: Electrical Continuity CheckingC. Pogo Pin Layout Recommendation (73-way)44.452.54Typ.2.80 Pogo2.546.522.54Test Pogo Pin Probing ArrayMX123 Connection System User Manual - AS-34566-001 Rev B49
Section 6: Electrical Continuity CheckingD. Pogo Pin / Probe Opening Check electrical continuity on the terminal by inserting probe pin downthe center of receptacle TPA opening.Molex Receptacle connectorOpening for probe pin/male terminalMX123 Connection System User Manual - AS-34566-001 Rev B50
Section 6: Electrical Continuity CheckingE. RecommendationsWhen testing the connector for continuity, it is imperative that you donot damage the terminals!Pogo pins should be checked for damage or sticking several times a shift: First, a visual inspection of all the pins for damage should be performed. Next, a testing block should be used to depress all the pogo pins up intothe barrel. If there is a bent or sticking pin, it should remain stuck in thebarrel of the pogo pin. A damaged or stuck pin should be replacedbefore any additional testing is performed.Probing damage can occur If a sharp-ended probe is inserted into the terminal. This may damagethe plating and increase contact resistance. If an oversized diameter probe is inserted into the terminal. This willoverstress the beam in the terminal, creating an environment forintermittent contact and/or increased electrical resistance. If a probe is inserted into the terminal at an angle or off center. Thismay damage the terminal and/or the connector.MX123 Connection System User Manual - AS-34566-001 Rev B51
Section 6: Electrical Continuity CheckingF. Manual Probing of the Connector If the connector must be probed off-line, please use:– GM probe tool #J-35616-64B for the 0.64mm terminal, and#J-35616-65B for the ECM pins. (Fig. 6-1).– GM probe tool # J-35616-4A for the 2.80mm terminal (Fig. 6-1).Insert the probe through the terminal opening as shown in Fig. 6-2.Fig. 6-2Fig. 6-1MX123 Connection System User Manual - AS-34566-001 Rev B52
Section 6: Electrical Continuity CheckingF. Manual Probing of the ConnectorManual probing damage can occur If a probe is inserted into the back of the connector. This maydamage the wire seal, creating an environment for fluid ingress.WRONG! If the wire insulation is pierced or chafed. This may create a leakpath for fluid ingress and/or wire corrosion.MX123 Connection System User Manual - AS-34566-001 Rev B53
Section 7: Tool Ordering Information Contact your Molex Inside Sales Representative at (800) 786-6539. For electronic copies and future updates of this document, refer tothe Molex Website at http://www.molex.com/ind/mx123.html.Tool DescriptionMolex Part No.GM or Supplier Part No.0.64mm Service Tool63813-1400XX0198262.80mm Service Tool-Yazaki P/N X39899-J3740.64mm Probe Tool-J-35616-64B, J-35616-65B2.80mm Probe Tool-J-35616-4A0.64mm Hand Crimp Tool63811-4200XX0198252.80mm Hand Crimp Tool-J-38125-6 : SPX #12085270J-38125-7 : SPX #12085271MX123 Connection System User Manual - AS-34566-001 Rev B54
Section 8: Revision HistoryRevision LevelPublication DateBOct 22, 20099 (same as revA)Dec 1, 20068July 22, 20057Feb 15, 20056Aug 20, 20045Jan 16, 20044Oct 13, 20033Sept 15, 20032Sept 5, 20031June 16, 2003MX123 Connection System User Manual - AS-34566-001 Rev B55
Section 9: Files UG Models Available Through GM IMAN Molex Drawings Available Through Molex SalesSection 10 (Appendix A): Document ChangeHistory Rev 1: Initial ReleaseRev 1 to Rev 2:–Modified the Connector Mating and Unmating Procedure–Updated and Released Only Sections 4 and 5Rev 2 to Rev 3:–Updated the Connector Mating and Unmating Procedure Based on Customer Input–Updated and Released Only Sections 4 and 5Rev 3 to Rev 4:–Incorporated the Connector Modified Mating Procedure into the Full Reference ManualRev 4 to Rev 5:–Revised Section 4 – Connector Mating Instructions–Revised Section 5 – Service Instructions–Added Appendix A – Document Change History–Added Appendix B – Connector Mating Instructions – Modified Mating Procedure–Added Appendix C – Service Instructions – Modified Unmating ProcedureRev 5 to Rev 6: Production Copy–Revised All Sections for Production ReleaseRev 6 to Rev 7:–Revised Multiple Sections with Formatting Updates .–Revised Section 5: Terminal Crimping.–Revised Section 5: Harness Connector Removal from Module.–Revised Section 6. Added Pogo Pin and Probing Recommendations.–Added Section 7: Tool Ordering Information.Rev 7 to Rev 8:–Revised Section 2: Product Summary–Revised Section 5: Servicing Instructions–Added Appendix B: Cleaning InstructionsMX123 Connection System User Manual - AS-34566-001 Rev B56
Section 11 (Appendix B): Cleaning InstructionsSTEP 1: While the ECM connection is secure, use a small squirt bottle to squirtwater liberally and directly onto the connector slides and around allexposed surfaces, top and bottom, to loosen dirt, grit, and smallrocks. The area around the CPA and primary latch should also besprayed off. The more water used, the cleaner it will become. Do notattempt to un-mate any connectors until Step 4.Repeat Step 1until there is novisual evidenceof dirt, grit, orother debris.Water stream pathsMX123 Connection System User Manual - AS-34566-001 Rev B57
Section 11 (Appendix B): Cleaning InstructionsSTEP 2: Use high pressure air to remove loosened debris. Direct air pressurearound connector slides and all exposed surfaces, top and bottom. Whendone, ECM and connectors should be visibly dry and debris free. Do notattempt to un-mate any connectors until Step 4.Repeat Step 2until there is novisual evidenceof dirt, grit, orother debris.Air stream pathsMX123 Connection System User Manual - AS-34566-001 Rev B58
Section 11 (Appendix B): Cleaning InstructionsEnlarged area to show detail“Gritty” slides“Clean” slidesMX123 Connection System User Manual - AS-34566-001 Rev B59
Section 11 (Appendix B): Cleaning InstructionsSTEP 3: Carefully remove any remaining debris from the slide area with a smallbrush. Do not attempt to un-mate any connectors until Step 4.STEP 4: You will need to start to cycle the lever arm to determine if you haveexcessive resistance. If lever arm binds, or resistance is felt. Repeat steps1, 2, and 3 until the connector is visibly clean and offers little resistance toun-mating.Step 1MX123 Connection System User Manual - AS-34566-001 Rev BStep 260
Section 11 (Appendix B): Cleaning InstructionsSTEP 5: If excessive resistance is felt while un-mating the connector, continuecleaning connector with the lever arm raised to the point of resistance asshown below. Rotating the lever arm back and forth will help loosenadditional debris.STEP 6: Repeat Steps 1 through 5 until you can un-mate the connector with littleresistance.DO NOT APPLY WATER TO ANYECM ASSEMBLY IFANY CONNECTORS AREUN-MATED FROM THE ECMHEADERS!Water and Air Spray PathsMX123 Connection System User Manual - AS-34566-001 Rev B61
Section 11 (Appendix B): Cleaning InstructionsSTEP 7: Once the connector is removed, inspect for damage and grit. Additionalcleaning of the connector housing may be necessary. To avoid droppinggrit into terminal openings clean connector with the TPA facing theground. Using a clean damp (NOT DRIPPING WET) paper towel or rag,brush off the heavy deposits. This effort should be directed at theconnector housing, not the TPA or terminal openings.DO NOT APPLY WATER TO TPA OR EXPOSED TERMINAL OPENINGS!CLEAN HEREDO NOT WIPE HERE“Gritty” J2 Connector“Cleaned” J2 ConnectorMX123 Connection System User Manual - AS-34566-001 Rev B62
Section 11 (Appendix B): Cleaning InstructionsSTEP 8: After connector removal, additional cleaning of the ECM header may benecessary. The amount of dirt pictured on the left below is unacceptable.Using a damp (NOT DRIPPING WET) clean paper towel or rag, brush offthe heavy deposits. This effort should be directed at the outside of theECM header, not the internal area where the terminal pins are.STEP 9: Blow off with high pressure air to dry and remove any grit particles insidethe header.DO NOTAPPLYWATER TOHEADERPINS OREXPOSEDCONTACTAREAS“Gritty” ECM Header“Cleaned” ECM HeaderMX123 Connection System User Manual - AS-34566-001 Rev B63
Section 11 (Appendix B): Cleaning InstructionsSTEP 10: Once the connector is in pre-stage, use a few drops of water to lubricatethe slides while re-mating. This will limit any potential binding.Arrows show where to place drops of waterMX123 Connection System User Manual - AS-34566-001 Rev B64
F. Grommet Seal Plug Installation Step 1: Orient seal plug to the opening in the grommet cap. Plug should not be installed when rotated 90 degrees from proper orientation. Step 2: Hold head of seal plug securely to prevent rotation during assembly. Step 3: Push seal plug until it locks in
