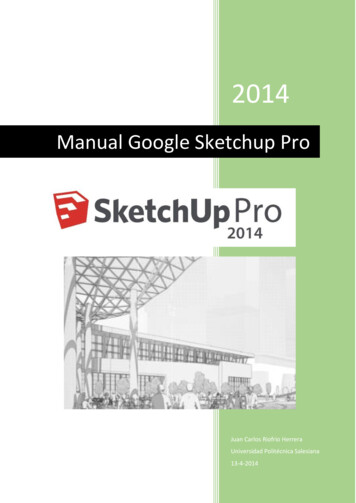
Transcription
SketchUp: an OverviewBy Norm Berls
Objectives and Non-Objectives Introduction to the SketchUp mindset.HighlightsBest PracticesPitfallsNot a ClassWon’t cover every aspect
Hardware Toshiba laptop S70B Intel i7 chip @ 2.6 GHz 16 Gb memory 64 bit system (Windows 7) Mouse 2 buttons wheel/button Left-Button: Primary Selection Tool Objects Tools Right-Button : Secondary Selection Tool Tool Options Wheel Button: Multifunction Roll: Pan / Zoom, List Scrolling Click: Quick Orb
About SketchUp Running 2016 version today.2017 version became available recentlyA real no-kidding 3D drawing tool.Difficult to use as a 2D drawing tool.Depends on color to communicate information to you.If you are color blind, you are at a great disadvantage in SketchUp.Very good as a drawing and prototyping tool.Imperfect as a final engineering drawing tool.
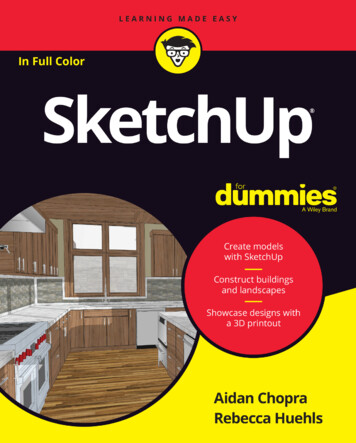
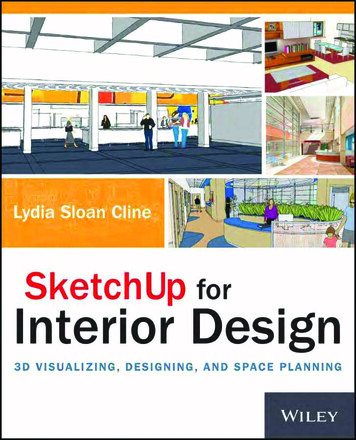
Learning SketchUp Many YouTube tutorial videos (mostly about architecture). One book: SketchUp 2014 for Dummies Mostly about architecture.Instructions often leave out critical information.Not up to date with most recent SketchUp (2017)Still, is a fair study aide and reference. SketchUp has a tutorial facility under Help
More About SketchUp Originally conceived as an architect’s tool SketchUp will run without the Internet but, it will complain if theInternet is not available. Need Internet for help facility. Export tools: 2D drawings of 3D objects Animations
Still More About SketchUp Currently owned by Trimble (surveying company)30 day trial download freeAfter 30 days, some functionality goes awayStill usable as a drawing packageSupport for surveying (geodesy and cartography tools)
The Inference Engine SketchUp often needs a lot of precise information to draw something. It can be very cumbersome to input all this info by hand. SketchUp contains an “Inference Engine” that runs when you activate atool and makes assumptions about what you are trying to do. These assumptions are automatically translated into parameter settings. This can be very helpful but, if you don’t know that it is going on, it canbe very annoying and confusing. Open Inference Demo line tool.(Close project)
General Layout, Four Important Tools Open Select Note and demo menupulldowns. Note and demo toolbars. Note and demo tray. The four most importanttools are Select, Orbit,Zoom and ZoomExtents. You will use themconstant3ly. Demo the tools.
After Select Demo
SketchUp: Starting a Project Start SketchUp Pick a template under Options. I prefer “3D Printing –Inches” Click “Start Using SketchUp” Window Model Info Units Length Units DecimalInchesPrecision 0.000”Enable Length Snapping 0.001” (Important) Angle Units Precision 0.0 Enable Angle Snapping 1.0 Snapping (Automatic jump to a point) Inference engine at work 1.000 means look for points on a circle 1.0 degrees apart Click-Enter to set defaults.
Demo Continued: Still Getting Started Perspective mode is nice but a pain when you are trying to draw. I prefer Parallel mode for creating and editing drawings. Camera Parallel Projection
Demo Continued: Still Getting Started Select initial group and Delete it. Rotate blue vertical axis to appear vertical via Orbit and PanTools.
Result After Start Demo 3 Axes Red Left-Right Green Front-Back Blue Up-Down Keep colors and theirdirectional meaningsconstantly in mind whenusing SketchUp. Axis orientations are keyinformation for theInference Engine.
About Exact Dimensions Open a new project and set it up. To draw something: Select a tool (e.g. Line)Drag mouse to position cursor at starting pointLeft-Click and drag to drawMeasurements Box at lower right will show size of the object you drew.It can be very difficult to draw something to a precision of 0.001” When you let up on Left-Click, you can type in an exact size forthe graphical object you just drew. Click-Enter to force SketchUp to accept exact size.
Cube Demo Create 2x2x2 cube SketchUp works with Lines (also called Edges) Lines are always drawn in black. Lines have length, but no height or width. SketchUp works with Faces (flat planes). Faces have no thickness. But Faces have two sides Each side of a Face can have a different color or texture. When a set of polylines all fall in the same plane, SketchUpautomatically detects it and creates a Face. Faces can be dragged with Push/Pull tool to create solids.(Keep new project open)
Result of Cube Demo
About Push/Pull Push/Pull only works on Faces. When you Push/Pull a Face through a space, what SketchUp doesdepends on whether that space is empty or filled by material. Empty space will be filled with new material. Filled space will be emptied of material. Partially empty and partially filled space will be both filled andemptied. The exact details are controlled by the Inference Engine.
#10 SHCS Edges and Faces are sufficient to draw very complex parts.
Circle Demo Draw a 1.0” circle centered on the top of the cube. Use Tape Measure Tool to find center of cube. Draw circle. Type 0.5 (Radius) and Enter. Use Push/Pull to drag circle into cylinder. Type 2.0 to specify depth of hole and Enter.(Keep project open)
Result Circle Demo
Demo: Color and TexturePainting with Color Continue with result of Circle DemoSelect topOn Default Tray click on OutlinerScroll to MaterialsSelect ColorsSelect a colorSelect Paint BucketPaint selected facePainting with Texture Select a side faceOn Default TrayScroll to MaterialsSelect MetalSelect Metal Steel TexturedSelect Paint BucketPaint selected face
Result of Color/Texture Demo
Demo: Group and Explode Open ColorTexture Edit Select All Edit Make Group Look in Default Tray Rename Group Oops, left out other stuff. Select Object Right-Click Explode Look in Default Tray(Keep project open)
Result of Group/Explode Demo
Demo: Hide, Unhide, Undo, Redo Continue from Group/Explode DemoSelect a face.Right-Click HideSelect a lineRight-Click Hide Caution: Hide is next to Erase in the menu Mistakes can be reversed with Edit Undo A mistaken Undo can be reversed with Redo If you intend to click Hide but mistakenly click Erase and don’t realize it Edit Unhide All
Result of Hide, Unhide, Undo, Redo Demo
Demo: Orbit, Zoom, Pan, Zoom Extents Open ColorTextureOrbitZoomPanZoom Extents
Result of Orbit, Zoom, Pan, Zoom Extents Demo
Demo: Organizing a Complex ProjectInspect ProjectEdit a Group Open BestFrontRest1 What if you want to edit just one part? 128 Parts Click on part to select Window Model Info Statistics Entire Model Right-Click Edit Component View statistics Edit Close Group/Component Default Tray In Default Tray Scroll to top Right-Click BestFrontRest1 Select BestRifleRest1 Right-Click Expand All Zoom Extents Show nested components
Result of Organize Demo
Demo: Hide Some Parts On the Default TrayParts have been organized into Groups.Use Right-Click to select and hide Groups.Leave Clamping Assembly visible.Note icon on Clamping AssemblyClick on to expand Clamping Assembly.Groups can be made of Groups.Hide Clamping Mechanism Group.Expand Clamping Base Assembly Group.Hide everything except Base Part.Zoom Extents.Close Group (because we were editing)
Result of Hide Demo
Demo: Export a Picture How did I get the 2d picture of the part for Power Point?File Export 2D GraphicSupply directory and file name.Use JPG format.
Best Practices from Grouping and Visibility Completely draw every part.No missing lines.No missing faces.Set color by selecting whole group.Set texture by selecting whole group.Control visibility by group.
Demo: Standard Views, Scenes, AnimationStandard Scenes Open BestRifleRest1Select CameraSelect Standard ViewsSelect TopZoom ExtentsAdding a SceneAbout Animation I like to create scenesfor each of the standardviews. View Animation Add Scene Rename Scene Top Exclude from Animation Examine each sceneRun AnimationStop AnimationSet exportparameters Show how to exportanimation
Animation Demo Result (a movie)
Demo 12: Intersecting Objects Open Intersect Goal: drill a second hole perpendicular to the first. Two Groups Cube Cylinder Occupy same space but don’t intersect Select both groups Left-Click cube. Shift, Left-Click cylinderRight-Click Intersect Faces With SelectionExplode both GroupsErase unneeded lines and surfaces.Problem: circular intersection face on cube can’t be selected. Only the face of the cube canbe selected. Solution: redraw one arc line of the circle. Circular face can now be selected and deleted.
Intersect Demo Result
Demo: Smooth Lines, Smooth Object Open Smooth Select line, smooth it, Undo. If you do the same thing to every vertical line on the cylinder, youget cylinder two. Select third cylinder Soften/Smooth Edges
Smooth Demo Result
Demo: The trouble with circles (1) Open CircleTrouble 1 Draw Parallel lines along length ofcylinders. One pair defines a surface and the otherdoes not. Draw diagonal across missing surface. Any three points determine a plane. Proves that the four points do not lie in acommon plane. Zoom circles and note misalignment. Select Erase misaligned circle. When you draw a circle, make sure theradius line is parallel to one of the majoraxes (red, green, blue) if you can. Redraw 0.5 inch circle aligned to red axis. Redraw circle flank lines.
Demo: The Trouble with Circles (2) When you draw a circle, you specify a centerpoint and a radius. SketchUp also needs a plane to draw the circlein. The Inference Engine supplies the plane. When you draw a circle, carefully note theorientation of the circle. Make sure it is on theplane you want. If it is not, you will have to experiment with theorbit tool to get the Inference Engine to pickanother plane. When the center is not on some other plane, theInference Engine will pick a plane perpendicularto one of the major axes (red, green, blue). Open CircleTrouble 2 Draw a circle on each of the three planes.
Demo: The Trouble with Circles (3) Drawing a round hole in a circular object is difficult with SketchUp. When Sketchup draws a circle on the surface of a cylindrical object, it has to pickone of the flat faces of the cylinder as the plane on which to draw the circle. This can create trouble. Open CircleTrouble 3 The solution is to draw a plane exactly tangent to the cylinder at the center ofthe desired circle. SketchUp will use this plane to draw the circle on. Examine circle from end of cylinder. Unhide TangentSquare group. Draw circle 0.5 inch circle on tangent plane. Examine new circle from end of cylinder.
The trouble with circles (4) SketchUp doesn’t actually draw circles. What it does is draw polygons with enough equalsides that the polygon resembles a circle. You can set the number of sides of a circlepolygon to most any number you want. Click on the circle tool to get into circle mode. If the box at the lower right says “Sides”, youcan type your number anywhere and click Enter.Then draw your circle. If the box at the lower right says “Radius”, youcan type your number anywhere, followed by an“s” and click Enter. Then draw your circle. The more sides on each circle, the slowerSketchUp will run. 360 is an excessive number of sides. 24 (thedefault) is much more reasonable.
Demo: The First Rotation Method Open Rotation 1Select the GroupOrient group so left hexagon faces youFind center of left end of hex rod.Click on Rotate toolClick on center of hexagonMove cursor directly right and Left-Click to create ahandle point.Rotate the object counter-clockwise about 15 degrees.Type 15.0 and Click-Enter.Click ESC key and click on Select tool.Edit Delete GuidesEdit Select None
First Rotation Method Result
Demo: The Second Rotation Method Open Rotate 2 Select the object you want to rotate. Determine two points to serve as a rotation axis. Here thiswill be the far right and far left points on the facinghexagon. Click on the Rotation Tool to turn it on. Left-Click on the first point and hold the button down. Drag the cursor to the second point and let the button up. Move the cursor directly up and Left-Click to establish ahandle. Rotate counter-clockwise about 15.0 degrees. Type 15.0 and Click-Enter. Click ESC key and click on Select tool. Edit Select None
Second Rotation Method Result
Importing Projects into Projects Problem: Insert a #10 SHCS into a drilledand counter-bored hole. Solution: Import a set of #10 SHCS into theproject and maneuver one into position.
Demo: Import a SHCS and position it Open: Import File Import MachineScrew #10A Position cursor and Left-Click Select the screws. Right-Click Explode Select smallest screw Copy and Paste in Place Use Move tool to maneuver screwinto place.
Result of Import a SHCS Demo
Dimensioning Problem: How to add dimensioning to a project.Dimensioning tool not on upper menu.Available on Tools pulldown menu.Available on Left Column menu.
Demo: Add a dimension to a project Open: LatheAngleTool 2Left-Click on Dimension icon.Move to first point on line to be dimensioned, Left-Click.Move to second point on line to be dimensioned, Left-Click.Drag in direction you want annotation to lay and when satisfied,Left-Click.
Demo: Editing a Dimension A dimension is a third kind of object in addition to edges andfaces. Dimensions can be edited. SketchUp contains special editors forediting dimensions. Use Select tool to select a dimension: Left-Click. Right-Click on selected object to bring up special menu. Note how text behaves under Orbit tool. Text is a fourth kind of object.
Result of Dimension Demo
Follow Me Follow Me is a Sketchup tool that allows you to easily createcomplex drawings of things like pipelines. It starts with a polygon and a polyline that is perpendicular to theplane of the polygon. The polygon is then automatically moved along the polyline tocreate a solid object. Open PipeExtrude
Demo: Follow Me Open PipeExtrude Select everything with a box Unselect the circle by: Hold down Shift Left-Click on circle line Left-Click on circle face Left-Click on Follow Me Right-Click on the circle face
Result of Follow Me Demo
Yet Another Demo of Follow Me Open SpringEdit Select AllUnselect circleLeft-Click on Follow MeOoops!!!The spring polyline contains so many line segments that areso small relative to the circle that Sketchup cannot computethe Follow Me object.Hide the circleUnhide the square groupRepeat the Follow Me procedureSelect and Smooth
How’s That for a Spring?
3D Warehouse SketchUp contains an Internet link to the Trimble “3D Warehouse”.There are free projects out there you can copy.For example there are many metal lathes.I copied one for this presentation.
Metal Lathe from 3D Warehouse.
Extension Warehouse SketchUp contains an Internet link to the Trimble “ExtensionWarehouse”. An “Extension” is an extra bit of programmed functionality thatyou can download and add to SketchUp I have added extensions to my copy of SketchUp: Flattext – allows text printing on any surface in SketchUp. Curve Maker – draws different types of spiral curves. Bezier Curves – draws very smooth curved lines. Flattext cost 9 but, the other two were free.
Demo: Curve and Spiral Extensions Open: Alfano 1The background engraving is a demo by Sam Alfano.I captured it off YouTube and made a JPG file of it.I then Imported this file into SketchUp.Draw Bezier curve and edit it.Draw Spiral curve and edit it.
Results of Curve and Spiral demo
SketchUp Bugs SketchUp is a large complex program. All such programs contain bugs. The problems I have seen have involved a lot of move, rotate andresize operations. SketchUp can lock up and no longer respond to commands. Save your work. Close and restart SketchUp.
Lest we forgetSketchUp contains and works with four basic objects:1. Edges (Lines)2. Faces3. Dimensions4. TextFundamentally, SketchUp is a simple-minded system.
Access to Sketchup Tools and Options1.2.3.4.Top menu of pulldowns.Top and left side icon bars.Right side Tray scroll list of options for tools.Right-Click on a selected object will reveal popup menu.
Conclusions about SketchUp FreeRelatively easy to learnSmart software that can really help you out (inference engine)A real 3D drawing tool but, not really a mechanical drawing toolGood control of object visibilityGood organizational tools (groups and groups within groups)Extra functionality available as extensionsExport 2D drawingsAnimationsOwned and supported by a major corporation. In 5 years time SketchUp is stillgoing to be a viable product being developed and supported.
The End
Learning SketchUp Many YouTube tutorial videos (mostly about architecture). One book: SketchUp 2014 for Dummies Mostly about architecture. Instructions often leave out critical information. Not up to date with most recent SketchUp (2017) Still, is a fair study aide and reference.