Transcription
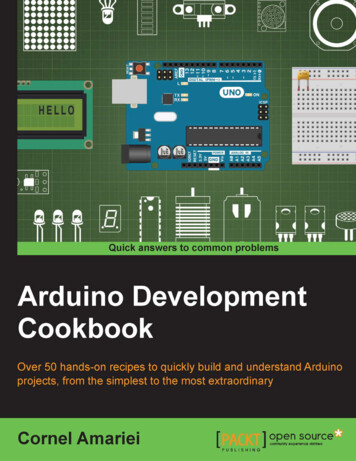
Arduino DevelopmentCookbookOver 50 hands-on recipes to quickly build andunderstand Arduino projects, from the simplestto the most extraordinaryCornel AmarieiBIRMINGHAM - MUMBAI
Arduino Development CookbookCopyright 2015 Packt PublishingAll rights reserved. No part of this book may be reproduced, stored in a retrieval system, ortransmitted in any form or by any means, without the prior written permission of the publisher,except in the case of brief quotations embedded in critical articles or reviews.Every effort has been made in the preparation of this book to ensure the accuracy of theinformation presented. However, the information contained in this book is sold withoutwarranty, either express or implied. Neither the author, nor Packt Publishing, and its dealersand distributors will be held liable for any damages caused or alleged to be caused directlyor indirectly by this book.Packt Publishing has endeavored to provide trademark information about all of the companiesand products mentioned in this book by the appropriate use of capitals. However, PacktPublishing cannot guarantee the accuracy of this information.First published: April 2015Production reference: 1170415Published by Packt Publishing Ltd.Livery Place35 Livery StreetBirmingham B3 2PB, UK.ISBN 978-1-78398-294-3www.packtpub.comCover Image by Cornel Amariei (cornelam@gmail.com)
CreditsAuthorCornel AmarieiReviewersProject CoordinatorJudie JoseProofreadersSimone BianchiSimran BhogalWilson da Rocha FrançaStephen CopestakeVincent GijsenFrancis PereaCommissioning EditorEdward GordonAcquisition EditorIndexerRekha NairGraphicsLaurentiu MihailescuAbhinash SahuSam WoodProduction CoordinatorContent Development EditorKomal RamchandaniRitika SinghCover WorkTechnical EditorVivek AroraCopy EditorsCharlotte CarneiroPuja LalwaniKomal Ramchandani
About the AuthorCornel Amariei is a Romanian inventor and entrepreneur in the fields of Robotics and3D printing. He has been working with the Arduino platform since its early days in 2007. Hispast experience involves large cargo gamma ray scanning robotics, ATM security systems,and blind assisting devices. In his spare time, he is a performing musician playing multipleinstruments—predominately the guitar. He is also a swimmer, water polo player,and photographer.Over the years, he has built hundreds of Arduino projects, ranging from flying Quadcoptersto levitating magnets and underwater robots. Currently, he splits his time between doing hisundergraduate studies in electric engineering and computer science at Jacobs Universityin Bremen, Germany, and his start-ups and research and development job.I would like to thank my parents: my mother, Cristina, and my father, Eugen,for buying me my first technology book 18 years ago. I don't know whetherthis was the intended path they had in mind for me, but considering theamount of support they offered during the writing of this book, I believenow it is.I would also like to thank my friends, colleagues, and business partnersfor accepting my new project and providing me with the time required tocomplete it, even if this meant more work for them.Finally, I would like to thank Packt Publishing for offering me the chanceto write this book and for handling all the delays I brought to the project,as most of this book was written in transit, short breaks, late nights, andearly mornings.Thank you.
About the ReviewersSimone Bianchi lives in Italy, where he got a degree in electronic engineering.Now he works full time for a software house as a Java developer. In his spare time, he likesto feed his curious side by exploring other topics so that he can develop components for theTalend platform, an app for the Android system, delight himself by building IoT projects usingdifferent micro controllers (such as the Arduino and Spark Core) with the help of his 6-year-oldnephew, Leonardo, or simply learn new things such as AngularJS or 3D graphics.I'd like to thank Packt Publishing for giving me the opportunity to review theirbook again after Talend for Big Data and Arduino Android Blueprints, and Ihope I have contributed to making this your favorite book companion duringyour Arduino projects.Leo, here is your project book.Wilson da Rocha França is a system architect in a leading online retail company in LatinAmerica. He is an IT professional, computer science passionate, and an open source enthusiast;he graduated with a university degree from Centro Federal de Educação Tecnológica CelsoSuckow da Fonseca, Rio de Janeiro, Brazil, in 2005 and also holds a master of businessadministration degree from Universidade Federal do Rio de Janeiro in 2010.He is passionate about e-commerce and the Web; he had the opportunity to work not only inonline retail, but also in other markets, such as comparison shopping and online classifieds.He has dedicated most of his time to being a Java web developer.
He is currently working on a MongoDB book and had also worked as a reviewer on InstantVarnish Cache How-to, Packt Publishing.First and foremost, I would like to thank my wife, Christiane, for standing byme. I would also like to express my special gratitude to Packt Publishing forgiving me such attention and time. My thanks and appreciation also go tomy family and people who have helped me out with their abilities.Vincent Gijsen is an all-rounder. With a bachelor's in embedded systems and a master'sin information science, he has also worked in a big data start-up and is currently working asa security officer and cyber security consultant regarding vital infrastructure. He has been areviewer on Storm Blueprints: Patterns for Distributed Real-time Computation, Packt Publishing.He has a broad range of interests. In his spare time, he likes to fiddle with lasers,microcontrollers, and other related electronics, hence this review. He hopes you likethis book as much as he enjoyed reviewing it.Francis Perea is a professional education professor at Consejería de Educación de laJunta de Andalucía in Spain with more than 14 years of experience.He specializes in system administration, web development, and content managementsystems. In his spare time, he works as a freelancer and collaborates, among others,with ñ multimedia, a little design studio in Córdoba working as a system administratorand main web developer.He has also collaborated as a technical reviewer for SketchUp 2013 for ArchitecturalVisualization, Arduino Home Automation, and Internet of Things with the Arduino Yún,by Packt Publishing.When not sitting in front of a computer or tinkering in his workshop, he can be foundmountain biking or kitesurfing or as a beekeeper taking care of his hives in AxarquíaCounty, where he lives.I would like to thank my wife, Salomé, and our three kids, Paula, Álvaro,and Javi, for all the support they give me even when we all are busy.There are no words to express my gratitude.I would also like to thank my colleagues in ñ multimedia and my studentsfor being patient. The need to be at the level you demand is what keepsme going forward.
www.PacktPub.comSupport files, eBooks, discount offers, and moreFor support files and downloads related to your book, please visit www.PacktPub.com.Did you know that Packt offers eBook versions of every book published, with PDF and ePubfiles available? You can upgrade to the eBook version at www.PacktPub.com and as a printbook customer, you are entitled to a discount on the eBook copy. Get in touch with us atservice@packtpub.com for more details.At www.PacktPub.com, you can also read a collection of free technical articles, sign upfor a range of free newsletters and receive exclusive discounts and offers on Packt booksand ion/packtlibDo you need instant solutions to your IT questions? PacktLib is Packt's online digital booklibrary. Here, you can search, access, and read Packt's entire library of books.Why Subscribe?ffFully searchable across every book published by PacktffCopy and paste, print, and bookmark contentffOn demand and accessible via a web browserFree Access for Packt account holdersIf you have an account with Packt at www.PacktPub.com, you can use this to accessPacktLib today and view 9 entirely free books. Simply use your login credentials forimmediate access.
Table of ContentsPrefaceChapter 1: Power on – Arduino Basicsv1IntroductionDownloading the Arduino softwareConnecting ArduinoUploading code to ArduinoLearning Arduino code basicsCode basics: Arduino CCode Basics – Arduino pins1246789Chapter 2: Blinking LEDs13Chapter 3: Working with Buttons41IntroductionBlinking LED without delay()Connecting an external LEDFading the external LEDRGB LEDLED bar graphThe 7-segment display13131620243035IntroductionConnecting a buttonButton with no resistorThe toggle switchButton to serialButton debouncing1,000 buttons to 1 pinButton multiplexing4141475155576166i
Table of ContentsChapter 4: SensorsIntroductionSimple sensor – potentiometerTemperature sensorDetecting motion – PIR sensorMeasuring distance – infrared and ultrasonicNoise reductionAccelerometerLocalization – GPS717172768084879296Chapter 5: Motor Control101Chapter 6: More Output Devices141Chapter 7: Digital Communication with Arduino161IntroductionControlling small motorsControlling motors with transistorsControlling speed with PWMSpinning motors both waysServo motorStepper motorBipolar stepper motorsBrushless motorsIntroductionCreating soundTransistor driverRelay driverOptocouplers/OptoisolatorsMore outputs – shift registersIntroductionSerial outputControlling the Arduino over serialSoftware serial and UART between ArduinosWireless serialI2C between ArduinosSD cardsLCD character 1147151153156161162164167172175180183187
Table of ContentsChapter 8: Hacking193Appendix: Electronics – the Basics209Index217IntroductionMore digital pinsFaster PWMStoring data internally – EEPROMTiming Arduino codeExternal interruptsWorking of electric currentOhm's lawDiodes and LEDsWorking with breadboards193193195199201202209210213215iii
PrefaceThe year was 2005 when a few guys from the Interaction Design Institute Ivrea, Italy wantedto create a simple microcontroller board for their students—a board that was more modern,cheaper, and easier to use than the designs available at that moment. And they named itArduino, after the local bar, which was named after King Arduino.The initial version was bulky, complicated to connect, and lacked USB, and other featurescommonly found these days, but the board had potential. Now, Arduino is renowned for itssimplicity and ease of use. Children are building projects using Arduino that only10 years ago would have required engineers.The whole design is open sourced and clones of the board can be found everywhere inthe world. There is no known number of Arduino boards but it is in the range of hundredsof thousands or even more. Everybody can design their own custom implementation ofthe standard invented in 2005.Today, Arduino has been to every corner of the planet and even above it. It has fueled otherrevolutions such as the maker, the open source and 3D printing movements. It is continuouslyupgraded to be faster and handle more. But what is Arduino?Arduino is a microcontroller board, designed to connect to electronics and control them.We can write code for the Arduino that will get data from the environment, and makedecisions and take actions based on the data. Robots, 3D printers, toys, even toastersmay have an Arduino inside, powering up all the interaction.This book contains recipes that show how to implement key topics of the Arduino, startingfrom basic interaction with buttons and LEDs, going up to interaction with the GlobalPositioning System (GPS), making music, or communicating with the Internet. It is intendedfor programming or electronics enthusiasts who want to combine the best of both worlds tobuild interactive projects.v
PrefaceWhat this book coversChapter 1, Power on – Arduino Basics, will teach you to connect, install, and transfer thefirst program to the Arduino board. This chapter covers the basics of how to use the Arduinoboard, the types of boards, and how to use the Arduino IDE.Chapter 2, Blinking LEDs, covers one of the basic uses of Arduino, controlling LEDs.Various types and implementations have been covered, RGB LEDs, blinking and fadingLEDs, 7-segment displays, or more advanced control techniques.Chapter 3, Working with Buttons, will show you how to detect and use buttons as a keyinput method. Several types of buttons have been covered along with solutions to themost common button implementation issues. Also, ways of connecting more buttonsthan available digital pins have been shown.Chapter 4, Sensors, covers the most important sensors that can be connected to theArduino. Probably the most important thing for Arduino is to be able to read as manyparameters from the environment as possible. Using sensors, it can read distance,temperature, light intensity, or even global localization.Chapter 5, Motor Control, will show you how to connect and control multiple types of motors.Making things move is incredibly easy using motors and Arduino. Small and large, brushlessand servos motor along with speed and direction control, have all been covered here.Chapter 6, More Output Devices, talks about getting more out of Arduino. This chaptercovers how to control different loads, how to make sound, how to isolate and protect theboard, and how to command more outputs.Chapter 7, Digital Communication with Arduino, covers several communication protocolssuch as UART, I2C, Serial, and Ethernet, to get the most out of the communication interfacesavailable on Arduino. Arduino can communicate with other boards, computers, and eventhe Internet.Chapter 8, Hacking, talks about the small hacks that can help an Arduino design go further.It includes speeding up the PWM, reacting to external interrupts, or even storing data insidethe Arduino forever.Appendix, Electronics – the Basics, covers the basics of electronics, such as breadboards,Ohm's law, and so on.What you need for this bookIn general, for the recipes in this book you will need the following items:ffviAn Arduino board
PrefaceffA USB cable to connect the Arduino to the computerffA breadboard with a jumper wire kitffA general set of resistors with values between 100 ohm and 10,000 ohmffAn assortment of general LEDsffA few push buttons and switchesff1N4148 and 1N4001/1N4007 diodesSome of the more focused recipes require specific hardware components in order toimplement them. This is a list of specific components required per chapter:Chapter 2, Blinking LEDs:ffRGB LEDff7-segment display with at least one digitffStandard multi-segment bar graphChapter 3, Working with Buttons:ff4051 or equivalent multiplexer Integrated Circuit (IC)Chapter 4, Sensors:ff10K or other potentiometerffLM35 or TMP36 temperature sensor Integrated Circuit (IC)ffPIR motion sensorffGas sensors such as the MQ-3, MQ-4, MQ-5, and others in the seriesffSharp IR sensor such as the GP2Y0A21YKffUltrasonic sensor such as the MaxSonar EZ series or similarffSimple accelerometer breakout such as the ADXL335ffStandard I2CffStandard GPS receiver with UART communicationff4051 or equivalent multiplexer Integrated Circuit (IC)Chapter 5, Motor Control:ffSmall vibrating motorffStandard NPN transistors such as the BC547, 2N3905, or the TIP120ffStandard Logic Level N Channel MOSFETs such as the IRF510 or IRF520ffArduino motor shieldvii
PrefaceffStandard RC servo motorffULN2003 or ULN2004 Darlington Array ICffSmall bipolar stepper motorffBrushless motor with suited ESCChapter 6, More Output Devices:ff8-ohm small speakerffStandard NPN transistors such as the BC547, 2N3905, or the TIP120ffGeneral 5V relayff1.5–3.0 V battery with wire terminalsffGeneral optocoupler/optoisolator such as the TLP621, 4N35, or LTV-816ffA 74HC595 shift registerChapter 7, Digital Communication with Arduino:ffAnother Arduino boardffRF Link Transmitter and Receiver (434/315 Mhz) or equivalentffArduino compatbile Ethernet ShieldffLCD character DisplayffArduino compatible SD shieldChapter 8, Hacking:ffA DC motorffA resistor between 220 ohm and 4,700 ohmffA standard NPN transistor (BC547, 2N3904, N2222A, TIP120) or a logic levelcompatible MOSFET (IRF510, IRF520)ffA standard diode (1N4148, 1N4001, 1N4007)Who this book is forIf you want to build programming and electronics projects that interact with the environment,this book will offer you dozens of recipes to guide you through all the major applications ofthe Arduino platform. It is intended for programming or electronics enthusiasts who want tocombine the best of both worlds to build interactive projects.viii
PrefaceSectionsThis book contains the following sections:Getting readyThis section tells us what to expect in the recipe, and describes how to set up any software orany preliminary settings needed for the recipe.How to do it This section characterizes the steps to be followed for "cooking" the recipe.How it works This section usually consists of a brief and detailed explanation of what happened in theprevious section.There's more It consists of additional information about the recipe in order to make the reader moreanxious about the recipe.See alsoThis section may contain references to the recipe.ConventionsIn this book, you will find a number of styles of text that distinguish between different kinds ofinformation. Here are some examples of these styles, and an explanation of their meaning.Code words in text, database table names, folder names, filenames, file extensions,pathnames, dummy URLs, user input, and Twitter handles are shown as follows: "In theloop() function, we first print the half Christmas tree."A block of code is set as follows:if (logFile) {logFile.print(val1); // Write first valuelogFile.print(" "); // Write a spaceix
PrefacelogFile.println(val2); // Write second valuelogFile.close(); // close the file}New terms and important words are shown in bold. Words that you see on the screen, inmenus or dialog boxes for example, appear in the text like this: " To easily find information abouta card, run the Arduino IDE built-in example found under File Examples SD CardInfo."Warnings or important notes appear in a box like this.Tips and tricks appear like this.Reader feedbackFeedback from our readers is always welcome. Let us know what you think about this book—what you liked or may have disliked. Reader feedback is important for us to develop titles thatyou really get the most out of.To send us general feedback, simply send an e-mail to feedback@packtpub.com, andmention the book title via the subject of your message.If there is a topic that you have expertise in and you are interested in either writing orcontributing to a book, see our author guide on www.packtpub.com/authors.Customer supportNow that you are the proud owner of a Packt book, we have a number of things to help you toget the most from your purchase.Downloading the example codeYou can download the example code files from your account at http://www.packtpub.comfor all the Packt Publishing books you have purchased. If you purchased this book elsewhere,you can visit http://www.packtpub.com/support and register to have the files e-maileddirectly to you.x
PrefaceDownloading the color images of this bookWe also provide you with a PDF file that has color images of the screenshots/diagrams usedin this book. The color images will help you better understand the changes in the output. Youcan download this file from oads/2943OS ColoredImages.pdf.ErrataAlthough we have taken every care to ensure the accuracy of our content, mistakes do happen.If you find a mistake in one of our books—maybe a mistake in the text or the code—we would begrateful if you could report this to us. By doing so, you can save other readers from frustrationand help us improve subsequent versions of this book. If you find any errata, please report themby visiting http://www.packtpub.com/submit-errata, selecting your book, clicking onthe Errata Submission Form link, and entering the details of your errata. Once your errata areverified, your submission will be accepted and the errata will be uploaded to our website oradded to any list of existing errata under the Errata section of that title.To view the previously submitted errata, go to https://www.packtpub.com/books/content/support and enter the name of the book in the search field. The requiredinformation will appear under the Errata section.PiracyPiracy of copyrighted material on the Internet is an ongoing problem across all media.At Packt, we take the protection of our copyright and licenses very seriously. If you comeacross any illegal copies of our works in any form on the Internet, please provide us withthe location address or website name immediately so that we can pursue a remedy.Please contact us at copyright@packtpub.com with a link to the suspectedpirated material.We appreciate your help in protecting our authors and our ability to bring youvaluable content.QuestionsIf you have a problem with any aspect of this book, you can contact us at questions@packtpub.com, and we will do our best to address the problem.xi
1Power on – ArduinoBasicsIn this chapter, we will cover the following recipes:ffDownloading the Arduino softwareffConnecting ArduinoffUploading code to ArduinoffLearning Arduino code basicsffCode basics: Arduino CffCode basics: Arduino PinsIntroductionWhen we have an idea, we take a pen and we sketch it down on a piece of paper. Imagineif we could build things that interact with the environment just as easily. This is where theArduino platform comes into play.1
Power on – Arduino BasicsArduino is an open source family of electronic microprocessor boards that we can easilyprogram to understand and interact with the environment. Over the years, Arduino has becomethe standard for building electronics projects. Arduino has been sent into space to run microsatellites; it has been sent to the bottom of the ocean to control small robotic submersibles;and now, Arduino has arrived for you. Let's explore the limitless world of Arduino.If you want to go through the basics of electronics before starting with the book, you canrefer to the Appendix, Electronics – the Basics.Downloading the Arduino softwareThe first thing we need is the Arduino Integrated Development Environment (IDE). One ofthe best parts about Arduino is that the software in which we need to program the boards isfree and open source. The Arduino IDE is compatible with Windows, Mac OS X, and Linux.Getting readyWe only need one thing to complete this recipe—a computer connected to the Internet.How to do it Follow these simple steps:1. Visit the Arduino website at http://arduino.cc/.2. In the main menu, go to the Download section.3. Select your operating system and download the latest stable release of theArduino software. At the time of writing, the latest stable version compatiblewith all standard boards was version 1.0.5.4. After it downloads, install the Arduino software.There's moreNow that we have the Arduino IDE installed, let's familiarize ourselves with the user interface.2
Chapter 1Here is a screenshot of the Arduino software running on Windows. It looks the same on Macand Linux, since it's all written in Java.First, we will discuss the Tool Bar. In the Tool Bar, we can find the most used buttons:ButtonDescriptionThe Verify button compiles the code and checks it for errors.The Upload button compiles the code and, if there is no error in the code,uploads it to the Arduino board.The New button starts a new program. In the Arduino world, programs arecalled sketches.The Open button simply allows us to open a saved sketch.The Save button saves the current sketch.This button opens the Serial Monitor window that allows us to communicatewith the Arduino board. It is extremely helpful when we debug a program.More information can be found in the Serial output recipe in Chapter 7,Digital Communication with Arduino3
Power on – Arduino BasicsIn the Sketch tab, we can see all the opened Arduino Sketches. This comes handy when wewant to work on multiple programs at the same time.The Code Space area is where all the magic happens. That's where we write the codethat powers satellites and cat food dispensers. It's a code editor with automatic syntaxhighlighting and autoarranging.The Status Display area indicates all the bad stuff. Whenever there are errors in the code, theywill be displayed there. It also displays errors in the connection with the board. The only goodthing it can display is that the code has been successfully uploaded to the Arduino board.Additional functionality can be found in the main menu bar. Here, we have the classic Filemenu where we have Save, Open, Close, and also some examples. In the following recipes,more will be discussed about the menu bar components. A nice trick worth sharing is in theTools menu—the Auto Format tool will format the code to look professional and clean.See alsoConsider the following recipes to better understand how to use the Arduinosoftware environment:ffThe Connecting Arduino recipeffThe Uploading code to Arduino recipeConnecting ArduinoBefore we can start writing code and making things move, we first need to connect theArduino board to our computer. The Arduino board is compatible with Mac, Windows, andLinux. Here we will discuss how to connect and install the drivers.Getting readyThe following are the ingredients required for this recipe:ffAn Arduino board connected to the computer via USBffThe Arduino IDE downloaded and installedHow to do it This recipe is split in two, as the steps for Mac and Windows are slightly different.Mac OS XFollow these steps to connect Arduino to Mac OS X:4
Chapter 11. Connect the Arduino to the computer using a USB cable. If everything is properlyconnected, the green light will turn and stay on.2. If you have an Arduino Uno, Leonardo, Due, or Mega 2560, no drivers are neededand the board is ready to go.3. If you're using an older Arduino board such as the Duemilanove, Diecimila, orPro Mini, you will require FTDI drivers. To obtain them, you can visit http://www.ftdichip.com/Drivers/VCP.htm and download the latest. After downloadingthem, click on the installer and follow the instructions. Finally, reboot the computerand the Arduino board will be installed.WindowsThe following steps are required for the Uno, Mega 2560, Leonardo, and Due boards whenconnecting Arduino to Windows:1. Connect the Arduino to the computer using a USB cable. If everything is properlyconnected, the green light will turn on and stay on.2. Windows will begin its driver installation process and fail. Click the Start button andopen the Control Panel. There, navigate to System and then Device Manager.3. In the Device Manager window, search for Ports (COM & LPT) and look for a portwith a name similar to your board. For the Arduino Uno, the port should be namedArduino UNO . If there is no such title under Ports, look in Other Devices for anUnknown Device. That will be your Arduino board.4. Right-click on the Arduino Board in Device Manager and choose Update DriverSoftware. Next, select Browse my computer for driver software.5. This will require the path to the Arduino driver. This can be found in the Arduinoinstallation folder in Program Files, in the drivers folder. It is named Arduino.inf. Select the file and Windows will finish installing the driver.These are the steps for the older FTDI-based Duemilanove, Diecimila, Nano, and Mega boards:1. Connect the Arduino to the computer using a USB cable. The green light will turn onif everything is connected properly.2. In Windows Vista and higher, the drivers will install automatically and the board willbe ready for use.3. If the driver installation fails, navigate to Device Manager in a similar fashion as forthe newer boards and, under Ports (COM & LPT), search for a USB Serial Converteror similar. Choose Update Driver Software, select Browse my computer for driversoftware, and then select the FTDI driver folder from the Arduino installationfolder, in the drivers folder. After selection, click on Next and Windows will finishinstalling the Arduino board.5
Power on – Arduino BasicsSee alsoThe procedure for an Ubuntu Linux computer is at g code to ArduinoIt's time to power on the Arduino board and make it do something. In this recipe, we willconnect the Arduino to the computer and upload an example sketch from the Arduino IDE.Getting readyTo execute this recipe, the following are the components required:ffA computer with the Arduino IDE installedffAn Arduino board connected to the computer via USBHow to do it Follow these steps:1. Connect the Arduino to the computer using a USB cable. If everything is properlyconnected, the green LED light will turn on.2. If this is the first time the Arduino has been connected to the computer, driverinstallation might be required. Please follow the Connecting Arduino recipe toproperly set up the Arduino board.3. Start the Arduino IDE and, in the Menu Bar, go to File Examples 01. Basicsand click on the Blink example. This will load the Blink sketch.4. Make sure your Arduino board is selected in the Board menu. The menu can befound in the Menu bar in Tools Board.5. We need to check whether the correct serial port is selected. Under Tools SerialPort, we can see all available serial port devices connected to the computer. OnWindows, each port will be labeled as COM followed by a number. Usually, Arduinoinstalls on COM3, but not always. A fast way to check which serial port the Arduinois connected to is to unplug the cable and see which COM port disappears inthe menu. That will be our Arduino board. In the Mac, the port should be calledsomething be
But what is Arduino? Arduino is a microcontroller board, designed to connect to electronics and control them. We can write code for the Arduino that will get data from the environment, and make decisions and take actions based on the data. Robots, 3D printers, toys, even toasters may have an
