Transcription
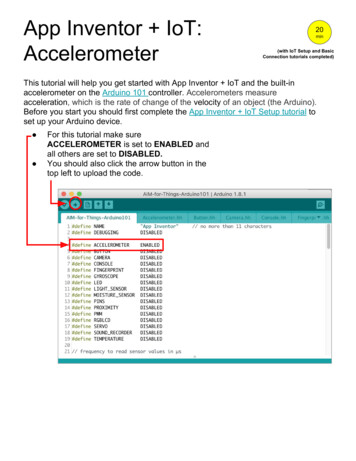
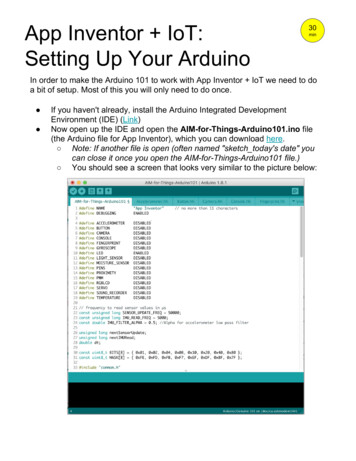
App Inventor IoT:Setting Up Your Arduino30minIn order to make the Arduino 101 to work with App Inventor IoT we need to doa bit of setup. Most of this you will only need to do once. If you haven't already, install the Arduino Integrated DevelopmentEnvironment (IDE) (Link)Now open up the IDE and open the AIM-for-Things-Arduino101.ino file(the Arduino file for App Inventor), which you can download here. Note: If another file is open (often named "sketch today's date" youcan close it once you open the AIM-for-Things-Arduino101 file.) You should see a screen that looks very similar to the picture below:
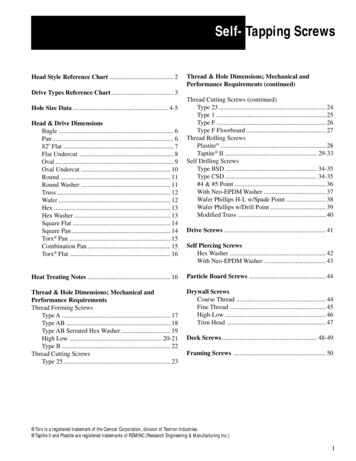
Now we're going to install some libraries that are necessary to run Arduino with AppInventor. Note: While you might not need these libraries for every project they are a goodbaseline and are required for the Healthy Plant App Click on the Sketch dropdown menu, hover over Include Library, and thenselect Manage LibrariesIn Filter your search. type "DHT-sensor-library" and click Install.
Now, let's do the same for “Adafruit Unified Sensor” (you might need to scrolldown to find the right one)Getting the Grove LCD RGB Backlight working is a bit different. First you need to download the library file here to your computer. In the Arduino IDE menu, click onSketch Include Library Add .ZIP Library Find the file on your computer and upload it
To confirm the library was successfully installed click back to manage libraries:Sketch Include Library Manage Libraries In the search bar type in "Grove LCD" You should see "Grove LCD RGB Backlight-master" as InstalledNow, if you haven't already, you should now plug in your Arduino to your computer.
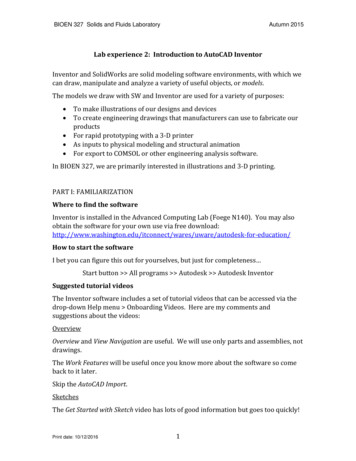
Next, you need to select the correct Arduino board (Arduino/Genuino 101). Under the Tools menu go to the Board sub-menu. At the bottom if you see"Arduino/Genuino 101" then select it. If not, follow the steps below.If you don't see the Arduino/Genuino 101, select Board Manager from the samesub-menu mentioned above.
In the search bar, type "101" and then select the "Intel Curie Board by Intel" Click on the "Select version" dropdown, and select 1.0.7 Note: DO NOT use later versions of the firmware Click on "Install"Next we need to select the port that the Arduino IDE (programming environment)will use to talk to the Arduino. First, make sure the Arduino is plugged into your computer. Under the Tools menu, select the "Port" sub-menu For Macs, under the "Port" sub-menu, you should see an option that startswith: /dev/cu.usbmodem For PC computers, you should see an option that starts with: COMX (Arduino/Genuino 101) with X being some number from 1-8 Select this option Note: It sometimes takes a minute after you plug in your Arduino forthe Port to show up under the submenu
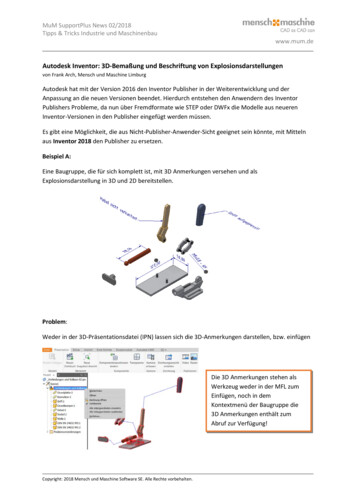
To run the Arduino program we need to send it to the board. To do this, click onthe arrow button in the top left corner of the program window.Once you have sent the code to the Arduino board, your App Inventor app caninteract with the Arduino. Follow any of the How To’s to make an app to controlsensors on your board.
Next, you need to select the correct Arduino board (Arduino/Genuino 101). Under the Tools menu go to the Board sub-menu. At the bottom if you see "Arduino/Genuino 101" then select it. If not, follow the steps below. If you don't see the Arduino/Genuino 101, sel