Transcription
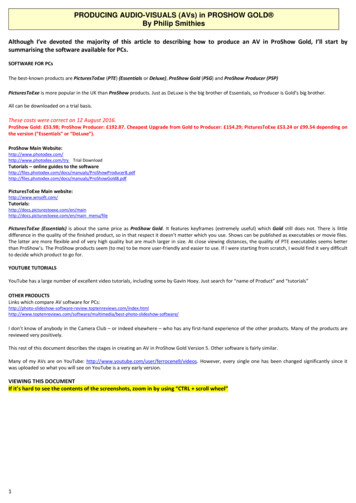
PRODUCING AUDIO-VISUALS (AVs) in PROSHOW GOLD By Philip SmithiesAlthough I’ve devoted the majority of this article to describing how to produce an AV in ProShow Gold, I’ll start bysummarising the software available for PCs.SOFTWARE FOR PCsThe best-known products are PicturesToExe (PTE) (Essentials or Deluxe), ProShow Gold (PSG) and ProShow Producer (PSP)PicturesToExe is more popular in the UK than ProShow products. Just as DeLuxe is the big brother of Essentials, so Producer is Gold’s big brother.All can be downloaded on a trial basis.These costs were correct on 12 August 2016.ProShow Gold: 53.98; ProShow Producer: 192.87. Cheapest Upgrade from Gold to Producer: 154.29; PicturesToExe 53.24 or 99.54 depending onthe version (“Essentials” or “DeLuxe”).ProShow Main x.com/try Trial DownloadTutorials – online guides to the nuals/ProShowGold8.pdfPicturesToExe Main xe.com/en/main menu/filePicturesToExe (Essentials) is about the same price as ProShow Gold. It features keyframes (extremely useful) which Gold still does not. There is littledifference in the quality of the finished product, so in that respect it doesn’t matter which you use. Shows can be published as executables or movie files.The latter are more flexible and of very high quality but are much larger in size. At close viewing distances, the quality of PTE executables seems betterthan ProShow’s. The ProShow products seem (to me) to be more user-friendly and easier to use. If I were starting from scratch, I would find it very difficultto decide which product to go for.YOUTUBE TUTORIALSYouTube has a large number of excellent video tutorials, including some by Gavin Hoey. Just search for “name of Product” and “tutorials”OTHER PRODUCTSLinks which compare AV software for I don’t know of anybody in the Camera Club – or indeed elsewhere – who has any first-hand experience of the other products. Many of the products arereviewed very positively.This rest of this document describes the stages in creating an AV in ProShow Gold Version 5. Other software is fairly similar.Many of my AVs are on YouTube: http://www.youtube.com/user/ferrocene9/videos. However, every single one has been changed significantly since itwas uploaded so what you will see on YouTube is a very early version.VIEWING THIS DOCUMENTIf it’s hard to see the contents of the screenshots, zoom in by using “CTRL scroll wheel”1
Important note: This guide was written for Versions 4 and 5. The current release is Version 8 but the basics remain the same.SETTING THE SHOW PARAMETERSFIG 013 Create a title (this is NOT theClick on Show Show SettingsThe “Show Settings” Dialogue Box appears.1 Change these values to “0”2 Untick this box (to prevent the irritatinghatched borders from appearing (shownin a few screenshots but removed frommany).same as the filename – although itcan be – and may be changed at anytime)4 Decide on the *Aspect Ratio(4:3, 16:9 or custom)5 No need for a thumbnailThen press “OK” at the bottomright.Note: sometimes the “New Empty Show” Boxappears when ProShow is opened. Untick the“Show at Start-up” box and close.*The Aspect Ratio used by the club’sprojector is 4:3 but most monitors andmany projectors are 16:9. Most of myAVs use the 16:9 ratio. Either ratio canbe played on any computer. If, forexample, you played a 16:9 show on a4:3 monitor, there would be blackspaces at the top. You can change theaspect ratio at any time, but you wouldhave to make some adjustments to theimages.You are now ready to create the show.OPENING SCREENFIG 02The opening screen resembles this:Navigate to the relevant folder(s)to access the images you’ll beusingThe “Preview Screen”Timeline / slide listDefault is “Slide List” tab which isgenerally more usefulClick and drag at these points if you wish to resize the main windows:Then click “Save” (CTRL S).Choose a file name and save it in the appropriate folder. The file extension will be .psh. Thename of the show will now appear at the very top of the screen. Note: you can have different titles (Fig 01.3) and file names.FIG 03See section on “FILE TYPES” and “IMAGE SIZES” on page 14.2
SAVING and STORING PROSHOW FILESI suggest that you create a new folder (with a shortcut on the desktop and/or taskbar) so that everything is stored and saved in the sameplace. This will make organisation so much easier.No matter what software you use, if you rename the images you use, or move them to different folders, you be told that the files can’t befound. You will be asked if you want to search for these files. Tick the “Yes” box that appears and follow the on-screen instructions.However, please note that if you rename images (rather than just move them), the software – understandably – will never find them.Save your work regularly.PSG is fairly stable but it does have its uncooperative moments. Incidentally, you can UNDO beyond the last save – in fact, back to the stateof the show when it was opened. Unfortunately, there is no “Revert” option.IF IN DOUBT A basic rule for most Windows programmes: if in doubt, RIGHT-click to bring up a context menu.PREFERENCES / CUSTOMISING YOUR SHOWSAt some stage, it is useful to go to Edit Preferences to customise your shows e.g. set up standard default times, choose screen colours,etc.THE WIZARDNote: You can use the “Wizard” Key to create a very basic AV. See Appendix 1.PREPARING THE SHOW – ADDING SLIDESImages can be in .jpg, .tiff, .gif, .bmp or .png format.FIGs 04, 05, 06Right-clickfor optionsOPTIONAL: Right-click here and select“Insert” Blank Slide” from drop-downlist (or ALT B). A blank slide at beginning(and end) ensures smooth entry into (andexit from) show. I set the time of theblank slides to 0.25 secondsNavigate to the relevant folder – and drag the first slide in (alternatively, just doubleclick the slide). Add the rest of the slides (singly or in multiple).Images can be added at any time and to anywhere in show. PSG will put a green tickand number in the File List by each picture that’s been added to the show. Your screenwill resemble Fig 07. Clicking on an image in either the timeline (the “thumbnail”) or filelist will bring it up on the main (Preview) screen.The timings in Fig 6 Slide 2 are the default settings that I use for every slide. You canchange all defaults and lots more besides in Edit PreferencesYou can also drag in slides directly from Windows Explorer (e.g. from “My Pictures”)3You can change theslidetimesandtransition times byclickingonthenumbers and typing innewones.Everyadditional slide in theshow you add willhave the same timesas the one before itbut times can bechanged at any time.
FIG 07Whenever you want to see what the show lookslike, simply click the “Play Button”To toggle between full-screen and preview screen: click “ALT ENTER” or click( ESC to cancel)Drag along either of these two bars to see aspeeded-up versionA slide can be repositioned by clicking it and moving it using the left ( ) and right ( ) arrows on the keyboard (below the “K” and “L” keys).To select more than one slide, use the standard Windows techniques: “CLICK” on the first and then “CTRL click” to select additional slides “CLICK” on the first slide and then “SHIFT click” on the final slideStandard useful shortcuts are CTRL X/C to cut/copy and CTRL V to paste. The image(s) will be pasted before the image you click on.Insert a blank slide at the end if necessary.ESSENTIAL SLIDE ADJUSTMENTSDouble-click on the slide thumbnail at the bottom of the screen (#5 in this case) to be modified and the “Slide Options” dialogue box, withits three tabs, appears.FIGs 8 and 9ADJUSTMENTS tabThe “Adjustments” tab,as its name suggests,enables a large numberofbasic(nondestructive) adjustmentsto be made e.g add aborder(Outline)orconvert to monochrome(Colourise).LAYER SETTINGS tabClick on “Layer Settings” tab.The majority of your images willnot completely fill the availablespace because their aspect ratiois different from your choice inFigs 4 and 5 (for example, mostcameras have a 3:2 aspectratio). Adjust the figures hereand/or drag the image/fourhandles to fill the screen.MOTION EFFECTSClick the “Effects” tab.FIG 10This returns settings to their default.values.Click in “Starting Position” Box. Change values for “Starting Position” by changing numbers and/or dragging sliders and/or dragging theimage. Then click on “Ending Position” to make changes there. In this example, I’ve changed the values as indicated below so that at thestart the image fills the screen and at the ends I have zoomed in slightly – see Fig 11 for final effect.Note: Even if you don’t like movement, you should, at the very least, use the “Layer Settings” option to ensure that that image fills the screen and/or is correctly positionedand/or sized.4
FIG 11PreviewbuttonDifferent starting (left)and ending (right)The zoom/pan is normally smooth, but may look better as “linear” in certain casese.g. a long “pan” with a panoramic image or in the effects in Appendix 4You can move to the next / previous slides by clicking here.The greater the zoom/pan, the longer the duration should normally be.There are plenty of effects to investigate as can be seen from the screenshots. Take time to look at them: hover your cursor over each tosee a brief description.ADVANCED MOTION EFFECTSThese are discussed in Appendix 4.TRANSITION EFFECTSBy default, each transition is a linear cross-fade – shown asdifferent effects. When you click a transition, this full screen box appears with a range ofFIG 12Clicking on any transition effect in this box gives a preview in the top left corner. The drop-down list shows a large range of alternatives.Double-click on the effect to apply it or click “Apply”. The screen also shows at the bottom right the most recently used effects which canbe applied directly.CAPTIONSDouble-click on the relevant slide (a blank one if you prefer) then click on the “Captions” tab and the “ ” to create captions:FIG 13This box in Fig 14 appears:5
FIG 14Type text hereChoose placement, etc. hereChoose format hereChoose caption behaviour here. “Browse” gives apreview.Clicking on “ ” enables the addition of extracaptions, with different effects if required.The caption can be resized and repositioned by clicking and dragging, or by typing numbers into the appropriate boxes. In Gold, the captionlasts just very slightly less than the slide; unfortunately, you cannot alter the duration.SOUNDTRACKClick “SHOW SOUNDTRACK”, then “ ”, then “Add Sound File”. Navigate to relevant folder and song, click “OPEN” and then “O.K.” Youcan use more than one piece of music as described below.FIG 15This is the waveform for the music track. Switching to “Timeline” enables additional changes to be made to the sounds.The screen will resemble Fig 16. (Note: if the song is visible in the folder/slide list on the left, you can just drag it to the timeline)6
FIG 16Click on the “ ” and navigateto add additional music.You can make some basicedits by clicking “Edit Fadesand Timing” which brings upthe dialogue box (Fig 17)below.Importing music from a CD isnot recommended as thequality isn’t as high.Explore this option when youwant to match the “beat” ofthe music exactly with theduration of the slide.FIG 17Hold the cursor over each icon to see what it does. For example, you can fade out music, or cut it short using the sliders or entering valuesin the boxes.Version 8 has a much-improved “Timeline” window and it is possibly easier to make changes there.“Audacity” is free downloadable user-friendly music-editing software which offers a huge range of effects as those in AV software are fairlybasic. “Audacity” is available for PCs and Macs.7
ADDITIONAL SLIDE ADJUSTMENTS: LAYERSYou can have two (or more) images (“layers”) in the same slide/frame, with effects being set individually for each. To add a second image,hold down the CTRL key and drag an image from the file list on top of an existing slide. Repeat as many times as desired. Layers are usefulwhen you want to include images which are square(-ish) or in portrait format as in the example below.FIG 18“CTRL drag” this imageonto Slide 1 to create asecond layer. “CTRL drag”further images onto slide 1Then double-click the image to open the “Slide Options” box and modify each layer as described below in Fig 19:FIG 19You can temporarily toggle layers onand off by ticking/unticking this box.You can drag images to the Layers list.Dropping an image ONTO a layer willreplace the existing layer and retain itssettings; dropping an image betweenlayers will cause it to be added to the list.Click each layer in the “Layer Settings” tab to position image.The two top images are set at -25, 0 and 25, 0, respectively and the zoom is set at 98% . A white border (Outline) has been added from the“Adjustments “tab. The bottom layer (which completely fills the screen) is an image from earlier in the show but modified in the“Adjustments” tab – turned to monochrome (“Colourised”), “Blurred” and the “Brightness” increased. (CTRL or or or can also beused to move layers). The preview window now looks like Fig 20:FIG 208
.PNG FILESPng. files are exceptionally useful as they can be partially transparent thus enabling the creation of countless special effects. Fig 21 is abasic .png version of the statue in Fig 20FIG 21In Photoshop, a selection was made of the figures in the image on the right of Fig 20. It was copied to anew file which was saved as a .png file. This preserves only the selection and the background becomescompletely transparent.Many of the effects seen in AVs can only be achieved by using .png files.Note: when you first add a layer to a file, it may partially or totally obscure the layer below, depending on its aspect ratio. By doubleclicking on the slide and opening the “Slide options” box, you will see that all the layers are there.STYLESConsider exploring the Slide Styles tab in the “Slide Options” box.This video link is useful, even though it only covers version 4: http://www.youtube.com/watch?v 7rc-WEI bPg&NR 1.There are a range ofother YouTube videos which may be helpful.PLAYBACKThe show can be played back at any point. (Go to Edit Preferences to set quality)FIG 22Right-clicking in the grey areagives some useful options.ALT ENTER toggles betweenfull-screen playback andPreview screen.Hold your cursor over these buttons and drag this slider to investigate their effects9
SYNCHRONISING PICTURES AND MUSICIt’s unlikely that the music and the slide show will be exactly the same length. A simple way to address this is to select some or all the slides(sometimes, if the two times are very close, modifying the timings of one or both end blank slides may be sufficient) and go to:Audio Quick Sync – Selected Slides and click “Yes” when prompted.FIG 24FIG 23ADDING SOUND EFFECTS ON TOP OF EXISTING MUSIC TRACKNavigate to the folder which contains the effect (e.g. the sound of traffic) you wish to add:FIG 25CTRL drag the sound to the slide where you want the sound to begin. Then double-click on the slide:FIG 26Edit the sound accordinglyThis is one site which has some free downloadable (.mp3) sound effects: s/INCORPORATING VIDEOShttp://www.youtube.com/watch?v gMSgrlPS3ts gives a clear demonstration – by Gavin Hoey, no less.10
PUBLISHING THE AV – CREATING “MOVIE” FILES and/or EXECUTABLESThe show must now be converted into a playable form – either a movie file (e.g. .avi, .mov or .mp4) or an executable (.exe) or both. Moviefiles are much larger and take longer to create but are of higher quality and can be played on both PCs and Macs and also “SMART” TVs.Appendix 2 describes how to create executables. External competitions until recently insisted on executables but most now also allowmovie files.CREATING AND PLAYING MOVIE FILES (e.g. .AVI FILES)Movie files (e.g. .avi files) are a higher quality alternative to executables and are easily created as shown below:Go to “Publish” “Video for Web, Devices and Computers” Video File AVI. Select MPEG-4 SP 1080 (for .avi format) and then click“Create”. The file takes much longer to produce than an executable – roughly three minutes for every minute of show. (FIG 27)FIG 27You will see in Fig 27 above that numerous other video/movie file formats (e.g. .mp4 and .mov) can also be created.The file can be played with Windows Media Player or other software such as VideoLan VLC. Both methods are described in the next pages.11
PLAYING MOVIE FILES WITH WINDOWS MEDIA PLAYER and ON MODERN TELEVISIONSOPTIONAL FIRST STAGEFIG 28Open Windows Media Player. ClickTools OptionsIn the box that appears find the“Performance” tab.Consider deselecting “Display fullscreen controls”. This is notessential, and can be reversed; itresults in the file playing withoutthe toolbar becoming visible whenyou move the mouse – which mayor may not be what you want.Then click “OK”To play the file from this box, click File Open and then navigate to the folder where your file(s) is/are kept. Double-click the file (Note: ifyou want to play more than one file, hold down “CTRL” and click any other files you also wish to play) and then click “Open”.FIG 2912
Alternatively, go to the folder which contains your shows and either (i) double-click or (ii) right-click* on the file name and from the menuwhich appears select “Play with Windows Media Player” or “Add to Windows Media Player list”.(*or click the first one and then CTRL click the others to play a sequence)FIG 20,Note: I use VideoLan/VLC Media Player as my default player – hence the VideoLan icon by each filename.The show begins to play as shown below (with close-up of corner shown by main screenshot):FIG 30Click on the “View Full Screen” and the show(s) will play completely filling the screen. Alternatively, or if this icon is not present, press the“F11” key or “ALT ENTER”. These will toggle between full screen and the original size.Press “ESC” to escape (if necessary, then click the “x” at the top right-hand corner”)It’s as easy as that. Once you’ve played an .avi file, you won’t want to use executables anymore.PLAYING .AVI FILES ON A MODERN TELEVISIONIf you have a modern “Smart” TV, it will have a USB port.Copy the movie files to a memory stick/portable hard drive and place it in the USB port. When the menu appears, simply navigate using thearrows on the controller. Not all “Smart” TVs can play all movie formats. If one movie format doesn’t work, try another.If you’re intending to show a PC-created movie file on a Mac, ensure the Mac can cope with that format. For example, Macs may not beable to cope with .avi formats although they can handle .mp4 and .mov files.13
PLAYING .AVI FILES WITH VIDEOLAN VLC MEDIA PLAYERMany people, including the club and the KCPA, use VideoLan (VLC Media Player), a free downloadable software for both PCs and Macs. Todownload it, go to http://www.videolan.org/vlc/index.html. Follow the instructions. A shortcut icon will be placed on the desktop.The file can be played by right-clicking the file-name and selecting “Add to VLC Media Player’s List” from the menu which appears. You canselect more than one file by clicking the first file-name and CTRL clicking the others and selecting “Add to VLC Media Player’s List”. IfVideoLan is the default media player, the show will open with a double-click.However, in order to obtain the best results, you do need to tweak thesettings. See Appendix 2. As the software is frequently updated, thescreenshots you obtain may be slightly different to the ones shownthere. These changes will ensure that the file(s) play full-screen andreturn to the desk-top (main menu) at the end, something which isusually a requirement for external competitions.CHANGING VIDEOLAN SETTINGS – see Appendix 2FILE TYPES AND FILE SIZESFILE TYPESThe file created on page 3 will be a .psh file. I suggest you type “show or hide file extensions” in search facility on main Windows screenand follow on-screen instructions to make file extension always visible.FIG 31FIG 32During the course of producing a show, PSG will produce a number of files with the same name but different extensions: .psh is the main file with links to music and images and should NEVER be deleted. .bak (Back-Up) file can safely be deleted after the .psh file is saved and closed. .b01, .b02, etc. are produced each time the file is saved and can safely be deleted after the .psh file is saved and closed. .pxc files are huge with full copies of images and music. They are created automatically as you prepare your show. When you aretotally happy with the executable or movie file, the .pxc file will not be needed and can be permanently deleted. If you re-openthe .psh file, the .pxc file is automatically recreated.FILE SIZESProShow can cope with image sizes of any size and shape, and with the majority of file formats.Since most computers these days are powerful, with lots of RAM and hard drive capacity, there is rarely any need to resize your images. Alarge file will retain quality when you zoom in whereas a small one won’t. Conversely, a larger file will take longer to upload, and somemachines may struggle with them.14
APPENDIX 1 – CREATING AN AV USING THE WIZARD KEYThe Wizard Tool has changed enormously since the first version of this guide. I suggest you read pages 110-120 of the User owGold8.pdf) for an overview of the process.APPENDIX 2 – MODIFYING VIDEOLAN SETTINGSRight-click a file-name, select“Properties” from the menu whichappears and click the “Change ”button and select “VLC MediaPlayer” to make it the defaultplayer.As the software is frequently updated, thescreenshots you obtain may be slightly differentto the ones shown here. These changes willensure that the file(s) play full-screen and returnto the desk-top (main menu) at the end (often arequirement for external competitions).Only a handful of alterations will need to bemade.Double-click the VideoLan icon on the desktop. The programme then opens.Goto “Tools Preferences”. This box then appears. Make changes where necessary as shown in the following screen-shots.Remember to zoom (CTRL scroll) to see settings more clearly in this .pdf document.NOTE: As the programme is frequently updated, your version will not be identical to the screenshots here.Choose “Simple” first.15
VIDEOLAN SETTINGS – SIMPLEYou can disable this if you don’t want the controls toappear at the bottom of the screen when the mouse isused. I leave it ticked.Important to deselect this to prevent the title appearingon-screen16
OPTIONALDouble-click and replace “Esc”with “CTRL L” as shownDouble-click and replace “CTRL Q” with “Esc” as shownThe reason for the last changes – reconfiguring the two hotkeys – is that if the show fails to exit properly (as hasbeen known to happen with executables produced by all software), the “Esc” key would be the common key toreturn to full screen.ALL (ADVANCED SETTINGS)17
There may be no need to check these settings 18
APPENDIX 3 – CREATING EXECUTABLESWhen the show is complete and saved, you can create an executable for use on your own and other computers. To ensure that the showopens instantly at full-screen when the file-name is double-clicked (and without an intermediate display), amend various settings as shownin the following screen-shots.Click on “Publish” and then “Executable” to create a file which can be played on any PC (but, unlike movie files, not on a Mac or TV).FIG AYou can create movie files here as described previously. Theyare large, but the quality is superior to executables. You canalso create .mov files which play on QuickTime on Macs.You can upload directly to YouTube. The on-screen instructions arestraightforward. Normally, you would upload an .avi file.A dialogue box like this appears, normally with the “Menu” tab active (Fig B).FIG BFor ease of use, and to satisfy most competitions’ criteria, click on “no menu”. Fig C appears:FIG C19
Click on “Shows” tab (Fig D).FIG DYou may have already set thisDeselect this option unless you wish to be driven mad.Click on the “Options” tab. Fig E appears.FIG EDisable if using in competitionsSet to your monitor resolutionSet to “Full Screen”Set to maximumWhen happy, click “Create”. The standard “Save” dialogue box will appear. Name your executable and save it. The extension will be .exe.When the executable has been created, this dialogue box appears:FIG FIf you click “Yes”, the executable plays straightaway.Every time you double-click (or right-click and select “Open”) on the file name of the executable, it starts to play immediately. Right-clickingwhilst it’s playing offers a variety of options if you haven’t disabled on-screen controls. Press “Esc” to exit.The executable can be copied to a CD, memory stick or hard drive and played on any PC (including, of course, the one on which it wascreated). Executables cannot be played on TVs or on *Macs whereas movie files can.One of the weaknesses of ProShow in my opinion is that the quality of executables, at least when viewed closely, is not as good as PTE’s.(Movie files are just as good).Anti-virus software can sometimes refuse to allow executables to play and may quarantine them. Right-click on the file-name and select“File Insight” from the menu that appears and investigate the options available. Choosing “Trust Now” is highly desirable.When executables (.exe) are created as described in Appendix 3, they may be fragmented – sometimes into hundreds of pieces. If you findyour executable doesn’t play smoothly, I suggest you defragment your computer (particularly an older / less powerful machine).*PTE does offer the option to create an executable which can be played on a Mac.20
APPENDIX 4 – ADVANCED MOTION EFFECTSThe ProblemIf you create a motion effect such as a zoom or a pan in an image, with a transition at the beginning and end, you will find that the image isstill moving during both the transition-in and the transition-out, often making it impossible to see a critical part of the image.The SolutionSuppose you want to create a zoom-in on slide 2 in Fig A below, but want to do it in such a way that the movement begins only when thetransition-in is over and stops before the transition-out begins – and keep the overall length of the show the same. The techniques on thenext few pages will enable you do this.ProShow Producer and PicturesToExe both feature keyframes and enable the problem to solved in a different and rather easier way. Note:it appears that in Version 8 you can specifically set motion to start only after the Transition In is over. It wasn’t clear if you have the facilityto stop motion before the transition out begins.FIG A (Opening screen)Slide 2Note: Parts B – D are the same is described in Figs 10 and 11 earlier1Double-click somewhere in the centre of the thumbnail of the slide to be modified (slide 2 in this example) to open the “Slideoptions” dialogue box in Fig BFIG B221Click on “Effects” to bring up the dialogue box in Fig C
FIG C3Make changes to the “Starting Position” as required by altering numbers in the appropriate boxes and/or by dragging the slidersand/or by dragging the image.4FIG DClick on the “Ending position” section and make changes in the same way (Fig D).5When you play the slide in the usualway or by clicking here, there will (ofcourse) still be movement duringtransitions (which is what we aretrying to avoid).6Click “OK” to return to the mainscreen (FIG E).FIG E7Click here and press “ALT B” to insert ablank slide before Slide 2.8Then click here and press “ALT B” to inserta blank slide before Slide 3Alternatively, right-click on the thumbnail and select“Insert Blank Slide” from the menu which appears. Itwill appear to the left of the thumbnail you clicked.22
Your screen will look like Fig F, with the original slide 2 now becoming slide 3.FIG FFIG G (section of Fig F)9Change the four numbers exactly as shown in the close-up in Fig G so that there are four values of “0” (zero). You might achieve amore pleasing effect if the duration of the slide is slightly longer (e.g. 0.5s – although that will lengthen the show) but the two transitionsMUST be set at 0s)FIG H10Double-click on the thumbnail in slide 3 to open the Slide Options dialogue box (“Effects” tab) as shown in Fig H.11Now click on “Copy” and a menu appears (Fig I)23
FIG I121314Click on “Copy End to Next Slide”. The menu will then disappear.Click on “Copy” again and then click on “Copy Start to Previous Slide”. The menu will then disappear.(it doesn’t matter whether you do 12 or 13 first)Click “O.K”.Your screen now looks like Fig J.FIG JWhen you play the sequence from here, you will see that the problem has been solved. There will be a transition from slide 1 to the mainpicture of the lighthouse (slide 3). When the transition is complete, the zoom in will begin. As soon as the zooming has completely stopped,there will be a smooth transition to the next picture (slide 5).Note: these changes do NOT change the overall length of the show because the new slides have durations and transitions of “0” seconds.MOTION EFFECTS – PEOPLE/OBJECTS DISAPPEARING/REAPPEARING / COLOUR TO MONOCHROMEThis is easily achieved by having two slides (one with and one without the boat) with very short slide times (0.5s in this example) and a longtransition (3.0s in this example). Alternatively, one could be in monochrome and the other in colour.24
Just as DeLuxe is the big brother of Essentials, so Producer is Gold’s big brother. All can be downloaded on a trial basis. These costs were correct on 12 August 2016. ProShow Gold: 53.98; ProShow Producer: 192.87. Cheapest Upgrade from Gold to Producer
