Transcription
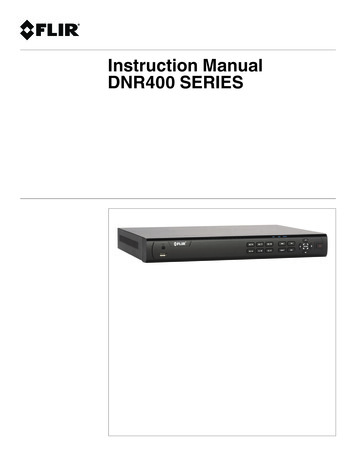
Instruction ManualDNR400 SERIES
Instruction ManualDNR400 SERIES#LX400022; r. 2.0/23322/23322; en-USiii
Thank you for purchasing this product. FLIR is committed to providing our customers with a high quality,reliable security solution.This manual refers to the following models:DNR408 (8-channel)DNR416 (16-channel)For the latest online manual, downloads and product updates, and to learn about our complete line ofaccessory products, please visit our website at:www.flirsecurity.com/proWARNINGRISK OF ELECTRIC SHOCKDO NOT OPENWARNING: TO REDUCE THE RICK OF ELECTRIC SHOCK DO NOT REMOVECOVER. NO USER SERVICABLE PARTS INSIDE.REFER SERVICING TO QUALIFIED SERVICE PERSONNEL.The lightning flash with arrowhead symbol, within an equilateraltriangle, is intended to alert the user to the presence of uninsulated"dangerous voltage" within the product’s enclosure that may be ofsufficient magnitude to constitute a risk of electric shock.The exclamation point within an equilateral triangle is intended toalert the user to the presence of important operating andmaintenance (servicing) instructions in the literature accompanyingthe appliance.WARNING: TO PREVENT FIRE OR SHOCK HAZARD, DO NOT EXPOSE THIS UNITTO RAIN OR MOISTURE.CAUTION: TO PREVENT ELECTRIC SHOCK, MATCH WIDE BLADE OF THE PLUGTO THE WIDE SLOT AND FULLY INSERT.#LX400022; r. 2.0/23322/23322; en-USiv
Table of contents1Important Safeguards .11.1General Precautions. 11.2Installation. 11.3Service . 31.4Use. 32DNR400 Series Features.43Getting Started (DNR400 Series) .54DNR400 Series Front Panel.65Rear Panel (DNR400 Series) .76Basic Setup (DNR400 Series).86.1Step 1: Connect the IP Cameras . 86.2Step 2: Connect the Mouse. 86.3Step 3: Connect the Ethernet Cable . 86.4Step 4: Connect the Monitor. 86.5Step 5: Connect the Power Cable to Power the NVR. 96.6Step 6: Upgrade Firmware to Latest Version (if Available) . 96.7Step 7: Verify Camera Image . 96.8Step 8: Set the Time . 106.9Default System Password & Port Numbers . 106.9.1 FLIR Cloud . 106.10Quick Access to System Information . 106.11Connecting Cameras to the Local Area Network (LAN) . 127Mouse Control . 158Remote Control . 168.1Setting the Remote Control Address . 179Using the System . 189.1On-Screen Display . 189.2Using the Quick Menu. 199.3Adjusting Camera Image Settings. 199.4Using the Navigation Bar . 219.5Using the Camera Toolbar . 219.5.1 Using Quick Playback . 219.5.2 Using Digital Zoom in Live Display . 229.5.3 Using Real-time Backup . 229.6Using the Virtual Keyboard. 229.7Adjusting Camera Zoom & Focus . 2310Setting The Time . 2411Recording. 2511.1Video Recording Types . 2511.2Main Stream and Sub Stream . 2511.3Setting up Scheduled or Manual Recording . 2511.4Configuring Hard Drive Overwrite . 2612Search (Playback) . 2712.1Playing Back Video from the Hard Drive. 2712.2Playback Controls . 2812.3Playing Back from a USB Drive . 2813Backup. 3013.1Formatting the USB Thumb Drive . 3013.2Backing up Video. 31#LX400022; r. 2.0/23322/23322; en-USv
Table of contents13.313.4Using Video Clip Backup . 31Viewing Backup Files. 3213.4.1 Viewing Backup Files on PC . 3213.4.2 Viewing Backup Files on Mac . 3514Managing Passwords and User Accounts. 3814.1Changing Passwords. 3814.2Adding Users . 3914.3Modifying Users . 3914.4Deleting Users . 4014.5Account Groups . 4014.6Adding Groups . 4014.7Modifying Groups . 4114.8Deleting Groups . 4115Using the Main Menu . 4215.1Camera . 4215.1.1 Remote Device . 4215.1.2 Viewing Camera Status . 4315.1.3 Viewing Camera Firmware Versions . 4315.1.4 Upgrading Camera Firmware . 4315.1.5 Recording. 4415.1.6 Configuring Recording Quality . 4415.1.7 Configuring Audio Recording . 4515.1.8 Configuring Snapshot Recording Settings. 4615.1.9 Creating Custom Channel Names. 4715.2Info . 4815.2.1 HDD Info . 4815.2.2 Record Info . 4815.2.3 Version . 4915.2.4 Event Info . 4915.2.5 Online Users . 5015.2.6 Load. 5015.2.7 Test. 5115.2.8 BPS . 5115.2.9 Log . 5115.3Setting. 5315.3.1 Network . 5315.3.2 Selecting DHCP or Static IP Address (TCP/IP) . 5315.3.3 Configuring System Ports (Connection). 5415.3.4 Configuring DDNS Settings . 5515.3.5 Configuring Email Alerts . 5515.3.6 Configuring Switch Settings (Advanced). 5615.3.7 Event. 5715.3.8 Configuring Motion Detection. 5715.3.9 Configuring Video Loss Settings . 5915.3.10 Configuring Alarm Input Devices. 6015.3.11 Controlling Alarm Output Devices . 6115.3.12 Configuring Hard Drive Warnings. 6215.3.13 Configuring Network Warnings . 6315.3.14 Storage. 6315.3.15 Configuring the Video Recording Schedule . 64#LX400022; r. 2.0/23322/23322; en-USvi
Table of contents15.415.3.16 Configuring Pre-Recording . 6415.3.17 Configuring the Snapshot Schedule . 6515.3.18 Configuring Holidays. 6615.3.19 Formatting the Hard Drive . 6715.3.20 Configuring Hard Drive Type . 6815.3.21 Setting up Hard Drive Mirroring (Advanced) . 6815.3.22 Configuring Hard Drive Groups (Advanced) . 6915.3.23 Configuring General System Settings . 7115.3.24 Setting the Monitor Resolution (Display) . 7215.3.25 Saving Your System Configuration to a USB ThumbDrive . 7315.3.26 Setting the System to Factory Defaults. 7415.3.27 Upgrading Firmware from USB. 75Shutdown. 7616Connecting to Your System Over the Internet on PC or Mac . 7716.1System Requirements. 7716.2Step 1 of 3: Connect your System to Your Router . 7716.3Step 2 of 3: Obtain the system’s Device ID. 7816.4Step 3 of 3: Connect to the System Over the Internet . 7817Using FLIR Cloud Client for PC or Mac . 8217.1Home Page . 8217.2Live View . 8217.2.1 Live View Controls. 8317.2.2 Opening Live View in Multiple Monitors . 8417.3Controlling PTZ Cameras . 8517.3.1 PTZ Presets. 8617.3.2 PTZ Tours. 8717.3.3 PTZ Pattern . 8817.3.4 PTZ Scan . 8917.3.5 PTZ Pan. 8917.4Playback. 8917.5Playback Controls . 9117.6Downloading Video to your Computer Hard Drive. 9217.7Alarm . 9317.8Log . 9417.9E-map . 9517.10 Devices . 9717.11 Device Config . 9817.12 Alarm CFG . 9817.13 Tour & Task . 10117.14 Account . 10217.14.1 Managing User Accounts . 10217.14.2 Managing Roles. 10417.15 General . 10517.15.1 Basic . 10517.15.2 File . 10517.15.3 Alarm Prompt . 10617.15.4 Version . 10718Connecting to your System Using Smartphone or Tablet Apps. 10818.1iPhone. 108#LX400022; r. 2.0/23322/23322; en-USvii
Table of contents18.218.318.1.1 Prerequisites .18.1.2 Connecting to your System on iPhone.18.1.3 Live View Interface .18.1.4 Controlling PTZ Cameras.18.1.5 Viewing Snapshots and Videos with Local Files .18.1.6 Using Playback Mode on iPhone .18.1.7 Enabling Push Notifications .18.1.8 Using the Event List .18.1.9 Using Favorites .18.1.10 Using the E-Map .18.1.11 Device Manager.18.1.12 Adding Devices Using an IP or DDNS Address(Advanced) .iPad .18.2.1 Prerequisites .18.2.2 Connecting to your system on an iPad .18.2.3 Live View Interface .18.2.4 Controlling PTZ Cameras.18.2.5 Using Playback Mode on iPad.18.2.6 Using Local File to View Manual Recordings .18.2.7 Enabling Push Notifications .18.2.8 Using the Event List .18.2.9 Using Favorites .18.2.10 Using the E-Map .18.2.11 Using the Device Manager .18.2.12 Adding Devices Using an IP or DDNS Address(Advanced) .Android .18.3.1 Prerequisites .18.3.2 Connecting to your System on Android .18.3.3 Live View Interface .18.3.4 Controlling PTZ Cameras.18.3.5 Viewing Snapshots and Videos with Local Files .18.3.6 Using Playback Mode on Android .18.3.7 Enabling Push Notifications .18.3.8 Using the Event List .18.3.9 Using Favorites .18.3.10 Using the E-Map .18.3.11 Device Manager.18.3.12 Adding Devices Using an IP or DDNS Address(Advanced) 14314314514614719Remote Viewing On Internet Explorer . 14919.1Prerequisites . 14919.1.1 IE Live Display Overview. 15019.1.2 Using Search Mode in IE (Playback). 15120DDNS Setup (Advanced) . 15320.1Accessing your System within a Local Network (LAN) . 15320.1.1 Step 1 of 3: Connect your System to Your Router . 15320.1.2 Step 2 of 3: Obtain the System’s Local IP Address . 15420.1.3 Step 3 of 3: Connect to the System’s Local IPAddress . 154#LX400022; r. 2.0/23322/23322; en-USviii
Table of contents20.2DDNS Setup—Access your System Remotely over theInternet.20.2.1 Step 1 of 4: Port Forwarding .20.2.2 Step 2 of 4: Create a DDNS Account .20.2.3 Step 3 of 4: Enable DDNS on the System .20.2.4 Step 4 of 4: Connect to the System’s DDNS Address .15615715715815921Connecting a PTZ Camera (DNR400 Series). 16321.1Controlling a PTZ Camera (Local NVR) . 16421.2Advanced PTZ Controls . 16521.2.1 Presets . 16621.2.2 Tours . 16621.2.3 Pattern. 16721.2.4 Auto Scan . 16722DNR400 Series Hard Drive Insta
providingourcustomerswithahighquality, reliab