Transcription
Revised 10/23/2015WEB PAY EMPLOYEE GUIDEClient ResourceWWW.PAYLOCITY.COM
TABLE OF CONTENTSWEB PAY . 3SELF SERVICE PORTAL . 10HOME . 30EMPLOYEES . 38PAYROLL . 105TALENT . 109NOTIFICATIONS . 120GLOSSARY . 122
WEB PAYUse Web Pay self service and social collaboration to manage information and network with coworkers.Users may not have access to all of the options described in this guide. Each company determineswhich options are available and each user's security group determines the display of information.In order to maintain confidentiality, employees must contact their Company Administrator withquestions. Paylocity is not authorized to speak directly with employees. Click the Paylocity logo in the middle of the header to return to the default home page.Access messages in the header section of the screen. The bell indicates there are nomessages. When there are messages, the red box displays the number of messages.Click Help to view help text for each screen. Use the self service portal or the menus across the top of the application to navigate throughWeb Pay.Select Self Service Portal from the Applications menu.Use the search filter options to find specific employees.Select Home to access the self service portal.Select Directory to view all employees.Select Impressions to view impression badges received by employees.Select Teams to view the company’s team structure. Select Return to Portal from the Account Profile to return to the self service portal.Select Log Out from the Account Profile to log out of the application.Multiple Pages of InformationWhen there are multiple pages of information, use the page numbers and arrow keys to view allavailable information. Click the back arrow with an adjacent vertical line to access the first page.Click the multiple back arrows with an adjacent vertical line to access the prior set of pages.Click the back arrow to access the prior page.Click a page number to select a specific page.Click the forward arrow to access the next page.Click the multiple forward arrows with an adjacent vertical line to access the next set of pages.Click the forward arrow with an adjacent vertical line to access the last page.3
MESSAGE CENTERView or delete messages. Click the Received link to view the message details.Check the box adjacent to the message and click Delete to delete the message. Click the link to view additional details.Click Print to print the message.Click Keep As Unread to keep the message marked as an unread message.Click Return to return to the previous screen.4
MESSAGES View messages.Click View all Messages to access the Message Center.EVENT NOTIFICATIONWhen an Administrator launches an Event, the selected employee will receive a notification about theEvent for completion. Click the Please access the event here link to display the Event.1. Fill out the required information within the Event.2. Click Submit.5
SIDEBAR MENUUse the sidebar menu to access help or download mobile applications. Select Security to learn moreabout how Paylocity protects information.6
CHANGING INFORMATIONUsers may be able to edit certain fields in Web Pay. All fields with a green icon adjacent to the fieldname or a green title are required and must be populated in order to save information in a screen.Many of the changes made by employees are pending changes that will not take effect until a CompanyAdministrator approves them.Pending additionPending changePending deletionSaving InformationWhen finished entering information, use one of the save options to save the information.Save the updated information and remain on the current screen.Save the updated information and open a new screen to add additional information.Save the updated information and return to the previous screen.Save the updated information and close the current screenDiscard the changes and return to the previous screen.A warning will appear when navigating away from a screen where changes have been made but notsaved.7
SORTINGList pages display information in columns that can be sorted. There will be a triangle adjacent to thecolumn heading by which the system is sorting the information. The triangle will show the direction ofthe current sort.To change the sorting of displayed information, click the applicable column heading.8
SEARCH FILTERSSearch options are available to expand or limit the amount of information displayed. Select or enter the required criteria in one or more fields.Click the Search button to display all information that matches the required criteria.Verify the results in the display section.To save the search results for future use, enter a name for the search in the Save Search fieldand click the Save icon.Once the search has been saved, users can select the saved search from the Select SavedSearch drop down.To delete the saved search, select the saved search from the drop down and click the Deleteicon.Click Show All to display all information.9
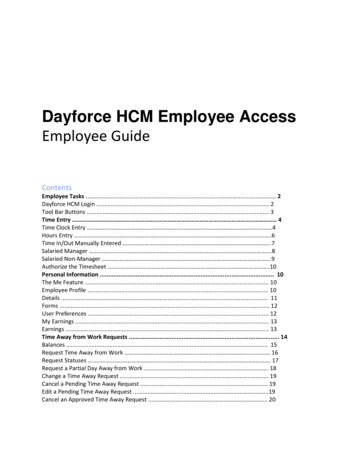
SELF SERVICE PORTALSELF SERVICE PORTALSelf service portal information is organized into tablet-friendly cards. Each company may configure theirown display and access. Click the icon to expand or collapse the card.Click Less to hide information in the card.Click More to display all information.Use the self service portal to manage Web Pay information. Click the boxes or the links to access associated Web Pay screens.10
11
APPLY FOR AN OPEN POSITIONApply for an open position in the company. Click the X in the top-right corner of your screen to closethis screen and return to the self service portal.1. Select the Open Position from the Open Position drop down.2. Click Save and Close to save the open position application and return to the main screen.CHANGE FEDERAL OR STATE TAX EXEMPTIONSView or change tax exemptions. Click the Tax link or View Full Taxes List to navigate to the Taxesscreen. Click the X in the top-right corner of your screen to close this screen and return to the selfservice portal.1. Select a Filing Status from the drop down.2. Enter the number of exemptions in the Exemption 1 field and in the Exemption 2 field (ifapplicable).3. The Amount Type defaults to Default Amount. If applicable, select another Amount Type fromthe drop down.4. Enter an Amount (S). This field is enabled when a dollar Amount Type is selected from the dropdown.5. Enter a Percent (%) as a whole number not as a decimal, (e.g., 10% should be entered as10.00 instead of 0.10).6. Save the updated information.Important Notes The portal window displays federal and state tax information. Click the View Full Taxes List linkto view or modify local taxes.12
COMPANY NEWS ITEMSView all company news items. Click the Publish Date link to view the details.DEDUCTION AMOUNTSView deduction information. Click the X in the top-right corner of your screen to close this screen andreturn to the self service portal. Click the Deduction link or View Full Deductions List to navigate to the Deductions screen.Depending on company configuration, users may be able to edit specific deductions.1. Select the applicable Calculation from the drop down.2. Enter the applicable Amount or Percentage.3. Click Save and Close to save the updated information and return to the self service portal.13
DEPENDENTSAdd, edit, or delete dependent information. Click the X in the top-right corner of your screen to closethis screen and return to the self service portal.1. To add a new dependent, select Add New Dependent from the drop down.2. Enter the Last Name (40 character limit), First Name (40 character limit), and Middle Name(20 character limit).3. Select the Relationship from the drop down.4. Select the Gender from the drop down.5. Select or enter the Birth Date.6. Enter the Social Security number in the SSN field.7. Check the Emergency Contact box if the dependent is an emergency contact. This will enablethe fields in the Emergency Contact section.8. Select Primary or Secondary in the Priority field. Employees are permitted to have more thanone primary and secondary emergency contact.9. Select the Primary Phone from the drop down.10. Enter additional information the Notes field (1000 character limit).11. Check the Stay in sync with Employee Information box to automatically populate thedependent's address with the employee's information.12. Enter the Address, Phone, and Email information.13. Check the Full Time Student box, if applicable.14. Save the updated information.14
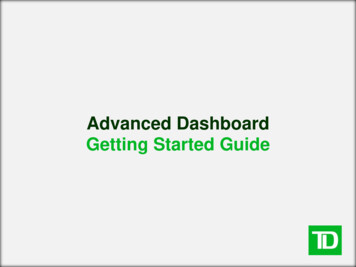
DIRECT DEPOSIT ACCOUNTAdd, edit, or delete direct deposit account information. Click the X in the top-right corner of your screento close this screen and return to the self service portal.1. To add a new direct deposit account, select Add New Direct Deposit Account from the dropdown.2. Select the applicable Account Type (Checking, Savings, or Pay Card) from the drop down.3. Enter the nine digit ABA Transit Routing Number without dashes or spaces.4. Enter the Account Number without spaces or symbols (17 character limit).5. Enter the Name on Account (30 character limit).6. If this is the main account, Save the updated information to deposit the entire paycheck to thismain account. If this is an additional account, check the Additional Deposit Account box.7. Select the Amount Type from the drop down to indicate whether the numeric value in theAmount field should be a Flat dollar amount, Percent, or Net Minus. Selecting Net Minus willissue a live check for the dollar amount entered into the Amount field with the balance beingdeposited into the corresponding bank account.8. Enter the Amount based on the Amount Type.9. Save the updated information. The specified amount will be deposited in each additionalaccount listed and the net check will be deposited into the main account.To change the order in which money is deposited into an additional deposit account, select the radiobutton adjacent to the applicable account Routing Number and click the blue up or down arrow tomove the account.15
16
EDIT EMPLOYEE PROFILE Click the image to upload a new profile image. Select Use Default Image to return to the defaultimage.Click Preview to preview the profile.Click View to view the profile that appears when users click Profile.Click the applicable icon to link a LinkedIn, Facebook, Google , or Twitter profile to theemployee profile.Click Upload Resume to upload a resume.Enter personal information in the About Me field. Click the spell check icon to check thespelling.Enter information in the Schools/Education search field to select an education option or entereducation information in the field and click Add to add the education information to theemployee profile. Make a selection from the Class Of drop down and enter additionalinformation in the comments field. Users may edit, save, or delete education information byclicking the applicable icon.Enter information in the Skills/Expertise search field to select a skill or expertise or enter skillsor expertise information in the field and click Add to add the information to the employee profile.Click the X to delete information.Check the box adjacent to those Interests that apply. Click the applicable section icon to addinterests from the selected section.Click Save Profile Changes to save the updated information.17
Important Notes When users add a new education option to their employee profile, the option will be available toevery user in the company. When users add a new skill or expertise to their employee profile, the option will be available toevery user in the company.18
HIDE OR DISPLAY THE NET AMOUNTClick the Net Amount icon to hide or display the Net Amount in the Compensation section of the selfservice portal.NEWS ITEMView the company news item. Click the X in the top-right corner of your screen to close this screen andreturn to the previous screen. Use the arrows adjacent to the drop down to navigate from one news item to the next or select aspecific news item from the drop down.Click the search icon located below the X to view a summary list of news items.19
PERSONAL INFORMATIONClick Personal Information to add or edit personal information from three available tabs: Details1.2.3.4.Enter your First Name, Last Name, and Middle Name.Enter your preferred Title and select an applicable Suffix.Enter a Preferred First Name and Prior Last Name.In the Personal section, enter your Social Security Number, Marital Status, Birth Date,possible Disability, Ethnicity, and Sex.5. To continue, click Save.20
Contact1. Enter applicable Phone and Email.2. To edit an Address, click the Edit icon ( ).3. From the Emergency Contact area, you are able to:a. Click the Add Contact link to add an Emergency Contact.b. Click the contact's Name to edit an existing Emergency Contact.4. Click Save when done editing.21
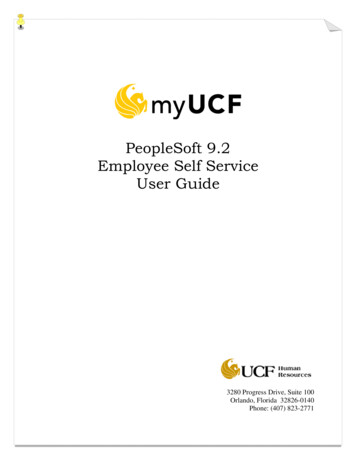
Social1.2.3.4.Update your Personal Image.Enter information in the About Me section.Click Save when done editing.Click Connect to connect your Employee Profile with your social media accounts.22
23
SUBMIT TIME OFF REQUESTSSubmit time off requests. Click the X in the top-right corner of your screen to close this screen andreturn to the self service portal.1.2.3.4.5.6.7.8.Select a Request Type from the drop down.Enter additional information in the Employee Comments field.Select the Single Day or Multiple Days radio button.Select or enter the Start Date.Select or enter the End Date.Enter the Hours Per Day.Enter the applicable Start Time.Click Save and Close to submit the time off request.For additional detail, click Discard changes and go to the Time Off Request History to access theTime Off Requests screen.UPLOAD NEW PROFILE IMAGE1. Click Upload New Profile Image.2. Click Select to find the image.3. Select the image and click Open to upload the image.24
UPLOAD RESUME1. Click Upload Resume to find the document.2. Select the resume and click Open to upload the document. Click My Resume to display the resume.Click the red X to delete the resume.25
USER PREFERENCESView preferences. Add or edit profile information. Click the image to upload a personal image. Select Use Default Image to return to the defaultimage.Click View to view the profile that appears when users click Profile in the Directory.Click the applicable icon to link a LinkedIn, Facebook, Google , or Twitter profile to theemployee profile.26
VIEW PROFILEView the employee profile. Click the email link to send an email to the employee.Click Add Impression to submit an impression badge for the employee.Click View Team to view the employee's team.Click the applicable icon to access the linked profile.Click View Impressions to view the recognition impression badges the employee has received.Click My Resume to view the employee's resume.VIEW IMPRESSIONSView the impression badges the employee has received. Depending on the company's configuration,supervisor approval of the impression badge may be required before the impression badge appears inthis screen. Click the email link to send an email to the employee.Click Add Impression to submit an impression badge for the employee.Click View Team to view the employee's team.Click the applicable icon to access the linked profile.Click View Profile to view the employee's profile.27
WEB TIME Select Web Time from the Applications menu or select Launch Time & Attendance in theTime Entry section of the self service portal.Clock in and out from the self service portal. To return to Web Pay, select Web Pay from the Applications menu.28
YEAR TO DATE COMPENSATIONView year to date compensation. Click the X in the top-right corner of your screen to close this screenand return to the self service portal.1. Select the Year from the drop down.2. Check the Include Employer Paid Taxes box to display employer paid taxes in the chart.3. Click the Run icon to display the information.Important Notes The YTD Compensation Chart will display up to 12 sections of information including employerpaid taxes. The largest earnings and/or deductions will display first. Additional earnings anddeductions will be combined into a total section that appears as Other. The YTD Compensation Chart pulls data from payroll history based on check date. It does notproject or annualize values based on insurance plan or recurring deduction/earning setup.29
HOMEABOUTView product information and system requirements. Click the Verify your system setup button to confirm all system requirements are present andaccurate to run the application. A green check will appear next to each option that meets therequirements.Adobe Reader is required to view and print pay stubs, reports, and other documents. Click theapplicable link in this screen to download Adobe Reader.Users may be required to click the applicable link to download and run the installation programto enable Offsite Printing.COPYRIGHTView copyright information.30
DIRECTORYView employee contact information. Use the search filters to view specific employees. Click the Email link to send an email to the employee.Click the Social Networks icon to access the linked profile.Click Profile to view the employee's profile.Click Team to view the employee's team.Click Impression to submit an impression badge for the employee.Click Portal to access the self service portal.SEARCH FILTER OPTIONSSearch for employees in Web Pay self service and social collaboration. Select a letter in the Last Name Filter to display only employees whose last name begins withthe selected letter.Click All to display all employees.31
Enter the employee's name in the Search field to find a specific employee.Enter information in the Search field to find specific employees who match the search criteria.Selected search criteria may appear at the top of the screen. Click the X to remove selectedcriteria. Click the filter icon to use multiple search criteria.Enter the applicable criteria in each search field and click Search. Click Reset to clear thespecified search criteria.32
IMPRESSIONSView employee impression badges. Use the search filters to view specific employees.Depending on the company's configuration, supervisor approval of the impression badge may berequired before the impression badge appears in this screen. Click Profile to view the employee's profile.Click Portal to access the self service portal.Click Team to view the employee's team.Click Impression to submit an impression badge for the employee.33
SUBMIT AN IMPRESSION BADGESubmit an impression badge to recognize a fellow employee for a job well done. Depending on thecompany's configuration, supervisor approval of the impression badge may be required.1. Select the Impression Badge. The selected badge displays a default title and comments.2. Select Share with everyone or Share with employee only.3. Customize the title and comment information in the Provide Comments fiel
questions. Paylocity is not authorized to speak directly with employees. Click the Paylocity logo in the middle of the header to return to the default home page. Access messages in the header section of the screen. The bell indicates there are no messages. When there a