Transcription
Paylocity Time and AttendanceUSER GUIDEPaylocity Time and Attendance User Guide (replaces ADP User Guide) July 1, 20171
This page is intentionally left blankPaylocity Time and Attendance User Guide (replaces ADP User Guide) July 1, 20172
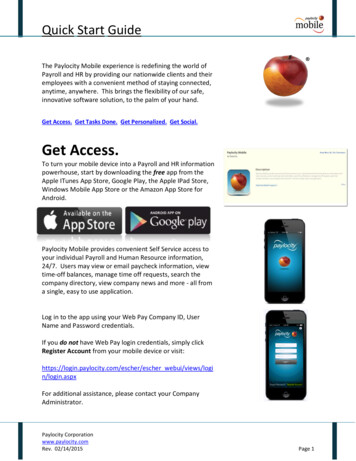
1. Access Web Time by clicking on the Paylocity Icon shown below on the PC desktop.2. Click Register User on the bottom right of screen to create a new User Name and Password.3. Enter 37565 Lori’s Gifts Company Id (not case-sensitive)4. Enter your Last Name.5. Enter your nine digit Social Security number (SSN)6. Enter your SSN a second time in the Confirm SSN field.7. Enter your Home Zip Code. If you have moved and not reported an address change to payroll, there may be an issuewhen you sign on. If you experience that issue, send an email to payroll@lorisgifts.com with your new address.8. Click Next.Paylocity Time and Attendance User Guide (replaces ADP User Guide) July 1, 20173
9. Enter the Image Text. This is a security process. If you can’t read the distorted letters, click on Dispay New Image to receive another set of letters.10. Click Next.11. Enter the User name (not case-sensitive) and Password (this is case-sensitive) you would like to use when accessing thisaccount; specific requirements are: User name must be between 3 and 20 characters long Password must be between 7 and 20 characters long, includes an upper and lower case letter, must include a numberand a special character such as # or !12. Enter your Password a second time in the Confirm Password field and click Next.13. Select login challenge questions from the Question 1, 2, and 3 drop downs and enter answers. Click Next.14. Select an image from the Select Security Image drop down.15. Enter a personal Security Phrase (128 character limit) and click Next.16. Verify all registration information is correct.17. Click Finish to create the new user account and enter Web Pay.Paylocity Time and Attendance User Guide (replaces ADP User Guide) July 1, 20174
Using Paylocity: After you’ve registered as a new user, sign onto the application. Remember the company ID is 37565. Thiswill take you to the Self Service Portal which is the beginning landing page. The self service portal provides you with all theinformation you need. Let’s review some of the sections of the portal:The Self Service Portal shows several blocks where various information is posted. Those blocks are News, Hi, Employee!,Company, Application, Time Entry, Pay, Time Off and Employees if you are a manager.1. The News section is where an assortment of information will be posted. For now it shows company anniversaries. Ifyou click on it, you’ll see information about that month’s anniversary.2. The Company section is where news about our company is posted.3. Hi, Employee’s Name (your name will be inserted here) is a section that contains useful personal information aboutyourself. When you click on View Employee Profile, you will find 3 tabs, Details, Contacts and Social, where you willenter your information. Completing this section is mandatory so please start as soon as you can. Make sure you tapSave after each section. Details are demographics about yourself like a preferred first name, prior last name, birthday,marital status, etc. Contact includes space to enter phone and email addresses, street address and emergency contacts. Social is a place where you can write a short description of yourself. Do not post a picture or social medial information. That will be reviewed at a future time.Paylocity Time and Attendance User Guide (replaces ADP User Guide) July 1, 20175
4. Application is where you can find additional on-line training information about Paylocity.5. Time Entry is where you clock in and out for a fast punch. More detailed information in later pages.6. Pay shows details of your past several paychecks. Click on the orange VIEW CHECKS and details are presented. Clickon Download Paystub if you want to see more detailed information. Remember to keep this info confidential.7. Time Off shows an overview of your PTO balance, used PTO, Available, and Approved. Requests are not made here.8. Employees is a section seen only by managers where information about direct reports is listed. All of the same info displayed in red is here.9. Logoff is available by clicking on the picture in the upper right corner and then sliding down to logout. Click on the manto see the info in the drop-down.Paylocity Time and Attendance User Guide (replaces ADP User Guide) July 1, 20176
Logging out of Paylocity and checking mail:In the upper right corner of your screen is a picture of a man and a red box that shows the number of emails you have.To logout of Paylocity: Click on the man until the drop down shows information. Slide the mouse down to Logout and click.You will be logged out of the application. Remember, if you don’t complete this step, any employees in your store will seeyour confidential information.To review your email: The red box shows 4 which is the number of emails waiting for you to review. Click on the red box andthe Message Center below is show. Click on the Received date/time to see the detail of each message. Click in the squareand the Delete or Mark as Read to remove or reduce your message number.Paylocity Time and Attendance User Guide (replaces ADP User Guide) July 1, 20177
Sending a message to an employee from the employee’s time card: when in the time card, ask questions or caution an employee of clocking in/out at the wrong times by clicking on the orange Send a Message.This will open up the Quick Message dialog box below where a message can be written to an employee and an expirationdate for the message to be viewed is assigned. When complete, click on the blue Send.Paylocity Time and Attendance User Guide (replaces ADP User Guide) July 1, 20178
CLOCKING IN AND OUT: Step 1: Wait until your scheduled clock in time is close. Allow for the time it takes to sign in. Singleclick the orange Clock In button and you are done. When you are ready to clock out, do the same thing with the blue ClockOut button.Step 2: If you are assigned to work outside your home store, click on the blue Transfer button. The box below will pop up and enable you to select the new store whereyou will Clock In. Next, click on the orange clock in button, as normal. When youclock out, click on the blue clock out button and it will complete that punch. Note: ifyou live in a state with 2 time zones, Paylocity defaults to one or the other. Tennessee is an example of this. The hours are still correct.Reminder: Please pay attention to the times you clock in and out compared to yourscheduled time. This is very important to make sure that yourstore is not penalized for going over your allocated hours. If astore exceeds hours, sales for bonus pay is forfeited for all employees during that pay period.Manual Time Entry would not be normally used. It provides aspace where you can select a cost center.APPROVING YOUR TIME SHEET: When your final shift during the 2 week pay period is completed, you are required to approve your timesheet before leaving. If this is not done, your manager will edit and approve what’s showing which may haveerrors. From your personal home page, go to My Timesheet. Once in the timesheet, you will be able to review all entries.Either use the Approve All button or click on each day in the left-hand column. If you see a yellow triangle with the ! Symbol,that is an indication that the punch time does not reflect hours entered for you on the schedule. If you’re seeing these symbols on your timecard, you should be waiting in the lobby until 5 minutes prior to your shift begins before clocking in.Paylocity Time and Attendance User Guide (replaces ADP User Guide) July 1, 20179
IF A TIME CARD NEEDS TO BE EDITED: To add information to a time card, select one to the types from the Pay Type dropdown. Many of these activities will be done by Payroll once an email request and supporting documentation is submitted.Examples of these are Jury Duty and Bereavement.Banking Time: Most banking time is requested to be done after hours. When the manager/asst. manager goes to the bankto drop off the deposit, an additional entry is made the next day with Banking pay type selected to record the time it took totravel from the store to the bank. No time from the bank to your home should be recorded. If a manager leaves during theday to get change at the bank, a clock out punch should be made. When the manager returns, another in/out punch shouldbe made/edited for the bank time. Lunch time should also be recorded separately.Supervisor’s Approval: Time Cards are approved at the end of a pay cycle. An email is also sent from Payroll as a reminder.The employees time card must be approved first. That will be indicated on the right of the screen in the EE App field whenit is checked. The supervisor will just click on the Approve box to the left. Then click on the red Save above the approvebox. When that task is completed, an indication will show in the Supv App box on the right. Using the blue Filter functionnear the top of the screen can assist if there are a large group of stores for a District or Regional Manager to approve.Paylocity Time and Attendance User Guide (replaces ADP User Guide) July 1, 201710
SCHEDULING: Step 1: Hover your mouse over the Web Pay Symbol in Grey. You will see 3 icons: Company, Self-ServicePortal and Web Time. (Unable to provide a screen shot of this.) Select Web Time. The next panel you’ll see has 5 icons.Step 2: Click on the Schedules icon.Step 3: COST CENTER EQUALS STORE NUMBER. In the cost center field, select the store number that matches your store.The number MUST be a 6 digit number so store 2 will be listed as 002000 while store 114 will be listed as 114000. Oncethe number is selected, click on up Update first, then Search.Step 4: Click on the Update text to record thecorrect gift shop.Paylocity Time and Attendance User Guide (replaces ADP User Guide) July 1, 201711
Step 5: If Update and Search were selected, you should see a list of employees like below. If you have no employees, repeat step 3 as you selected the wrong store/cost center. If correct, you should see an example like this:Step 6: Make sure the correct week is selected before you start. Click on the employees name and then click on the day ofthe week you are entering the schedule. The block will turn blue. Click on the Add Shift message.Important Tip about employees that work in their home store and another store: when the new shift is being added, clickon the filter (funnel) and select store. This will provide the 6 digit numbers used to select a store. Click on the second storeand the schedule will reflect the other store location.Paylocity Time and Attendance User Guide (replaces ADP User Guide) July 1, 201712
Step 7: Once the information is entered, select APPLY to save your work. At the bottom of the Add Shift screen, a Favoriteor recent shift can be selected from any shown for easy entry.Step 8: The final schedule should look similar to the one below.Step 9: On the top right of the screen is an Options button. This will allow you to change the settings shown in the ViewSettings box below.Caution: schedules should not be printed on storeprinters as they are not large enough to handle theformatting.Paylocity Time and Attendance User Guide (replaces ADP User Guide) July 1, 201713
Step 10: Schedules can be copied from week to week if employees work the same schedule. This is a very easy function andwill allow for editing if the schedule is close. Look for the More button next to the employee’s name. When you click,you’ll see the Copy Week or Delete Week box display. Then select the future week where you want to Paste that schedule.Click on the employee and then select Paste Week. The same hours will become available for you to save or edit.Above, you will see listed under the employees name their home store number (114000), site code (120) and their positioncode (145 for part time sales associate, 53 for part time assistant manager and 45 for store manager.)Paylocity Time and Attendance User Guide (replaces ADP User Guide) July 1, 201714
EDITING OR ADDING A MISSING PUNCH: Hover over the Web Pay box in the upper left of the screen until the 3 Icons become visible. Click on Web Time to begin the process.EDITING OR ADDING A MISSING PUNCH: Click on the Time Card Icon as seen below. Enter a Last Name, click on the correct one and Click on Go. Or select a name from the drop down list illustrated on the next page.Paylocity Time and Attendance User Guide (replaces ADP User Guide) July 1, 201715
EDITING OR ADDING A MISSING PUNCH: Make sure you have the correct employee and pay period date range selected.The system defaults to the current pay period. If you need to change the period, click on the previous or next box.EDITING OR ADDING A MISSING PUNCH: Find the day that requires a correction. Looked for informational symbols likeMissed Punch as notated below. Click on the box to edit and make the entry. Remember to enter A for AM or P for PM.Paylocity Time and Attendance User Guide (replaces ADP User Guide) July 1, 201716
REQUESTING PTO: Click on the Time Off Calendar Icon. You will see the Time Off work area. It has 3 Blue Icons for Requests, Status, and Balances. Click on the one appropriate to your activity. Select the Type which will be PTO in most cases.Fill in the rest of the information such as Single or Multiple Days, the start date and end date, time and the number of hoursrequested. Add any notes intended for the supervisor. Click on the orange Submit Request Box. An email notification willbe sent to your supervisor. You will receive an email when it is approved. You can also check on the status by clicking onthe blue Status box in the middle. If you want to check your PTO balance, do that by clicking on the Balances box. Salariedpersonnel must enter only 4 or 8 Hours Per Day per company policy.Paylocity Time and Attendance User Guide (replaces ADP User Guide) July 1, 201717
REQUESTING PTO: You can also check on the status of your PTO request by clicking on the blue Status box in the middlebox shown in the example below. The status will say Pending until it is Approved or Denied. If you want to check your PTObalance, do that by clicking on the Balances box.APPROVING PTO REQUESTS: The following screens outline how to approve PTO requests. Just enter the last and first nameof the individual you’re reviewing and click on the orange Search button. It will bring up the individual with their request inyellow for Pending. If you don’t see any names, click on the next month or time period as your selection may not be correct.Paylocity Time and Attendance User Guide (replaces ADP User Guide) July 1, 201718
APPROVING PTO REQUESTS: Click on the Yellow box with the employee name; the Time Off box will open. Review the timeframe requested and Approve or Deny the request. Always click onPaylocity Time and Attendance User Guide (replaces ADP User Guide) July 1, 201719
APPROVING PTO REQUESTS: Hover over Web Pay until the 3 Icons show. Click on the Web Time Icon. Click on the Yellowbox with the employee name; the Time Off box will open. Review the time frame requested and Approve or Deny the request. Click on the Time Off Calendar Icon. You will see the Time Off work area. It has 3 Blue Icons for Requests, Status, andBalances. Click on the one appropriate to your activity. Select the Type which will be PTO in most cases. Fill in the rest ofthe information such as Single or Multiple Days, the start date and end date, time and the number of hours requested. Addany notes intended for the supervisor. Click on the orange Submit Request Box. An email notification will be sent to yoursupervisor. You will receive an email when it is approved. You can also check on the status by clicking on the blue Statusbox in the middle. If you want to check your PTO balance, do that by clicking on the Balances box.APPROVING PTO REQUESTS: Next click on the time off calendar to see requests submitted.Paylocity Time and Attendance User Guide (replaces ADP User Guide) July 1, 201720
APPROVING PTO REQUESTS: If requesting by name, enter the first and last name and then click on the orange SearchAPPROVING PTO REQUESTS: If requesting from the calendar, click on the person in the box. Yellow means pending, greenmeans approved.Once the approval or denial is selected in thetime off box to the left, an email will be sent tothe employee communicating the status of theirrequest. Always click on the Save button.Paylocity Time and Attendance User Guide (replaces ADP User Guide) July 1, 201721
APPROVING PTO REQUESTS: If requesting from a list, click on the person in the box. Click on the Show List View in the bluebox.Paylocity Time and Attendance User Guide (replaces ADP User Guide) July 1, 201722
RECEIVING YOUR PAYCHECK ON AN aline card: An aline card is used for employees who don’t have a bank checking or savings account for direct deposit. This is the only alternative to receiving your pay check as no paper checks are distributed.This service is offered through ADP. Follow these instructions for setting up this option:1. When a new employee completes their On-boarding documents on-line, they select how they would like to be paid. Iftheir selection is an aline card, Payroll receives a notification. The store manager gives an envelope containing the cardto the employee and records the Proxy ID number on the top in an email to Payroll@lorisgifts.com. Payroll will activatethat number for the employee in 24 hours. Once the activation occurs, a pin and balance alert is set up by the employee by either on-line activation with their home computer at mycard.adp.com or by phone at 877 ADP-4321(877.237.4321) which is open 24/7. Please be sure to sign the back of your card. Read the Cardholder Agreement.2. Also included in the aline envelop are 2 aline checks. You can use the check as a standalone self issued payroll check toreceive your full net pay if you wich to receive you pay via paper check. You are not required to activate your aline cardto use the aline check. On pay day, the check must be made payable to yourself for your full net pay and dated. Call877.237.4321 to authenticate the check and write the authentication number provided on the check in the blocks.Once authenticated, the check can be deposited in an account or cashed for free at any branch of the bank listed on thecheck.3. Review the paperwork in the aline envelop to understand fees that may be associated with each type of transaction.4. You can chose to discontinue the use of an aline card deposit by changing your payroll option in Paylocity. This will bediscussed in the next section.Follow the instructions on thegreen sticker to activate the card.Paylocity Time and Attendance User Guide (replaces ADP User Guide) July 1, 201723
Changing bank accounts or changing from an aline card to a bank account: If you want to change from the current bankaccount to a new one, want to have money sent to a secondary bank account or switch from an aline card, complete thefollowing steps:1. Log into the Self-Service Portal and get to your HomePage; click on ‘Employees’ at the top of the page highlighted below.2. Select Employee Info from the drop down options3.Click onto the Payroll Setup tab where you will click on the Direct Deposit option.4. The screen below will show the existing Direct Deposit information and allow you to add or edit any account. Click onthe yellow highlighted section.5. Main Account is where your main check will go. Below you will see the lower part of the screen where detail is added.Make sure the routing and account numbers are entered correctly. There is an example at the bottom of the screen. SavePaylocity Time and Attendance User Guide (replaces ADP User Guide) July 1, 2
Paylocity Time and Attendance User Guide (replaces ADP User Guide) July 1, 2017 3 1. Access Web Time by clicking on the Paylocity Icon shown below on the P desktop. 2. lick Register User on the bottom right of screen to create a new User Name and Password. 3. Enter 37565 Loris Gifts o