Transcription
Skip to contentManuals User Manuals Simplified.AKAI MPC Live II User GuideHome » AKAI » AKAI MPC Live II User GuideContents [ hide12345678AKAI MPC Live II User GuideIntroductionFeatures:Box ContentsImportant:SupportConnection DiagramFeatures8.1 Top Panel9 Rear Panel10 Operation11 Read More About This Manual & DownloadPDF:12 File Downloads13 References14 Related Manuals
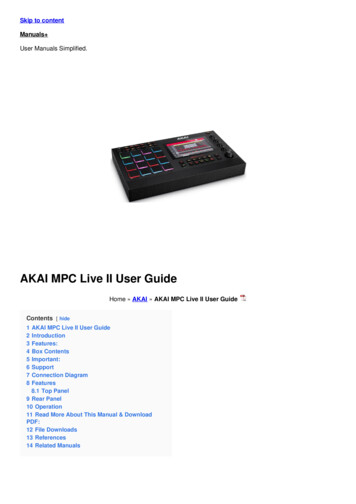
AKAI MPC Live II User GuideIntroductionFeatures:Standalone MPC—no computer requiredBuilt-in monitors7″ high-resolution multi-touch display16 velocity sensitive RGB PadsInternal, rechargeable lithium-ion batteryAlso acts as a control surface for MPC softwarePhono and line-level inputsThree stereo outputs (six mono)Two 5-pin MIDI inputs and outputs2 GB RAM, 16 GB of on-board storageFull-size SD card slotUser-expandable 2.5” SATA drive connector (SSD or HDD)Two USB-A 3.0 slots for thumb drives or MIDI controllersFour TRS CV/Gate jacks, eight outputs totalWi-Fi and Bluetooth enabledAbleton Link for cross-platform collaborationBox ContentsMPC Live IIPower AdapterUSB CableSoftware Download CardQuick start GuideSafety & Warranty ManualImportant:Visit akaipro.com and find the webpage for MPC Live II to download the complete User Guide.SupportFor the latest information about this product (documentation, technical specifications, system requirements,compatibility information, etc.) and product registration, visit akaipro.com. For additional product support, visitakaipro.com/support.Connection DiagramItems not listed under Introduction Box Contents are sold separately.
FeaturesTop Panel1. Display: This full-color multi-touch display shows information relevant to MPC Live II’s current operation. Touchthe display (and use the hardware controls) to control the MPC interface. SeeOperation to learn how to use some basic functions.2. Data Dial: Use this dial to scroll through the available menu options or adjust the parameter values of theselected field in the display. Pressing the dial also functions as an Enter button.3. Q-Link Knobs: Use these touch-sensitive knobs to adjust various parameters and settings. The knobs cancontrol one column of parameters at a time. The lights above the Q-Link Knobsindicate the currently selected column. Press the Q-Link button above them to change which column ofparameters they currently control.4. Q-Link Button: Press this button to change which column of parameters the Q-Link Knobs currently control(indicated by the lights above the Q-Link Knobs). Each press will select the nextcolumn. Press and hold Shift and then press this button to select the previous column instead.5. Pads: Use these pads to trigger drum hits or other samples. The pads are velocity-sensitive and pressuresensitive, which makes them very responsive and intuitive to play. The pads will lightup different colors, depending on how hard you play them (ranging from yellow at a low velocity to red at thehighest velocity). You can also customize their colors.\6. Pad Bank Buttons: Press any of these buttons to access Pad Banks A–D. Press and hold Shift while pressingany of these buttons to access Pad Banks E–H. Alternatively, double-press one ofthese buttons.7. Note Repeat / Latch: Press and hold this button, and then press a pad to trigger that pad’s sample repeatedly.The rate is based on the current tempo and Time Correct settings. Press and hold Shift and then press thisbutton to “latch” the Note Repeat feature. When latched, you do not have to hold the Note Repeat button for it tobe activated. Press Note Repeat once more to unlatch it. 48. Full Level / Half Level: Press this button to activate/deactivate Full Level. When activated, the pads will always
r their samples at the maximum velocity (127), regardless of the amount of force you use.Press and hold Shift and then press this button to activate/deactivate Half Level. When activated, the pads willalways trigger their samples at half-velocity (64).16 Level / Notes: Press this button to activate/deactivate 16 Level. When activated, the last pad that was hit willbe temporarily copied to all 16 pads. The pads will play the same sample as the original pad, but a selectableparameter will increase in value with each pad number, regardless of the amount of force you use. Press andhold Shift and press this button to activate/deactive Notes mode for the pads. When activated, you can playmusical scales/modes, chords or progressions using the pads while in any mode. Use Pad Perform Mode toconfigure the settings for the pads.Erase: As a Sequence is playing, press and hold this button and then press a pad to delete the note event forthat pad at the current playback position. This is a quick way to delete note events from your sequence withouthaving to stop playback. When playback is stopped, press this button to open the Erase window where notes,automation and other sequence data can be erased from the sequence. Download the full User Guide for moreinformation.Undo / Redo: Press this button to undo your last action. Hold down Shift and press this button to redo the lastaction you undid.Copy / Delete: Press this button to copy one pad to another. When the From Pad field is selected, press the“source” pad (the pad you want to copy). When the To Pad graphic (of all pads) is selected, press the“destination” pad. You can select multiple destination pads, and you can select pads in different pad banks. TapDo It to continue or Cancel to return to the previous screen.Press and hold Shift and press this button to delete.Step Seq/Automation: Press this button to view Step Sequencer Mode where you can create or edit sequencesby using the pads as “step buttons,” simulating the experience of a traditional step-sequencer-style drummachine. Press and hold Shift and press this button to toggle the Global Automation state between Read andWrite.TC / On/Off: Press this button to open the Timing Correct window, which contains various settings to helpquantize the events in your sequence. Press and hold Shift and press this button to turn Timing Correct on andoff.Shift: Press and hold this button to access some buttons’ secondary functions (indicated by gray writing).Double-press this button to see which buttons have secondary functions—the buttons will flashfor a few seconds.Menu / Browse: Press this button to open the Mode Menu. You can tap an option on the Menu screen to enterthat mode, view, etc.Press and hold Shift and then press this button to view the Browser. You can use the Browser to locate andselect programs, samples, sequences, etc.Main / Grid: Press this button to enter Main Mode. Press and hold Shift and then press this button to enter GridView Mode.Mix / Sampler: Press this button to view the last used Mixer Mode, either Track Mixer (default) or Pad Mixer. InTrack Mixer Mode, you can set levels, stereo panning, and other settings for your tracks, programs, returns,submixes, and masters. In Pad Mixer Mode, you can set a program’s levels, stereo panning, routing, andeffects. Pressing the button multiple times will toggle between the two Mixer Modes. Press and hold Shift andthen press this button to view the Sampler, where you can record audio samples to use in your projects.Mute / Sample Edit: Press this button to view the last used Mute Mode, either Track Mute (default) or Pad Mute.In Track Mute Mode, you can mute tracks within a sequence or set mute groups for each track. In Pad MuteMode, you can mute pads within a program or set mute groups for each pad within a program. Pressing thebutton multiple times will toggle between thetwo Mute Modes. Press and hold Shift and then press this button to enter Sample Edit Mode where you can edityour samples using various functions and processes.Next Seq / XYFX: Press this button to view Next Sequence Mode where you can trigger different sequencessimply by playing the pads. This is useful for live performances, letting you change a song’s structure in realtime. Press and hold Shift and press this button to view XYFX Mode, which turns the touchscreen into an XYpad where each axis represents the range of an effect parameter. As you move touch or move your finger onthe touchscreen, the current position will determine the current value of the two parameters. You can use thismode to create interesting effect automation on your tracks.–/ : Press these buttons to decrease/increase the value of the selected field in the display.Tap Tempo / Master: Press this button in time with the desired tempo to enter a new tempo (in BPM). Pressand hold Shift and press this button to set whether the currently selected sequence follows its own tempo (thebutton will be lit amber) or a master tempo (the button will be lit red).Rec: Press this button to record-arm the sequence. Press Play or Play Start to start recording. Recording in this
24.25.26.27.28.29.way (as opposed to using Overdub) erases the events of the current sequence. After the sequence playsthrough once while recording, Overdub will be enabled.Overdub: Press this button to enable Overdub. When enabled, you can record events in a Sequence withoutoverwriting any previously recorded events. You can enable Overdub before or during recording.Stop: Press this button to stop playback. You can double-press this button to silence audio that is still soundingonce a note stops playing. Press and hold Shift and press this button to stop playback and return the playheadto 1:1:0.Play: Press this button to play the sequence from the playhead’s current position.Play Start: Press this button to play the sequence from its start point.Master Vol: Turn this knob to adjust the volume of the outputs, phones output and speakers.Speakers: When the Speaker switch on the rear panel is set to On, these speakers will play the current audio.Use the Master Volume knob to control the volume of the speakers.Rear Panel1. Power Input: Use the included power adapter to connect MPC Live II to a power outlet.2. Power Adapter Restraint: Secure the power adapter cable to this restraint to prevent it from accidentallyunplugging.3. Power Switch: Turns MPC Live II’s power on/off.4. Charging Indicator: This light (behind the vent) will turn on when MPC Live II’s internal battery is charging (whenthe power input is connected to a power outlet). When the battery is fully charged or when it is disconnectedfrom a power outlet, then this light will turn off.5. Link: Connect a standard Ethernet cable to this port to use Ableton Link and other compatible devices with MPCLive II. Download the full User Guide for more information.Note: You can also use Ableton Link wirelessly over a Wi-Fi connection. Download the full User Guide for moreinformation.6. USB-B Port: Use the included USB cable to connect this high-retention-force USB port to an available USB porton your computer. This connection allows MPC Live II to send/receive MIDI and audio data to/from the MPCsoftware on your computer.7. USB-A Ports: Connect USB flash drives to these USB ports to access their files directly using MPC Live II.When connected to a computer in Controller Mode, you can access drives connected to this port from yourcomputer. You can also connect standard MIDI controllers to these ports.8. SD Card Slot: Insert a standard SD, SDHC or SDXC card into this slot to access its files directly using MPCLive II.9. Rec Vol: Turn this knob to adjust the volume of the inputs.10. Inputs (1/4” / 6.35 mm): Use standard 1/4” (6.35 mm) TRS cables to connect these inputs to an audio source(mixer, synthesizer, drum machine, etc.). In Sample Record Mode, you can selectwhether you want to record either channel or both channels in stereo or in mono. To use these inputs, set theLine/Phono switch to Line.11. Inputs (RCA): Use a standard RCA stereo cable to connect these inputs to a phono-level audio source like aturntable. In Sample Record Mode, you can select whether you want to record either channel or both channelsin stereo or in mono. To use these inputs, set the Line/Phono switch to Phono.12. Line/Phono Switch: Set this switch to the appropriate position, depending on which inputs you want to use. Ifyou are using the RCA inputs, set this switch to Phono to provide the additional amplification needed for phonolevel signals. If you are using the 1/4” (6.35 mm) inputs, such asa CD player or sampler, set this switch to Line.13. Grounding Terminal: If using phono-level turntables with a grounding wire, connect the grounding wire to theseterminals. If you experience a low “hum” or “buzz”, this could mean that your turntables are not grounded.Note: Some turntables have a grounding wire built into the RCA connection and, therefore, nothing needs to beconnected to the grounding terminal.14. Outputs (1/4” / 6.35 mm): Use standard 1/4” (6.35 mm) TRS cables to connect these outputs to your monitors,mixer, etc.). The Master L/R outputs are the same as Outputs 1,2.15. Phones (1/4” / 6.35 mm): Connect standard 1/4” (6.35 mm) stereo headphones to this output.
16. Speaker On/Off: Use this switch to turn the MPC Live II internal speakers on or off.17. MIDI In: Use a standard 5-pin MIDI cable to connect these inputs to the MIDI output of an external MIDI device(synthesizer, drum machine, etc.).18. MIDI Out: Use a standard 5-pin MIDI cable to connect these outputs to the MIDI input of anexternal MIDI device (synthesizer, drum machine, etc.).19. CV/Gate Out: MPC Live II will send control voltage (CV) and/or Gate signals over these outputs to optionalexternal sequencers. Use standard 1/8” (3.5 mm) TS cables to send a single CV/Gate signal per output, or usea stereo TRS-to-dual mono TSF breakout cable (such as a Hosa YMM261) to send two CV/Gate signals per output.20. Kensington Lock Slot: You can use this slot to secure your MPC Live II to a table or other surface.OperationHere is some general information about how to use the MPC Live II display:Tap a button or option to select it. Use the data dial or –/ buttons to change its setting or valueSpread two fingers to zoom in (into a section of a waveform, for example). Pinch two fingers to zoom out.
Double-tap a button to access advanced editing options. In some cases, this will show a numeric keypad that you canuse to enter a value (an alternative to the data dial or –/ buttons). Tap the upper-left part of the display to return tothe previous view.The upper edge of the display shows the toolbar, which contains information about the current view (often the nameof the current track, sequence, audio pointer position, etc.).Tap an item to select it.The lower edge of the display shows various buttons that you can use in the current view.Tap a button to press it.To return to a previous view, either tap outside of the window currently in the display or tap the left arrow ( ) in theupper-left part of the display.Read More About This Manual & Download PDF:File DownloadsAKAI User Guide Download [optimized]MPC Live IIDownloadReferencesTechnical Support & Assistance l Akai Pro
Music Production Hardware & Software Akai ProLegalKensington TrademarkRelated Manuals1. AKAI MPC ONE User Guide MPC ONE Quickstart Guide Introduction Features: Standalone MPC—no computer required.2. AKAI C57 Metallic Housing Bluetooth Car FM Transmitter User Guide User Guide AKAI C57 Metallic HousingBluetooth Car FM Transmitter.3. Maxell Mobile Battery MPC-CTY12400 User Manual Maxell Mobile Battery MPC-CTY12400 User Manual IntroductionThank you for.4. User Manual JBL Live 400 BT / Live 500 BT Headphones INSTRUCTION MANUAL LIVE400BT / LIVE500BT QuickStart Guide 1. What’s.5. behringer LIVE BUDS User Guide Quick Start Guide LIVE BUDS High-Fidelity Wireless Earphones with Bluetooth.6. SIMSKY Live Box User Guide SIMSKY Live Box User Guide Welcome Thanks for purchasing ezcap270.
AKAI MPC Live II User Guide Home » AKAI » AKAI MPC Live II User Guide . 8 Features 8.1 Top Panel 9 Rear Panel 10 Operation 11 Read More About This Manual & Download PDF: 12 File Downloads 13 References 14 Related Manuals. AKAI MPC Live II User Guide . Connect a standard Ethernet cable to this port to use Ableton Link and other compatible .
