Transcription
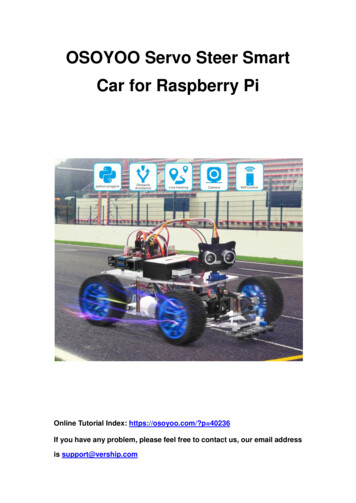
OSOYOO Servo Steer SmartCar for Raspberry PiOnline Tutorial Index: https://osoyoo.com/?p 40236If you have any problem, please feel free to contact us, our email addressis support@vership.com
Table of ContentsOSOYOO Servo Steer Smart Car for Raspberry Pi. 0Preface . 3Safety Instruction . 3About OSOYOO . 3About This Kit . 3Online Tutorial Index: . 3Customer Service and Tech Support . 4OSOYOO V2.1 Robot car kit Lesson 0: Introduction . 5Why Raspberry Pi is so important to the Robot Car DIY learning kit? . 6Tutorial and sample projects . 6OSOYOO Servo Steer Smart Car for Raspberry Pi lesson 1: Hardware Installation . 7Objective. 7Parts & device . 7Hardware installation . 10Circuit connection . 21OSOYOO Servo Steer Smart Car for Raspberry Pi lesson 2: Software Installation andBasic Movement . 26Objective. 26Parts & device . 26Installation Raspberry Pi OS . 27Using console . 30A. Using console directly . 30B. Using console remotely . 36Steering servo alignment . 44Basic movement . 48OSOYOO Servo Steer Smart Car for Raspberry Pi Lesson 3: Line Tracking . 51Objective. 51Parts & device . 51Hardware installation . 51Circuit connection . 52Software installation . 53OSOYOO Servo Steer Smart Car for Raspberry Pi Lesson 4: Obstacle Avoidance . 56Objective. 561
Parts & device . 56Hardware installation . 57Circuit connection . 58Software installation . 58OSOYOO Servo Steer Smart Car for Raspberry Pi Lesson 5: Wifi UDB control by phone . 61Objective. 61Parts & device . 61Hardware installation . 62Circuit connection . 62Software installation . 62OSOYOO Servo Steer Smart Car for Raspberry Pi Lesson 6: Web Camera Control . 67Objective. 67Parts & device . 67Hardware installation . 68Circuit connection . 69Software installation . 702
PrefaceSafety Instruction Do not plug or unplug any wire or module when power is on,Do not even touch the board when power is on or your hand has staticcharge (you can move static charge by touching metal tap).Reversing /- when connecting modules with board, or incorrectlyconnecting can destroy your electronics and cause fire hazard.Please make sure polar direction is correct when you install batteries inyour battery box, otherwise it can destroy your device and cause firehazard.Please don’t use Carbon zinc batteries as power, as output current ofthis kind of battery is too low and it is unable to load the robot carDo not leave batteries in battery box if you don’t use it for long time dueto the risk of fire and malfunction.About OSOYOOOSOYOO brand owned by Pinetree Electronics Ltd, the only Canadian OwnedScience Fair Supplier, Circuit Builder, IOT, Autonomous Smart Machine, HomeElectronics Workshop and Accessory Company.Pinetree Electronics Ltd established since 2009 in Vancouver, Canada. We areEngineers and Programmers Ourselves, So We Know How Important It Is toCREATE Your Dreams! Not All Robot Kits Are Created Equal: Pay For TrueQuality & You Will Not Be Disappointed.For more information and tutorial of OSOYOO products, please visit:www.osoyoo.comAbout This KitOSOYOO Servo Steer Smart Car For Raspberry Pi is a perfect combination ofchallenge and excitement, learning and fun. The kit comes with step by stepONLINE tutorial with text, picture and video. The kit is great for any skill level— whether you’re a pro, enthusiast, or a beginner.Online Tutorial Index:General Introduction: https://osoyoo.com/?p 40236OSOYOO robot car introduction video: https://osoyoo.com/2021004700.html3
oo.com/manual/2021004700.pdfCustomer Service and Tech SupportYou have following two options to ask for help:1) Leave comments on our tutorial https://osoyoo.com/?p 402362) Send email to support@osoyoo.info. We guarantee that all inquiries willbe replied in 24 hours.4
OSOYOO V2.1 Robot car kit Lesson 0:IntroductionThere are many entry level Robot Car Kits in the market, most of them are controlledby Arduino Boards. You can check our tutorial blog for such Arduino Robot kit iy-introduction .The advantage of Arduino Robot Car kit is that Arduino has no Operation System andprogramming is simple and easily. For some basic robot application which needs onlysimply logic to handle sensor data and control actuators, Arduino-controlled robotcar is a good choice.However, for some more complex robot applications which need more complexfunctions such as computer vision (CV), Internet of Things (IoT), web server controletc, Arduino board’s ability is too weak to reach the target.In order to help intermediate students to complete some complex Robotic project.We developed a more advanced Raspberry Pi Robot Car learning Kit.5
Why Raspberry Pi is so important to the Robot Car DIY learning kit?Because Raspberry Pi is a real computer which has Linux OS (Raspbian) and thereforemuch powerful than Arduino Board which is simply a micro-controller (MCU).With Raspbian OS and its huge open-source software community , people can makemuch complicated Robot projects,i.e web appliation, database, A.I, machinelearning, IoT, Computer Vision etc.Unlike Arduino board, Raspberry Pi programming environment is much morecomplex and flexible. It supports almost all programming language as long as thelanguage is supported by Rasbian Open Source community. The most commonlyused languages for access Raspberry Pi GPIO pins are C and Python. If you want tolearn some Raspberry Pi hardware GPIO programming, you can read our tutorial infollowing tarter-kit-v1-introduction/Tutorial and sample projectsWe have developed a step-by-step tutorial which evolves from a simple carwithout any control to a multi-function robotic car controlled by mobile APP.Every lesson has detailed sample code with comments, circuit graph,assembly instruction and video. Even if you have no programmingexperience, you can follow the step-by-step instruction and gradually becomea master.Our robotic car is 100% open source. If you are an intermediate player andhave time to read our code comments, you can easily customize this roboticcar to make your own project for science fair, college homework or evencommercial applications.Robot car Sample Projects: Lesson 1 Basic robot car assembly: URL https://osoyoo.com/?p 36370Lesson 2 Line Tracking: URL https://osoyoo.com/?p 36411Lesson 3 Obstacle Avoidance: URL https://osoyoo.com/?p 36426Lesson 4 robot car controlled by phone: URLhttps://osoyoo.com/?p 39617Lesson 5 Make a simple website server in Pi: URLhttps://osoyoo.com/?p 40284Lesson 6 Web-Camera Controlled: URL https://osoyoo.com/?p 364406
OSOYOO Servo Steer Smart Car forRaspberry Pi lesson 1: HardwareInstallationWelcome to the first lesson of OSOYOO Servo Steer Smart Car for Raspberry Pi!In this lesson, we will install the framework of the OSOYOO Servo Steer Smart Car for RaspberryPi and simply introduce the hardware of this robot.All lessons are based on the frame work of this lesson. Please follow this lesson carefully.Please enter the link to watch the video: https://youtu.be/85tj4KS5 poNo.123PictureDeviceRaspberry pi board 2/3/4(not in package)OSOYOO PWM HAT v1.0OSOYOO model X motordriver module4Servo motor7Qty.Link1Click here to buy1Click here to buy1Click here to buy1Click here to buy
5Servo motor holder1Click here to buy6Servo horn1Click here to buy7Voltage meter1Click here to buy8Motor with cable2Click here to buy9Motor holder2Click here to buy10Wheel4Click here to buy11Motor Flexible Coupler1Click here to buy12RC Steering Cup2Click here to buy8
13Connecting rod2Click here to buy14Rod radial end bearing2Click here to buy15Chassis1Click here to buy1Click here to buy1Click here to buy1Click here to buy1Click here to buy1Click here to buy161718193pin female to 3pin femalejumper wire6Pin female to femalejumper wire2Pin 20cm XH2.54female jumper wire18650 battery boxBattery charger for 1865020battery(Optional)9
211Pair 18650 batteries(Optional)1Click here to buy22Philips screwdriver1Click here to buy23L Type hex wrench1Click here to buy1. Remove the protective film from the chassis.2. Fix motor holders on the lower chassis with 8pcs M3.5*12 screws, M3.5 nuts andM3.5 rubber washers. From top to bottom, use M3.5*12 screws cross lower chassis,Motor holder, 3.5 rubber washer and then 3.5 nut as follow:10
3. Cross motor holder, use M3*8 screws to fix motor on motor holder as follow:4. Install motor flexible couplers on motors and use cup point screws to fix motorflexible couplers on motor.The shaft from the motor has a flat area on it. Make sure that cup point screws arepositioned on this flat, and tightened both screws on the shaft.11
5. Install OSOYOO MODEL X motor driver module to lower car chassis with 4pcs M2.5plastic screws, plastic pillars and plastic nuts. (Please make sure you install theOSOYOO MODEL X motor driver module in correct direction.)6. Fix servo motor on servo motor holder with M3*10 screws and nuts as follow:12
7. Use M3*10 screws cross servo motor holder with servo motor, lower chassis andnut to fix servo motor on lower chassis as follow:8. Install servo horn on servo motor with 2pcs M2*10 screws as follow:9. Push 4x12x4 roller bearing into front of RC steering cup tightly as follow:13
10. Push 4x8x4 roller bearing into back of RC steering cup tightly as follow:11. Use M4*20 screw cross RC steering cup as follow:12. Fix Motor Flexible Couplers on M4*20 screw with Cup point screws as follow:13. Fix RC steering cups on lower car chassis with M2.2*8 self-tapping screws asfollow:14
14. Install M3*22 copper pillars beside of RC steering cups with M3*10 screws asfollow:15. Install triangular Acrylic sheets on the M3*22 copper pillars and fix these withM2.2*8 self-tapping screws and M3*10 screws as follow:15
16. Install M3*4 6 copper pillar on servo horn as follow:17. Fix 2 connecting rods with Rod radial end bearings, and make sure the lengths ofthese are about 62mm and 82mm18. Install two ends of 82mm connecting rod under RC steering cups with 2pcsM2.2*8 self-tapping screws as follow (Note: When installing 82mm connectingrod, please keep the heads of two RC steering cups parallel, or you need toadjust the length of this connecting rod) :16
19. Install one end of 62mm connecting rod on left RC steering cup with M2.2*8 selftapping screw and the other end on M3*4 6 copper pillar with M3*8 screw as follow(Note: When installing 62mm connecting rod, please keep the servo hornperpendicular to the micro servo, or you need to adjust the length of thisconnecting rod) :20. Install 4 wheels on motor flexible couplers with M4*6 screws as follow:17
21. From bottom to top, use M3*8 cross M3 wash, lower chassis and M3*45 copperpillar to fix M3*45 copper pillar on low chassis as follow:22. Use M2.5 plastic pillar cross Raspberry Pi and M2.5*13 plastic pillar from bottomto top and fix 2pcs M2.5*13 plastic pillars on Raspberry Pi as follow:23. Fix 2pcs M2.5 plastic pillars on upper chassis as follow:18
24. Install 2pcs M2.5 plastic screws under the chassis and 2pcs M2.5 plastic screwson Raspberry Pi25. Fix 18650 battery box on upper chassis with M3*10 screws and M3 nuts19
26. Install voltage meter on low car chassis with 2pcs M2.5 plastic screws, plasticpillars and plastic nuts27. Insert OSOYOO PWM Hat V1.0 on Raspberry Pi as follow:20
Note: before fix upper chassis on lower chassis, please connect the parts. To learnmore about the GPIO pins of Raspberry Pi, please f-raspberry-pi-gpio/1) Connect 2 motors to OSOYOO MODEL X motor driver module K1 and K3 sockets asfollowing graph:2) Connect OSOYOO MODEL X motor driver module to OSOYOO PWM Hat V1.0 with6Pin female to female jumper wire as following graph3) Connect Voltage Meter to OSOYOO MODEL X motor driver module with 3pinfemale to female jumper wires as below connection diagram21
4) Connect 18650 battery box to OSOYOO PWM Hat V1.0 as below connectiondiagram22
5) Connect Servo motor to PWM15 of OSOYOO PWM Hat V1.0 as following:23
6) Connect upper chassis to lower chassis with 6 copper pillars and fix copper pillarswith M3*8 screws and M3 washes as following:7) Please install your 18650 batteries in battery box for 18650 as per followinginstruction (Note: Check the box instruction and make sure polar direction iscorrect, otherwise it can destroy your device and cause fire hazard.):Now hardware installation is almost down.24
25
OSOYOO Servo Steer Smart Car forRaspberry Pi lesson 2: SoftwareInstallation and Basic MovementIn this tutorial, we will simply tell you how to install Raspberry Pi OS for theRaspberry pi and how to use console to control raspberry pi. We’ll use OSOYOOServo Steer Smart Car for Raspberry Pi to do some simple movements. Once the carinstallation is completed, it is very important to test the installation and samplecode. If you have passed the test movement of this lesson, it means Raspberry pi,motors, battery, model X board, servo motor and wire connections between theseparts are all functioning well, and you can move on other sample lessonsIf you don’t complete the frame of car, please review lesson 1Please enter the link to watch the video: https://youtu.be/YCcgr-RUON4 Servo Steer Smart Car for Raspberry Pi (with raspberry pi board) x1Micro SD card (more than 8GB) x1Micro SD card reader x126
OSOYOO 5 inches DSI touch screen for Raspberry Pi x1PC x1Raspberry pi OSDownload Raspberry pi OS from:(Recommend use ing-version)systems/#raspberry-pi-os-32-bit7 zip is a free zip utility that un-Download 7 zip from:zips zip filehttps://www.7-zip.org/Raspberry Pi Imager is a imagerDownload Raspberry Pi imager otepad is a free sourcecode editorDownload Notepad from:and Notepad replacement ts several languages.PuTTY is a SSH tool forDownload PuTTY from:Windows usershttps://www.chiark.greenend.org.uk/ sgtatham/putty/Note: there is a 16GB micro SD card which is burn 2021-05-07-raspios-busterarmhf.img in the package of OSOYOO Servo Steer Smart Car for Raspberry Pi. If youuse this micro SD card, please skip the steps of Raspberry Pi OSStep 1: Download Raspberry Pi Imager from https://www.raspberrypi.org/software/and then install this software.27
Step 2: Prepare a new Micro SD card (more than 8GB) and insert it in USB micro SDcard reader, and connect USB micro SD card reader with your PC.Step 3: If the micro SD card is not new, please open Raspberry Pi Imager, select“Erase” as Operating system, then select your micro SD card and then click “write” toformat the SD card firstly as following:28
Step 4: Open Raspberry Pi Imager, select “Raspberry Pi OS (32-bit)” as Operatingsystem, then select your micro SD card and then click “write” to burn the OS in yourmicro SD card (Note: if you want to burn the OS you have download, please select“Use custom” and then browse the OS in your PC)29
A. Using console directlyNote: A screen monitor is needed when you use the console directly.1. Connect Raspberry Pi to your HDMI monitor or TV. Put a keyboard and mouse intoRaspberry Pi USB ports. Insert SD card into the slot on your Raspberry Pi as following:2. Please click the Lan icon at the right-upper corner, and select your WIFI SSID, andenter the pass word of your wifi to connect wifi hotspot. Then you can see theconsole full screen.30
3. If you click the Lan icon, and get the notice as following:4. Please click configure the WIFI localisation as following:31
5. Click the icon of Terminal on the screen, or press CTRL ALT T simultaneously,then a terminal will pop up as follows:32
6. Find out the IP address of the RPi.Method A: Connect your Pi to monitor and mouse, click LAN or Wifi icon to get theIP address as following photoMethod B: you can also find the IP address by typing terminal command:hostname -I33
7. Enable SSHTyping terminal command: sudo raspi-config34
Go to configuration menu, go to Interface Options - SSH - Yes - Select - Finish(Note: please use “arrows” on keyboard to position the cursor where you want to goand press “enter” to confirm the select)35
B. Using console remotelyNote: For 2016-11-25 release or above, SSH (a protocol securing remote loginsession and other network service) is disabled by default. Therefore, when youneed to log in remotely, you need to enable ssh firstly.1. Insert Micro SD card which is burn with Raspberry Pi OS in USB micro SD cardreader, and connect USB micro SD card reader with your PC.36
2. Open this micro SD card in your computer3. Create a txt. file and renamed “ssh” under /boot/ to enable it.37
4. Download the file “wpa supplicant.conf” and then use Notepad to open thisfile, and replace the SSID and PSK with your own wifi SSID and password and savethis file:ssid "Your wifi-A ssid"psk "ssid password"The content of “wpa supplicant.conf” as following:country CNctrl interface DIR /var/run/wpa supplicant GROUP netdevupdate config 1network {ssid "Your wifi-A ssid"psk "ssid password"key mgmt WPA-PSKpriority 10}network {ssid "Your wifi-B ssid"psk "ssid password"key mgmt WPA-PSKpriority 2scan ssid 1}5. Send the file “wpa supplicant.conf” from your PC to the micro SD card38
6. Plug the MicroSD card into the Raspberry Pi and then power on the Raspberry Pi.7. Login the Wifi router and check the IP address of your Raspberry Pi (Or you canuse some IP address scan APP to scan the IP address)39
8. Use ssh tool to control Raspberry Pi remotelyRemark: For three platforms: Windows, Mac and Linux, it might be a little bitdifferent to do this.(1) Linux and Mac users can easily log into the Raspberry Pi via ssh. On Linux or Mac,find Terminal and open it.40
Type in ssh pi@IP address (ssh is the tool for remote login; pi is the user name, andas the name suggests, your RPi’s IP address) and then press Enter to confirm. Forexample:ssh pi@192.168.0.107If you get a prompt that no ssh is found, you need to install a ssh tool like Ubuntuand Debian by yourself:sudo apt-get install ssh(2) For Windows users, you may use a ssh tool to log into Raspberry Pi remotely, likePuTTY.Step 1. Download PuTTY from:https://www.chiark.greenend.org.uk/ sgtatham/putty/ and install this exe. in yourWindows PCStep 2. Open PuTTY and click Session on the left tree-alike structure (generally it’scollapsed upon PuTTY startup):41
Step 3. Enter the IP address you got into the textbox under Host Name (or IPaddress) and 22 under Port (by default it is 22), then click open.42
Step 4. Note that when you first log in to the Raspberry Pi with the IP address, you’llbe prompted with a security reminder. Just click Yes. When the PuTTY windowprompts login as: type in the user name: pi, and password: raspberry (the defaultone, if you haven’t changed it).Note: when you’re typing the password in, the window shows nothing just null, butyou’re in fact is typing things in. So just focus on typing it right and press Enter. Afteryou log in the RPi successfully, the window will display as follows:43
For other platforms, please contact your supplier.After learning how to install Raspberry Pi OS and use the console of Raspberry Pi,you can follow the next steps to test the frame work of the robot car in lesson1.Note: In our sample lessons, we use Windows PC as the remote console device andPuTTY as the ssh toolStep 1: Power the car and run the following command and enable the I2C (I2C is aprotocol which will be used to exchange data with I2C device)sudo raspi-configThen select Interfacing Options- I2C- Yes- Select- Finish44
Step 2: Install GPIO and pca9685 PWM Library by running the following commands:cd sudo apt-get install rpi.gpiosudo pip install adafruit-pca968545
Step 3: Run following commands to find the front value of the servo:wget ython servo.pyStep 4: If your steering servo does not facing face to center front direction, then youhave two options:Option 1) Turn off the power and remove the horn from the servo motor. Install thearm as the follow picture. And then install M3*4 screws on the middle of the horn to46
fix the horn.Option 2) Install M3*4 screws on the middle of the horn to fix the horn and enterthe following command in terminal:sudo nano servo.pyYou can change the default value of line 20CENTER 425 #Steer servo car go forward47
If your steering wheels tends to left, increase the value from 425 to 430, 435, 440 If your steering wheels tends to right, decrease the value from 425 to 420, 415,410 Then click “ctrl” “x”, and then Y to save this file and run the command: pythonservo.py again. Repeat these steps until your steering wheels finally faces to front,and write down this value to change the lesson2,3,4,5,6 code and make steeringservo always facing front at default FRONT value1. Power the car and type the following commands in the terminal:wget pypython pi-basic.py48
2. After above python is running, you motors will move forward and then movebackward , and turn left for then turn right, then back to right and finally back toleft.3. Please run the following command to change the default value 425 in line 20 asthe FRONT value. If you align the wheel direction manually, please skip this step.sudo nano pi-basic.py49
You can download the sample python code from https://osoyoo.com/driver/p3car/v3car-basic.py and read it via Notepad . If you have some basic pythonknowledge, you can easily understand how to customize the code for your ownapplication.50
OSOYOO Servo Steer Smart Car forRaspberry Pi Lesson 3: LineTrackingIn this lesson, we use our Raspberry Pi robot car to automatically drive along a black line in whiteground . We will use 5-point IR tracking sensors to detect the line.No.PictureDeviceQty.AccessoriesLink1Tracking sensormodule1M2.5 Plastic Screw x 2Click here toM2.5 Plastic Nut x2buyM2.5 Plastic Pillar x 227pin 25cm Femaleto Female Cable1Click here tobuy3Philipsscrewdriver1Click here tobuyStep 1: You must complete Lesson 2 basic frame workStep 2: Install tracking sensor modules under lower car chassis with2pcs M2.5 plasctic screws, M2.5 plastic pillars and M2.5 plastic51
nuts.Step1: Connect GND-VCC pin of tracking sensor module to GND-5V of osoyoo PWM HAT board ;connect IR1, IR2, IR3, IR4, IR5 pins to GPIO5, GPIO6, GPIO13, GPIO19, GPIO26 of Raspberry piwith 7pin 25cm female to female cable as the following photo shows (Remember : DO NOT removeany existing wires installed in Lesson 1 ):52
Step 2: Adjust the sensitivity of tracking sensor modules.Turn on and hold the car and adjust the potentiometer on the tracking sensor with Philipsscrewdriver until you get the best sensitivity status: the signal indicate LED light will turn on whensensor is above black track, and the signal LED will turn off when the sensor is above white ground.53
Download the python code by typing following command in yourRaspberry Pi terminal:wget ng.pyTurn on the battery of your car and put the car on the black track line:Now you can run the line tracking python program by typing following command:python pi-tracking.pyYour car will move along the black track line.54
55
OSOYOO Servo Steer Smart Car forRaspberry Pi Lesson 4: ObstacleAvoidanceIn this lesson, our Raspberry Pi robot car will use Ultrasonic sensor to detect obstacles and makeautomatic driving and avoid collision.No.1PictureDeviceQty.Ultrosonic Sensor1AccessoriesM1.4*8 Screw x 4M1.4 Nut x 4LinkClick here tobuyM2.2*8 Self Tapping2Servo Motor1Screw x 2M2*4 Self TappingClick here tobuyScrew x 1M1.4*8 Screw x 43Mount Holder for1Ultrasonic SensorM1.4 Nut x 4M2*4 Self TappingScrew x 120Pin jumper wire4female to femalesome20cm56Click here tobuy
5Philips screwdriver1Click here tobuyStep 1: You must complete Lesson1 and Lesson 2Step 2: Install servo motor at the front of upper car chassis with 2pcs M2.2*8 self tapping screws.Step 3: Install ultrasonic module to mount holder with 4pcs M1.4*8 screw and M1.4 nuts.Step 4: Install ultrasonic holder on micro servo motor with 1pcs M2*4 self-tapping screw.57
Connect ultrasonic sensor holder SG90 servo motor to PWM 14 port of OSOYOO PWM HAT board,and connect GND and VCC of ultrasonic module to GND and 5V of OSOYOO PWM HAT board, thenconnect TRIG and ECHO of ultrasonic module to GPIO20 and GPIO21 of raspberry pi as followinggraph (Remember: DO NOT remove any existing wires installed in Lesson 1):58
Download the python code by typing following command in your Raspberry Pi terminal:wget le.pyTurn on the battery of your car and your servo and run the program, If you are using Python 2 inRaspberry Pi, type:python pi-obstacle.pyYour servo will rotate the ultrasonic sensor to front position for 3 seconds. If your sensor is notfacing front direction, please turn off the battery or press Ctrl-C key to stop the program. Thenremove the sensor from servo and re-install it, make sure it faces front and fix the position withscrew, now you can type same command python pi-obstacle.py and run the program again.59
Now the car will automatically make obstacle avoidance auto drivi
The advantage of Arduino Robot Car kit is that Arduino has no Operation System and programming is simple and easily. For some basic robot application which needs only simply logic to handle sensor data and control actuators, Arduino-controlled robot car is a good choice. However, for some more complex robot applications which need more complex