Transcription
Server/PublisherVersion 11.20 SR17 for Microsoft Windows Lund, Sweden, 2017Authored by QlikTech International AB
Copyright 1994-2017 QlikTech International AB, Sweden.Under international copyright laws, neither the documentation nor the software may be copied, photocopied,reproduced, translated or reduced to any electronic medium or machine-readable form, in whole or in part,without the prior written permission of QlikTech International AB, except in the manner described in thesoftware agreement.QlikTech and QlikView are registered trademarks of QlikTech International AB.Active Directory , Excel , Internet Explorer , Microsoft , .NET , SharePoint , SQL Server , VisualStudio , Windows , Windows 7 , Windows 2000 , Windows NT , Windows Server , Windows Vista ,and Windows XP are trademarks of Microsoft Corporation in the United States, other countries, or both.CA SiteMinder is a registered trademark of Computer Associates.Chrome is a trademark of Google Inc.Firefox is a registered trademark of the Mozilla Foundation.IBM is a trademark of International Business Machines Corporation, registered in many jurisdictionsworldwide.Intel and Core Duo are trademarks of Intel Corporation in the U.S. and/or other countries.NetWeaver and SAP are trademarks or registered trademarks of SAP AG in Germany and in several othercountries.Novell is a registered trademark of Novell, Inc., in the United States and other countries.Oracle is a registered trademark of Oracle and/or its affiliates.Safari is a trademark of Apple Inc., registered in the U.S. and other countries.Salesforce.com is a trademark or registered trademark of Salesforce.com, Inc.Wikipedia is a registered trademark of the Wikimedia Foundation.Other trademarks are the property of their respective owners and are hereby acknowledged.2QlikView Server/Publisher - QlikView 11.20SR17
ContentsContents7Part 1 Introduction1 Overview1.11.21.31.49QlikViewQlikTech Support ServicesConventionsAbout this Document999102 What’s New in QlikView 11 Server?11Part 2 Installation173 Upgrading QlikView193.1 Upgrade Considerations3.2 Upgrade Procedure3.3 Multi-machine Preparation1919204 Installing QlikView Server234.1 Logging the Installation4.2 Obtaining the MSI package4.3 Completing the Installation2424245 Building a Farm5.15.25.35.427PlanningRoot/First InstallAdding Services on Other MachinesClustering2728282831Part 3 Architecture6 Roles6.16.26.36.46.56.66.76.833QlikView with PublisherQlikView without PublisherQlikView ServerWeb ServerDirectory Service ConnectorManagement ServiceDistribution ServiceReload Engine33343536373839397 Logging7.17.27.37.47.57.67.741Logging from QlikView ServerSession LogPerformance LogEvent LogEnd-user Audit LogManager Audit LogTask Performance Summary414143444547488 Documents, Data, and Tasks498.1 User Documents8.2 Source Data8.3 Source DocumentsQlikView Server/Publisher - QlikView 11.20SR174950503
Contents8.4 Tasks509 Service by Service9.19.29.39.49.59.69.753QlikView ServerQlikView Distribution ServiceQlikView Publisher RepositoryConfiguration FilesWeb ServerDirectory Service ConnectorQlikView Management Service5356585961646567Part 4 Security10 Security Overview11 Protection of the Platform697111.1 Functionality11.2 Special Accounts11.3 Communication71717112 Authentication7312.112.212.312.4Authentication when Using QlikView Server in a Windows User EnvironmentAuthentication with a QlikView Server Using an Existing Single Sign-on Software PackageAuthentication Using neither IWA nor Single Sign-on SoftwareQlikView Server Authentication Using Custom Users13 Authorization7913.1 Document Level Authorization13.2 Data Level Authorization797981Part 5 Licensing14 Client Access Licenses14.114.214.314.414.514.614.783CAL TypesIdentificationDocument CAL RestrictionsCombining Different CALsLicense LeaseCluster LicensingCold Standby Servers8384848485858515 Editions of QlikView Server8715.1 Editions15.2 Features and Limitations8789Part 6 Appendix9116 Silent dditional DialogsMSTAdditional Information9494989910017 Clustering QlikView Servers10117.1 Why Cluster QlikView Servers?17.2 Requirements for Clustered QlikView Deployment17.3 Building and Installing a QlikView Cluster473747576QlikView Server/Publisher - QlikView 11.20SR17101102104
Contents18 Clustering QlikView y Cluster QlikView Publisher?Requirements for a Clustered QlikView Publisher DeploymentSecurityConfiguring QlikView Publisher ClusteringTroubleshooting10911111111311511819 OEM12119.1 General19.2 Detailed Function Description12112120 DSP Interface12320.1 DirectoryServiceProvider12321 SNMP12521.1 MIB File21.2 Additional Information12612722 Deploying MSI Packages with Group Policies12922.1 General12912913022.2 Deploying the MSI Package22.3 Step-by-step Guide23 Certificate stallationUsing Microsoft Management Console13513613714024 QlikView Server Extensions14324.1 Adding Extensions to QlikView Server14325 Configuring Microsoft IIS for Custom Users26 Triggering EDX Enabled TasksQlikView Server/Publisher - QlikView 11.20SR171451495
Contents6QlikView Server/Publisher - QlikView 11.20SR17
Part 1 IntroductionPart 1 IntroductionQlikView Server/Publisher - QlikView 11.20SR177
8QlikView Server/Publisher - QlikView 11.20SR17
1 Overview1 OverviewThis document describes QlikView Server and contains information on installation, architecture, security,and licensing. The document also includes a number of appendixes that provide additional in-depthinformation.1.1 QlikViewQlikView ServerQlikView Server is a platform for hosting and sharing QlikView information over an intranet or the Internet.QlikView Server connects users, client types, documents, and objects within a secure environment.QlikView PublisherQlikView Publisher manages content, access, and distribution. By reducing data, each user can be presentedwith tailored information. The QlikView Publisher service and user interface are fully integrated intoQlikView Server and QlikView Management Console (QMC).1.2 QlikTech Support ServicesContact QlikTech if product support, additional training, or consultation concerning applicationdevelopment is needed. Consult the QlikTech homepage for current information on how to get in touch withthe support services:http://www.qlikview.comQlikTech International headquarters:QlikTech International150 N. Radnor Chester RoadSuite E220Radnor, PA 19087USAPhone: 1 (888)-828-9768Fax: 610-975-5987For other locations, visit the QlikTech home page (see above).1.3 ConventionsStyle CodingMenu commands and dialog options are written in bold. File names, paths, and sample code are written inCourier.QlikView Server/Publisher - QlikView 11.20SR179
1 OverviewEnvironment VariablesThe paths described in this document use environment variables. The variables and the equivalent paths inWindows Vista (and later) and Windows XP are presented below.EnvironmentVariableWindows Vista and laterWindows XP%ProgramData%C:\ProgramDataC:\Documents and Settings\AllUsers\Application Data%ProgramFiles%C:\Program FilesC:\Program Files%UserProfile%C:\Users\[username]C:\Documents and Settings\[username]1.4 About this DocumentThis document describes QlikView Server and QlikView Publisher version 11.20. The contents of thesoftware as well as the document may change without prior notice.10QlikView Server/Publisher - QlikView 11.20SR17
2 What’s New in QlikView 11 Server?2 What’s New in QlikView 11 Server?This chapter describes the functionality that has been added or improved in QlikView 11 Server.Context Sensitive HelpContext sensitive help has been added in QlikView Management Console (QMC).LDAPsConfigurable LDAP DSP for LDAPs (LDAP via SSL) support has been added.Audit Logging by DocumentIn some cases, it is required to generate a user audit log, so that every query is registered and it is possible tosee “who did what” retroactively.QlikView 10 Server can do this; however, the switch is for the entire server – either all documents arelogged or no document is logged. In addition, if there is a large number of selections in a list box, not everyselection is logged.In QlikView 11 Server, this logging can be done per individual document. In addition, logging of everyselection can be enabled.QlikView Server/Publisher - QlikView 11.20SR1711
2 What’s New in QlikView 11 Server?Enable/Disable Document Download, Exporting, and Printingper Document and UserIn many situations, the system manager wants to prevent any “hard” data coming out of QlikView Server. Inthese situations, downloads of the .qvw file, printing, and exporting are not allowed; only the interactivesession with QlikView Server is permitted.In QlikView 10 Server, this functionality is available at the document level only for downloading.In QlikView 11 Server, this has been improved so that the functionality is available on a per user level aswell as the capability to enable and disable exporting and printing on a per document and user level.Supporting Task for .qvd CreationThe creation of .qvd files can be added as a Supporting Task.Note! This is not a replacement for creating .qvd files using a .qvw. See the QMC online help for moreinformation.Distribution to Email within a .qvw DocumentA .qvw file can be distributed to email recipients defined in a field in the document.Alert Email to Document AdministratorsAlert emails can be sent to document administrators.12QlikView Server/Publisher - QlikView 11.20SR17
2 What’s New in QlikView 11 Server?License TrackingThe use of licenses has been added to the QlikView Event Server logs. The following events are now logged(when using low verbosity logging):l “PGO”, “Recreating [file name] from backup”l “PGO”, “Recreating corrupt file [file name]”l “PGO”, “Creating file [file name]”l “License”, “License leased to user [user name] on machine [machine name]”l “CAL usage”, “Using CAL of type [CAL type] for user [user name] on machine [machine name].Sessions on this caltype: X”l “CAL usage”, “Releasing session CAL for user [user name] on machine [machine name]”l “CAL usage”, “Usage CAL session for user [user name] on machine [machine name] stopped”l “CAL usage”, “Named User CAL session for user [user name] on machine [machine name] stopped”l “CAL usage”, “Document CAL session for user [user name] on machine [machine name] stopped”l “CAL allocation”, “Unused (Document) Named User CAL [user name] deleted – ok”l “CAL allocation”, “(Document) Named User CAL (not used for 7 days) [user name] deleted – ok”l “CAL allocation”, “Unused (Document) Named User CAL [user name] marked for deletion – ok”l “CAL allocation”, “(Document) Named User CAL [user name] added – ok”l “CAL allocation”, “Named User CAL (not used for 7 days) [user name] deleted – ok”l “CAL deallocation”, “(Document) Named User CAL [user name] no longer marked for deletion – ok”l “CAL deallocation”, “(Document) Named User CAL [user name] not marked for deletion – denied”l “CAL deallocation”, “(Document) Named User CAL [user name] not found – denied”Distribution and Reload PerformanceThe performance of reload and distribution has been improved.ReloadsPrior to QlikView 11 Server, a reload is performed in the following way with Publisher:1. The entire document (.qvw) is loaded to memory from disk.2. A reload is completed.In QlikView 11 Server, a reload is performed in the following way:1. The document (.qvw) without the data is loaded to memory from disk.2. A reload is completed.The performance enhancement is the reduction in time to load the document to memory from disk, sincethere is no data. QlikView 11 Publisher can open source documents without data prior to executing a reloadtask. There is no need to load the document data to memory and then perform a reload of the document.Loop and ReducePrior to QlikView 11 Server, a loop and reduce is performed in the following way with Publisher:1. The entire document is loaded to memory from disk.2. The document is reduced and saved to disk.3. Go to Step 1 until the Loop is completed.In QlikView 11 Server, a loop and reduce is performed in the following way:1. The entire document is loaded to memory.2. The document is reduced while being duplicated in memory.3. The document is reduced and saved to disk.4. Go to Step 2 until the Loop is completed.The performance enhancement is the number of times the document is loaded from disk for each loop.However, the memory footprint is increased (based on the largest slice during the loop and reduce) for thedocument.QlikView Server/Publisher - QlikView 11.20SR1713
2 What’s New in QlikView 11 Server?QlikView Management Console User InterfaceThe QMC user interface has been improved:llllllllUser interface inconsistencies have been cleaned up.The performance of refreshing tables all over the QMC has been improved.The Status page is drawn and updated faster.All of a task chain can be expanded by right-clicking.A user can be removed from all distributions where the user is explicitly targeted.Search and filters have been added to Source Documents, User Documents, and Tasks.Alerts within QMC have been added for service status.Clustering and user types have been made more consistent among the services.Reduction with Lock FieldsIn previous versions of QlikView, a reduction was affected by lock fields (by in effect reduce on the lockedvalues). In QlikView 11 Server, the reduction ignores any locked fields.Improved LoggingChanges to the settings in QlikView Server and QlikView Web Server are stored in the audit log.The logging and error handling have been improved for QlikView Distribution Service.QMC and QMEC are Merged into QMCQMC has been removed and QlikView Enterprise Management Console (QEMC) has been renamed toQMC.AccessPoint RemakeAccessPoint has been given a new look and feel:llllNew search capabilities have been added.The document attributes have been leveraged to improve the categorization of documents.Document descriptions can be added.Global messages can be shown on the AccessPoint by adding messages in QMC.EDX EnhancementsStarting an EDX returns a session ID to allow interrogation of the status of the session rather than on thetask. When the session is done, the status contains a list of all the tasks (and session IDs) that have beentriggered, allowing for continuous tracking of the status. This functionality is available through the API.Load Balancing ImprovementsA new algorithm, “CPU with RAM Overload”, for load balancing when using a QlikView Web Server hasbeen added for improved management of a cluster of web servers. In essence, the web server can now routetraffic based on RAM and CPU use.RetriesIf a task that contains a loop fails, it restarts from the point of failure, rather than from the beginning of theloop.MSI – Installation of QlikView ServerThe usability of the MSI has been improved.14QlikView Server/Publisher - QlikView 11.20SR17
2 What’s New in QlikView 11 Server?QlikView Settings ServiceWhen Microsoft IIS is used as web server, a new support service, QlikView Settings Service, allows IIS tobe managed via the same port (4750) that is used to manage QlikView Web Server.QlikView Server/Publisher - QlikView 11.20SR1715
16QlikView Server/Publisher - QlikView 11.20SR17
Part 2 InstallationPart 2 InstallationQlikView Server/Publisher - QlikView 11.20SR1717
18QlikView Server/Publisher - QlikView 11.20SR17
3 Upgrading QlikView3 Upgrading QlikView3.1 Upgrade ConsiderationsMigrating from 32-bit (x86) to 64-bit (x64) VersionWhen migrating from 32-bit (x86) to 64-bit (x64) or from 64-bit (x64) to 32-bit (x86), the running versionmust be manually removed prior to installing the new version.Upgrading from Version 8 to 11Upgrading from QlikView Server version 8 to version 11 requires upgrading to version 9 prior to upgradingto version 11.Note! QlikView Server cannot be upgraded directly from version 8 to version 11.Upgrading from Version 9 or 10 to 11Considerations for upgrading from QlikView version 9 or 10 to version 11:llllllllThe installation of QlikView Server requires a reboot of the machine for proper operation.QlikView Server version 9 handles EDX triggers via HTTP POST calls only. In QlikView Serverversion 10 and 11, EDX triggers are triggered by the QlikView Management Service (QMS) API,where more granular functionality is available. See the QMS API documentation in the ManagementConsoles and the QlikView SDK for usage instructions.QlikView AccessPoint is the default start page for QlikView Server.Previous Management Consoles for QlikView Server and Publisher have been completely replaced byQlikView Management Console (QMC). The QMC must be started to register a license for QlikViewServer, unless a valid license is already available on the machine running QlikView Server.Anti-aliasing on fonts is no longer available.QlikView has a common file format for versions 7, 8, 9, 10, and 11.Windows 2000 is no longer an officially supported host operating system.See the Release Notes for more information on upgrading to QlikView 11.3.2 Upgrade ProcedureFor a successful upgrade of QlikView Server, take the following basic practices into account:lllBack up the current QlikView data directory, which includes most of the log and some of theconfiguration files as well as the document folders. The files are typically located in the followinglocation:Windows 7 and later, Windows Server 2008 and later: %ProgramData%\QlikTechWindows XP, Windows Server 2003: C:\Documents and Settings\AllUsers\Application Data\QlikTechPerform the upgrade during a scheduled downtime – QlikView Server must be stopped for theupgrade to be successful.Licensing information and settings are saved by default when QlikView Server is removed. They areapplied to any subsequent installation of QlikView Server on the system.Note! The installation does not support upgrade from beta or release candidate versions of QlikView 11Server.QlikView Server/Publisher - QlikView 11.20SR1719
3 Upgrading QlikViewTo install QlikView Server, proceed as follows:1. Verify that backup media exists for the current release of QlikView Server and back up all currentfiles associated with QlikView Server (HTML pages, QlikView documents, licensing file, QlikViewServer .shared files, and so on).2. When running QlikView Server version 8, use the Users tab in QMC to determine if there are anyactive users linked to QlikView Server. It may be a good idea to send out a broadcast message tonotify the users that the service will be stopped.3. Uninstall QlikView Server from Start Menu Control Panel.4. Install QlikView 11 Server.Note! When upgrading from a previous version and using Microsoft IIS, the virtual folders in IIS must beupdated (see the table below).Microsoft IISVirtual FolderUpdate RequiredQVAJAXZfcUpdate to kViewAjax.QvPluginUpdate to kViewPlugin.QvClientsUpdate to nalyzerRemovedQvJavaRemovedQvPrintRemoved3.3 Multi-machine PreparationWhen upgrading an installation that is spread over multiple machines, extra planning is required, sinceversions cannot be mixed arbitrarily.Simple UpgradeThis procedure requires no special planning and involves the smallest risk, but causes the system to be downfor some time.Proceed as follows to perform a straight-forward upgrade:1.2.3.4.Perform a backup as described in Upgrade Procedure (page 19).Stop all services running on all machines.Upgrade the services on each machine (in any order).Start all services on all machines.Maximize UptimeThis procedure requires more planning, but the system uptime (from an end user point of view) is maximized.Proceed as follows to perform the upgrade:1. Perform a backup as described in Upgrade Procedure (page 19).2. Stop QMS (which means QMC becomes unavailable).3. Upgrade in the following order (let the installer restart the services):a) Web serversb) Directory Service Connector (DSC)c) QlikView Server (QVS)20QlikView Server/Publisher - QlikView 11.20SR17
3 Upgrading QlikViewd) QlikView Distribution Service (QDS)e) QMS4. Start QMS (which means QMC becomes available again).Migration to a New MachineAn alternative way is to build the new environment on new servers.Note! When upgrading from a previous version and using Microsoft IIS, the virtual folders in IIS must beupdated (see Upgrade Procedure (page 19)).Proceed as follows to perform a migration to a new machine:1. On the new machine, install a running, licensed version of QlikView 11 Server.2. Stop all QlikView services on the old machine.3. Remove or rename the %ProgramData%\QlikTech\ManagementService\QVPR folder.4. Remove or rename the %ProgramData%\QlikTech\ManagementService\qvpr NewMachineName .ini file.5. Copy the QVPR folder and the .ini file “as is” from the old machine to the new one (that is, keepthe folder name):Version 9: ion 10: %ProgramData%\QlikTech\ManagementService6. Rename the .ini file (that is, change qvpr OldMachineName .ini to qvpr NewMachineName .ini).7. Change all references to OldMachineName to NewMachineName in the QVPR .xml files.8. Start the QlikView services on the new machine.9. In QMC, change the source folder path to the correct folder (or the tasks cannot be edited).10. Shut down the old machine.QlikView Server/Publisher - QlikView 11.20SR1721
22QlikView Server/Publisher - QlikView 11.20SR17
4 Installing QlikView Server4 Installing QlikView ServerNote! If Microsoft IIS is to be used as web server, it must be installed prior to QlikView Server.Note! IPv4 is required for installation of QlikView Server. IPv6 is currently unsupported.It is recommended not to move folder locations after the QlikView Server installation is complete, sincemany settings depend on the initial file locations. If the location of QlikView Server has to be changed afterthe installation, proceed as follows:1. Run the QlikView Server installation executable:l Microsoft Windows x86 version: QlikViewServer x86Setup.exel Microsoft Windows x64 version: QlikViewServer x64Setup.exel Microsoft Windows Server 2012/Windows 8 (and later): QlikViewServer Win2012andUp.exe2. If the User Account Control dialog is displayed, click Yes to allow the program to make changes onthis computer.3. Click Next in the Welcome dialog.4. Select the region for the location of the server. Click Next to continue.5. Read the license agreement, select I accept the terms in the license agreement, and click Next tocontinue.6. Enter the customer information for QlikView Server. Click Next to continue.7. All files are installed in the specified folder. To change the root folder for the installed files, clickChange to specify the preferred location. Finally, click Next to continue.8. Select the type of installation you want to perform:lllFull installation, Single machine with QlikView Webserver: Used to run all components on a singlemachine with QlikView Web Server as web server.Full installation, Single machine with Microsoft IIS: Used to run all components on a single machine withMicrosoft IIS as web server. This option is only available if IIS is installed on the target machine.Custom installation, select profiles: If this option is selected you select the profiles you want to be includedin the installation from the Profiles section in the dialog:l QlikView Server: Installs QlikView Server, Directory Service Connector, and the QlikView Server exampledocuments.llReload/ Distribute Engine: Installs the Reload Engine and the QlikView Distribution Service.Management Console: Installs the QlikView Management Service together with the QlikViewManagement Console (QMC).Webserver: Installs the QlikView Web Server.To make further configuration of features to be installed, click Config. When done, click Next.To use pre-defined configuration of features, click Next.9. Set the account that the QlikView Server and Publisher services are to run under. Click Next to continue.lNote! The account that is used to run the QlikView services must have local administrator privileges.Note! If using a local administrator account on Windows XP Professional x64 SP2 that is not part of a domain, theinstallation program cannot resolve the account. This means that the account for the services in Computer Managerhas to be set manually.You can also select I want to specify the account to be used for the services later.10. Select the IIS Website from the drop-down list and click Next.Note! This step is only applicable if Full installation, Single machine with Microsoft IIS was selected in Step 8. Ifnot, proceed directly to the next step.11. Select the Service Authentication method:lUse digital certificates: Authenticate communication between QlikView servers using digital certificates andSSL. This alternative is recommended in environments where not all servers have access to a commonWindows Active Directory or when the security provided by certificate authentication is required. Note thatdigital certificates are only supported by Windows Server 2008 R2 and later.QlikView Server/Publisher - QlikView 11.20SR1723
4 Installing QlikView ServerUse QlikView Administrators Group: Authenticate communication between QlikView services based onmembership in the local Windows group QlikViewAdministrators. This alternative can be used inenvironments where all servers that are part of the QlikView installation can authenticate using a commonWindows Active Directory.Click Next to continue.12. Click Install to start the installation.lNote! This may take several minutes to complete.13. Click Finish when the installation is complete.14. Log off from Windows and then log on again, so that group memberships added during the installation are updated.Note! It may be sufficient to log off from Windows and then log on again. However, it is recommended to restart themachine to enable the QlikView Server functionality.4.1 Logging the InstallationThe setup procedure is logged when running the QlikView Server installation executable. The log files areas follows:lllMicrosoft Windows x86 version: QlikViewServerx86.wilMicrosoft Windows x64 version: QlikViewServerx64.wilMicrosoft Windows Server 2012/Windows 8 (and later): QlikViewServer Win2012andUp.wilThe log files are stored in the Temp folder of the user (for example,%UserProfile%\AppData\Local\Temp). Each time an installation is executed, a new file isgenerated, over-writing the previous log file.4.2 Obtaining the MSI packageIf the MSI package is needed for the installation, proceed as follows to extract it from the .exe file:1. Start the installation from the .exe file and wait until the first dialog opens.2. Locate the MSI file (often stored with a random name, for example, ed34g.msi) in the Temp folderin %UserProfile%\AppData\Local (C:\Documents and Settings\username\LocalSettings on pre-Windows Vista systems).3. Copy the .msi file to another location.4. Exit the .exe installation.5. Install QlikView Server using the .msi file. See Silent Installation (page 93) for information onhow to perform a silent installation. For additional information, see Deploying MSI Packages withGroup Policies (page 129).4.3 Completing the InstallationAfter successfully installing QlikView Server, a license must be registered in QlikView ManagementConsole (QMC) to activate the installed software.Note! If access is denied when starting QMC, log off from Windows and then log on again, so that groupmemberships added during the installation are updated.Note! Running real-time anti-virus protection on the server degrades the performance of QlikView Server. Itis recommended that the user documents, source documents, log directories, and .pgo files are excludedfrom the anti-virus scanning.Running Microsoft IISHandling TimeoutsNote! This is only needed when using very large QlikView documents that return timeouts.24QlikView Server/Publisher - QlikView 11.20SR17
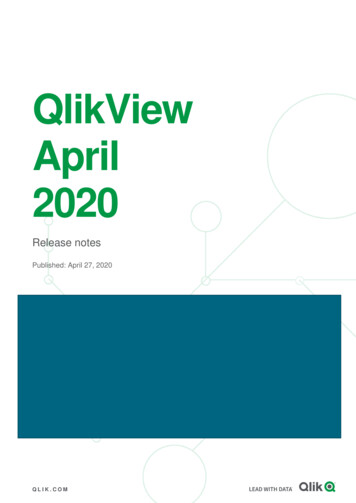
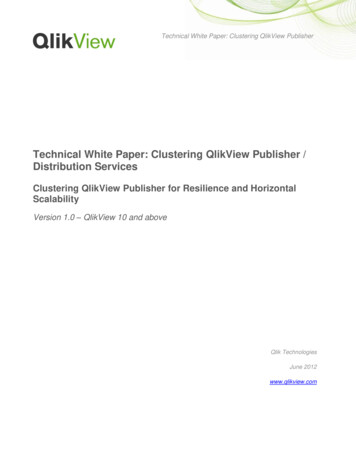
4 Installing QlikView ServerProceed as follows to handle timeouts:1. Open the kViewAjax\web.config file in a texteditor (for example, Notepad).2. Search for the following text: httpRuntime requestValidationMode "2.0" / 3. Edit the text so that it becomes: httpRuntime requestValidationMode "2.0" executionTimeout "900"/ 4. Save the file.Enabling ASP.NETIf Microsoft IIS is used as web server in a Windows Server 2003 (or later) environment, enable ASP.NET toensure proper operation of the QlikView Server sample pages and the extended functions (for example,QlikView Server tunnel).Optimizing the PerformanceTo optimize the performance when running Microsoft IIS and AJAX, turn on compression in the web server.For information on how to configure IIS 6, 0629%28WS.10%29.aspx.For information on how to configure IIS 7, 2942%28WS.10%29.aspx.LicensingThe licensing is used to authenticate QlikView Server and allow it to run on a specific machine.Proceed as follows to enter the license for QlikView Server:1. Go to System Licenses in the QMC.2. Select a QlikView Server or Publisher.3. Fill in the Serial number and Control fields on the QlikView Server License or QlikViewPublisher License tab (depending on whether QlikView Server or Publisher was chosen).Note! Any previously defined tasks are deleted when the QlikView Publisher license is activated.QlikView Server/Publisher License tab in QMCThe license is checked every time a document is opened. If the time limit specified by the License EnablerFile (LEF) is reached, the QVS automatically enters offline mode, which means that it is reachable from theQMC, but not operational.The License Enabler File (LEF), lef.txt, for QlikView Server is automatically saved
QlikView Server is a platform for hosting and sharing QlikView information over an intranet or the Internet. QlikView Server connects users, client types, documents, and objects within a secure environment. QlikView Publisher QlikView Publisher manages content, access, and distribution.