Transcription
ge.com20″ and 24″ Compact ElectricRangesHOTPOINTSafety Instructions . . . . . . . . 2–4Operating InstructionsOven . . . . . . . . . . . . . . . . . . . .6–9Surface Units . . . . . . . . . . . . . . . .5Owner’s Manual andInstallation InstructionsRA720RA724Care and CleaningBroiler Pan and Grid . . . . . . . . 11Cooktop . . . . . . . . . . . . . . . 10, 11Knobs . . . . . . . . . . . . . . . . . . . . 12Oven Door . . . . . . . . . . . . . . . . 11Oven Heating Elements . . . . . . 11Oven Interior . . . . . . . . . . . . . . 12Painted Surfaces . . . . . . . . . . . . 12Shelves . . . . . . . . . . . . . . . . . . . 10Surface Units and Drip Pans . . .10Installation InstructionsAnti-Tip Device . . . . . . . . . . 13, 19Dimensions and Clearances . . . 14Electrical Connections . . . . .15–18Flooring . . . . . . . . . . . . . . . . . . 14Leveling . . . . . . . . . . . . . . . . . . 19Preparation . . . . . . . . . . . . . . . . 14Tools You Will Need . . . . . . . . . 14Troubleshooting Tips . . . . . . . 20Consumer SupportConsumer Support . . . Back CoverProduct Registration . . . . . . 21, 22Warranty . . . . . . . . . . . . . . . . . . 23Write the model and serialnumbers here:Model #Serial #You can find them on a labelunder the cooktop. See theLift-Up Cooktop section in thismanual for instructions on howto lift the cooktop.183D9541P002 49-88025-1 05-07 JR
WARNING!For your safety, the information in this manual must be followed to minimize the risk of fire orexplosion, electric shock, or to prevent property damage, personal injury, or loss of life.ANTI-TIP DEVICEOperating InstructionsSafety InstructionsIMPORTANT SAFETY INFORMATION.READ ALL INSTRUCTIONS BEFORE USING.Care and CleaningAll ranges can tip and injury could result.To prevent accidental tipping of the range, attach it to the wall by installing the Anti-Tipdevice supplied.If the Anti-Tip device supplied with the range does not fit this application, use the universal Anti-Tipdevice WB2X7909.To check if the device is installed and engaged properly, carefully tip the range forward. The Anti-Tipdevice should engage and prevent the range from tipping over.If you pull the range out from the wall for any reason, make sure the device is properlyengaged when you push the range back against the wall. If it is not, there is a possible risk ofthe range tipping over and causing injury if you or a child stand, sit or lean on an open door.Please refer to the Anti-Tip device information in this manual. Failure to take this precautioncould result in tipping of the range and injury.SAFETY PRECAUTIONSWhen using electrical appliances, basic safety precautions should be followed, including the following:Installation Instructions Use this appliance only for its intendeduse as described in this manual. Be sure your appliance is properlyinstalled and grounded by a qualifiedtechnician in accordance with theprovided installation instructions.Troubleshooting Tips Don’t attempt to repair or replace anypart of your range unless it is specificallyrecommended in this manual. All otherservicing should be referred to a qualifiedtechnician. Before performing any servicerecommended in these instructions,DISCONNECT THE RANGE POWERSUPPLY AT THE HOUSEHOLDDISTRIBUTION PANEL BY REMOVINGTHE FUSE OR SWITCHING OFF THECIRCUIT BREAKER.Consumer Support Do not leave children alone—childrenshould not be left alone or unattended inan area where an appliance is in use. Theyshould never be allowed to sit or stand onany part of the appliance.2 Don’t allow anyone to climb, stand orhang on the door or range top. Theycould damage the range and even tip itover, causing severe personal injury. CAUTION: ITEMS OF INTEREST TOCHILDREN SHOULD NOT BE STOREDIN CABINETS ABOVE A RANGE ORON THE BACKSPLASH OF A RANGE—CHILDREN CLIMBING ON THERANGE TO REACH ITEMS COULDBE SERIOUSLY INJURED. Never wear loose-fitting or hanginggarments while using the appliance.Flammable material could be ignitedif brought in contact with hot heatingelements and may cause severe burns. Use only dry pot holders—moist or damppot holders on hot surfaces may result inburns from steam. Do not let pot holderstouch hot heating elements. Do not use atowel or other bulky cloth. For your safety, never use your appliancefor warming or heating the room. Storage in or on appliance—Flammablematerials should not be stored in an ovenor near surface units.
WARNING!SAFETY PRECAUTIONSCOOK MEAT AND POULTRY THOROUGHLY Installation InstructionsCook meat and poultry thoroughly—meat to at least an INTERNAL temperature of 160 F and poultryto at least an INTERNAL temperature of 180 F. Cooking to these temperatures usually protects againstfoodborne illness.OVENStand away from range when opening oven door. Hot air or steam which escapes can cause burnsto hands, face and/or eyes. When using cooking or roasting bags inoven, follow the manufacturer’s directions. Do not use your oven to dry newspapers.If overheated, they can catch fire. Keep the oven vent ducts unobstructed.Troubleshooting TipsConsumer Support Don’t heat unopened food containers inthe oven. Pressure could build up and thecontainer could burst, causing an injury. Keep oven free from grease buildup. Place oven shelf in desired position whileoven is cool. If shelves must be handledwhen hot, do not let pot holder contactheating elements in the oven. Pulling out shelf to the shelf stop is aconvenience in lifting heavy foods. Itis also a precaution against burns fromtouching hot surfaces of the door oroven walls.Care and Cleaning Do not touch heating elements or interiorsurface of oven. These surfaces may be hotenough to burn even though they are darkin color. During and after use, do nottouch, or let clothing or other flammablematerials contact surface units, areasnearby the surface units or any interiorarea of the oven; allow sufficient time forcooling first. Potentially hot surfaces include thecooktop and areas facing the cooktop,oven vent opening and surfaces near theopening, and crevices around the ovendoor. Remember: The inside surface of theoven may be hot when the door is opened.Operating Instructions Keep hood and grease filters clean tomaintain good venting and to avoidgrease fires. Do not let cooking grease or otherflammable materials accumulate in ornear the range. Do not use water on grease fires. Neverpick up a flaming pan. Smother flamingpan on surface unit by covering pancompletely with well-fitting lid, cookiesheet or flat tray. Flaming grease outside apan can be put out by covering withbaking soda or, if available, a multipurpose dry chemical or foam-type fireextinguisher.Safety Instructionsge.com3
SURFACE COOKING UNITSUse proper pan size—This appliance is equipped with one or more surface units of different size.Select cookware having flat bottoms large enough to cover the surface unit heating element. The useof undersized cookware will expose a portion of the heating element to direct contact and may resultin ignition of clothing. Proper relationship of cookware to surface unit will also improve efficiency.Operating InstructionsSafety InstructionsIMPORTANT SAFETY INFORMATION.READ ALL INSTRUCTIONS BEFORE USING.Troubleshooting TipsInstallation InstructionsCare and Cleaning Never leave surface units unattended athigh heat settings. Boilover causes smokingand greasy spillovers that may catch onfire. Be sure drip pans are in place. Theirabsence during cooking could damagerange parts and wiring. Don’t use aluminum foil to line drippans or anywhere in the oven except asdescribed in this guide. Misuse couldresult in a shock, fire hazard or damageto the range. Only certain types of glass, glass/ceramic,earthenware or other glazed containers aresuitable for range-top service; others maybreak because of the sudden change intemperature. To minimize the possibility of burns,ignition of flammable materials and spillage,the handle of a container should be turnedtoward the center of the range withoutextending over nearby surface units. Always turn surface unit to OFF beforeremoving cookware. Keep an eye on foods being fried at HI orMEDIUM HIGH heats. To avoid the possibility of a burn orelectric shock, always be certain that thecontrols for all surface units are at OFFposition and all coils are cool beforeattempting to lift or remove the unit. Don’t immerse or soak removable surfaceunits. Don’t put them in a dishwasher. Do not flame foods on the cooktop. If youdo flame foods under the hood, turn thefan on. Foods for frying should be as dry aspossible. Frost on frozen foods or moistureon fresh foods can cause hot fat to bubbleup and over sides of pan. Use little fat for effective shallow or deepfat frying. Filling the pan too full of fat cancause spillovers when food is added. If a combination of oils or fats will be usedin frying, stir together before heating, or asfats melt slowly. Always heat fat slowly, and watch as it heats. Use a deep-fat thermometer wheneverpossible to prevent overheating fat beyondthe smoking point. Use extreme caution when moving a greasefilled pan or disposing of hot grease.Consumer SupportREAD AND FOLLOW THIS SAFETY INFORMATION CAREFULLY.SAVE THESE INSTRUCTIONS4
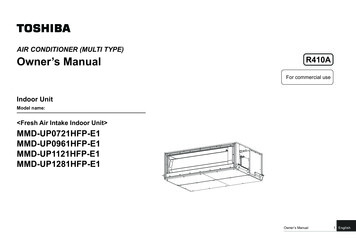
ge.comThroughout this manual, features and appearance may vary from your model.Surface Cooking ControlsYour surface units and controls are designedto give you a variety of heat settings for surfaceunit cooking.Switching heats to higher settings alwaysshows a quicker change in temperaturethan switching to lower settings.How to Set the ControlsPush the control knob in.Control must be pushed in to set onlyfrom the OFF position.Be sure you turn control to OFF whenyou finish cooking. An indicator lightwill glow when ANY surface unit is on.Care and CleaningTurn either clockwise orcounterclockwise to desiredheat setting.When control is in any positionother than OFF, you can turn it withoutpushing in.A Burner On indicator light will glowwhen any surface unit is on.Heat Setting GuideMediumlowMediumhighMEDIUM HIGH – Fast fry, pan broil;maintain fast boil on large amountof food.MED – Saute and brown; maintain slowboil on large amount of food.MEDIUM LOW – Cereal; maintain servingtemperature of most foods.LO – Cook after starting at HI; cookwith little water in covered pan. Use tosteam rice.NOTE:At HI or MEDIUM HIGH, never leavefood unattended. Boilovers causesmoking; greasy spillovers maycatch fire.At LO, melt chocolate, butter onsmall unit. Do not overfill cookware with fatthat may spill over when adding food.Frosty foods bubble vigorously. Watchfoods frying at high temperatures.Keep range and hood clean fromaccumulated grease. To conserve the most cooking energy,pans should be flat on the bottom,have straight sides and tight-fittinglids. Match the size of the saucepanto the size of the surface unit. A panthat extends more than an inchbeyond the edge of the drip pantraps heat, which causes “crazing”(fine hairline cracks) on porcelain,and discoloration ranging from blueto dark gray on chrome drip pans.5Consumer Support Use medium- or heavyweightcookware. Aluminum cookwareconducts heat faster than othermetals. Cast-iron and coated cast-ironcookware is slow to absorb heat,but generally cooks evenly at low ormedium heat settings. Steel pans maycook unevenly if not combined withother metals.Troubleshooting TipsCooking TipsInstallation InstructionsHI – Quick start for cooking; bring waterto boil.Operating InstructionsAt both LO and HI positions, there isa slight niche so control clicks at thosepositions; HI marks the highest setting;LO, the lowest setting.In a quiet kitchen, you may hearslight clicking sounds during cooking,indicating heat settings selected are beingmaintained.Safety InstructionsUsing the surface units.
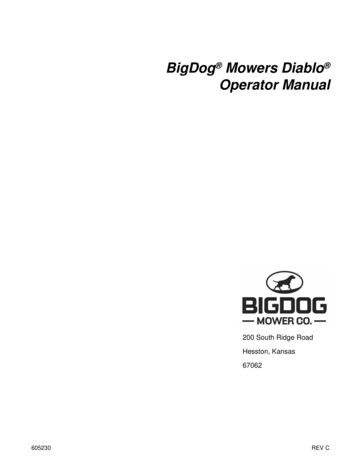
The OVEN TEMP knob is located on the control panel on the front of the range.OVENTEMPBumpCare and CleaningWhen placing cookware on a shelf, pullthe shelf out to the bump on the shelfsupport. Place the cookware on theshelf, then slide the shelf back into theoven. This will eliminate reaching intothe hot oven.Installation InstructionsThe Oven Cycling Light glows until the ovenreaches your selected temperature, then goes offand on with the oven unit(s) during cooking.Oven ShelvesThe shelves are designed with stop-locksso when placed correctly on the shelfsupports, they will stop before comingcompletely out of the oven and will nottilt when you are removing food fromthem or placing food on them.To remove the shelves from the oven, pullthem toward you, tilt front end upwardand pull them out.To replace, place shelf on shelf supportwith stop-locks (curved extension ofshelf) facing up and toward back of oven.Tilt up front and push shelf toward backof oven until it goes past the bump onthe shelf support. Then lower front ofshelf and push it all the way back.Oven Shelf PositionsThe oven has four shelf supports—A(bottom), B, C and D (top).Shelf positions for cooking are suggestedon Baking and Roasting pages.The oven has 4 shelf positions.Use of Aluminum Foil If desired, a sheet of aluminumfoil may be used on the floor of theoven under the bake element.Be certain foil does not touch bakeelement. Aluminum foil used in thisway may slightly affect the browningof some foods. Change foil when itbecomes soiled.Consumer SupportTroubleshooting TipsOven Temperature ControlTo use the oven, simply turn the knobto the desired cooking temperatures,which are marked in 25 F incrementson the dial. OVEN TEMP maintains thetemperature you set, from 200 F to BROIL.Operating InstructionsSafety InstructionsUsing the oven.6 DO NOT place a sheet of aluminumfoil on the shelf. To do so may resultin improperly cooked foods, damageto oven finish and increase in heaton outside surfaces of the oven.You may use aluminum foil to line thebroiler pan and broiler grid. However,you must mold the foil tightly to thegrid and cut slits in it just like the grid.
ge.comTo avoid possible burns, place the shelves in the desired position before you turn the oven on.How to Set Your Oven for Baking or RoastingPlace food in oven on center ofshelf. Allow at least 2 inches betweenedge of bakeware and oven wall oradjacent cookware.Close oven door. TurnOVEN TEMP knob clockwise todesired temperature. Preheat ovenfor at least 10 minutes if preheatingis necessary.Check food for doneness atminimum time on recipe. Cooklonger if necessary. Turn OVENTEMP knob to OFF and removefood.Shelf Positions When baking three or four items, usetwo shelves positioned on the secondand fourth sets of supports (B & D)from bottom of oven. Bake angel food cakes on first shelfposition (A) from bottom of oven. Roasting is usually done on the bottomshelf position (A).PreheatingTEMP Most roasts will cook satisfactorilywithout preheating. Preheat the oven only when necessary,usually for baking. If you find preheating is necessary,keep an eye on the Oven Cycle lightand put food in the oven promptlyafter the light goes out. The OvenCycle light will then cycle on and offwith the oven thermostat as it cyclesto maintain oven temperature.Installation InstructionsOVEN Preheating the oven takes about 10minutes.Baking and Roasting Tips Roasting is cooking by dry heat.Tender meat or poultry can be roasteduncovered in your oven. Roastingtemperatures, which should be lowand steady, keep spattering to aminimum. When roasting, it is notnecessary to sear, baste, cover or addwater to your meat. Thaw most frozen poultry beforeroasting to ensure even doneness.Some commercial frozen poultrycan be cooked successfully withoutthawing. Follow directions given onpackage label.Consumer Support Do not open the oven door duringa baking operation—heat will be lostand the baking time might need tobe extended. This could cause poorbaking results. If you must open thedoor, open it partially—only 3 or4 inches—and close it as quicklyas possible. Frozen roasts of beef, pork, lamb, etc.,can be started without thawing, butallow 10 to 25 minutes per poundadditional time (10 minutes per poundfor roasts under 5 pounds, more timefor larger roasts).Troubleshooting Tips Follow a tested recipe and measure theingredients carefully. If you are using apackage mix, follow label directions.Care and Cleaning Most baking is done on the secondshelf position (B) or the third shelfposition (C) from the bottom.Operating InstructionsPosition the shelf or shelves in theoven. If cooking on two shelves atthe same time, stagger the pans forbest heat circulation.Safety InstructionsUsing the oven for baking or roasting.7
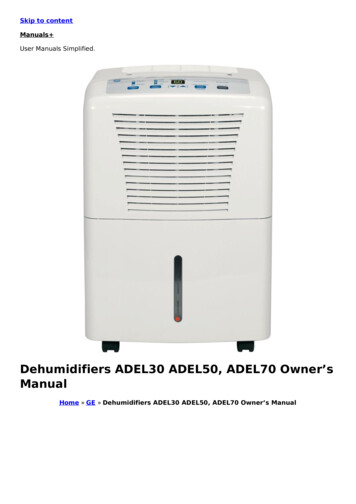
Safety InstructionsOperating InstructionsAdjust the oven thermostat—Easy to do yourself!You may find that your new oven cooks differently than the one it replaced. Use your new oven for a few weeks tobecome more familiar with it. If you still think your new oven is too hot or too cold, you can adjust the thermostatyourself.Do not use thermometers, such as those found in grocery stores, to check the temperature setting of your oven.These thermometers may vary 20–40 F.NOTE: This adjustment will not affect the broiling temperatures. The adjustment will be retained after a power failure.OVENTo Adjust the Thermostat with this Type of KnobTEMPPull the OVEN TEMP knob off the rangeand look at the back side.To make an adjustment, loosen(approximately one turn), but donot completely remove, the twoscrews on the back of the knob.LOOSENSCTOWSRECO MAOKE ERLKE ERTROTATEHO MATWith the back of the knob facingyou, hold the outer edge of the knobwith one hand and turn the front ofthe knob with the other hand.To increase the oven temperature,move the top screw toward the right.You’ll hear a click for each notch youmove the knob.After the adjustment is made, retightenscrews so they are snug, but becareful not to overtighten.Replace the knob, matching the flatarea of the knob to the shaft, andcheck performance.To decrease the oven temperature,move the top screw toward the left.Back of OVEN TEMP knobThe type of margarine will affect baking performance!Most recipes for baking have beendeveloped using high-fat products suchas butter or margarine (80% fat). If youdecrease the fat, the recipe may notgive the same results as with a higherfat product.Troubleshooting TipsInstallation InstructionsCare and CleaningFront of OVEN TEMP knob(knob appearance may vary)Each click will change the oventemperature approximately 10 F.(Range is plus or minus 60 F fromthe arrow.) We suggest that you makethe adjustment one click from theoriginal setting and check ovenperformance before making anyadditional adjustments.Consumer SupportRecipe failure can result if cakes, pies, pastries,cookies or candies are made with low-fat spreads.The lower the fat content of a spread product, themore noticeable these differences become.8Federal standards require productslabeled “margarine” to contain at least80% fat by weight. Low-fat spreads, on theother hand, contain less fat and morewater. The high moisture content of thesespreads affects the texture and flavor ofbaked goods. For best results with your oldfavorite recipes, use margarine, butter orstick spreads containing at least 70%vegetable oil.
ge.comBroiling may be slightly different from any previous broiling you may be acquainted with, so be sure to read thissection completely.How to Set Your Oven for BroilingIf the meat has fat or gristlearound the edge, cut vertical slashesthrough both about 2″ apart. Ifdesired, fat may be trimmed,leaving a layer about 1/8″ thick.Close the door. Always broil with thedoor closed.Turn the OVEN TEMP knobclockwise to BROIL. You will feela slight niche at the broil position.Turn food only once duringcooking.Turn the OVEN TEMP knob to OFF.Serve food immediately, and leavethe pan outside the oven to coolduring the meal for easiest cleaning.Broiling Guide When arranging food on pan, do notlet fatty edges hang over sides becausethe dripping fat will soil the oven. Frozen steaks can be broiled bypositioning the oven shelf at the nextlowest shelf position and increasingcooking time given in this guide 11 2times per side.FoodBaconAmount orThicknessShelfPosition If your range is connected to 208volts, rare steaks may be broiled bypreheating the broiler and positioningthe oven shelf one position higher.Time In MinutesFirst Side Second Side Comments31 2 min.31 2 min.C10 min.7 min.Space evenly.1″ thick1 to 11 2 lbs.C9 min.9 min.Chicken1 whole2 to 21 2 lbs.,split lengthwiseA35 min.15 min.Fish1 lb. fillets1/4 to 1/2″ thickC5 min.5 min.Steaks less than 1″thick cook throughbefore browning. Panfrying is recommended.Slash fat.Reduce time about 5to 10 minutes per sidefor cut-up chicken.Brush each side withmelted butter. Broilskin-side-down first.Handle and turn verycarefully. Brush withlemon butter beforeand during cooking,if desired. Preheatbroiler to increasebrowning.Ground BeefBeef SteaksMediumArrange in single layer.9Consumer SupportCTroubleshooting Tips1/2 lb.(about 8 thin slices)1 lb. (4 patties)1/2 to 3/4″ thickInstallation Instructions If desired, marinate meats orchicken before broiling, or brushwith barbecue sauce the last 5 to 10minutes only.Care and CleaningPlace the meat on the broiler gridin the broiler pan which comes withyour range. Always use the grid sothe fat drips into the broiler pan;otherwise the juices may becomehot enough to catch fire.Place the shelf in position C formost broiling.Operating InstructionsBroiling is cooking food by intense radiant heatfrom the upper element in the oven. Most fishand tender cuts of meat can be broiled. Followthese steps to keep spattering and smoking toa minimum.Safety InstructionsUsing the oven for broiling.
Be sure electrical power is off and all surfaces are cool before cleaning any part of the range.Proper care and cleaning are important so your range will give you efficient and satisfactory service. Follow thesedirections carefully in caring for your range to assure safe and proper maintenance.Porcelain Enamel CooktopOven ShelvesThe porcelain enamel finish is sturdybut breakable if misused. This finish isacid-resistant. However, any acidic foodsspilled (such as fruit juices, tomato orvinegar) should not be permitted toremain on the finish.Clean the shelves with an abrasivecleanser or steel wool.To clean the surface units, turn thecontrol to the highest setting for aminute. The coils will burn off any soil.Drip panReceptacleTo remove the surface unit, lift itabout 1 inch above the drip panand pull it out.To remove a surface unit:To remove the drip pans for cleaning,the surface units must be removed first.Make sure the surface units are coolbefore touching them.Lift the surface unit about 1 inch abovethe drip pan and pull it out.Do not lift the surface unit more than 1 inch. Ifyou do, it may not lie flat on the drip pan whenyou plug it back in.Replace the drip pan into therecess in the cooktop.NOTE: Repeated lifting of the surface unitmore than 1 inch above the drip pan canpermanently damage the receptacle.To clean the drip pans:Drip pans can be cleaned in thedishwasher or by hand. If you use ascouring pad, rub lightly to preventscratching.Can I cover the drip pans with foil?No, because using foil so close tothe receptacle could cause shock,fire or damage to the range.CAUTION: Do not immerse the surface units inliquids of any kind. Do not clean the surface units in adishwasher.To replace a surface unit: Do not bend the surface unit plugterminals.Replace the drip pan into the recess inthe cooktop. Make sure the opening inthe pan lines up with the receptacle. Do not attempt to clean, adjust or inany way repair the plug-in receptacle.Insert the terminals of the surface unitthrough the opening in the drip pan andinto the receptacle.10After cleaning, rinse the shelves withclean water and dry with a clean cloth.Surface Units and Drip PansSurface unitConsumer SupportTroubleshooting TipsInstallation InstructionsOperating InstructionsIf your range is removed for cleaning, servicing or any reason, be sure the anti-tipdevice is reengaged properly when the range is replaced. Failure to take thisprecaution could result in tipping of the range and cause injury.Care and CleaningSafety InstructionsCare and cleaning of the range.Guide the surface unit into place so itrests evenly.
Lift-Up CooktopClean the area under the cooktop often. Built-upsoil, especially grease, may catch on fire.To make cleaning easier, the cooktopmay be lifted up and propped open.Remove the front surface and drip pans.See the Surface Units and Drip Panssection. Grasp the two front surface unitwells and lift the cooktop up and prop itopen with the prop rod provided.Lift-Off Oven DoorThe oven door is removable, but it isheavy. You may need help removing andreplacing the door.Hinge lockTo remove the door:Open the door to the full openposition.Lowerhinge armGrasp the door firmly on each side,lift slightly and pull it straight outand away from the oven.Firmly grasp both sides of the doorat the top.Insert and seat the upper and lowerhinge arms into the oven slots.Push the hinge locks down from thehinge hooks.Close the oven door and make sureit is working properly. If it is notworking properly, remove andreplace it following the above steps.DO NOT ATTEMPT TO CLOSE THE DOORUNTIL THIS STEP IS COMPLETE. THEHINGE OR DOOR COULD BE DAMAGED.Oven Heating ElementsThe bake element can be lifted gently toclean the oven floor. Do not attempt toclean any oven surface when any burnerelement is on. Always wear protectivehand-wear when cleaning interior ovensurfaces or surfaces near heatingelements. If spillovers, residue or ashaccumulate around the bake element,gently wipe around the element withwarm water.Troubleshooting TipsDo not clean the bake element or thebroil element. Any soil will burn off whenthe elements are heated.Both the broiler pan and grid canalso be cleaned in the dishwasher.If food has burned on, sprinkle the gridwith detergent while hot and cover withwet paper towels or a dishcloth. Soakingthe pan will remove burned on foods.Do not store a soiled broiler pan and gridanywhere in the range.11Consumer SupportBroiler Pan and GridAfter broiling, remove the broiler panfrom the oven. Remove the grid from thepan. Carefully pour out grease from thepan into a proper container. Wash andrinse the broiler pan and grid in hotwater with a soap-filled or plasticscouring pad.Installation InstructionsPull the hinge locks up over thehinge hooks on both sides.To replace the door:Care and CleaningSlotUpperhinge armOperating InstructionsBe sure all surface units are turned offbefore raising the cooktop.After cleaning underneath the cooktopwith hot, soapy water and a clean cloth,hold the cooktop up, return the proprod to its storage position and lower thecooktop until it snaps into position.Be careful not to pinch your fingers.Replace the two front drip pans andsurface units. See the Surface Units andDrip Pans section.Safety Instructionsge.com
Control KnobsThe control knobs may be removed for easiercleaning.Make sure the knobs are in the OFFpositions and pull them straight off thestems for cleaning.Operating InstructionsSafety InstructionsCare and cleaning of the range.The knobs can be cleaned in adishwasher or they may also be washedwith soap and water. Make sure the insidesof the knobs are dry before replacing.Replace the knobs in the OFF positionto ensure proper placement.Painted SurfacesPainted surfaces include the sides,control panel, door and kick panel.Clean these with soap and water or avinegar and water solution.Care and CleaningDo not use commercial oven cleaners, cleansingpowders, steel wool or harsh abrasives on anypainted surface.Installation InstructionsPorcelain Oven InteriorWith proper care, the porcelain enamel interiorwill retain its attractive finish for many years.Cautions about using spray-on ovencleaners:Soap and water will normally do the job.Heavy spattering or spillovers mayrequire cleaning with a mild abrasivecleanser. Soapy, wet pads may also beused. Do not allow food spills with a highsugar or acid content (such as milk,tomatoes, sauerkraut, fruit juices or piefilling) to remain on the surface. Theymay cause dull spots even after cleaning. Do not spray the oven cleaner on theelectrical controls and switches becauseit could cause a short circuit and resultin sparking or fire.Troubleshooting TipsHousehold ammonia may make thecleaning job easier. Place 1/2 cupammonia in a shallow glass pan and leavein a cold oven overnight. The ammoniafumes will help loosen the burned-ongrease and food.Consumer SupportWhen necessary, you may use acommercial oven cleaner. Follow thepackage directions.12 Do not directly spray oven cleaneronto the oven heating elements. Do not allow a film from thecleaner to remain on the temperaturesensor—it could cause the oven toheat improperly. (The sensor is locatedat the top of the oven.) Carefullywipe the bulb clean after eachoven cleaning, being careful not tomove the sensor since a change inits position could affect how the ovenbakes. Do not spray any oven cleaner on theoutside oven door, handles or anyexterior surface of the oven, cabinetor painted surfaces. The cleaner candamage these surfaces.
InstallationInstructions20″ and 24″ CompactElectric RangesQuestions? Call 800.GE.CARES (800.432.2737) or Visit our Website at: ge.comBEFORE YOU BEGINFOR YOUR SAFETY:Read these instructions completelyand carefully.All rough-in and spacing dimensions must bemet for safe use of your range. Electricity tothe range can be disconnected at the outletwithout moving the range if the outlet is inthe preferred location (remove lower drawer). IMPORTANT IMPORTANT — Save theseinstructions for local inspector’s use.— Observe allgoverning codes and ordinances.Note to Installer – Be sure to leave theseinstructions with the Consumer.Note to Consumer – Keep theseinstructions for future reference.Skill level – Installation of this appliancerequires basic mechanical skills.Completion time – 1 to 3 hoursProper installation is t
To prevent accidental tipping of the range, attach it to the wall by installing the Anti-Tip device supplied. If the Anti-Tip device supplied with the range does not fit this application, use the universal Anti-Tip device WB2X7909. To check if the device is installed and engaged properly, carefully tip the range forward. The Anti-Tip