Transcription
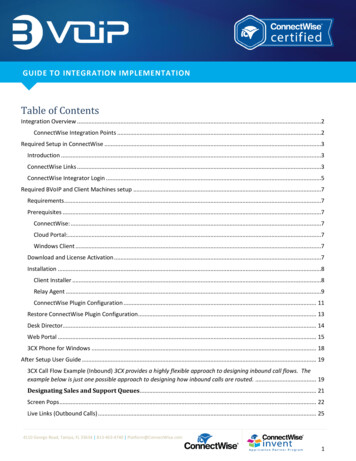
GUIDE TO INTEGRATION IMPLEMENTATIONTable of ContentsIntegration Overview .2ConnectWise Integration Points .2Required Setup in ConnectWise .3Introduction .3ConnectWise Links .3ConnectWise Integrator Login .5Required BVoIP and Client Machines setup .7Requirements .7Prerequisites .7ConnectWise: .7Cloud Portal:.7Windows Client .7Download and License Activation .7Installation .8Client Installer .8Relay Agent .9ConnectWise Plugin Configuration . 11Restore ConnectWise Plugin Configuration . 13Desk Director. 14Web Portal . 153CX Phone for Windows . 18After Setup User Guide . 193CX Call Flow Example (Inbound) 3CX provides a highly flexible approach to designing inbound call flows. Theexample below is just one possible approach to designing how inbound calls are routed. . 19Designating Sales and Support Queues. 21Screen Pops . 22Live Links (Outbound Calls) . 254110 George Road, Tampa, FL 33634 813-463-4740 Platform@ConnectWise.com1
GUIDE TO INTEGRATION IMPLEMENTATIONApplying New Updates. 26Frequently Asked Questions . 28Tips & Tricks . 28Integration OverviewBVoIP has built integration to industry disrupting 3CX Phone System and ConnectWise. This integration works withboth on premise and cloud deployments of 3CX.This also works with on premise and cloud deployments ofConnectWise. We only use the ConnectWise API and do not tie into the raw database directly to accomplish this.This integration ties directly into ConnectWise’s APIs via any commercially available web browser and 3CX Phone forWindows.ConnectWise Integration PointsSecurity tingProcurementProjectSalesService DeskSystemTime & Expense4110 George Road, Tampa, FL 33634 813-463-4740 Platform@ConnectWise.com2
GUIDE TO INTEGRATION IMPLEMENTATIONRequired Setup in ConnectWiseIntroductionThe BVoIP 3CX CRM Plugin for ConnectWise creates a seamless integration between ConnectWise and 3CX. Thesolution consists of three main components: An Integration Server. The Integration Server manages communication between the client plugin andConnectWise, and manages the licensing of endpoints. This is managed by BVoIP in the cloud so that youdon’t have to worry about any additional infrastructure to manage. A plugin for 3CX Phone for Windows. The plugin displays call notifications and performs screen-pops forincoming calls. The plugin instructs ConnectWise to display either a contact, ticket, or search screen. Theplugin also supports the optional Desk Director add-in.A web portal: used to authorize extensions to use the BVoIP 3CX CRM Plugin for ConnectWiseConnectWise LinksThe BVoIP 3CX CRM Plug-in for ConnectWise simplifies placing outbound calls through the use of “Live Links”.Invoking a Live Link displays a dialog containing phone number links. Clicking on a phone number link willautomatically dial the selected phone number.In order to make these “Live Link” available in the ConnectWise Web Interface you must setup the links one timefrom the ConnectWise Setup Tables from the .Net ConnectWise Internet Client:1. Open the ConnectWise Internet Client (the setup tables needed are not available in the web client at thistime)2. In the left-hand pane navigate to: Setup Setup Tables3. In the search screen type “Links” in the “Table” filter field to display existing “Live Links”.4110 George Road, Tampa, FL 33634 813-463-4740 Platform@ConnectWise.com3
GUIDE TO INTEGRATION IMPLEMENTATION4. Click on “Links” to display existing “Live Links” or create new “Live Links”5. Create three “Live Links” – one for tickets, contacts, and company. To create a new live link click on the“New Item” icon6. Create three “Live Links” using the following information. When finished creating a “Live Link”, press thesave iconLink NameTable ReferenceLink DefinitionLink NameTable ReferenceLink DefinitionLink NameTable ReferenceLink Definition3CX Ticket Phone ntrol?phonenumbers Company Phone:[companyphone];Contact Phone:[contactphone]&options ticketnumber:[srnumber]3CX Contact Phone ntrol?phonenumbers Company Phone:[companyphone];Contact Phone:[contactphone];Office Phone:[memberofficephone];Home Phone:[memberhomephone];Mobile Phone:[membermobilephone]&options rdid]3CX Company Phone ntrol?phonenumbers Company Phone:[companyphone];Contact Phone:[contactphone]&options companyid:[companyrecordid]4110 George Road, Tampa, FL 33634 813-463-4740 Platform@ConnectWise.com4
GUIDE TO INTEGRATION IMPLEMENTATIONConnectWise Integrator LoginJust as a user must authenticate with ConnectWise by entering a user name and password, the BVoIP 3CX CRMPlugin must login to interact with ConnectWise. Each PC must authenticate to ConnectWise using an “integrationuser”. To create the ConnectWise integration user, perform the following steps:1. Open the ConnectWise Internet Client.2. Click on Setup -- Setup Tables -- Integrator Login3. Click on the “New Item” icon to create a new integrator login.4110 George Road, Tampa, FL 33634 813-463-4740 Platform@ConnectWise.com5
GUIDE TO INTEGRATION IMPLEMENTATION4. On the Integrator Login configuration screen, enter a username and password.5. Set the Access Level to “all records”.6. In the Service Board combo box, select the desired service board.7. Check all of the API check boxes in the left-most column starting with “Service Ticket API” and select allavailable API’s in the list.8. Press the save icon4110 George Road, Tampa, FL 33634 813-463-4740 Platform@ConnectWise.com6
GUIDE TO INTEGRATION IMPLEMENTATIONRequired BVoIP and Client Machines setupRequirements 3CX Phone for WindowsThe “Pro” editions of Windows 7, 8, 8.1Microsoft .Net 4.5BVoIP 3CX CRM Plugin for ConnectWisePrerequisitesFor the integration between 3CX and ConnectWise to function you must ensure ALL of the following prerequisitesare completed:ConnectWise:1. Integration User / Password created with necessary API permission.2. Live Links must be setup within the setup tables.Cloud Portal:1. The 3CX extensions have been authorized to use the 3CX plugin on the BVoIP 3CX CRM Plugin forConnectWise web portalWindows Client2. Browser Popup Blocker is disabled for the ConnectWise website3. 3CX Phone for Windows is installed prior to installing the BVoIP 3CX CRM Plugin for ConnectWise clientapplication4. The client portion of the BVoIP 3CX CRM Plugin is installed on each PC5. The user is logged in to ConnectWise web client at all times6. 3CX Phone for Windows must be running at all timesDownload and License ActivationThe BVoIP Plugin client installer is run on each workstation. When you sign up, BVoIP will present the download linkto the current available version.Licensing for the ConnectWise plugin is based on the number total active users you need. Your QTY of availablelicensed plugin users will be set by BVoIP from the cloud.4110 George Road, Tampa, FL 33634 813-463-4740 Platform@ConnectWise.com7
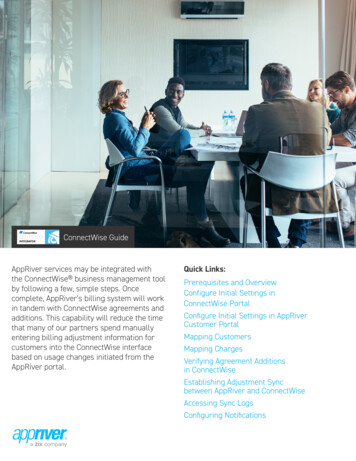
GUIDE TO INTEGRATION IMPLEMENTATIONInstallationClient Installer1. Once you have downloaded the client installer, right-click on the compressed file and choose extract.This will decompress and extract the installer files.2. In the folder created by the extraction process, double-click on ConnectWisePluginInstaller.exe. You willbe prompted to allow administrative access to perform the install. Press “Yes” to continue theinstallation.FIGURE 7: USER ACCOUNT CONTROL3. Press “Next” on the initial Setup Wizard screen:FIGURE 8: CRM PLUGIN INSTALLATION WIZARD4110 George Road, Tampa, FL 33634 813-463-4740 Platform@ConnectWise.com8
GUIDE TO INTEGRATION IMPLEMENTATIONRelay Agent4. Enter the appropriate host name or IP address and port for the relay agent (as provided by BVoIP foryour account).5. On the CRM Plugin installer screen, press “Test Relay Settings” to confirm that you can communicatewith the Relay Agent. You should see a “Test success!” message.4110 George Road, Tampa, FL 33634 813-463-4740 Platform@ConnectWise.com9
GUIDE TO INTEGRATION IMPLEMENTATION6. After a successful Relay test, press the “Next” button to continue with the installation of the CRM Plugin.7. When the CRM plugin installation is complete, press “Run Application” to start the CRM Pluginconfiguration program.4110 George Road, Tampa, FL 33634 813-463-4740 Platform@ConnectWise.com10
GUIDE TO INTEGRATION IMPLEMENTATIONConnectWise Plugin ConfigurationThe CRM plugin configuration screen manages the settings necessary for the plugin to login and communicate withConnectWise.1. Make the necessary configuration settings and press “Save”2. Press the “Restart 3CX Phone” to apply the changes.4110 George Road, Tampa, FL 33634 813-463-4740 Platform@ConnectWise.com11
GUIDE TO INTEGRATION IMPLEMENTATIONThe following table describes each of the CRM configuration settings.SettingDescriptionConnect Wise Web HostConnect Wise Company IDConnect Wise Version StringHostname of the ConnectWise server – this can be cloud or on premise ConnectWiseCompany ID you use to login to ConnectWiseThis should automatically be determined by the installer via the ConnectWise API duringinstallation.Integration account username (this is different than your user login username)Integration account password (this is different than your user login password)Indicate when the screen pop will happen. Valid values are “RINGING” or “ANSWERED”.Log additional debug information. When set to true, the ConnectWise plugin will log extradebug information to a text file for troubleshooting purposes. Valid values are ‘true’ or‘false’.List the queues that pop the support ticket screen. A comma separated list of queueextension numbers. Only one queue (extension 822) can pop specific ticket numbers.List of queues that pop the company/contact screen. A comma separated list of queueextension numbers.Host name of the BVoIP Server.TCP port number used to communicate with the relay agent. This number will varyhowever BVoIP will instruct you on which port to use.Integrate with Desk Director. Valid values are ‘true’ or ‘false’Host name of the BVoIP Server.Connect Wise Integration User NameConnect Wise Integration PasswordConnect Wise Screen Pop Open OptionConnect Wise DebugConnect Wise Ticket Queue ListConnect Wise Company Queue ListConnect Wise Relay Services DNS NameConnect Wise Relay Services PortConnect Wise Desk Director IntegrationConnect Wise Licensing Host4110 George Road, Tampa, FL 33634 813-463-4740 Platform@ConnectWise.com12
GUIDE TO INTEGRATION IMPLEMENTATIONRestore ConnectWise Plugin ConfigurationWhen the ConnectWise plugin is installed on a PC, the 3CX Phone for Windows configuration file is updated to loadthe ConnectWise plugin. Unfortunately, when 3CX releases an automatic update for 3CX Phone for Windows, theirupdater deletes all plugin information.To restore the ConnectWise plugin configuration information in the 3CX Phone for Windows configuration file, openthe ConnectWise 3CX Plugin Configuration screen and press “Restart 3CX Phone”.4110 George Road, Tampa, FL 33634 813-463-4740 Platform@ConnectWise.com13
GUIDE TO INTEGRATION IMPLEMENTATIONDesk DirectorDesk Director is a 3rd Party Add-on for ConnectWise (Please See DeskDirector User Guide). Enabling integration withDesk Director is very simple. On the ConnectWise 3CX Plugin configuration screen:1. Enter “true” in the “Connect Wise Desk Director Integration” field.2. Press “Save” to update the plugin configuration.3. Press the “Restart 3CX Phone” The plugin will open Desk Director whenever a caller has specified a ticketnumber.4110 George Road, Tampa, FL 33634 813-463-4740 Platform@ConnectWise.com14
GUIDE TO INTEGRATION IMPLEMENTATIONWeb PortalThe web portal allows you to specify which 3CX extensions have permission to use the plugin and consume a clientlicenses. To access the web portal, a user must have 3CX system admin rights.To configure 3CX admin rights:1.2.3.4.5.Log in to the 3CX Management ConsoleSelect the extension that will be assigned 3CX System Administration rightsSelect the “Options” tab“Check” Allow 3CX Management Console AccessClick the “Configure Permissions” button4110 George Road, Tampa, FL 33634 813-463-4740 Platform@ConnectWise.com15
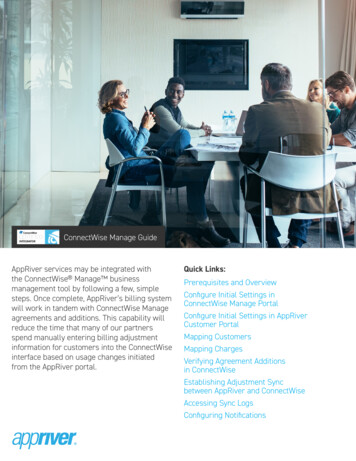
GUIDE TO INTEGRATION IMPLEMENTATION6. Check the System Administrator check box and click OK7. Next click “Apply” and then “OK”.FIGURE 1: 3CX SYSTEM ADMINISTRATOR8. Once you have assigned the necessary permissions, you can login to the 3CX ConnectWise Integration webportal. To login to the web portal, browse to the default URL:URL to be provided by BVoIP during account setup9. On the login screen enter the 3CX extension number and PIN for an extension with 3CX SystemAdministration permissions:4110 George Road, Tampa, FL 33634 813-463-4740 Platform@ConnectWise.com16
GUIDE TO INTEGRATION IMPLEMENTATIONHaving successfully logged into the 3CX ConnectWise Integration login screen, the “Settings” screen willdisplay. On this screen you manage which extensions are authorized to use the BVoIP 3CX CRM Plug-in forConnectWise client plug-in.10. Select each extension authorized to use the BVoIP 3CX CRM Plugin for ConnectWise by clicking on the checkbox next to the desired extension.11. Press the “Save” button to committ your changes.4110 George Road, Tampa, FL 33634 813-463-4740 Platform@ConnectWise.com17
GUIDE TO INTEGRATION IMPLEMENTATION3CX Phone for WindowsIn order for the BVoIP 3CX CRM Plugin for ConnectWise to function properly, 3CX Phone for Windows must beconfigured to “Run this program as an administrator”. You can ensure it is always run as an Administrator bynavigating to the executable here:C:\ProgramData\3CXPhone for Windows\PhoneApp\3CXWin8Phone.exe1. Right-mouse click on the executable and choose properties.2. Select “Run this program as an administrator3. Press OK to save the changesWith this change whenever 3CX Phone for Windows is started it will automatically run with the necessary privileges.You will need to reapply this configuration change if you update or reinstall 3CX Phone for Windows.4110 George Road, Tampa, FL 33634 813-463-4740 Platform@ConnectWise.com18
GUIDE TO INTEGRATION IMPLEMENTATIONAfter Setup User Guide3CX Call Flow Example (Inbound)3CX provides a highly flexible approach to designing inbound call flows. The example below is just onepossible approach to designing how inbound calls are routed.The BVoIP 3CX CRM Plugin for ConnectWise matches inbound Callers to a ConnectWise Company or Contact basedon either the caller’s phone number, or by a ticket number entered by the caller. When an Inbound call is received,the BVoIP 3CX CRM Plugin displays a small notification (toast) in the lower right-hand corner of the screen, andautomatically displays the appropriate ConnectWise screen (typically when the call is answered).4110 George Road, Tampa, FL 33634 813-463-4740 Platform@ConnectWise.com19
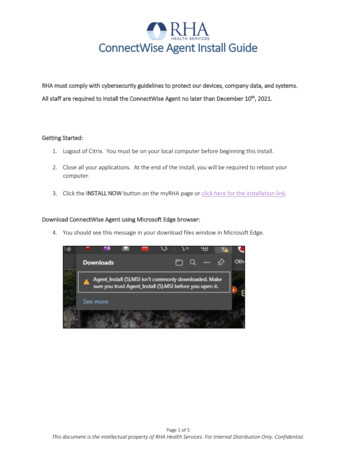
GUIDE TO INTEGRATION IMPLEMENTATIONHow calls are routed within 3CX will affect which ConnectWise screen is displayed. The diagram below outlines howan inbound call might be routed within 3CX. The example presents the caller with three options: (1) Sales, (2)Support Existing Case, or (3) Support New Case. Selecting “Sales” will direct the caller to a designated 3CX “Sales” queue. If the caller ID (phone number) isfound in ConnectWise, the Company or Contact screen will display. If the phone number is not found in anyof the phone fields the ConnectWise Company search screen will display. Navigating to “Support Existing Case” directs the caller to a 3CX Voice Application Designer (VAD) DigitalReceptionist that prompts the caller for their ticket number. The VAD application then transfers the caller toa designated 3CX “Support” queue. If the ticket number is found in ConnectWise, the ticket will display. Ifthe ticket number cannot be found, the ConnectWise ticket search screen will display. Choosing “Support New Case” will transfer the caller to a designated 3CX “Support” queue. Because noticket number was specified by the caller, a new ticket is automatically created and displayed inConnectWise.4110 George Road, Tampa, FL 33634 813-463-4740 Platform@ConnectWise.com20
GUIDE TO INTEGRATION IMPLEMENTATIONDesignating Sales and Support QueuesThe BVoIP 3CX CRM Plugin for ConnectWise selects the screen to display for inbound calls based on the type of 3CXqueue (sales or support) the caller is waiting in. If the caller is waiting in a “sales” queue a Company screen willdisplay, or if waiting in a “support” queue a ticket screen will display.Identifying a 3CX queue as either a “sales” or “support” queue is typically configured globally by the IntegrationServer (installed on the 3CX server) but you can override the global settings at each PC.To identify whether a queue is either a “Sales” or “support” queue at the PC, click on the 3CXConnectWise Plugin desktop shortcut. This will open the ConnectWise 3CX Plugin Configurationscreen below: “Support” queues are identified by entering the 3CX queue extension number in the “Connect Wise TicketQueue List” field.“Sales” queues are identified by entering the 3CX queue extension number in the “Connect Wise CompanyQueue List” fieldYou can identify multiple queues as either “sales” or “support” by enter a list of extension numbers, separatedby commas, in the appropriate field.4110 George Road, Tampa, FL 33634 813-463-4740 Platform@ConnectWise.com21
GUIDE TO INTEGRATION IMPLEMENTATIONScreen PopsWhen a call is received on a designated “Sales” queue, the BVoIP 3CX Plugin for ConnectWise will search for thecaller’s phone number in ConnectWise. If the phone number is found, the plugin will “pop” the caller’s contactinformation if the number is associated with a contact, or the Company if not associated with a contact withinConnectWise. From this screen the Agent can easily record notes about the conversation and access other relevantinformation about the caller.If the caller’s phone number is not found within ConnectWise, the Company Search screen will display:4110 George Road, Tampa, FL 33634 813-463-4740 Platform@ConnectWise.com22
GUIDE TO INTEGRATION IMPLEMENTATIONWhen an inbound call is received on a designated “Support” queue, a new ticket is created, summary informationabout the call is saved, and a recording of the conversation is attached to the ticket (if the call was recorded).4110 George Road, Tampa, FL 33634 813-463-4740 Platform@ConnectWise.com23
GUIDE TO INTEGRATION IMPLEMENTATIONIn some situations the plugin can’t automatically create a ticket. For example, if the caller’s phone number was notfound in ConnectWise the Agent will first need to find the caller or create a new contact record – then manuallycreate a ticket for the call. After the ticket has been created and the call is finished, the plugin will prompt the agentfor the ticket number. This dialog enables the agent to associate call summary information and attach a recording ofthe call (assuming the call was recorded) to the correct ticket.When the BVoIP 3CX CRM Plugin for ConnectWise Integration Server was installed, a specialized Digital Receptionistwas created. This Digital Receptionist prompts the caller to enter their ticket number, or, if they don’t know theirticket number, to press “*”. The caller is then forwarded to the designated “Support” queue.If the caller entered their ticket number, the plugin will automatically pop the correct ticket on the Agent’s screen. Ifthe ticket number entered by the caller is not found, a warning stating the ticket does not exist will display on thenew Service Ticket screen. If the caller pressed “*”, the Company ticket search screen will display.4110 George Road, Tampa, FL 33634 813-463-4740 Platform@ConnectWise.com24
GUIDE TO INTEGRATION IMPLEMENTATIONLive Links (Outbound Calls)In addition to performing screen pops within ConnectWise for inbound calls, the BVoIP 3CX CRM Plugin forConnectWise can also automate outbound calls through the use of ConnectWise Live Links.Navigating to a ConnectWise Company, Contact, or Ticket screen displays a “Links” combo box on thescreen. Selecting the live link will display a “Live Link” dialog that lists one or more phone numbers. In the exampleabove, selecting “3CX Company Phone Control” from the Company screen will display the following dialog:Clicking on one of the phone number links will: (1) initiate an outbound call to the selected number, (2) create anote for the Contact containing summary information about the call, and (3) attach a recording of the call to theCompany (provided the call was recorded). The process of initiating outbound calls through Links is identical forCompanies, Contacts, and Tickets.4110 George Road, Tampa, FL 33634 813-463-4740 Platform@ConnectWise.com25
GUIDE TO INTEGRATION IMPLEMENTATIONApplying New UpdatesNaturally the plugin will need to be updated as BVoIP makes modifications or feature enhancements. This can beeasily accomplished right through the Plugin Configuration Screen.You will notice that at the lower right hand corner of the window it will show in red that there is an UpdateAvailable! Simply click on the “Check for Updates” button.A dialog box will pop up on your screen. Simply click the “Yes” button to continue.4110 George Road, Tampa, FL 33634 813-463-4740 Platform@ConnectWise.com26
GUIDE TO INTEGRATION IMPLEMENTATIONYou will notice that the update button will change to “Downloading”.Press the “OK” button to complete the download process. You will find a .zip file on your desktop with the updatedinstall version of the plugin. You can then follow the installation process outlined on Page 6 of this guide to completethe installation process.4110 George Road, Tampa, FL 33634 813-463-4740 Platform@ConnectWise.com27
GUIDE TO INTEGRATION IMPLEMENTATIONFrequently Asked QuestionsQuestion: Do we need to use the new and existing support options for incoming calls since we usually live answertoday?Answer: You could bypass those options and just screen pop new tickets every time a call comes into your supportqueue and then child ticket everything. You could also opt to screen pop to the Account Screen under the Servicetab as another option. We would highly suggest adding those two options in to get the full time savings andperformance aspect of the integrations.Question: We see there is a plugin for Windows what about MAC?Answer: Today we only have a Windows Plugin but the MAC version has been suggested are taking that underconsideration for future releases.Question: Is there any way to get screen pops to show up when calls come in directly to someone’s extension ratherthan through a queue?Answer: This is something that is planned for a future release.Question: Is there any way for screen pops to show up in the .NET or ConnectWise Internet Client instead of theWeb Based ConnectWise?Answer: Today the only thing that works from the .NET or Internet Client is the Live Link Drop down fromCompany’s, Contact’s, and Tickets for outbound Click-To-Call. Inbound screen pops will only show in in the browserbased ConnectWise.Question: What happens if a call comes into a queue and nobody answers?Answer: The PBX is very flexible into how you route calls in that scenario. A suggestion would be to have calls hit avoicemail box and then have that voicemail box email your ConnectWise Email Connector and create a ticket for youautomatically.Tips & TricksTip: Make sure all of your extensions are set to record so that recordings automatically get uploaded intoConnectWise.Tip: Make sure to allow any new extensions that you want to enable the BVoIP plugin for in the Authorization WebPortal.Tip: Make sure to always update your plug-in once a new version is released.Tip: You can be logged into multiple machines with the same extension but the screen pop will show up whereveryou answer the call.Tip: Send us feature requests in through our portal so that we can plan future releases!4110 George Road, Tampa, FL 33634 813-463-4740 Platform@ConnectWise.com28
ConnectWise. We only use the ConnectWise API and do not tie into the raw database directly to accomplish this. This integration ties directly into onnectWises APIs via any com mercially available web browser and 3CX Phone for Windows. ConnectWise Integration Points Security Modules Add Update Delete Inquire Companies Finance