Transcription
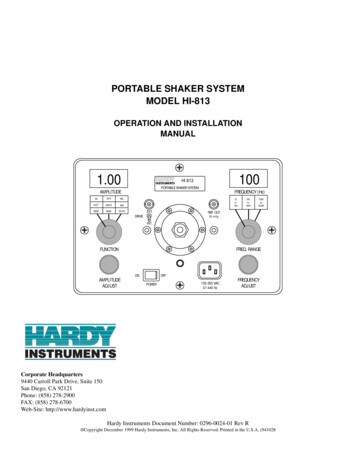
PORTABLE SHAKER SYSTEMMODEL HI-813OPERATION AND INSTALLATIONMANUAL1.00100HI 813PORTABLE SHAKER EQUENCY (Hz)10to100EXT.100to10001000to10000REF. OUTDRIVE50 mV/gINT.FUNCTIONFREQ. RANGEONAMPLITUDEADJUSTOFFPOWER105-265 VAC47-440 HzFREQUENCYADJUSTCorporate Headquarters9440 Carroll Park Drive, Suite 150San Diego, CA 92121Phone: (858) 278-2900FAX: (858) 278-6700Web-Site: http://www.hardyinst.comHardy Instruments Document Number: 0296-0024-01 Rev R Copyright December 1999 Hardy Instruments, Inc. All Rights Reserved. Printed in the U.S.A. (941028
Table of ContentsTABLE OF CONTENTSTABLE OF CONTENTS1 - - - - - - - - - - - - - - - - - - - - - - - - - - - - - - - ITABLE OF ILLUSTRATIONS1 - - - - - - - - - - - - - - - - - - - - - - - - - - - - ICHAPTER 1 - OVERVIEW - - - - - - - - - - - - - - - - - - - - - - - - - - - - - - 1-1A Brief Description of Chapter 1- - - - - - - - - About Hardy Manuals- - - - - - - - - - - - - - Description - - - - - - - - - - - - - - - - - - - Traceability - - - - - - - - - - - - - - - - - - - The Microcomputer - - - - - - - - - - - - - Typical Applications - - - - - - - - - - - - - - Test Transducer Operational Characteristics 1-4CHAPTER 2 - SPECIFICATIONS - - - - - - - - - - - - - - - - - - - - - - - - - - - 2-1Electrodynamic Vibrator - - - - Amplitude Readout Accuracy - - Acceleration - - - - - - - - Velocity - - - - - - - - - - Displacement- - - - - - - - Frequency Accuracy - - - - - - Display Resolution - - - - - Output Frequency Display - Operator Interface - - - - - - - Digital Displays - - - - - - - Vernier Controls - - - - - - Internal Functions - - - - - - - Displayed Functions - - - - Amplitude Display Units - - Frequency Display Units - - Power Requirements - - - - - - AC Power - - - - - - - - - Maximum Input Power - - - Battery Size (2) - - - - - - - Battery Type - - - - - - - - Battery Charger - - - - - - Dynamic Specifications vs. Load Waveform Distortion - - - - Environmental Specifications - - Operating Temperature RangeAltitude - - - - - - - - - - - Humidity - - - - - - - - - - Long Term Stability - - - - - Physical Dimensions - - - - - - Aluminum Case - - - - - - Weight - - - - - - - - - - - Approvals - - - - - - - - - - - CE - - - - - - - - - - - - - -22-22-22-22-22-22-22-22-22-22-22-2CHAPTER 3 - INSTALLATION - - - - - - - - - - - - - - - - - - - - - - - - - - - - 3-1A Brief Description of Chapter 3Unpacking - - - - - - - - - - Accessories - - - - - - - Stud - - - - - - - - - -------------------------------------3-13-13-13-1i
HI 813 PORTABLE SHAKER SYSTEMAccelerometer Adapter, Circular Plate- - - - - - - - - - - - - - Power Cord - - - - - - - - - - - - - - - - - - - - - - - - - - Wrench- - - - - - - - - - - - - - - - - - - - - - - - - - - - - Manual - - - - - - - - - - - - - - - - - - - - - - - - - - - - - Options- - - - - - - - - - - - - - - - - - - - - - - - - - - - - - - DI 223 Non-Contact Displacement Eddy Current Probe Fixture Kit DI 224 Non-Contact Displacement Eddy Current Probe Fixture Kit Installation Procedures - - - - - - - - - - - - - - - - - - - - - - - - - Triaxial Accelerometer Installation- - - - - - - - - - - - - - - - - - Installation of the Mounting Bracket and Cables - - - - - - - - - DI-103 Installation for A & B Axes - - - - - - - - - - - - - - - - DI-103 Installation for the C-Axis Tests - - - - - - - - - - - - - DI-103A Installation for A & B- Axes Tests- - - - - - - - - - - - DI-103A Installation for the C-Axis Tests - - - - - - - - - - - - Non-Contact Displacement Probe Bracket Assembly Installation - - - - - DI-223 Bracket Assembly - - - - - - - - - - - - - - - - - - - - - - DI-224 Bracket Assembly - - - - - - - - - - - - - - - - - - - - - - ---------------- 3-1- 3-1- 3-1- 3-1- 3-1- 3-1- 3-2- 3-2- 3-2- 3-2- 3-3- 3-4- 3-6- 3-7- 3-9- 3-9- 3-10CHAPTER 4 - CALIBRATION - - - - - - - - - - - - - - - - - - - - - - - - - - - - 4-1A Brief Description of Chapter 4 - - - - - - - - - - - - - - Required Test Equipment - - - - - - - - - - - - - - - - - Detailed Calibration Process - - - - - - - - - - - - - - - Quick Calibration Check Procedures - - - - - - - - - - - Frequency Checks - - - - - - - - - - - - - - - - - - - - Frequencies for Acceleration, Velocity and DisplacementFrequencies for Acceleration and Velocity - - - - - - - Frequencies for Acceleration - - - - - - - - - - - - - PTER 5 - OPERATING PROCEDURES - - - - - - - - - - - - - - - - - - - - - 5-1A Brief Description of Chapter 5 - - - - - - - - - - - - - - - - - - - - - - Mechanical Information - - - - - - - - - - - - - - - - - - - - - - - - - - Some Precautions - - - - - - - - - - - - - - - - - - - - - - - - - - Usable Frequency Range vs. Weights- - - - - - - - - - - - - - - Electrical Information - - - - - - - - - - - - - - - - - - - - - - - - - - - PSS Modules- - - - - - - - - - - - - - - - - - - - - - - - - - - - - Signal Generator - - - - - - - - - - - - - - - - - - - - - - - - - Power Amplifier- - - - - - - - - - - - - - - - - - - - - - - - - - Electrodynamic Vibrator - - - - - - - - - - - - - - - - - - - - - Reference Accelerometer - - - - - - - - - - - - - - - - - - - - - Digital Voltmeter and Frequency Indicator - - - - - - - - - - - - - English or Metric Units - - - - - - - - - - - - - - - - - - - - - - Battery Information - - - - - - - - - - - - - - - - - - - - - - - - - - Batteries - - - - - - - - - - - - - - - - - - - - - - - - - - - - - Charge Life- - - - - - - - - - - - - - - - - - - - - - - - - - - - Precautions - - - - - - - - - - - - - - - - - - - - - - - - - - - Storage - - - - - - - - - - - - - - - - - - - - - - - - - - - - - Check Procedures - - - - - - - - - - - - - - - - - - - - - - - - - - - - Standard Checks for Transducers - - - - - - - - - - - - - - - - - - - - - Linearization - - - - - - - - - - - - - - - - - - - - - - - - - - - - - Frequency Response - - - - - - - - - - - - - - - - - - - - - - - - - Typical Transducer Sample Data Sheet - - - - - - - - - - - - - - - - Typical Transducer Calibration Sample Data Sheet - Accelerometer Typical Transducer Calibration Sample Data Sheet - Velocity PickupChecking for Loose Cables or Connectors- - - - - - - - - - - - - - - - - Non Contact Displacement (Eddy Current) Probe Checks - - - - - - - - - Sensor Frequency Response Check - - - - - - - - - - - - - - - - - --------------- 5-1- 5-1- 5-1- 5-2- 5-2- 5-2- 5-2- 5-3- 5-3- 5-3- 5-3- 5-3- 5-3- 5-4- 5-4- 5-4- 5-4- 5-4- 5-5- 5-5- 5-5- 5-5- 5-5- 5-6- 5-6- 5-6- 5-6ii
Table of ContentsSensor Linearization Check - - - - - - - - - - - - - - - - - - - - - - - - Optional Linearization Procedure - - - - - - - - - - - - - - - - - - - Internal Reference Accelerometer Accuracy Check - - - - - - - - - - - - - - Mass Loading Compensation - - - - - - - - - - - - - - - - - - - - - - - - - Test Transducer and Mounting Fixture Weight Guide - - - - - - - - - - - Mounting Hardware Weight (Typical for use with 0228-0071-02 Adapter)------------5-85-95-105-105-105-10GENERAL VIBRATION INFORMATION - - - - - - - - - - - - - - - - - - - - - - - A-1HI-813 - - - - - - - - - - - - - - - - - - - - - - - - - - - - - - - - - - - - - - - - B-1EC DECLARATION OF CONFORMITY - - - - - - - - - - - - - - - - - - - - - - - - B-1CERTIFICATE OF CALIBRATION AND CONFORMANCE - - - - - - - - - - - - - - C-1EC DECLARATION OF CONFORMITY - - - - - - - - - - - - - - - - - - - - - - - - C-1iii
HI 813 PORTABLE SHAKER SYSTEMiv
Table of IllustrationsTABLE OF ILLUSTRATIONSCHAPTER 1 - OVERVIEWFIG. 1-1FIG. 1-2FIG. 1-3FIG. 1-4FIG. 1-5BLOCK DIAGRAM HI-813 - - - - - - - - - - - - - - - - - - - - - - - - - - - - - - - - - - 1-3CHECKING ACCLEROMETERS WITH BUILT-IN AMPLIFIERS - - - - - - - - - - - - - - - 1-3CHECKING VELOCITY TRANSDUCERS THAT ARE SELF POWERED - - - - - - - - - - - 1-4CHECKING ALARM SET POINTS ON VIBRATION MONITORING SYSTEMS - - - - - - - - 1-4CHECKING THE CALIBRATION OF TRANSDUCERS AND PORTABLE DATA COLLECTORS1-4CHAPTER 3 - INSTALLATIONFIG. 3-1FIG. 3-2FIG. 3-3FIG. 3-4FIG. 3-5FIG. 3-6FIG. 3-7FIG. 3-8FIG. 3-9FIG. 3-10INSTALLATION OF MOUNTING BRACKET FOR AXIS A & B - DI-103 A-AXIS POSITION WITH A ARROW POINTING DOWN DI-103 B-AXIS POSITION WITH B ARROW POINTING DOWN DI-103 INSTALLATION FOR C AXIS TEST - - - - - - - - - - DI-103A A-AXIS POSITION WITH A ARROW POINTING DOWN DI-103A B-AXIS POSITION WITH B ARROW POINTING DOWN DI-103A INSTALLATION FOR C-AXIS TEST - - - - - - - - - - DI-223 BRACKET INSTALLATION/REMOVE SCREWS - - - - DI-223 BRACKET/THUMB SCREWS - - - - - - - - - - - - - BRACKET WITH MICROMETER- - - - - - - - - - - - - - - - TER 4 - CALIBRATIONFIG. 4-1FIG. 4-2CALIBRATION SETUP DIAGRAM - - - - - - - - - - - - - - - - - - - - - - - - - - - - - - 4-2ACCESS PORT TO POTS R27, R25, R23 - - - - - - - - - - - - - - - - - - - - - - - - - - 4-3CHAPTER 5 - OPERATING PROCEDURESFIG. 5-1FIG. 5-2FIG. 5-3HI-813 TOP PANEL FUNCTIONS - - - - - - - - - - - - - - - - - - - - - - - - - - - - - - 5-3REMOVE SOCKET HEAD CAP SCREWS - - - - - - - - - - - - - - - - - - - - - - - - - - 5-7DISPLACEMENT CALIBRATION - TYPICAL LINEARITY PLOT - - - - - - - - - - - - - - - 5-9I
HI-813 PORTABLE SHAKER SYSTEMII
Chapter 1 - OverviewCHAPTER 1 - OVERVIEWA Brief Description ofChapter 1This manual provides the user and service personnel with a descriptionof the specifications, installation, setup, configuration, operation, communication, maintenance, and troubleshooting procedures for theHardy Instruments HI-813 Portable Shaker System (PSS). The HI-813is a field test instrument to verify the accuracy of accelerometers,velocity pickups and non contact displacement transducers. The Instrument comes with the fixtures and hardware needed to mount mosttransducers to the vibrating shaking head. All accessories are stored inthe removable lid of the PSS.About Hardy ManualsEvery Hardy Installation and Operation manual is organized into easilyreferenced chapters, that are almost always the same: Chapter 1 - Provides an introduction to the instrument and an Overview of the equipment and its capabilities.Chapter 2 - Provides a complete list of Specifications.Chapter 3 - Contains information needed to Installthe HI-813 TTS. (both standard and optional equipment)Chapter 4 - Provides all Calibration instructions.Chapter 5 - Pertains to the Operating Procedures ofthe HI-813 TTS.Hardy Instruments hopes that this manual meets your needs for information and operation. All corrections or suggestions for improvementsof this manual are welcome and can be sent to the Technical Publications Department or Customer Support Department at Hardy Instruments Inc.DescriptionThe HI-813 is designed to test all three types of transducers: AccelerometersVelocity TransducersEddy Current Displacement ProbesThe standard instrument is completely self contained and consists of: Sine OscillatorPower AmplifierElectrodynamic ShakerTraceable Reference AccelerometerDigital DisplayBatteries and built-in battery charger.1-1
HI 813 PORTABLE SHAKER SYSTEMA built-in reference accelerometer is permanently attached to theshaker and armature so as to maximize accuracy between the referenceaccelerometer and the Transducer Under Test (TUT). The PSS provideslong term reliable performance over the frequency range of 30 Hz to 10kHz.The PSS is used for a number of applications including: Verification and calibration of vibration transducersand associated test systems.Verification of connector and cabling integrity.Verification of speed indicator measuring systems.Loads of up to 750 grams (26.5 ounces) can be mounted directly on theshaker head (reference accelerometer). For larger loads we recommendthat an external transducer suspension system be used. Under theseconditions the vibration waveform should be viewed on an oscilloscopeto aid in positioning the test transducer and shaker head to reduce distortion that might occur with very large weights.NOTE:Reference Accelerometer and shaker head are used interchangeably and mean thesame thing.TraceabilityThe moving part of the vibrator contains the reference accelerometerand along with the electronics is factory calibrated with traceability tothe National Institute of Standards and Technology (NIST). We recommend the built-in standard be re-calibrated once each year. The manualprovides a simple calibration check which can be performed more frequently. For a more detailed check, contact your local Hardy representative for more information.The HI-803 provides - 3% indicated value (IV) - 1 digit amplitudeaccuracy over the following ranges:MEASUREMENTFREQUENCY RANGEACCELERATION: g’s, 0 - PEAK 30 Hz to 3 kHzVELOCITY: ips, 0 - Peak30 Hz to 400 HzDISPLACEMENT: Mils, Peak - Peak30 Hz to 150 HzThe ability to provide performance at high frequency ranges in velocityand displacement are limited by several factors. The major factor is theamount of force available from the electrodynamic vibrator. Other factors include: 1-2Mechanical coupling of the test transducer and fixturing.Lateral forces of the test transducer and fixturing.Weight of the test transducer and fixturing.
Chapter 1 - Overview Reaction of the shaker mechanism to resonance.Accuracies of - 6% IV in the acceleration mode can be obtained overthe extended range of 10 kHz provided proper care is given whenmounting the test transducer to the shaker head.The MicrocomputerThe microcomputer manages the operation of the PSS by interpretingexternal commands entered from the frequency control buttons, monitoring operating parameters, measuring the built-in reference accelerometer and the transducer under test, performing calculations anddriving the displays. A significant benefit in having a microcomputer isits ability to run self tests to insure the PSS is functioning properly.FIG. 1-1 BLOCK DIAGRAM HI-813Typical entSourceAC Voltmeter orVibration MeterFIG. 1-2 CHECKING ACCLEROMETERS WITH BUILT-IN AMPLIFIERS1-3
HI 813 PORTABLE SHAKER SYSTEMFIG. 1-3 CHECKING VELOCITY TRANSDUCERS THAT ARE SELFPOWEREDHI-813PortableShakerFIG. 1-4 CHECKING ALARM SET POINTS ON VIBRATIONMONITORING SYSTEMSHI-813PortableShakerFIG. 1-5 CHECKING THE CALIBRATION OF TRANSDUCERS ANDPORTABLE DATA COLLECTORSTest TransducerOperationalCharacteristics Guide1-4C Charge AmplifierV Voltage AmplifierS Self GeneratingTest TransducerSensitivityC/V/SCurrentHardy InstrumentsDI-111 Accelerometer100mV/gV2mA
Chapter 2 - SpecificationsCHAPTER 2 - SPECIFICATIONSElectrodynamic Vibrator Rated Sine Vector ForceMax. Displacement (pk to pk)1st major resonance of tableFrequency Range (minimum load)Rated LoadCoil ResistanceMagnetic FieldSensor AttachmentVibrator Cooling4.0 lbs (17.6 N)0.1 inch (2.54 mm)12,000 Hz (nominal)25 Hz to 10,000 Hz26.4 ozs (750 grams)0.96 ohms (nominal)Permanent Magnet1/4-28 UNF ThreadsConvection CoolingAcceleration 30 Hz to 1000 Hz1 KHz to 10 kHz - 0.3dB - 1 digit - 1dB - 1 digitVelocity 30 Hz to 500 Hz - 0.3 dB - 1 digitDisplacement 30 Hz to 100 Hz - 0.3% dB - 1 digitAmplitude ReadoutAccuracyFrequency AccuracyDisplay ResolutionWithin 1 HzOutput FrequencyDisplay - 1% IV or less, 1 digitOperator InterfaceDigital DisplaysTwo (2)Vernier ControlsTwo (2) Adjustable/lockInternal FunctionsDisplayed FunctionsReference level in g, ips & disp., frequency dependentAmplitude DisplayUnitsEnglish or MetricFrequency DisplayUnitsHzPower RequirementsAC Power100-240 VAC, 47-63 HzMaximum InputPower50-60 watts2-1
HI 813 PORTABLE SHAKER SYSTEMBattery Size (2)10 VDC, 2.5 amp. hourBattery TypeSealed solid gel lead acidBattery ChargerBuilt-in, automaticDynamic Specificationsvs. LoadWaveformDistortion0-100Frequency Range grams100-250grams250-500grams500-700grams25 - 100 Hzl00 - 1000 Hz1 - 2 kHz1 - 10 kHz4g4g1.5g1.5g2g2g1gn/a1g1gn/an/a10 g7g3g3g30 Hz to 2 kHz, 5% T.H.D. with 100 gram load up to 80% ratedshaker ture Range0-50o C (32-122o F)AltitudeNot AffectedHumidity95-98% non condensingLong Term Stability3% per year maximumPhysical DimensionsAluminum Case11”L x 7”W x 10”H (28mmH x 18mmW x 25.4mmH)Weight19 lbs. (8.62 kg)ApprovalsCE2-2CE Marked
Chapter 3 - InstallationCHAPTER 3 - INSTALLATIONA Brief Description ofChapter 3Chapter 3 covers unpacking, cabling, interconnecting, configurationand installing the HI-813 PSS and Optional Equipment. Users and service personnel should be familiar with the procedures contained in thischapter, before installing or operating the HI-813 PSS. Hardy Instruments appreciates your business. Should you experience any problemsinstalling this equipment, contact your local or Hardy Instruments Inc.,Customer Support for assistance.UnpackingStep 1. Before signing the packing slip, inspect the packing for damage of any kind.Step 2. Report any damage to the carrier company immediately.Step 3. Check to see that everything in the package matches the billof lading. You should normally have: One Assembled HI-813 PSS UnitPower Cord (Prt. #6006-0008)Special Spanner Wrench (Prt. #0228-0072-01)Operation and Installation ManualStep 4. Write down the Model and Serial number of the instrument.Store this information in a convenient location for referencewhen contacting The Hardy Customer Support Departmentfor parts or service.AccessoriesStud 1/4-28 to 1/4-28 Stud - - - - - - - 0228-0070-0111/4-28 to 10-32 UNF Stud - - - - 0228-0070-02AccelerometerAdapter, CircularPlateFits many common sensors with flange style bases. Prt. # 0228-007101Mounting Screw - Prt. #2824-0135Power Cord115 VAC - - - - - - - - - - - - - - - - - - - - 6006-0008WrenchSpanner - - - - - - - - - - - - - - - - - - - - - 0228-0072-01ManualOperation and Installation- - - - - - - - - - - - - 0296-0024-01OptionsDI 223 Non-ContactDisplacement EddyCurrent ProbeFixture KitNOTE:Mounting Kit with Micrometer and Bracket Assembly with target standard. (Prt. #0251-0019-01) Used for Linearization check.There should be no weight on the vibration generator during shipping.The unit must be free of any brackets before transportation.3-1
HI 813 PORTABLE SHAKER SYSTEMDI 224 Non-ContactDisplacement EddyCurrent ProbeFixture KitNOTE:Bracket Kit (Prt. #0251-0011-01) with target standard. Used for Frequency Response Checks.For purchasing information contact your local Hardy Instruments Representative.Installation ation of theMounting Bracketand CablesStep 1. ALWAYS use the Spanner Wrench (Prt. #0228-0072-01) toprevent damage to the Reference Accelerometer when installing the mounting bracket or a test accelerometer. (See Fig. 31)FIG. 3-1 INSTALLATION OF MOUNTING BRACKET FOR AXIS A & BStep 2. While holding the reference accelerometer steady with thespanner wrench, place the mounting bracket (Prt. #02050043-01) over the top of the reference accelerometer.WARNINGALWAYS USE THE SPANNER WRENCH WHEN INSTALLING, REMOVING OR ADJUSTING THE TRANSDUCERS OR MOUNTING BRACKET ONTHE REFERENCE ACCELEROMETER.Step 3. While still holding the spanner wrench in place, use the allenwrench provided with the bracket kit to screw the mountingbracket socket head screw into the reference accelerometer.(See Fig. 3-1) Tighten the screw so that the bracket is snug3-2
Chapter 3 - Installationagainst the reference accelerometer. If you want, use a torquewrench and torque to 18 inch pounds. Do not over torque themounting screw. Overtightening the mounting screw cancause bad readings.DI-103 Installationfor A & B AxesStep 4. Position the TUT for the A position. (See Fig. 3-2)FIG. 3-2 DI-103 A-AXIS POSITION WITH A ARROW POINTING DOWNStep 5. Screw the socket head bolt into the mounting bracket. Use atorque wrench and tighten the bolt that fastens the transducerto the bracket to 18 inch pounds. Do not overtighten.Step 6. Perform the tests for Axis A. This information can be found inthe documentation that comes with the transducer you aretesting. We use the DI-103 as an example. Make sure to referto the test documentation for the transducer you are currentlyusing. This information may differ from manufacturer to manufacturer. If you have more than one transducer to test, complete the test for the A Axis for all the transducers beforemoving on to Axis B or Axis C. This will save a lot of time.Step 7. When all the tests are complete, use the allen wrench andloosen the socket head bolt until you can rotate the transducerto the Axis B position. (See Fig. 3-3)3-3
HI 813 PORTABLE SHAKER SYSTEMFIG. 3-3 DI-103 B-AXIS POSITION WITH B ARROW POINTING DOWNStep 8. Screw the socket head bolt into the mounting bracket. Use atorque wrench and tighten the bolt that fastens the transducerto the bracket to 18 inch pounds. Do not overtighten.Step 9. Perform the tests for Axis B. This information can be found inthe documentation that comes with the transducer you aretesting. We use the DI-103 as an example. Make sure to referto the test documentation for the transducer you are currentlytesting. This information may differ from manufacturer tomanufacturer. If you have more than one transducer to test,complete the test for the B Axis for all the transducers beforemoving on to Axis C. This will save a lot of time.Step 10. When all the tests are complete, use the allen wrench andloosen the socket head bolt until you can remove the accelerometer from the bracket.Step 11. Use the allen wrench provided and remove the mountingbracket socket head screw. Take the mounting bracket off thereference accelerometer and store it in secure location. Do notstore the bracket in the kit bag provided, because it mightdamage the reference accelerometer when closing the lid.DI-103 Installationfor the C-Axis Tests3-4Step 12. Slide the spacer (Prt. #0205-0049-01) over the socket headbolt that fastens the Transducer Under Test (TUT) to the reference accelerometer. (See fig. 3-4)
Chapter 3 - InstallationFIG. 3-4 DI-103 INSTALLATION FOR C AXIS TESTStep 13. Use the spanner wrench to hold the reference accelerometer.(See Fig. 3-1)Step 14. Use a torque wrench to tighten the socket head bolt to the reference accelerometer. Tighten to 18 inch pounds. (See Fig. 314NOTE:You can position the TUT in any of 1 of four directions.Step 15. Perform the tests for Axis C. This information can be found inthe documentation that comes with the transducer you aretesting. We use the DI-103 as an example. Make sure to referto the test documentation for the transducer you are currentlytesting. This information may differ from manufacturer tomanufacturer. If you have more than one transducer to test,complete the test for the C Axis for all the transducers. Thiswill save a lot of time.Step 16. When all the tests are complete, use the allen wrench andloosen the socket head bolt until you can remove the accelerometer.3-5
HI 813 PORTABLE SHAKER SYSTEMDI-103A Installationfor A & B- AxesTestsWARNINGStep 1. ALWAYS use the Spanner Wrench (Prt. #0228-0072-01) toprevent damage to the Reference Accelerometer when installing the mounting bracket or a test accelerometer. (See Fig. 31)ALWAYS USE THE SPANNER WRENCH WHEN INSTALLING, REMOVING OR ADJUSTING THE TRANSDUCERS OR MOUNTING BRACKET ONTHE REFERENCE ACCELEROMETER.Step 2. While still holding the spanner wrench in place, use the allenwrench provided with the bracket kit to screw the mountingbracket socket head screw into the reference accelerometer.(See Fig. 3-1) Tighten the screw so that the bracket is snugagainst the reference accelerometer. If you want, use a torquewrench and torque to 18 inch pounds. Do not over torque themounting screw. Overtightening the mounting screw cancause bad readings.Step 3. Position the TUT for the A position. (See Fig. 3-15FIG. 3-5 DI-103A A-AXIS POSITION WITH A ARROW POINTING DOWNStep 4. Screw the socket head bolt into the mounting bracket. Use atorque wrench and tighten the bolt that fastens the transducerto the bracket to 18 inch pounds. Do not overtighten.Step 5. Perform the tests for Axis A. This information can be found inthe documentation that comes with the transducer you aretesting. We use the DI-103 as an example. Make sure to referto the test documentation for the transducer you are currentlyusing. This information may differ from manufacturer to manufacturer. If you have more than one transducer to test, com3-6
Chapter 3 - Installationplete the test for the A Axis for all the transducers beforemoving on to Axis B or Axis C. This will save a lot of time.Step 6. When all the tests are complete, use the allen wrench andloosen the socket head bolt until you can rotate the transducerto the Axis B position. (See Fig. 3-18)FIG. 3-6 DI-103A B-AXIS POSITION WITH B ARROW POINTING DOWNStep 7. Screw the socket head bolt into the mounting bracket. Use atorque wrench and tighten the bolt that fastens the transducerto the bracket to 18 inch pounds. Do not overtighten.Step 8. Perform the tests for Axis B. This information can be found inthe documentation that comes with the transducer you aretesting. We use the DI-103 as an example. Make sure to referto the test documentation for the transducer you are currentlytesting. This information may differ from manufacturer tomanufacturer. If you have more than one transducer to test,complete the test for the B Axis for all the transducers beforemoving on to Axis C. This will save a lot of time.Step 9. When all the tests are complete, use the allen wrench andloosen the socket head bolt until you can remove the accelerometer from the bracket.Step 10. Use the allen wrench provided and remove the mountingbracket socket head screw. Take the mounting bracket off thereference accelerometer and store it in secure location. Do notstore the bracket in the kit bag provided, because it mightdamage the reference accelerometer when closing the lid.DI-103A Installationfor the C-Axis TestsStep 11. Slide the spacer (Prt. #0205-0049-01) over the socket headbolt that fastens the Transducer Under Test (TUT) to the reference accelerometer. (See fig. 3-19)3-7
HI 813 PORTABLE SHAKER SYSTEMFIG. 3-7 DI-103A INSTALLATION FOR C-AXIS TESTStep 12. Use the spanner wrench to hold the reference accelerometer.(See Fig. 3-11)Step 13. Use a torque wrench to tighten the socket head bolt to the reference accelerometer. Tighten to 18 inch pounds. (See Fig. 319)NOTE:You can position the TUT in any of 1 of four directions.Step 14. Perform the tests for Axis C. This information can be found inthe documentation that comes with the transducer you aretesting. We use the DI-103A as an example. Make sure torefer to the test documentation for the transducer you are currently testing. This information may differ from manufacturerto manufacturer. If you have more than one transducer to test,complete the test for the C Axis for all the transducers. Thiswill save a lot of time.Step 15. When all the tests are complete, use the allen wrench andloosen the socket head bolt until you can remove the accelerometer.3-8
Chapter 3 - InstallationNon-ContactDisplacement ProbeBracket AssemblyInstallationDI-223 BracketAssemblyStep 1. On the top cover of the HI-813 on both sides of the shakerhead you will see two screws. Use an allen wrench andremove the two screws. (See Fig. 3-8)1.00100HI 813PORTABLE SHAKER SYSTEMAMPLITUDEIN/SG'sM /S2PEAKFREQUENCY (Hz)M ILM M/SMMPEAKPK-PK10to100EXT.100to10001000to10000REF. OUTDRIVE50 mV/gINT.FUNCTIONFREQ. RANGEONAMPLITUDEADJUSTOFFPOWER105-265 VAC47-440 HzFREQUENCYADJUSTRemove thesescrewsFIG. 3-8 DI-223 BRACKET INSTALLATION/REMOVE SCREWSStep 2. Place the bracket over the threaded holes and use the thumbscrews to fasten the bracket to the top panel. (See Fig. 3-9)FIG. 3-9 DI-223 BRACKET/THUMB SCREWSStep 3. Attach the Eddy Current Probe to the bracket.Step 4. Attach the target standard to the shaker head.3-9
HI 813 PORTABLE SHAKER SYSTEMDI-224 BracketAssemblyStep 1. On the top cover of the HI-813 on both sides of the shakerhead you will see two screws. Use an allen wrench andremove the two screws. (See Fig. 3-8)Step 2. Place the bracket over the threaded holes and use the thumbscrews to fasten the bracket to the top panel. (See Fig. 3-10)FIG. 3-10 BRACKET WITH MICROMETERStep 3. Place the Eddy Current Probe in the holder.Step 4. Attach the target standard to the shaker head.3-10
Chapter 4 - CalibrationCHAPTER 4 - CALIBRATIONA Brief Description ofChapter 4Required TestEquipmentDetailed CalibrationProcessChapter 4 pertains to the setup and calibration of the HI-813 PSS. Thischapter lists the equipment necessary, test equipment setup and Calibration test in order to perform a calibration of the PSS. Do not attemptthis calibration without proper test equipment. A list is provided of thetest equipment required. It is important that all test equipment have acurrent calibration. All users and service personnel should be familiarwith this section before attempting an installation or repair of thisinstrument. Reference Standard Accelerometer and Data SheetPower Supply2 RMS voltmeters and other display equipment(scope) with an aggregate accuracy of one (1.0) percent or better.Step 1. Remove the certification sticker on the left side of the chassiswhen looking down on the top panel. An access port isexposed.Step 2. Turn the Amplitude lock knob counter clockwise to unlockthe Amplitude knob.Step 3. Turn the Amplitude knob counter clockwise until it stops.This sets the Amplitude to its minimum value.Step 4. Attach the External Standard Reference Accelerometer to theshaker head. See Chapter 3 for installation instructions. Makesure you have the Standard Reference Accelerometer DataSheet to check the readings at various frequency settings.Step 5. Turn the Power Switch on.Step 6. Turn the Frequency Lock knob counter clockwise to unlockthe frequency knob.Step 7. Turn the Frequency Range knob until the has
HI 813 PORTABLE SHAKER SYSTEM 1-4 FIG. 1-3 CHECKING VELOCITY TRANSDUCERS THAT ARE SELF POWERED FIG. 1-4 CHECKING ALARM SET POINTS ON VIBRATION MONITORING SYSTEMS FIG. 1-5 CHECKING THE CALIBRATION OF TRANSDUCERS AND PORTABLE DATA COLLECTORS Test Transducer Operational Characteristics Guide C Charge Amplifier V Voltage Amplifier S Self .