Transcription
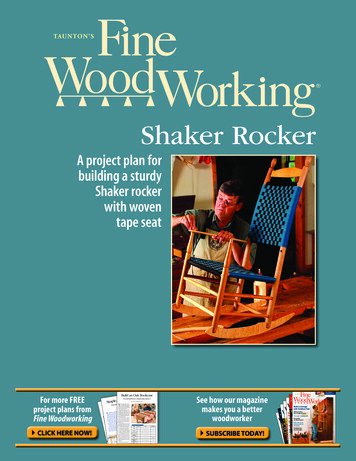
WTAUNTON’SShaker RockerAproject plan forbuildinga sturdyShaker rockerwith woventape seatFor more FREEproject plans fromFine Woodworking CLICK HERE NOW!Build an Oak Bookcaseh chenbcenrkobrkurdyoW, Stleturdy WSimpS,leYSimpFrom Getting Started in Woodworking, Season 2Fromson 2B y A s2C h r i s t i A n Aing, ASeaorkasSe onin Woodwrtedou canthank Mike Pekovich,rking,ting StaFine Woodworking’sodwoart direcAWot i A nFrom Get ted intor, fordesigning thishsimpler i sbuts AtookC a straightforbookcase.HeB y An Adadog Star stylishi Awithward form--an oak bookcasei s tGettinh rand rabbet Cjoints--andadded nice proALies LisTA s and elegant curves.portionsB yanD suppwareWe agreed that screws would reinforceLisTer, harDedspLieLuMbthe joints nicely, andthat gave us a de-supkiln-dring 2x4s,ensivebe8-ft.-loedre anDinexpsign option on the sides.Chooseoak4Dwajaw caneasy and4x4s, kiln-dribengriedwide. Front, hartile and alignplugs,grainench is8-ft.-loby 3 in.jaw canthick.2 carefully,berthe, kiln-d and MDFand versathe plugshis workb2x4sthemin.FrontLuMofa71/2 in. longMakefromriedsheetlongwide. jaw is 3/48-ft.-long 1 4x8vise jaws, by 3 in.yet is sturdypensivekiln-dbase is disappear.by 6 in.the rear thick.4 wood,wide4x4s, andodthepieces for in. longlongto build,like walnut,orker. The contrastingthick and is 3/4 in.d, 46in.inex, joinedby in.woodw8-ft.-long 2 Hardwojaw ick plywoo71/2and 11/2any and2 addrear3/4-in.-throws of plugsa nicet designof MDF feature1 in.jaws,foreasyn viseh isin. wideatile and 2x4s)thevise,sheebetweeenougThesides,andingod, 4r (4x4ss forconbenchmountto the s.broadat theand versthick1 4x8 hintingpiecedoweln lumbeisk plywoblockin.foroodcraft.com)sturdyhis workconstisructioFillerand short struction3/4-in.-thicand 11/2(www.w )in a2subtleway.11 in.The baseHardwoodgluevise,, yet with longjoined nsityyellowrker.boltsorking Visedcraft.comof tingeen(medium-debottle.wooto build simplyBy design the betwbookcasemoun a2x4s),1 containswoodwo s andction Woodw (wwwMDFforThe , withVise ed rodblocklessonsGrozlayers offor any is twoels.sheetnumber of fundamentalforRapid-Aing(4x4. aatop8 enouofshorand likelengthsthe Woodshelf. furniture-makers,e of yellocutsitywould-betion lumband from6-ft.d-Actionoard),-denhandyded rod4 Rapi1 bottlvideoboltsconstruc fiberbmake aother projectsthe ia.sthreatodiumjaw of viseGroz series,(methis benchin thisover3 8-in.3 washer-in.-dwithwholewith long hofleftng frontMDFviseofa 8few16 hsthing can1be7-in.built withjustdt,to makefor attachienougrssimplyjaw ofle sheehandlengt 3 8-in. nutswashersfront ng rear jawf. portablesingneedeand a powertools:two layeonly atools4 6-ft.a circular16 erssaw, abolts, nuts, attachingy shelar saw,Thefromfor attachitop iscirculjaw benchtopng 1/4-20d screwsdrill,hand a router 3 8-in. washers fore a ahandd), cut drill/driver,2 2-in.-loflatheahing rear ting16this benca to mak1/4-20washtable.attac for laminahtop attaching visefiberboar areover, nuts,The- shelvesattach 3tothenutssideswith-long,makecasts forscrewsbenc s, for vise 8-in.routerbolts11/2-in.or a tolefta handa smalldrywallating16 the back 2and-longscrewhingrouterneededsimple dadoes,tialandback, andend forlamin and washerlong 1/4-20enough heldattacflatheadoneof 11/4-in.s forscrewstoolsBoxessenlaratsaw1/4-202 2-in.-Screws1 g,roomers, forscrew-long lag andhardwareListis an dropinto rabbets.allLumberwash21/2-in.aiscircuThe only There.,drywn.-lon 3 reinwhichsplash- dadoisjoints2and-in.-dia11/2-is and rsdriver,fastene4 8n.-lonthevisealso attachthe gpPartll casttable.vise, smaforceorkingThedrill/ woodwerlag screwQtYsizeof 11/4-iype gtabletolare airon3 in. longa routBox plugsthefor a shop.lowerstretcher,and r or any one, roughlynersjaws, anddowelsan essein at woodw h is woode3 woodthenscrew holes. Smaller8-in.-d screws3 8-in.-diatop. fasteheld rout toollong4in.roomarringsizedtable16is3is23/4 in. x 11 in. x 52 in.ly sides, whicnon-mholes,-typeviseto attach the plywoodback.withdogusedThere fittedg visels, rough. Thee are. 16 S-clip piecesreceivtheshopsoriesaddlife to rectangulardworkin benchia. dowegtopand,Curvesacces3 8-in.-dandjawsbenchdworkin handyiron woo jaws16d and Pekovichof furniture,worked inwoodeny of53/4 in. x 10 5/8 in. x 27 in.sheLVesany wooa variets, sizethree types, each irregular and organicmarringtool in to fitdog hole62 in.ies.with non(asssoropposed to radius curves that canreceiveaccefittedhtopin.11/2 in.benchseem mechanical).At the top are genin.13/4 in. x 3 1/4 in. x 27 1/24in.back 62sPLashand benchandyjawsty oftle curves that speed up as they movea varie35 16 in.forward, each taken from a section ofto fitTT24 in.11/2 in. curve. At the bottom are twoa Frencharchedstretcherlong curves formed with a flexible woodbatten, one extending end to end on the27 8 in.and the other a shortlower stretcher,graceful arch at the bottomin. the sides,10 of13 16 in.ending at a straight step at each end to8 in.27 legs.suggest24 in.SidestretchersVideOs13 16 in.17 in.in.13 16in.31/2 in.17ViDeOs31/2 in.ViDeOsusOakOakOakin.3 4Oak veneer5 8 in.1/4 in. x 27 1/2 in. x 45 3/4 in.5 in.plywood33 8 333 4 in.3 4 in.1#12 x 2 in. flat head screws 1Steel24#6 x 3/4 in. flat head screwsSteel93 16 in.93 16 in.Go to Finewoodworking.com/start to watch a multi-part video detailing how to build this bookcase from start to finish.41 in.9 in.95 8 in.9 in.95 8 in.Finewoonline atVisit usVisitscrews FOrbackmateriaL4 in.13 4 in.3/4 in. x 3 in. x 26 1/2 1 in.Oak11ersbackLong stretchstretchersscrewsLong FOr30sheLVes10 in.Sideers16 in.13 stretch--Asa Christiana, editor, Fine Woodworking35 16 in.odworkoodwat Finewonlineorkining.comg.com/start/start41 in.48 in.to finish.startto finish48 in.startnch fromworkbeh frombuild this bencg how to this workdetailint videoto builda two-parling howto watchdetaiart videoa two-pto watchSee how our magazinemakes you a betterwoodworker SUBSCRIBE TODAY!
Shaker RockerJigs and story sticks ensure accurate joineryB YThe Shaker rocker is one of the mostrecognized rocking-chair designs, andrightfully so. It has simple and attractive lines, it is economical to build, and,if designed properly, it can be very comfortable.This chair also is a wonderful project inmy woodworking classes because it introduces students to spindle turning, steambending, and a few important hand-tooltechniques. The plans I use in class arean amalgamation of an early brethren’srocker, which is detailed in John Kassay’sThe Book of Shaker Furniture, and theE R N I EC O N O V E Rrocking chairs made later at the famousShaker production shop at Mount Lebanonin New York state.I made a number of modifications toimprove the strength of the chair, takinginto account modern-day physiques. Theoriginal 13 8-in.-thick back posts are beefedup to 19 16 in. thick, and all of the seat railsand stretchers are about 1 8 in. larger indiameter than those on classic examplesof the chair.I also took some historical liberties withits design, incorporating features from various chairs produced by different Shakercommunities. The arms and rockers arein. thick and book-matched from thesame figured maple board. The front armposts have a ginger-jar profile and attachto the arms with a through-tenon and amushroom cap. Finally, the back is wovenwith one curved back splat above.1 2Turn all of the spindlesTurning the various chair parts is fairlystraightforward, but there are a few tips andtricks that will make it go easier. To begin,mill all of the stock for the rails, stretchers,and posts to length but just oversize inTURNING TIPSAll of the parts for thischair, except for thearms, rockers, and thecurved back slat, areturned on the lathe. Theback posts require asteady rest and a lathethat accommodates a43-in.-long turning.Size the rail tenons precisely with awrench. Turn the tenons with a wide partingtool until the open-ended wrench slides overthe tenon.Use a steady rest to turn the long back posts. Conover used a bed extension on his Nova DVR3000 lathe to accommodate the 43-in.-long posts. At this length, a steady rest is required to prevent the turning from chattering when working the center region.48FINE WOODWORKINGA simple method to hold the mushroomcaps for turning. Turn a tenon on scrap stock,then jam the cap blank over the tenon.Photos: Matt Berger
Credit HereJANUARY/FEBRUARY 200549
SHAKER ROC KERArm,1 2 in. thickFront post,13 8 in. dia.by 20 7 8 in.long13 4 in.21 16 in.The chair is made from roughly 8 bd. ft. ofhard maple. Conover used curly or figuredwood as much as possible, except for theseat rails and stretchers, where straightgrain stock is necessary for strength. All ofthe finished dimensions include tenons.Back slatMortise, 1 2 in.deep by 1 4 in.wide3 in.Curvedback railScrew and plugBack post, 19 16 in. dia.by 43 in. longUpperportion ofpost tapersfrom 1 9 16 in.dia. to13 8 in. dia.16 in.StretcherSeatrailCap, 13 4 in. dia.by 3 4 in. thickRocker, in. thick12 -in.dia. pin3 8Tenon, 11 16 in. dia.by 3 4 in. long in. thick14 in.3451 2 in.211 16 in.13 4 in.153 4 in.71 4 in.BACK SLATMortises,1 in. deepNo taper; leave roughand unfinished.41 2 in. 15 16in. dia.Tenon, 5 8 in. dia.by 7 8 in. long41 2 in.Upper curved back rail, 163 8 in. longLower curved back rail, 16 1 4 in. longBack seat rail, 16 in. longFront seat rail, 21 1 8 in. longSide seat rails, 161 2 in. long41 2 in.41 2 in. in.58BACK AND SEAT RAILS in.5823 4 in.Slot, 13 4 in. deepby 1 2 in. wide41 8 in. in. dia.34 in. dia.78Tenon, 5 8 in. dia.by 7 8 in. long80 100 FRONT AND TOP VIEWSOF BACK AND FRONT POSTS50FINE WOODWORKINGBack stretcher, 16 in. longFront stretchers, 21 1 8 in. longSide stretchers, 16 1 2 in. longSTRETCHERSTenon, 1 2 in.dia. by 1 2 in.long, is shapedafter the chairis assembled.1 sq. 1 in.ARM AND ROCKERDrawings: Bob La Pointe
thickness so that you have some room forerror when turning the delicate stretchersand rails to their final diameters.This project requires you to be diligentand organized in the way that you milland dimension the turning billets. Becausethere are so many parts that are nearlyidentical, varying only slightly in lengthand diameter, it’s wise to mark each pieceas it’s made.Steady rest prevents chatter—The longback posts require a lathe with 43 in. between centers. To accommodate that distance, I attached a bed extension to myNova DVR 3000 lathe. A turning of thislength also requires the use of a steadyrest, which supports the post at the centerto keep it from chattering. Steady rests areavailable commercially or can be made inthe shop (see FWW #161, p. 34 and FWW#143, p. 14, respectively).Size tenons with a wrench—Anotherturning trick helps produce consistent andperfectly sized round tenons, which willensure a good glue bond when they arejoined to the round mortises. First, markthe length of the tenon with a set of dividers, measuring from the end of the turning.Then, as you approach the final diameterof the tenon, fit an open-ended wrench ofthe finished diameter over the area. It willslide over the tenon when it’s turned to thecorrect diameter. Ease into the fit, becauseif you turn the tenons undersize, you increase the chance of the joinery failing.Finish parts on the lathe—You can sandand finish nearly all of the round partson the lathe (see FWW #165, pp. 62-65).The exceptions are the back posts, the seatrails, and the curved back rails. The backposts are steam-bent before finishing, andthe seat rails and curved back rails are leftunfinished to provide traction so the Shaker-tape weave doesn’t slide around.The Shakers generally finished theirchairs with varnish. I favor either Minwaxor Olympic Antique Oil.Jigs align parts for accurate joineryAfter steam-bending the back posts, youcan begin drilling the round mortises forthe rail and stretcher joinery. This requirestwo jigs to hold the posts steady at thedrill press. I also make four story sticksto locate the center points of the seat railSteam-bending made simpleThe bending of the back posts, the back slat, and the backrails is done by heating the parts in a steambox and thenclamping them to a form.To do the job, I use a shopmade steambox composedof a propane outdoor stove that boils water in a 5-gal. gastank and then sends steam through a radiator hose intoa 4-in.-dia. Schedule-80 drainpipe. The back posts shouldsteam in the box for about an hour at a temperature around200 F to become flexible enough to bend. The back slatand rails need to steam for only about 15 to 20 minutes.Once a part is removed from the steambox, you have about30 to 60 seconds to clamp it to a form.Just like a teapot, the steambox must leak steam toprevent it from exploding under pressure. Also, it must bepositioned on a slope so that condensation inside the box can drain into the watertank. Always wear heavy gloves and eye protection when operating the steambox andshuttling parts to the bending jigs. An extra pair of hands is a big help.For more on steam-bending, see FWW #149, pp. 78-83.BACK-RAIL BENDING JIGCleat13 4 in.18 3 4 in.BACK-POST BENDING JIGOnly the upper26 in. of thejig is curved.47 1 2 in.93 4 in.BACK-SLAT BENDING JIG13 8 in.18 3 4 in.M AY / J U N E 2 0 0 551
USE A JIG TODRILL THE RAILAND STRETCHERMORTISESThe adjacent mortises oneach post must be drilled atprecise angles. Begin withthe mortises for the front andback rails and stretchers.Then use a tenoned stick toset the angle for the side railand stretcher mortises.Position the back posts in a drilling jig. V-blocks attached to a plywood base helpto hold the posts in place for drilling. Use a center punch and a story stick to locateand align the drill bit. Then drill the mortises 1 in. deep.Set the angle for the side mortises. Make a shorter jig to allow clearance for the bend in theback posts. Insert a tenoned stick into the mortise and use a guide block angled at 10 to align thepost in the jig (left). Then transfer the mortise locations from the story stick to the post (center).52FINE WOODWORKINGand stretcher mortises. The measurementsfor the seat-back mortises aren’t includedon the story sticks and instead are locatedwith a tape measure, measuring from thebottom of each back post.It doesn’t matter in what order you cutthe mortises, but I begin with the frontposts. Using the story stick, lay out andmark the center point on the mortises forthe two front stretchers and the front seatrail. With the post clamped in the jig, drill5 8-in.-dia. mortises, 1 in. deep, using a drillpress. Then insert a spare spindle into themortise and rotate the front post 80 , usingthe guide block for alignment. Clamp thefront post in the jig in its new orientationand mark the mortises for the side stretchers and seat rail. Drill those mortises withthe same setup. The process is the same for theback posts, but the mortises are 100 apart.The most important detail to keep inmind is to drill adjacent mortises on thecorrect side of each post. I mark the insideedges of the front and back posts to keepthings straight. Once all of the mortiseshave been drilled, you will notice thatsome adjacent holes intersect (you can seedaylight when you look into the mortises).This is intentional: The intersecting holeswill help strengthen the glue joints whenall of the parts are brought together.Drill and chisel mortises by hand—Mortising the back posts for the curvedback slat is best done by hand. Use ahandheld drill to bore the round mortisesfor the curved back rails. First, dry-fit thechair with two band clamps. Measure fromthe bottom of each back post to mark thelocation of the back slat and rails, then usethe bent parts to eyeball the approximateDrill holes for the side rails and stretchers.The adjacent holes should intersect with thefront and back rail and stretcher mortises.
D R Y- F I T T H E C H A I R , A N D A L I G NTHE OTHER MORTISES BY EYERather than calculate the angles of the mortises, Conover dry-assembles thechair using band clamps and holds the curved part in place to determine themortising angle.Drill for the curved back rails. With the chair temporarilyassembled, Conover uses the curved back rail to align thedrill at the correct angle.Determine the angle of the mortise. Conover uses a mortising chisel tochop the mortises for the curved back slat. He rests the slat in place to setthe proper angle for chopping (center). A piece of tape on the chisel marksthe desired depth of the mortise (right) so that it can engage 3 8 in. of the tenon.angle of each mortise. Hold the chisel tothis angle during mortising, and do thesame thing with a handheld drill to borethe round mortises for the rails.Long open time aids assemblyI use 90-minute clear epoxy to assemblethe chair, taking advantage of the glue’slong open time and its ability to preventsqueaky joints. Apply well-mixed epoxy tothe mortises and tenons with a solder brush.Be sure to wear disposable gloves; epoxyis difficult to get off your skin.Assemble the back posts first, then addthe side stretchers and finish up with thefront-post assembly. Two band clampsgenerally are adequate to hold the chair together while the glue sets. However, during assembly a bar clamp can be helpfulto drive some of the tenons home. Oncethe chair is clamped, set it on a flat floorand muscle it into proper alignment bystepping on the front rail to hold it steady;ASSEMBLETHE CHAIRAll of the parts of thechair, except for the armsand rockers, go togetherin one glue-up. Conoverprefers to use 90-minuteepoxy for its long opentime. Join the back partsfirst, then insert the sidestretchers, and wrapup with the front-postassembly, clamping itwith two band clamps.Once all of the parts areassembled and clamped,rest the chair on the floorto check for alignment.JANUARY/FEBRUARY 200553
then shake the back posts side to side andfront to back.Attach rockers after glue-upI choose highly figured material for the armsand rockers. The arms are book-matchedand the rockers mirror-matched, so only oneof each needs to be shaped. Trace the patterns onto planed 5/4 material, bandsaw tothe lines, and handplane or sand away allsaw and planer marks. Resaw the shapedpieces, then plane them to 1 2 in. thick.Finally, round over the top and bottom edgesof the arms with a 1 4-in. roundover bit.Each rocker is attached with a pinnedbridle joint, a process best done by hand.Scribe the rockers to the bottom of the posts,then lay out the bridle joint 13 4 in. deep.Backsaw the shoulders of the joint and remove the waste with a chisel. Undercut thejoint with the chisel from both directions toprevent tearout, much like cutting a throughmortise. Then test-fit the rocker and refineany tight spots with a chisel and rasp.After a slide fit has been achieved, tracethe outline of the bridle joint on the rockerto facilitate positioning it in the same placeon subsequent trials. The fit is refined onthe front by flattening the edge of the rocker between the pencil marks. You also willhave to chisel the back edge of the bridlejoint on the back post so that the rockersets fully in the joint. Glue the rocker intoplace once you’re satisfied with its fit, thendrill a through-hole and pin the rocker toboth posts with a maple dowel.CUT BRIDLEJOINTS FORT H E RO C K E R SBoth rockers are cut froma single piece of 5/4 curlymaple. First bandsaw andsmooth the profile, thenresaw it into two piecesfor perfectly matchedrockers.Mark the location of the rockers. With the chair clamped upside down in a vise,the rockers are positioned where they will join the front and back posts. Scribe a linedown both sides of the post to the correct depth.Cut the bridle joints by hand. Use a backsawto cut along the scribe lines. Then clean outthe waste with a chisel.54FINE WOODWORKINGMeasure the gap. The rocker initially won’tsit flat in the groove. Use dividers to measurethe gap on one side when the other is set.Arms go on lastThe arms are attached after the woven seatand back are completed. First, measure theChisel the mortise until the rocker is fullyset. Then the rockers can be glued and pinnedto the front and back posts.
AT TAC H T H E A R M SMake the arms longer than necessary, then cut themto length and tenon the ends after the chair has beenassembled. The joint is reinforced with a screw insertedfrom the rear of the back post. Weave the seat andback before attaching the arms.Measure for the arm joinery. Determine thedistance from the back post to the center of thefront-post tenon on the assembled chair. Add1 16 in. to determine the distance from the tenonshoulder to the mortise center to ensure the jointstays under tension after assembly.distance from the back post to the centerof the front-post tenon. That measurement,plus 1 16 in., is the distance from the arm’stenon shoulder to the center of the roundmortise at the front of the arm. The extra1 16 in. puts the joint under tension.Next, raise a 1 2-in. tenon on the end ofthe arm to go into a stepped hole drilledinto the back post. Although I use an antique tenon maker, modern versions canbe used in an electric drill. Alternatively, thejob could be done by careful carving.Mark the location of the mortise on theback post at the same distance above theseat as on the front post. Drill through theback post with a 1 16-in. bit to locate thecenter point of the mortise. Now, drill a1 2-in.-dia. by 1 2-in.-deep mortise to acceptthe arm tenon. Finally, from the oppositeside, countersink the 1 16-in. through-holefor a #8 by 2-in. flat-head wood screw. Idrill deep enough to bury the screw undera plug, but not too deep that it breaks intothe 1 2-in. mortise on the opposite side.The arms are glued and secured with afaceplate-turned mushroom cap on eachfront post and a wood screw covered by a plug from the rear.Ernie Conover is a regular contributor to FineWoodworking who teaches woodworking at hisworkshop in Parkman, Ohio.Locate the arm mortise. Hold the arm in placeto determine the mortise angle. Drill throughthe post using a 1 16-in.-dia. drill bit, then drill a1 2-in.-deep mortise using a 1 2-in.-dia. bit.Countersink the back of the post. After weaving the seat and back, glue the arm in place andsecure it with a screw. Cover the screw hole witha maple plug.Shaker weaveMy wife, Susan, who is a fiber artist, weaves the Shaker-tape seats andbacks on my chairs. However, most of my students find that weaving ispart of the fun of making a Shaker rocking chair. You’ll need about 80 yd.of 1-in.-wide tape to complete this chair. For instruction on weaving withShaker tape, see FWW #121, pp. 78-81. Instructions are also availablefrom Shaker Workshops.S H A K E R - TA P ESOURCESShaker Workshops800-840-9121; www.shakerworkshops.comRoyal Wood Ltd.800-526-1630www.royalwoodltd.comM AY / J U N E 2 0 0 555
The Book of Shaker Furniture, and the rocking chairs made later at the famous Shaker production shop at Mount Lebanon in New York state. I made a number of modifications to improve the strength of the chair, taking into account modern-day physiques. The original 13 8-in.-thick back posts


