Transcription
MUNIS GuideDeveloped by Computer Education Support in Collaboration with Financial ServicesUpdated November 2018
Table of ContentsLogging on to MUNIS . 4Menus . 5Logging Off . 6Accounting Code. 8Account Inquiry . 10Printing a Single Account . 19Printing a List of Accounts – SBDM Report . 20Accounting Code - Quick Review . 21Budget Transfers and Amendments . 22Purchasing and Receiving . 29Model Procurement . 30Commodity Codes . 33Vendor Inquiry . 35Adding an Attachment to Your Requisitions . 38Warehouse Requisitions. 38Normal Requisition (BID items) . 44Non-Bid Requisition (Non-Competitive D&F) . 51Non-Bid Requisition (Small Purchase D&F) . 62Blanket Requisitions . 71Purchasing Quick Review . 72Rejected Requisitions . 73Correcting, Adding, or Deleting a Requisition . 74Purchase Order Receiving . 84View/Printing Existing Receiving Files . 87Help & Forms . 902
SYSTEM: Logging on to MUNIS Menus Logging off MUNIS3
Logging on to MUNIS1. Open your internet browser.2. Type the following URL into the address bar and press the ENTER default.aspxThis sample screenshot is how MUNIS appears upon opening.Bookmark this page to avoid typing it each time you log into MUNIS. You may also wish toput a shortcut on your desktop for faster/easier access on a daily basis.To create a shortcut on your desktop, right-click on your Desktop, select “New” and“Shortcut” in the menu. Then, paste the web address in the dialogue box and follow theremaining prompts.4
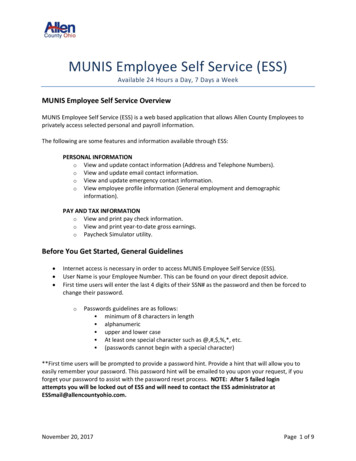
MenusClick TYLER MENU at the top of thescreen.MUNIS screens are found under Munis- Quick Links – Departmental Functions.The caret symbol ( ) indicates that the menu iscollapsed. Click once on the caret symbol to expand theview.5
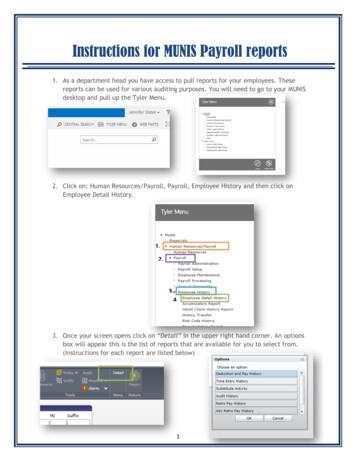
Logging Off1. Click the drop-down arrow next to your name; then select Sign Out from themenu as shown below.2. Click the Close box at the top right corner to close the browser window.6
ACCOUNTING: Accounting Code Account Inquiry Printing a Single Account Printing a List of Accounts Budget Transfers and Amendments Non Posted Budget Transfers Accounting Code - Quick Review Expenditure Code Quick Reference7
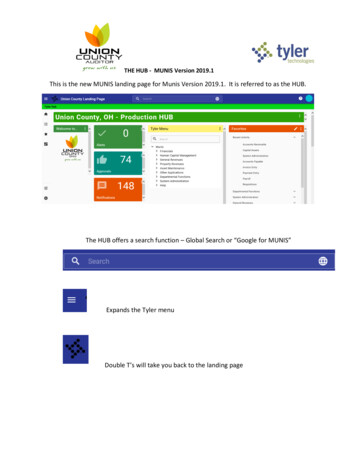
Accounting CodeAll expenses in MUNIS utilize an account or General Ledger (GL) code. The code iscomprised of these segments: Organization (Org), Object, and Project. Look atthis sample MUNIS accounting code:14910770610900XFThe first part of the account code is known as the Organization or Org. The Orgrepresents WHO the code is for when purchasing items. The sample belowrepresents one Org. The Org has three sections; the Unit, the Fund, and the KeyCode.149 1 077The first three numbers of the Org make up the Unit. The Unit identifies the schoolor cost center. For schools, the Unit is the school location number. For centraloffices, the Unit is represented by a 900 number or two letters and a number (CE1or HR1). The sample code above is for location 149 - Blake Elementary School.The fourth and sometimes fifth number of the Org is the Fund. General Fundaccounts are represented with the number 1 and Special Revenue accounts, suchas Federal and State grants are represented with the number 2. The DistrictActivity Funds, or Fund 22, are represented with a 28 as the fourth and fifth digits.There are additional Fund codes, but these two are the ones used most often byschools and offices.The last three numbers of the Org are known as the Key Code. The Key Code is theKentucky Department of Education (KDE) identifier for specific functions, programs,or instructional levels. For all practical purposes, you can think of the Key Code asan arbitrary number. An example is 077 - Office of the Principal.The second segment of the MUNIS account code is known as the Object. TheObject represents WHAT the code can be used for when purchasing items. Forexample, the Object 0610 stands for General Supplies.8
The third segment of the MUNIS account code is the Project. The project is aspecial identifier for flexible codes, and special funding. Below are examples ofFund 1 (General Fund) Project numbers:900XF – flexible, site-based account (funds that can be transferred)900XN – non-flexible, site-based account (funds that cannot be transferred)900XA – non-flexible, add-on funds that the District provides for specific programs(money in addition to the site-based allocation)900XS – flexible, supplemental money (e.g., monthly attendance bonus); orflexible accounts for central offices and special schools.Fund 2 (Special Revenue) projects do not start with 900X. Special Revenue orGrants have project codes that are 4 to 5 digits. The first digit represents thefunding source. KDE and MUNIS refer to Fund 2 as Special Revenue and Grants &Awards and Financial Planning & Management (Budget Office) refer to Fund 2 asGrants.0123– Local– State-funded– Nutrition Services & Federaland up – Federal-fundedThe fourth digit of the project is a letter that represents the year of funding. Forexample, a Fund 2 project 125D is a State-funded project for 2017-2018. Theproject will change to 125E the following year.Fund 22 (District Activity Fund) projects start with a 7. These funds cannot betransferred by a school.9
Account InquiryThe Account Inquiry screen allows you to view your school or department’s accountbalances. The Account Inquiry screen provides both summarized and detailedinformation.1. From the Quick Links menu select Departmental Functions and thenAccount Inquiry. The following screen is displayed.2. Press Ctrl-F or click the Search button in the Ribbon.3. In the Account Inquiry screen, enter information in the fields using the criterialisted below:To find ALL your accounts, enter your school location number or yourcentral office unit number followed by an asterisk (*) in the Org field.To find a specific accounting code, enter the entire Org, Object, and Projectcode in the appropriate fields. For example: 1491077 0610 900XFTo find all accounts in an organizational group (i.e., Library, ECE, Principal)enter the entire Org code in the Org field. For example: 1491077To find only General Fund accounts, enter a 1 in the Fund field and your10
unit number followed by an asterisk (*) in the Org field, or enter your unitnumber followed by the number 1 and an asterisk (*) in the Org field. Forexample: 1491*To find Special Revenue accounts, enter a 2 in the Fund field and yourUnit number followed by an asterisk (*) in the Org field, or enter your unitnumber followed by the number 2 and an asterisk (*) in the Org field. Forexample: 1492*To find FLEXIBLE accounts, enter a 1 in the Fund field and your unitnumber followed by an asterisk (*) in the Org field. TAB to the Projectfield and enter 900XF (schools) or 900XS (special schools and centraloffices). For example: 1491* in Org and 900XF in Project.If your location has both 900XF and 900XS accounts, enter 900XF 900XS inthe Project field to find both.4. After entering the search criteria, press the ENTER key or click theAccept button on the Ribbon.The Account Inquiry screen returns with the accounts that match the criteriathat you entered. If the search returns a large number of accounts, you will beprompted with a message, such as the one below.If you want to continue and look at all these records, click Yes, Continue toview them. If you wish to refine your request, click NO and change yourcriteria.5. The number of records in the found set is listed at the bottom of the screen6. To move through the records, click the Arrow tools at the bottom of the screen.7. To view the records in a list, press CTRL-B or click the Browse button in theRibbon.11
In Browse mode, the accounts appear in a list format as shown in this example.The main account headings in Browse view are: OrgObjectProject Description – The description is the name of the object pertaining tothat account. Rev Budget – The Revised Budget contains the amount of the originalbudget minus any amendments. Actual/Encumb – This amount reflects the sum of actual andencumbered expenses. Available – This amount reflects the Rev Budget minus theActual/Encumb.JCPS uses the Org, Object, and Project in lieu of theaccount number.12
8. Click the Show/Hide Col button in the Ribbon to hide all columns except themain account headings listed on the previous page. To hide a column, removethe check next to the name.You can also right-click on a columnheading, such as Record Number, to hideit.9. Click the Filter tool at the bottom of the Browse screen to display and print onlyselected accounts. After entering the criterion, click Go to filter the records.You can use the following operators and wildcards to filter either in the Browsewindow or in a search on the Account Inquiry screen fields: :*?LESS THANLESS THAN OR EQUAL TOGREATER THANGREATER THAN OR EQUAL TONOT EQUAL TOORRANGEWILDCARDWILDCARD (ONE CHARACTER)13
10. To sort a column in Browse view, click the account heading. An upward pointingarrow at the top of the heading indicates Ascending sort. An arrow pointingdown indicates a Descending sort order.11. To view a particular account while in the Browse view, click the UP or DOWNARROW or use the SCROLL BAR to scroll through the list of accounts. When youlocate the account you want to use, double-click the account. The GL AccountInquiry screen returns with the account information displayed.The Account Inquiry screen contains tabs for 4 Year Comparison, CurrentYear, and History account amounts.14
The fields for 4 Year Comparison are as follows: Original Budget – the amount of money that was appropriated to the account. Transfers In – the amount of money that was transferred into the account. Transfers Out – the amount of money that was transferred out of the account. Revised Budget – the original budget plus Transfers–In, minus Transfer–Out,plus CFwd – Budget (money carried forward from last year’s purchase orders –single year funds only, i.e. General Funds). Actual (Memo) – the total amount of money expensed to the account (moneythat has been invoiced by vendors, expensed through vouchers, and payrollexpenses). Encumbrances – the amount of money that has been charged to the accountfor purchase orders that have not yet been invoiced. Requisitions – the amount of money that has been encumbered throughrequisitions (requisitions that are not yet purchase orders). Available – the amount of money available to spend. Percent used – the percent of money that has been spent to-date.Always check the current fiscal year column to determine the remaining funds inany given account. Even if a grant is awarded in another year, the current fiscalyear column is used, not the award year.15
Account Detail1. Click the Folder icon next to a field to view transaction details for that field orclick the Detail button in the Ribbon to view all transactions for the account bya date range.2. If you click the Detail button the JournalSelection Criteria screen is displayed.4. Enter a journal year/period or date rangeto search (leave blank for all). Periodsrepresent months of the fiscal year, with 1representing July, 2 representing August,and so forth. 13 is an extra period that isused for year-end adjustments. Afterentering your criteria, press the ENTERkey or the Accept button in the Ribbon toview the transactions. If transactions arefound, the Account Detail screen isdisplayed.16
5. To print the detail screen, click the Print button in the Ribbon.6. Select the report format by clicking Summary or Detail. If prompted, sign inusing your username and password.7. If you have a connected MUNIS printer, you may choose to print the report to it.Otherwise, select the PDF option to generate a PDF file that you can save toyour computer or print.17
Account Detail SRC AbbreviationsAJE – Post Last Year AdjustmentsAPI – Accounts Payable InvoicedAPP – Accounts Payable PaymentAPM – Accounts Payable Invoice MaintenanceBUA – Budget Update AmendmentBUC – Budget Update CompletionCRP – Cash Receipts PostingFA* – Fixed Assets (not of use to general users)POE – Purchase Order EntryPOL – Purchase Order LiquidationGCR – General Cash TransferGBI – General Billing InvoiceGBM – General Billing MaintenanceGEN – General Journal EntryGEL – General Ledger Encumbrance JournalGNI – General Journal ImportGRV– General Journal ReversalINA – Inventory AdjustmentINI – Inventory IssuePOM – Purchase Order MaintenanceSOY – Start of YearYEC – Year End Closing18
Printing a Single AccountYou can print a report for a single account or you can print a list of accounts.1. From Quick Links, Departmental Functions select Account Inquiry.2. Click the Search tool and enter the account you wish to print.(complete instructions for finding an account are listed in thesection titled, Account Inquiry)3. When the account is displayed on the screen, click the Print button onthe Ribbon.4. If you have a connected MUNIS printer, you may choose to print the report to it.Otherwise, select the PDF option to generate a PDF file that you can save toyour computer or print.19
Printing a List of Accounts – SBDM Report1. From Quick Links, Departmental Functions select Account Inquiry.2. Click the Search tool and enter the search criteria. (completeinstructions for finding an account are listed in the section titled,Account Inquiry).3. When the accounts are displayed on the Account Inquiry screen, click theBrowse button in the Ribbon or press CTRL-B to view the records in a list.4. When the accounts are displayed on the screen, click the Print button on theRibbon.5. If you have a connected MUNIS printer, you may choose to print the report to it.Otherwise, select the PDF option to generate a PDF file that you can save toyour computer or print.20
Accounting Code - Quick Review Account Codes are used in MUNIS for expenses. JCPS uses ORG OBJECT PROJECT as the account code.The ORG is WHO the expense is for. Look at these sample codes. The samplecodes show different account codes for one location, but the entire ORG representswho the funds are for, or where the funds should be spent.1091059 - Wheeler Elem (109) – General Fund (1) – Library (059)1091077 – Wheeler Elem (109) – General Fund (1) –Principal (077)1091031 – Wheeler Elem (109) – General Fund (1) – Guidance (031)The OBJECT is WHAT you are purchasing or the expense of a salary. To see if youhave funds available for supplies, open Account Inquiry and search using your threedigit Unit (location number) in the Org field with an *asterisk then tab to the Objectfield and enter 0610. The search result will display all supply codes for your costcenter. The most recent object code quick reference guide is available on thePurchasing Department website.The PROJECT reflects the TYPE of funds. A quick search would be to look for allyour flexible funds by entering your Unit number plus an asterisk in the Org fieldand 900XF for schools or 900XS for central offices in the Project field.21
Budget Transfers and AmendmentsBudget Transfers and Amendments provide the flexibility of moving funds betweenflexible accounts. Users can decrease and increase the balances of flexibleaccounts by moving funds from one account to another.1. From Quick Links, Departmental Functions select Budget Transfers andAmendments. The following screen is displayed.2. Click the Add button on the Ribbon.The Fiscal year, Period and Effective date fields will be completedautomatically.3. Type your initials in the Journal reference 1 field.4. Type your school name in Journal reference 2 field.5. Enter your location or unit number, followed by a slash and the PROJECTnumber in the Short Description field. Example: 109/900XF6. Press the ENTER key or click the Accept button on the Ribbon. Thefollowing screen is displayed.22
7. Enter the ORG, OBJECT, and PROJECT for the account you are transferringfunds FROM. The account name is entered in the Description field.8. In the Comment field, type where the transferring funds are going, such as,TRANSFER TO POSTAGE; then press the TAB key.9. The EFF/DATE will automatically be entered. In the I/D field, enter the letter Dto indicate that you are decreasing this account.10. Enter the amount you are transferring out of this account. Do NOT enter adollar sign ( ).11. Press TAB. Another line will appear with the ORG, OBJECT, and PROJECTnumbers duplicated from the previous entry.12. Strike over the numbers with the ORG, OBJECT, and PROJECT numbers of theaccount you are transferring funds TO.13. Enter a short description, such as TRANSFER FROM GENERAL SUPPLIES inthe Comment field.14. Press TAB. The date will enter automatically. In the I/D field, enter the letter Ito indicate that you are increasing this account.15. Enter the amount that you are transferring into this account. Do NOT entera dollar sign ( ).16. Press TAB. Another line will appear with the ORG, OBJECT, and PROJECTnumbers duplicated from the previous entry.23
17. Continue in this manner to complete each line of the transfer. You can transferfunds from several accounts into one account or funds from one account intoseveral accounts. You also can make more than one set of transfers in thejournal.The dollar amount in theJournal Totals mustbalance.18. When you are finished, you will have an additional unused line. DO NOTPRESS TAB, press ENTER or click the Accept button on the Ribbon. Theadditional line will be deleted.19. When you have successfully completed the transfer, click the Return button onthe Ribbon to return to the Budget Amendment Entry screen.24
20. Click the Release button in the Ribbon. The Amendment status field changesto Approved. (If this transfer needs approval from another department such asTitle I, or FRYSC the Amendment status will show as Pending Approval until thedepartment head and Budget and Financial Planning approve the transfer. Checkyour email for either approved or held status for your amendment.)21. Click the Output-Post button and choose The current journal only;press ENTER or click Accept from the Ribbon.22. When the Output type dialog box appears, select the Save radio button.Enter a file name; then click the drop-down arrow to change Save as Type toPDF. Click OK.23. To view the PDF Report, return to the main menu and choose My SavedReports.25
A confirmation message is displayed. If you find a mistake on the transfer pressCTRL-U for Update or click the Update tool to make a change. After making thechange, click Accept or press ENTER to continue.24. If you find a mistake on the PDF copy, click No to cancel. Do not post theJournal until you are certain that the transfers are accurate. You cannotmake changes after the Journal is posted.25. If the printed copy is correct, click Yes to post the Journal. The followingmessage appears. Click OK.26. When finished, choose File – Exit from the menu, or click the Close box atthe top right corner of the window to exit.**IMPORTANT**You must get the message, No errors detected. Post Journal? If themessage did not prompt you to Post Journal, the transfers wereentered, but the Journal was not posted. This is usually caused by apermission problem. If the message ‘No errors detected. Post Journal?’did not appear, contact the MIS Help Desk at 3552.If the message Establishing new budget/creating a multi-fund codedisplays, ALWAYS click No to all before proceeding. Doing otherwise willcause the entire grant budget to be out of balance.Transfers and amendments MUST be output posted by 4pm onMondays, or they will be dumped and the process must be redone.26
Non-Posted Budget TransfersIf you had to leave the Budget Transfers and Amendments screen before theJournal was posted, you can pull the journal back up and post it at a later time.You can also make corrections or delete a journal that has not been posted.1. From the Quick Links menu, Departmental Functions, select BudgetTransfers and Amendments. Click the Browse button or Control-B.2. When the Budget Amendment Entry screen appears it will display any journalthat has not been posted. To complete this journal, double-click the line and thejournal opens up in the Budget Amendment Entry mode. Now you can makecorrections and release the journal and complete the Output-Post steps, ordelete the journal. To make corrections to a journal, click Lines. Click Updateor Ctrl-U to make changes to the account code oramounts. Click Accept or press ENTER to save thechanges. Click Return to return to the journal to Releaseand Output-Post. To delete the journal, click the Delete tool from the toolbar, or Ctrl-D. Click theYes, Delete button to confirm the action3. If all journals have been posted, this message will appear once you have chosenthe Browse button from the Budget Amendment Entry screen.27
It is recommended that you verify all journals are posted once they are created andthat no journals are in the Browse mode waiting for action. Any un-posted entrieswill be deleted on Monday afternoon.28
PURCHASING AND RECEIVING: Model Procurement Commodity Codes Vendor Inquiry Warehouse Requisition Normal Requisition (Bid Items) Non-Bid Requisition (Non Competitive D & F) Non-Bid Requisition (Small Purchase D & F) Blanket Requisition Quick Review Rejected Requisitions Making Changes/Adding/Deleting Purchase Order Receiving29
Model ProcurementThe Model Procurement Code is the law that governs all purchasing by the JeffersonCounty Public School District. (KRS 45A) Kentucky Model Procurement Code withthree general provisions:1. The statutory principles and policy guidance for managing and constructionfor public purposes.2. Administrative and judicial remedies for the resolution of controversiesrelating to public contracts.3. Set of ethical standards governing public and private participants in theprocurement process.The Kentucky Model Procurement Code became effective on local governmentalunits, including school boards, on January 1, 1980. The Jefferson County Board ofEducation adopted the use of Model Procurement since the law makes purchasing amore flexible tool for the user and gives the user the right to draft regulations,which will assist in the purchasing process.All school district employees MUST follow the Model Procurement Statutes, Federallaws and statutes and all state laws and statues pertaining to purchasing andprocurement as well as Board procurement policies.Purchasing ProcessThe standard purchasing process for State agencies involves: requisitioning; public bidsolicitation; bid receipt; evaluation and contract award.The Purchasing Department conducts the formal bids process. Sealed bids received inresponse to the solicitation are awarded to the bidder who offers the best value to theDistrict. Bids are tabulated; checked for responsiveness to the stated terms, conditionsand specifications; evaluated; and awarded to the bidder who offers the Best Value tothe District. These bids are also referred to as local bids. There are State andGovernment bids that are also used when purchasing items. When items are not onlocal, state, or government bids, the Determination and Findings process must befollowed when purchasing.The requisition to purchase request is forwarded through the MUNIS system to thepurchasing department who reviews and approves all requisitions. The PurchasingDepartment checks the requisition for accuracy and competitiveness. Once approved,the requisition is converted into a purchase order. For more procedural informationvisit the website: nance/Determination and Findings Information30
The Determination and Findings are written, signed, legally binding statements,submitted by an employee, to explain/justify the method and logic that he/she hasused to select material, services, or suppliers when committing federal, state, ordistrict funds for purposes of procurement of NON-BID materials or services. There aretwo (2) types of Determination and Findings in use by district employees:1. Small Purchase D & F2. Non-Competitive Negotiations D & FSmall Purchase D & F:The Small Purchase D & F is used when you are concerned with the monetary limitsrequired by Model Procurement and district Policy and when your purchase does notqualify for one of the noncompetitive methods.Small purchases may be used for the award of any contract or purchase that does notexceed an aggregate amount of 20,000.00. (Purchases of like items by the districtthat exceeds 20,000.00 in value must be formally bid. The 20,000.00 amount is thatamount purchased by the entire district in a fiscal year. This is called an AGGREGATEAMOUNT.) Dollar Limits and Requirements for a Small Purchase D & F are as follows: For all purchases which do not exceed 5,000.00 in value: Purchaser shalluse his/her best efforts to obtain the lowest price from a responsible/responsive vendor for the supplies, services, or construction to be procured.For all purchases which exceed 5,000.00 in value but do not exceed 10,000.00 in value: Purchase requisition; Small Purchase D & F with threetelephones quotes, electronic (Internet) or catalog – competitive comparisonprices.For all purchases which exceed 10,000.00 in value but which do not exceed 20,000.00 in value: Purchase requisition; Small Purchase D & F with threewritten quotes from competitive suppliers. Electronic (Internet) printedquotes will be accepted as a written quote.For all purchases which exceed 20,000.00 in value: Must be formally bid.Contact the Purchasing/Bid Specifications Unit.Non-Competitive Negotiation D & F:This Non-Competitive Negotiation D & F is used when competition is not feasible.Bidding is not required if the item/service fit any of the following:31
Emergency - “Emergency” shall mean a relative condition of insufficiency ofservice or of facilities resulting in disturbance or distress within the procurementprocedure of the Board. An emergency can be declared only if the Chief ExecutiveOfficer or his designee duly certifies that an emergency exists.Single Source - There is only one source within a reasonable geographical areawhere the product can be procured. (i.e. copyright holder, publisher)Licensed Professional - The contract is for the services of a licensed professional,such as attorney, physician, psychiatrist, psychologist, certified public accountant,registered nurse or educational specialist.Perishable Items - The contract is for the purchase of perishable items purchasedon a weekly or more frequent basis, such as fresh fruits, fresh vegetables, freshfish or fresh meat. This is to be used by Nutrition Services only.Replacement parts where the need cannot be reasonably anticipatedItems for Resale - The contract is for proprietary items for resale; or in schooldistricts the contract relates to an enterprise in which the buying or selling bystudents is a part of the educational experience.Expenditures made on authorized trips outside of Jefferson CountySignificant savings - The contract is for a sale of supplies at reduced prices thatwill afford a purchase at savings to the Board.32
Commodity CodesNumbers are used to identify items you wish to purchase. In MUNIS thisidentification number is called the commodity code. Items in the JCPSWarehouse and on line item bids have a unique commodity code which contains theexact description and price of the item.Percentage of discount bids and items that are not on bid are usually assigned ageneric commodity code. Generic commodity codes have a short, non-specificdescription followed by two asterisks. The asterisks remind the user that adescription must be entered to identify the item. Two examples of commodity codesare shown below. The commodity code for the folder, describes exactly what typeof folder you wish to purchase; while the ‘generic’ commodity code for the deskaccessories contains the two asterisks which means additional information isrequired.Commodity R, MANILA, LETTER SIZE 1/3 CUT (100/BOX)ACCESSORIES, DESK **1. Click the Quick Links, Departmental Functions menu and chooseCommodity Codes. The following screen is displayed.2. Click the Search button on the Ribbon or press CTRL-F.3. Click in the Short Description field. With your Caps Lock on, enter thename of the item followed by an
All expenses in MUNIS utilize an account or General Ledger (GL) code. The code is comprised of these segments: Organization (Org), Object, and . Project. Look at this sample MUNIS accounting code: 1491077 0610 900XF . The first part of the account code is known as the . Organization . or. Org. The . Org . represents . WHO . the code is for when .