Transcription
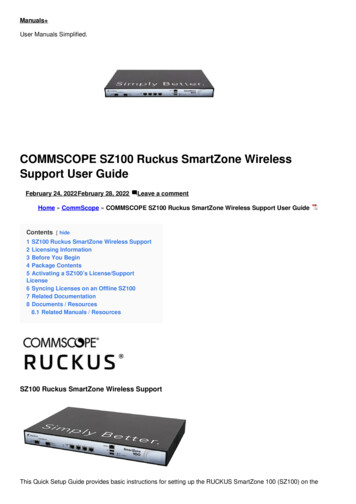
Manuals User Manuals Simplified.COMMSCOPE SZ100 Ruckus SmartZone WirelessSupport User GuideFebruary 24, 2022February 28, 2022Leave a commentHome » CommScope » COMMSCOPE SZ100 Ruckus SmartZone Wireless Support User GuideContents [ hide1 SZ100 Ruckus SmartZone Wireless Support2 Licensing Information3 Before You Begin4 Package Contents5 Activating a SZ100’s License/SupportLicense6 Syncing Licenses on an Offline SZ1007 Related Documentation8 Documents / Resources8.1 Related Manuals / ResourcesSZ100 Ruckus SmartZone Wireless SupportThis Quick Setup Guide provides basic instructions for setting up the RUCKUS SmartZone 100 (SZ100) on the
network. For information on advanced configuration and management options, see the SmartZone 100 GettingStarted Guide and SmartZone 100 Administrator Guide, which are available for download from the RUCKUS Supportwebsite: https://support.ruckuswireless.com/documentsThis Guide in Other ing InformationThe SZ100 comes pre-shipped with 1000 temporary AP Capacity Licenses, which are valid for a period of 90 daysfrom when the SZ100 is configured via the initial setup configuration. For operation beyond 90 days, you MUST buypermanent AP Capacity licenses. The purchased Licenses MUST be activated for them to become valid.The management of the AP Capacity Licenses and the ability to activate the permanent License will be through theRUCKUS Support Portal (https://support.ruckuswireless.com). An email will be sent to the User that is identifiedon the Purchase Order and full instructions as to how to activate the Licenses is included in the email. As a guide, fullinstructions can be found at https://support.ruckuswireless.com/activate.Using the LiMAN (license management) portal on the RUCKUS Support website, you can assign licenses to or froma SZ100 or move them to another SZ100 (see a summary of LiMAN features in Table 1). To physically manage thedistribution of licenses from the Support website to the actual SZ100, do one of the following:Connect the SZ100 directly to the Internet.Deploy a RUCKUS Local License Server (LLS) within your network. The LLS must be able to communicate withyour SZ100 and it must be connected to the Internet.LLS should first synchronize with the license server in the cloud to get the required license (as per theSZ100 serial number) Remove licenses from one SZ100 to add to a notherNOTE: In the event that the SZ100 is not connected to the Internet and you have not deployed an LLS, you candownload the actual licenses from the Support Portal and manually upload to the specific SZ100.For step-by-step instructions on how to activate the SZ100’s licenses, see Step 5: Activate the SZ100’s Licenses onpage 3.NOTE: The default temporary switch licenses is 100 per node, and 90 days for the temporary switch license period.TABLE 1 LiMAN features and how to activate them on the SZ100
LiMAN FeaturesSZ100 Online (Connected to theInternet)SZ100 Offline (Disconnected from theInternet)Three steps required: Register SZ100 controllers,licenses, support entitlement Add capacity licenses to SZ100controllers Remove licenses from oneSZ100 and add to anotherNo action required. The SZ100syncs with LiMAN automaticallywithin 24 hours and applies theappropriate licenses.1.Download the license file fromLiMAN.2.Log on to the SZ100, and thenupload the license file from LiMAN.3.Download the license response filefrom the SZ100, and then upload it toLiMAN.Before You BeginBefore deploying Ruckus Networks products, please check for the latest software and the release documentation.Release Notes and other user documentation are available ware upgrades are available at e license and limited warranty information are available athttp://support.ruckuswireless.com/warranty.
Package ContentsOne SmartZone 100 appliance with one AC/DC power supply unit and power cordOne console cableOne rack mount kitService Level Agreement/Limited Warranty Statement sheetRegulatory Statement sheetThis Quick Setup GuideWhat You Will NeedHardware Component Specific information.TABLE 2 Component Specific InformationProduct NameLabelModelCPUInteli7-3770MBCaswellCOB-7400-00 0PowerEnhanceENP-7025D-4 7XGB3.40 GHz, Socket: FCLGA11558GB DDR3RAMInnodisk–HDDWestern Digital–1600 DIMM1TB, 3.5” SATA HDDAn administrative computer (admin PC) with a connection to the local area networkA web browser, such as Internet Explorer, Mozilla Firefox, Google Chrome or Apple SafariThe IP address, netmask, gateway and DNS server addresses assigned to the SZ100 –if it has a static networkaddress (recommended)Step 1: Connect the SZ100 to the Network1. Connect the SZ100 to a convenient power source, and then press the power switch on the rear panel. TheAlarm LED shows a flashing red light as the SZ100 starts up. When the SZ100 has started up successfully, theAlarm LED turns to a solid green light.2. Obtain an Ethernet cable. Connect one end of the Ethernet cable to one of the LAN ports (port 1 or 2recommended) on the SZ100, and then connect the other end to your network’s switch or router. DHCP servershould be available in the connected LAN environment for SZ100 to get the IP address.NOTE: The SZ100 is a Universal Plug and Play (UPnP) device. Once you connect it to the network, it will
automatically configure itself, obtain an IP address, and make its presence known to other devices on thenetwork.3. Go to the admin PC and verify that the SZ100 is now discoverable on the network. On Windows 7 and Windows8, go to Control Panel Network and Internet View network computers and devices, and then locate theNetwork Infrastructure section. The SZ100 should appear there. In such scenarios, SZ100 and a system (laptopor a PC) should have cross-over connection and the system should have an IP address in the same subnet asSZ100. Configure SZ100 MGMT and CONTROL interface and add it to the new LAN connection. Use the newIP address to access SZ100.NOTE: If you prefer not to use UPnP, you can type the IP address of the SZ100 into a web browser instead. Incase there is no DHCP server on the network, the default IP address and URL of the SZ100 ishttps://192.168.2.2:8443 with a network mask of 255.255.255.0. Otherwise, an IP address is assignedautomatically from your existing DHCP service.FIGURE 1 The SZ100 appears in the Network Infrastructure section4. Double-click the SZ100 that appears in the Network Infrastructure section to start the SZ100’s Setup Wizard. Aweb browser loads and the SZ100’s Setup Wizard appears, displaying the Port Configuration screen.FIGURE 2 The Port Configuration screen of the Setup WizardStep 2: Complete the Setup Wizard1. When the Setup Wizard appears, complete the following screens: · Port Configuration: If you want to combinethe management, AP control, and AP tunnel traffic on a single interface (recommended for simple setup), clickOne Port Group. If you want to separate the management and AP control traffic from the AP tunnel traffic, clickTwo Port Group.NOTE: If you clicked Two Port Group, verify that the admin PC is connected to either port 1 or port 2 of the
SZ100.IP Setting: Configure the IP address settings of the SZ100 interface or interfaces either by assigning addressesautomatically (if a DHCP server exists on the network) or manually: If you clicked One Port Group on theprevious screen, configure the SZ100’s IP address settings on the IP Setting screen. If you clicked Two PortGroup, configure the IP address of the management and AP control interface on the Port 1 screen, and thenconfigure the IP address of the AP tunnel data interface on the Port 2 screen.Cluster Information: Select whether you want to create a new cluster with this SZ100 or to join an existingcluster on the network. If you want this SZ100 to join an existing cluster, you must type the cluster IP addressand admin password in the boxes provided.2. When the Confirmation screen appears, verify that all the settings displayed on the screen are correct. If youneed to make a correction, click Back until the appropriate setup screen appears, then make the changes.3. If they are all correct, click Finish to apply the settings and activate the SZ100 on the network. A progress barappears and displays the progress of applying the settings, starting the SZ100 services, and activating theSZ100 on the network. When the process is complete, the progress bar shows the message “100% Done.” Thepage also shows the IP address through which you can access the SmartZone web interface to manage theappliance.NOTE: Take note of this IP address. You will need this later to log on to the SZ100’s web interface.FIGURE 3 Take note of the IP address of the web interfaceStep 3: Connect theSZ100 to the Network1. Connect Port 1 to the router or switch.2. Connect Port 2 to another router or switch to which other SmartZone appliances (if present) are connected.NOTE: Depending on your network setup, you may also connect Port 2 to the same router or switch to whichPort 1 is connected.Step 4: Connect the APs to the Network1. Distribute the APs around your worksite.2. Record each AP’s Ethernet MAC address (printed on the bottom of every AP), and note each device’s exactworksite location.3. Connect the APs to a local power source.4. The operating temperature and humidity for the APs must be as below:TABLE 3 Operating Temperature and Humidity DetailOperating Temperature0ºC (32ºF) – 40ºC (104ºF)Operating Humidity5% to 85%, non-condensingHumidity, Storage95%, non-condensing
5. Using an Ethernet cable, connect the APs to the switch or router on the same network as the SZ100.NOTE: Some APs are PoE-capable. If connected to a Power over Ethernet switch, the APs can draw power throughthe Ethernet cables.When the APs are powered on, they will automatically discover the SZ100 on the network.NOTE: If an AP is already running a SZ image then autodiscovery on same LAN/IP subnet will not work. It only worksif the AP is running a SZ/universal LWAPP based image.FIGURE 4 Connecting the admin PC, SZ100, and APs to the networkStep 5: Activate the SZ100’s LicensesAfter you set up the SZ100 and verify that wireless clients are able to associate with managed APs successfully, youneed to activate and assign the AP and Tunnel Licenses using the LiMAN (license management) portal on theRuckus Networks Support site.Before You BeginYou must have a Ruckus Support portal account (including user name and password). You can use this account toaccess general Support site content including software upgrades, knowledge base articles and technical documents.If you do not have a Support portal account, you will be required to register one before continuing with your productand license activation.Every capacity and support license that you have purchased willhave its own unique activation code and each must be activated for the license to become valid. You will receive theactivation code in a separate Support Purchase Acknowledgment (SPA) email for each license/support license.Depending on the product, you may receive up to three (3) different SPA emails for all of your licenses. The firstthree characters of the activation code indicate the license type towhich the code is applicable.LIC: AP Capacity LicenseLIC: AP Tunnel LicenseSUP: Support LicenseActivating a SZ100’s License/Support License1. Open the SPA email that you received from Ruckus Networks.FIGURE 5 The SPA email from Ruckus
2. Log on to https://support.ruckuswireless.com.FIGURE 6 Ruckus Support portal logon page3. Have the serial number of your SZ100 device ready.4. Click the link in the SPA email.5. Follow the onscreen instructions to activate the licenses purchased. When required, you will be prompted foryour SZ100 serial number.6. It is important that you repeat steps #1 to #5 above for all licenses that you have purchased as this will simplifythe “ License” workflow in Step 7 below.7. After you finish activating all of your licenses, you need to assign them to your LiMAN account. Click the LiMANbutton, which appears after a license has been successfully activated (see Figure 7).If your device is listed, click its serial number and proceedto Step 8.If your device is NOT listed, click the Register Smart Device button (see Figure 8), enter your device’s serialnumber, and then click the Register Smart Device button (see Figure 9).
FIGURE 8 Click the serial number of your device or click Register Smart DeviceFIGURE 9 Enter your device’s serial number and click Register Smart Device
Click the License button (see Figure 10), enter the number of licenses to add in Qty to Add, and then click the AddLicense button (see Figure 11). Repeat for all licenses.FIGURE 10 Click Licens eFIGURE 11 Enter the number of licenses to add in Qty to Add and click Add License
Step 6: Sync the SZ100 with LiMANAfter you have activated the SZ100’s licenses on the Ruckus Networks Support Portal, the SZ100 must be syncedwith the Smart License server. This will enable the User’s ability to assign licenses to and back from a SZ100 orassign them to another SZ100.To physically manage the distribution of licenses from the Support Portal to the actual SZ100, do one of the following:Connect the SZ100 directly to the Internet. On the SmartZone web interface, go to the Administration LicenseServers tab, and then click the Sync Now button to sync the SZ100 with the SmartLicense server.FIGURE 12 Sync the SZ100 with the SmartLicense serverDeploy a RUCKUS Local License Server (LLS) within your network. The LLS must be able to communicate with yourSZ100 and it must be connected to the Internet. Contact Ruckus Wireless Support for information on how to setup anLLS. View the synced license details by navigating the controller’s web interface to Administration License page Installed Licenses.FIGURE 13 Installed Licenses
In the event that the SZ100 is disconnected from the Internet and you have not deployed an LLS, you can downloadthe actual licenses from the Support Portal and manually upload them to the specific SZ100. See Syncing Licenseson an Offline SZ100 on page 4.You have completed activating the capacity or support license for the SZ100 device.Syncing Licenses on an Offline SZ1001. On the Add License page of LiMAN, click the SZ100’s serial number. The View Device page appears (see2.3.4.5.Figure 14).FIGURE 14 The View Device pageClick Download License File. The license file is saved to the client.On the SZ100 web interface, go to Administration License . In the Upload License section (see Figure 12 onpage 4), click the Browse button, and then select the license file from your client to upload it to the SZ100On the SZ100 web interface, go to Administration License. In the Download License section, click theDownload button to download the license file from the SZ100 to your client.Go back to the LiMAN portal on the Ruckus Networks Support website, and then do the following:a) Go to the View Device page (see Figure 14).b) Click Upload License File.c) Click the Choose File button (see Figure 15), and then select the license file from your client.d) Click Send to complete the offline License synchronization. You have completed activating licenses on anoffline SZ100.FIGURE 15 Click the Choose File button
Related DocumentationIf you need more information about the SmartZone 100 or the SmartLicense platform, refer to the followingdocuments, which are available for download on the https://support.ruckuswireless.com Support website:For information on how to mount and install the SZ100 and how to complete the essential configuration tasks,refer to the SmartZone 100 Getting Started Guide.For information on how to perform advanced configuration tasks and AP management and monitoring, refer tothe SmartZone 100 Administrator Guide.For a complete list of documentation on the SmartZone 100, refer to the release notes.For more information on how to manage your SmartZone 100 licenses, refer to the SmartLicense User Guide.Documents / ResourcesCOMMSCOPE SZ100 Ruckus SmartZone Wireless Support [pdf] User GuideSZ100, Ruckus SmartZone Wireless SupportRelated Manuals / ResourcesQi-certified wireless chargers for iPhone - Apple SupportConnect the charger to power. Use the power adapter that came with your charger or a power adapter Wireless carrier support and features for iPad in Latin America and the Caribbean - Apple SupportWireless carrier support and features for iPad in Latin America and the Caribbean Choose your country or region Wireless carrier support and features for iPad in Asia-Pacific - Apple SupportWireless carrier support and features for iPad in Asia-Pacific Choose your country or region to learn about the Wireless carrier support and features for iPad in Europe - Apple SupportWireless carrier support and features for iPad in Europe Choose your country or region to learn about the
Leave a commentYour email address will not be published.CommentNameEmailWebsiteSave my name, email, and website in this browser for the next time I comment.Post CommentManuals ,homeprivacy
COMMSCOPE SZ100 Ruckus SmartZone Wireless Support User Guide February 24, 2022February 28, 2022 Leave a comment . NOTE: The default temporary switch licenses is 100 per node, and 90 days for the temporary switch license period. TABLE 1 LiMAN features and how to activate them on the SZ100. LiMAN Features SZ100 Online (Connected to the
