Transcription
N WirelessRouterBelkin Tech SupportUS: 877-736-5771310-898-1100 ext. 2263UK: 0845 607 77 87Australia: 1800 235 546New Zealand: 0800 235 546Singapore: 800 616 1790Europe: www.belkin.com/supportBelkin International, Inc.501 West Walnut StreetLos Angeles, CA 90220, USA310-898-1100310-898-1111 faxBelkin B.V.Boeing Avenue 3331119 PH Schiphol-Rijk, The Netherlands 31 (0) 20 654 7300 31 (0) 20 654 7349 faxBelkin Ltd.4 Pioneer AvenueTuggerah Business ParkTuggerah, NSW 2259, Australia 61 (0) 2 4350 4600 61 (0) 2 4350 4700 faxBelkin Ltd.Express Business Park, Shipton WayRushden, NN10 6GL, United Kingdom 44 (0) 1933 35 2000 44 (0) 1933 31 2000 fax 2007 Belkin International, Inc. All rights reserved. All trade names are registered trademarks ofrespective manufacturers listed. Mac, Mac OS, Apple, and AirPort are trademarks of Apple Inc., registeredin the U.S. and other countries. Windows, NT, Microsoft, and Windows Vista are either registeredtrademarks or trademarks of Microsoft Corporation in the United States and/or other countries.P75445
N WirelessRouterUser ManualF5D8233-4
Table of Contents1. Introduction . . . . . . . . . . . . . . . . . . . . . . . . . . . . . . . . . . . . . . 1Advantages of a Wireless Network . . . . . . . . . . . . . . . . . . . . 1Placement of your N Wireless Router . . . . . . . . . . . . . . . . . . 32. Product Overview . . . . . . . . . . . . . . . . . . . . . . . . . . . . . . . . . . 7Product Features . . . . . . . . . . . . . . . . . . . . . . . . . . . . . . . . . 73. Knowing your Router . . . . . . . . . . . . . . . . . . . . . . . . . . . . . . 10Package Contents . . . . . . . . . . . . . . . . . . . . . . . . . . . . . . . 10System Requirements . . . . . . . . . . . . . . . . . . . . . . . . . . . . . 10Setup Assistant Software System Requirements . . . . . . . . 104. Connecting and Configuring your Router . . . . . . . . . . . . . . . 155. Alternate Setup Method . . . . . . . . . . . . . . . . . . . . . . . . . . . . 236. Using the Web-Based Advanced User Interface . . . . . . . . . . 38Changing LAN Settings. . . . . . . . . . . . . . . . . . . . . . . . . . . . 39Viewing the DHCP Client List Page. . . . . . . . . . . . . . . . . . 41Configuring the Wireless Network Settings . . . . . . . . . . . . 41Setting WPA Security . . . . . . . . . . . . . . . . . . . . . . . . . . . . . 48Setting WEP Encryption . . . . . . . . . . . . . . . . . . . . . . . . . . . 50Using the Access Point Mode. . . . . . . . . . . . . . . . . . . . . . . 52Setting MAC Address Control . . . . . . . . . . . . . . . . . . . . . . 53Configuring the Firewall . . . . . . . . . . . . . . . . . . . . . . . . . . . 55Using Dynamic DNS . . . . . . . . . . . . . . . . . . . . . . . . . . . . . 59Utilities . . . . . . . . . . . . . . . . . . . . . . . . . . . . . . . . . . . . . . . 60Restarting the Router . . . . . . . . . . . . . . . . . . . . . . . . . . . . 61Updating the Firmware . . . . . . . . . . . . . . . . . . . . . . . . . . . 667. Manually Configuring Network Settings . . . . . . . . . . . . . . . . 748. Recommended Web Browser Settings . . . . . . . . . . . . . . . . . 799. Troubleshooting . . . . . . . . . . . . . . . . . . . . . . . . . . . . . . . . . . 8110. Information . . . . . . . . . . . . . . . . . . . . . . . . . . . . . . . . . . . . 97
IntroductionThank you for purchasing the Belkin N Wireless Router (the Router).Following are two short sections—the first discusses the benefits of homenetworking, and the other outlines best practices that maximize yourwireless home network range and performance. Please be sure to readthrough this User Manual completely, and pay special attention to thesection entitled “Placement of your N Wireless Router” on the next page. Byfollowing our simple setup instructions you will be able to use your BelkinHome Network to: Share one high-speed Internet connection with all the computers inyour home Share resources, such as files and hard drives among all theconnected computers in your home Share a single printer with the entire family Share documents, music, video, and digital pictures Store, retrieve, and copy files from one computer to another Simultaneously play games online, check Internet email, and chatAdvantages of a Wireless NetworkHere are some of the advantages of setting up a BelkinWireless Network: Mobility – you’ll no longer need a dedicated “computerroom”—now you can work on a networked laptop or desktopcomputer anywhere within your wireless range Easy installation – Belkin’s Easy Installation Wizard makessetup simple Flexibility – set up and access printers, computers, and othernetworking devices from anywhere in your home Easy expansion – the wide range of Belkin networking products letyou expand your network to include devices such as printers andgaming consoles No cabling required – you can spare the expense and hassle ofretrofitting Ethernet cabling throughout the home or office Widespread industry acceptance – choose from a wide range ofinteroperable networking products1
IntroductionThe element that makes Belkin’s N MIMO technology differentfrom a conventional radio is the use of multiple antennas and twosimultaneous data streams to deliver wireless transfers around yourhome or office. A conventional radio uses one antenna to transmit adata stream. Belkin’s N MIMO, on the other hand, uses two antennas.This design helps combat distortion and interference. Belkin’s NMIMO is multidimensional. It builds on one-dimensional smart-antennatechnology by simultaneously transmitting two data streams throughthe same channel, which increases wireless capacity.Another element that enhances Belkin’s N MIMO is the use ofaggregation as specified in the draft 802.11n specification. Byshortening the space between packets and combining multiple smallerpackets into one larger packet, Belkin’s N MIMO can transmit moredata through available bandwidth.Think of conventional radio transmission as a two-lane highway. Thespeed limit governs the maximum allowable flow of traffic throughthat lane. Compared with conventional radios, one-dimensional smartantenna systems help move traffic through that lane faster and morereliably—analogous to a four-lane road on which traffic consistentlymoves at a rate closer to the speed limit. Belkin’s N MIMO helpstraffic move at the speed limit and opens more lanes—to become thesuperhighway in this example. The rate of traffic flow is multiplied bythe number of lanes that are opened.212345678910sectionRevolutionary N Wireless Technology with MIMO (N MIMO)Your Belkin N Wireless Router uses a new smart-antenna technologycalled Multiple Input Multiple Output (MIMO). N MIMO complieswith the IEEE draft 802.11n specification. It increases speed, range,reliability, and spectral efficiency for wireless networking systems.
IntroductionPlacement of your N Wireless RouterImportant Factors for Placement and SetupYour wireless connection will be stronger the closer your computer isto your Router. Typical indoor operating range for wireless devices isbetween 100 and 200 feet.In the same way, your wireless connection and performance willdegrade somewhat as the distance between your Router andconnected devices increases. This may or may not be noticeableto you. As you move further from your Router, connection speedmay decrease. Factors that can weaken signals simply by gettingin the way of your network’s radio waves are metal appliances orobstructions, and walls.If you have concerns about your network’s performance that mightbe related to range or obstruction factors, try moving the computerto a position between five and 10 feet from the Router in order to seeif distance is the problem. If difficulties persist even at close range,please contact Belkin Technical Support.Note: While some of the items listed below can affect networkperformance, they will not prohibit your wireless network fromfunctioning; if you are concerned that your network is not operating atits maximum effectiveness, this checklist may help.1.Router PlacementPlace your Router, the central connection point of yournetwork, as close as possible to the center of your wirelessnetwork devices.To achieve the best wireless network coverage for your “wirelessclients” (i.e., computers enabled by Belkin Wireless NotebookNetwork Cards, Wireless Desktop Network Cards, and WirelessUSB Adapters): Ensure that your Router’s networking antennas are parallelto each other, and are positioned vertically (toward theceiling). If your Router itself is positioned vertically, point theantennas as much as possible in an upward direction. In multistory homes, place the Router on a floor that is asclose to the center of the home as possible. This may meanplacing the Router on an upper floor. Try not to place the Router near a cordless 2.4GHz phone.3
Introduction1Avoid Obstacles and InterferenceAvoid placing your Router near devices that may emit radio“noise,” such as microwave ovens. Dense objects that can inhibitwireless communication include: Refrigerators Washers and/or dryers Metal cabinets Large aquariums Metallic-based, UV-tinted windowsIf your wireless signal seems weak in some spots, make sure thatobjects such as these are not blocking the signal’s path (betweenyour computers and Router).3.Cordless Phones3456If the performance of your wireless network is impaired afterattending to the above issues, and you have a cordless phone:7 Try moving cordless phones away from your Router and yourwireless-enabled computers.8 Unplug and remove the battery from any cordless phonethat operates on the 2.4GHz band (check manufacturer’sinformation). If this fixes the problem, your phone maybe interfering. If your phone supports channel selection, change the channelon the phone to the farthest channel from your wirelessnetwork. For example, change the phone to channel 1 andmove your Router to channel 11. See your phone’s usermanual for detailed instructions. If necessary, consider switching to a 900MHz or 5GHzcordless phone.4.2Choose the “Quietest” Channel for your Wireless NetworkIn locations where homes or offices are close together, such asapartment buildings or office complexes, there may be wirelessnetworks nearby that can conflict with yours.Use the Site Survey capabilities found in the Wireless Utility ofyour wireless adapter to locate any other wireless networks thatare available (see your wireless adapter’s user manual), and moveyour Router and computers to a channel as far away from othernetworks as possible.4910section2.
Introduction Experiment with more than one of the available channels, inorder to find the clearest connection and avoid interferencefrom neighboring cordless phones or other wireless devices. For Belkin wireless networking products, use the detailed SiteSurvey and wireless channel information included with yourwireless network card. See your network card’s user guide formore information.These guidelines should allow you to cover the maximumpossible area with your Router. Should you need to cover aneven wider area, we suggest the Belkin Wireless RangeExtender/Access Point.5.Secure Connections, VPNs, and AOLSecure connections typically require a user name andpassword, and are used where security is important. Secureconnections include: Virtual Private Network (VPN) connections, often used toconnect remotely to an office network The “Bring Your Own Access” program from America Online(AOL), which lets you use AOL through broadband provided byanother cable or DSL service Most online banking websites Many commercial websites that require a user name andpassword to access your accountSecure connections can be interrupted by a computer’spower management setting, which causes it to “go to sleep.”The simplest solution to avoid this is to simply reconnect byrerunning the VPN or AOL software, or by re-logging into thesecure website.A second alternative is to change your computer’s powermanagement settings so it does not go to sleep; however, thismay not be appropriate for portable computers. To change yourpower management setting under Windows, see the “PowerOptions” item in the Control Panel.If you continue to have difficulty with Secure Connections, VPNs,and AOL, please review the steps above to be sure you haveaddressed these issues.5
IntroductionUS: 877-736-5771310-898-1100 ext. 2263UK: 0845 607 77 871234Australia: 1800 235 546New Zealand: 0800 235 5465Singapore: 800 616 1790Europe: www.belkin.com/support6789106sectionFor more information regarding our networking products, visit our websiteat www.belkin.com/networking or call Belkin Technical Support at:
Product OverviewProduct FeaturesIn minutes you will be able to share your Internet connection andnetwork your computers. The following is a list of features that makeyour new Belkin N Wireless Router an ideal solution for your home orsmall office network.Works with Both PCs and Mac ComputersThe Router supports a variety of networking environments includingMac OS 8.x, 9.x, X v10.x, Linux , Windows 98, Me, NT , 2000, XP,Vista , and others. All that is needed is an Internet browser anda network adapter that supports TCP/IP (the standard language ofthe Internet).Patent-Pending Network Status DisplayLighted LEDs on the front of the Router indicate which functionsare in operation. You’ll know at-a-glance whether your Router isconnected to the Internet. This feature eliminates the need foradvanced software and status-monitoring procedures.Web-Based Advanced User InterfaceYou can set up the Router’s advanced functions easily through yourweb browser, without having to install additional software onto thecomputer. There are no disks to install or keep track of and, bestof all, you can make changes and perform setup functions from anycomputer on the network quickly and easily.NAT IP Address SharingYour Router employs Network Address Translation (NAT) to share thesingle IP address assigned to you by your Internet Service Providerwhile saving the cost of adding additional IP addresses to yourInternet service account.SPI FirewallYour Router is equipped with a firewall that will protect your networkfrom a wide array of common hacker attacks including IP Spoofing,Land Attack, Ping of Death (PoD), Denial of Service (DoS), IP withzero length, Smurf Attack, TCP Null Scan, SYN flood, UDP flooding,Tear Drop Attack, ICMP defect, RIP defect, and fragment flooding.7
Product Overview1Integrated 10/100 4-Port SwitchUniversal Plug and Play (UPnP)UPnP is a technology that offers seamless operation of voicemessaging, video messaging, games, and other applications thatare UPnP-compliant.23456Support for VPN Pass-ThroughIf you connect to your office network from home using a VPNconnection, your Router will allow your VPN-equipped computer topass through the Router and to your office network.7Built-In Dynamic Host Configuration Protocol (DHCP)8Built-In Dynamic Host Configuration Protocol (DHCP) on-board makesfor the easiest possible connection of a network. The DHCP serverwill assign IP addresses to each computer automatically so there isno need for a complicated networking setup.Setup AssistantThe Setup Assistant, second generation of Belkin’s renowned EasyInstall Wizard, takes the guesswork out of setting up your Router.This automatic software determines your network settings for youand sets up the Router for connection to your Internet ServiceProvider (ISP). In a matter of minutes, your Router will be up andrunning on the Internet.Note: Setup Assistant software is compatible with Windows 2000, XP,and Vista; and Mac OS X v10.x. If you are using another operatingsystem, the Router can be set up using the Alternate Setup Methoddescribed in this User Manual (see page 23).8910sectionThe Router has a built-in, four-port network switch to allow yourwired computers to share printers, data and MP3 files, digital photos,and much more. The switch features automatic detection so it willadjust to the speed of connected devices. The switch will transferdata between computers and the Internet simultaneously withoutinterrupting or consuming resources.
Product OverviewIntegrated N Wireless Access PointN MIMO is an exciting new wireless technology based on the draftIEEE 802.11n specification. It employs MIMO (Multiple Input MultipleOutput) smart-antenna technology that achieves data rates of up to300Mbps.* Actual throughput is typically lower than the connecteddata rate and will vary depending on your networking environment.*NOTE: The standard transmission rate—300Mbps—is the physicaldata rate. Actual data throughput will be lower.MAC Address FilteringFor added security, you can set up a list of MAC addresses (uniqueclient identifiers) that are allowed access to your network. Everycomputer has its own MAC address. Simply enter these MACaddresses into a list using the Web-Based Advanced User Interfaceand you can control access to your network.9
Knowing your Router1Package Contents Belkin N Wireless Router Quick Installation Guide Belkin Setup Assistant Software CD RJ45 Ethernet Networking Cable Power Supply User Manual on the Setup Assistant CD Network Status Display Guide Wireless Security Setup Guide2456System Requirements Broadband Internet connection such as a cable or DSL modemwith RJ45 (Ethernet) connection At least one computer with an installed network interface adapter TCP/IP networking protocol installed on each computer RJ45 Ethernet networking cable Internet browser789Setup Assistant Software System Requirements A computer running Windows 2000, XP, or Vista TM; orMac OS X v10.x Minimum 1GHz processor and 128MB RAM Internet browser1010section3
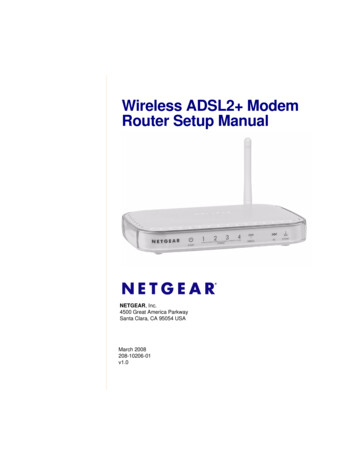
Knowing your RouterThe Router has been designed to be placed on a desktop. All of thecables exit from the rear of the Router for better organization andutility. The Network Status Display is easily visible on the FRONTof the Router to provide you with information about network activityand status. See the Network Status Display Guide for moredetailed information.(A)A.B.C.(B)(C)(D)(E)(F )Wireless SecurityOFFWireless security is offSolid BlueWireless security is onWireless-Computer StatusOFFWireless computer is not presentSolid BlueWireless computer is connected tothe RouterBlinking AmberProblem with wireless computerconnecting properly to the RouterWired-Computer StatusOFFWired computer is not presentSolid BlueWired computer is connected tothe RouterBlinking AmberProblem with wired computer connectingproperly to the Router11
Knowing your RouterD.1Router/Power StatusE.OFFRouter is offBlinking BlueRouter is booting upSolid BlueRouter is on and readyModem StatusThis icon lights in blue to indicate that your modem is connectedproperly to the Router. It turns amber when problem is detected.F.OFFRouter is NOT connected to modemSolid BlueRouter is connected to modem andfunctioning properlyBlinking AmberProblem with modemInternet StatusThis unique icon shows you when the Router is connected to theInternet. When the light is off, the Router is NOT connected to theInternet. When the light is blinking amber, the Router is attemptingto connect to the Internet. When the light is solid blue, the Routeris connected to the Internet. When using the “Disconnect after xminutes” feature, this icon becomes extremely useful in monitoringthe status of your Router’s connection.OFFRouter is NOT connected to the InternetBlinking AmberRouter is attempting to connect tothe InternetSolid BlueRouter is connected to the Internet122345678910sectionWhen you apply power to the Router or restart it, a short period oftime elapses while the Router boots up. During this time, the “router”icon blinks. When the Router has completely booted up, the “router”icon becomes a solid light, indicating the Router is ready for use.
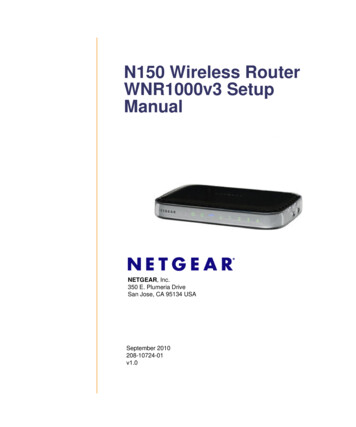
Knowing your Router(G)G.Push Button(H)(I) (J)(K)- WhiteThis button is set aside for future upgradeable features. Pleasecheck for the latest firmware updates at www.belkin.com/support.H.Connections to Wired Computers- GrayConnect your wired (non-wireless) computers to these ports.These ports are RJ45, 10/100 auto-negotiation, auto-uplinkingports for standard UTP category 5 or 6 Ethernet cable. The portsare labeled 1 through 4, with onboard LEDs on the connectors.I.Connection to Modem- YellowThis port is for connection to your cable or DSL modem. Use thecable that was provided with the modem to connect the modemto this port. Use of a cable other than the one supplied with thecable modem may not work properly.13
Knowing your RouterJ.1Reset Button – Redi.ii.3Resetting the Router4Push and release the “Reset” button. The lights on theRouter will momentarily flash. The “Power/Ready” light willbegin to blink. When the “Power/Ready” light becomes solidagain, the reset is complete.5Restoring the Factory DefaultsPress and hold the “Reset” button for at least 10 seconds,then release it. The lights on the Router will momentarilyflash. The “Power/Ready” light will begin to blink. Whenthe “Power/Ready” light becomes solid again, the restoreis complete.K.2Power Jack6789– BlackConnect the included 12V/1A DC power supply to this jack.1410sectionThe “Reset” button is used in rare cases when the Router mayfunction improperly. Resetting the Router will restore the Router’snormal operation while maintaining the programmed settings. Youcan also restore the factory default settings by using the “Reset”button. Use the restore option in instances where you may haveforgotten your custom password.
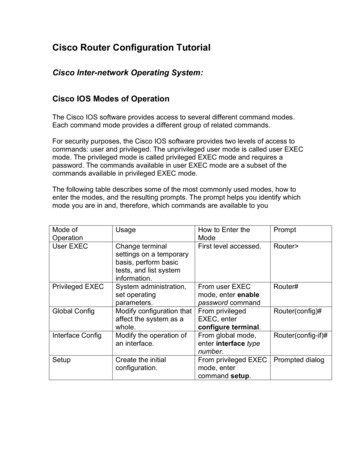
Connecting and Configuring your RouterVerify the contents of your box. You should have the following: Belkin N Wireless Router RJ45 Ethernet Networking Cable Power Supply Belkin Setup Assistant Software CD User Manual on the Setup Assistant CD Network Status Display Guide Wireless Security Setup GuideModem RequirementsYour cable or DSL modem must be equipped with an RJ45 Ethernetport. Many modems have both an RJ45 Ethernet port and a USBconnection. If you have a modem with both Ethernet and USB, andare using the USB connection at this time, you will be instructed touse the RJ45 Ethernet port during the installation procedure. If yourmodem has only a USB port, you can request a different type ofmodem from your ISP, or you can, in some cases, purchase a modemthat has an RJ45 Ethernet port on it.EthernetUSBSetup AssistantBelkin has provided our Setup Assistant software to make installingyour Router a simple and easy task. You can use it to get your Routerup and running in minutes. The Setup Assistant requires that yourcomputer be connected directly to your cable or DSL modem andthat the Internet connection is active and working at the time ofinstallation. If it is not, you must use the “Alternate Setup Method”section of this User Manual to configure your Router. Additionally,if you are using an operating system other than Windows 2000, XP,or Vista, or Mac OS X v10.x, you must set up the Router using the“Alternate Setup Method” section of this User Manual.15
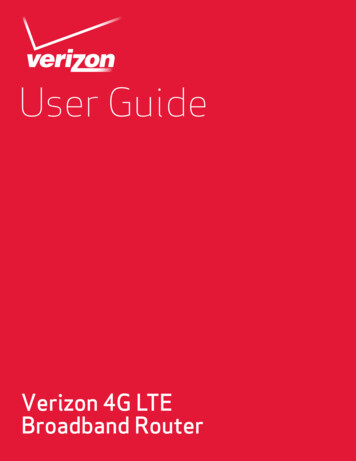
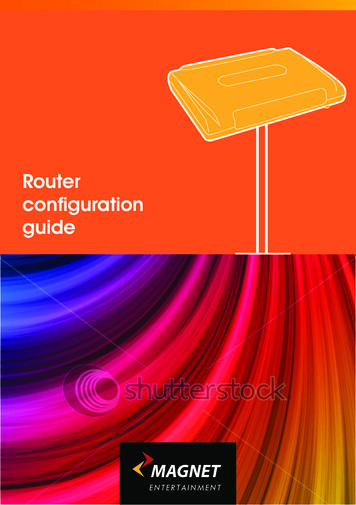
Connecting and Configuring your Router1Step 1Hardware Connections – Follow the Quick InstallationGuide (QIG)A.computermodem345B.C.Locate the networking cablethat connects your modem andcomputer. Unplug that cable fromyour modem, and plug it intoany gray port on the back ofthe Router.6Find your new networking cable(included in the box with yourRouter) and connect it to theyellow port on the back of theRouter. Connect the other end toyour modem, in the port that’snow free.9D.Plug in your modem’s power cord.Wait 60 seconds for the modemto start up. Plug the Router’spower supply into the black porton the back. Plug the other endinto the wall outlet.E.Wait 20 seconds for the Router tostart up. Look at the display onthe front of the Router. Make surethe “Wired” and “Router” iconsare lit up in blue. If they are not,recheck your connections.167810sectionrouterUnplug your modem’s powercord. Put the Router next tothe modem. Raise the Router’santennas.2
Connecting and Configuring your RouterStep 2Set Up the Router – Run the Setup Assistant SoftwareA.Shut down any programs thatare running on your computerat this time.Turn off any firewall orInternet-connection-sharingsoftware on your computer.B.Insert the CD into your computer.The Setup Assistant willautomatically appear on yourcomputer’s screen within 15seconds. Click on “Go” to runthe Setup Assistant. Follow theinstructions there.IMPORTANT: Run the Setup Assistant from the computer that isdirectly connected to the Router from Step 1 – B.Note for Windows Users: If theSetup Assistant does not startup automatically, select yourCD-ROM drive from “MyComputer” and double-click onthe file named “SetupAssistant”to start the Setup Assistant.17
Connecting and Configuring your RouterConfirmation ScreenVerify that you have completed all QIGsteps by checking the box to the rightof the arrow. Click “Next” to continue.123Progress ScreenSetup Assistant will show you aprogress screen each time a step inthe setup has been completed.5671.1 Checking SettingsThe Setup Assistant will nowexamine your computer’s networksettings and gather informationneeded to complete the Router’sconnection to the Internet.188910section4
Connecting and Configuring your Router1.2 Verifying Hardware ConnectionsThe Setup Assistant will nowverify your hardware connection.1.3 Naming your Wireless NetworkThe Setup Assistant will displaythe default wireless network nameor Service Set Identifier (SSID).This is the name of your wirelessnetwork to which your computersor devices with wireless networkadapters will connect. You caneither use the default or change itto something unique. Write downthis name for future reference.Click “Next” to continue.19
Connecting and Configuring your Router1.4 Requesting Internet Account1.5 Configuring the RouterThe Setup Assistant will nowconfigure your Router bysending data to the Routerand restarting it. Wait for theon-screen instructions.Note: Do not disconnect anycable or power off the Routerwhile the Router is rebooting.Doing so will render yourRouter inoperable.234567891020sectionInfo (if needed)If your Internet account requiresa login and password, you willbe prompted with a screen similarto the one on the left. Selectyour country or ISP from thedrop-down boxes.1
Connecting and Configuring your Router1.6 Checking Internet ConnectionWe are almost done. The SetupAssistant will now check yourconnection to the Internet.CongratulationsYou have finished installing yournew Belkin Router. You will see theCongratulations screen when yourRouter can connect to the Internet.You can begin surfing by opening yourbrowser and going to any website.You can use the Setup Assistant toset up your other wired and wirelesscomputers to connect to the Internetby clicking “Next”. If you decide toadd computers to your Router later,select “Exit the Assistant” and thenclick “Next”.TroubleshootingIf the Setup Assistant is not able toconnect to the Internet, you willsee this screen. Follow the on-screeninstructions to go through thetroubleshooting steps.21
Connecting and Configuring your Router1.7 Optional: Assistance2345CongratulationsOnce you have verified that your otherwired and wireless computers areproperly connected, your network is setup and working. You can now surf theInternet. Click “Next” to take you backto the main menu.67891022sectionConnecting Other ComputersThis optional step will help youto connect additional wiredand wireless computers to yournetwork. Follow the on-screeninstructions.1
Alternate Setup MethodStep 1Hardware Connections – Follow theQuick Installation Guide (QIG)See the QIG or Step 1: Hardware Connections from theprevious section.Step 2Set your Computer’s Network Settings to Workwith a DHCP ServerSee the section in this User Manual called “Manually ConfiguringNetwork Settings” for directions.Step 3Configuring the Router Using the Web-Based AdvancedUser InterfaceUsing your Internet browser, you can access the Router’s Web-BasedAdvanced User Interface. In your browser, type “192.168.2.1” (donot type in anything else such as “http://” or “www”). Then pressthe “Enter” key.23
Alternate Setup Method1Logging into the RouterYou will see the Router’s home page in your browser window. Thehome page is visible to any user who wants to see it. To make anychanges to the Router’s settings, you have to log in. Clicking the“Login” button or clicking on any one of the links on the home pagewill take you to the login screen. The Router ships with no passwordentered. In the login screen, leave the password blank and click the“Submit” button to log in.234678Logging out of the RouterOne computer at a time can log into the Router for the purposesof making changes to the settings of the Router. Once a user haslogged in to make changes, there are two ways that the computercan be logged out. Clicking the “Logout” button will log thecomputer out. The second method is automatic. The login will timeout after a specified period of time. The default login time-out is10 minutes. This can be changed from one to 99 minutes. For moreinformation, see the section in this manual titled “Changing the LoginTime-Out Setting”.Understanding the Web-Based Advanced User InterfaceThe home page is the first page you will see when you access theAdvanced User Interface (UI). The home page (shown on the nextpage) shows you a quick view of the Router’s status and settings. Alladvanced setup pages can be reached from this page.24910section5
Alternate Setup Method(11)(2) (3) (4)(5)(7)(6)(8)(1)(10)(9)1.Quick-Navigation LinksYou can go directly to any of the Router’s advanced UI pages byclicking directly on these links. The links are divided into logicalcategories and grouped by tabs to make finding a particularsetting easier to find. Clicking on the purple header of each tabwill show you a short description of the tab’s function.2.Home ButtonThe home button is available in every page of the UI. Pressingthis button will take you back to the
network, as close as possible to the center of your wireless network devices. To achieve the best wireless network coverage for your "wireless clients" (i.e., computers enabled by Belkin Wireless Notebook Network Cards, Wireless Desktop Network Cards, and Wireless USB Adapters): Ensure that your Router's networking antennas are parallel