Transcription
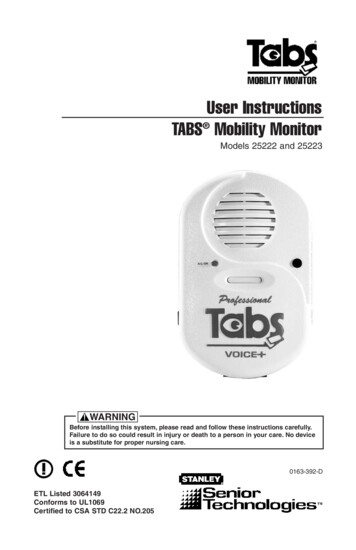
User InstructionsTABS Mobility MonitorModels 25222 and 25223WARNINGBefore installing this system, please read and follow these instructions carefully.Failure to do so could result in injury or death to a person in your care. No deviceis a substitute for proper nursing care.0163-392-DETL Listed 3064149Conforms to UL1069Certified to CSA STD C22.2 NO.205
Contact usThank you for purchasing your TABS system. If you have questionsabout your TABS monitoring system or would like to speak to TABS Customer Service, contact your local dealer, or call:TABS Mobility Monitors: 800-824-2996FCC ID: HCQ 3B6UMXF Canada: 2309 101 597This device complies with Part 15 of the FCC rules. Operation is subject to the following two conditions:1) this device may not cause harmful interference, and 2) this device must accept any interferencereceived, including interference that may cause undesired operation.Changes or modifications not expressly approved by the party responsible for FCC compliance couldvoid the user's authority to operate the equipment.For Canadian customers: "This digital apparatus does not exceed the class A limit for radio noiseemissions from digital apparatus as set out in the interference causing equipment standard entitled"Digital Apparatus" "ICES-003 of Industry Canada".All content herein is the property of The Stanley Works, its Affiliates, or their content suppliers and isprotected by United States and international copyright laws. The compilation of all content is likewisethe exclusive property of The Stanley Works (or the Affiliate identified in any copyright notice) and isprotected by United States and international copyright laws.The trademarks, service marks and logos (the 'Trademarks') used and displayed in this publication areregistered and unregistered Trademarks of The Stanley Works, its Affiliates and others. Nothing hereinshould be construed as granting, by implication, estoppel or otherwise, any license or right to use anyTrademark displayed herein without the prior consent of the Trademark owner. ARIAL, AUTISM ALLY,AUTISM ALLY design, the CATCH-ALL design, SENIOR TECHNOLOGIES, TABS, TIM,WANDERGUARD, and the WANDERGUARD design are some of the registered and unregisteredtrademarks owned by Stanley Logistics, Inc. and/or its Affiliates ("Stanley Trademarks"). StanleyTrademarks may not be used in connection with any product or service that is not manufactured by orunder license from The Stanley Works or its appropriate Affiliate. 2007 Printed in USA
Table of ContentsWarnings and cautions . . . . . . . . . . . . . . . . . . . . . . . . . . . . . . . . . . . 2Check your shipment . . . . . . . . . . . . . . . . . . . . . . . . . . . . . . . . . . . . 4How the TABS mobility monitor works . . . . . . . . . . . . . . . . . . . . . 5Installing the wall bracket (Model 25222) . . . . . . . . . . . . . . . . . . . . . 6Installing the wire bracket (Model 25223) . . . . . . . . . . . . . . . . . . . . . 9Installing the battery . . . . . . . . . . . . . . . . . . . . . . . . . . . . . . . . . . . 10Alarm options . . . . . . . . . . . . . . . . . . . . . . . . . . . . . . . . . . . . . . . . . 12How the TABS Disposable Patient Specific pressure pads work . . . 16Troubleshooting pressure pads . . . . . . . . . . . . . . . . . . . . . . . . . . . . . 21Nurse Call interface . . . . . . . . . . . . . . . . . . . . . . . . . . . . . . . . . . . . . 22Replacement parts and accessories. . . . . . . . . . . . . . . . . . . . . . . . . . 23TABS standard limited warranty . . . . . . . . . . . . . . . . . . . . . . . . . . 24Daily checklist for TABS pressure pads . . . . . . . . . . . . . . . . . . . . . 25
WARNINGRead and follow these Installation instructions, particularly the warnings and cautions,before using your TABS mobility monitor. Failure to do so may result in injury or death toa person in your care.Test your TABS monitor for proper operation before each use and: inspect the Dual Lock fastener for any signs of wear. listen to the voice message to make sure it is understandable and appropriate. replace any components with signs of wear or damage immediately. make sure nurse call interface cord is securely in place. make sure the monitor is held securely to the wall or wheelchair bracketUse your monitor in conjunction with your facility’s fall management program. TABS monitors are not a substitute for proper nursing care. The effectiveness of the TABS systemrelies entirely on an immediate response by the caregiver to the TABS alarm.The TABS mobility monitor will not stop a person from leaving a bed, chair, wheelchair orroom. It is intended only to alert a caregiver that a person may need assistance. Otherinterventions may still be required for some people.The TABS mobility monitor and TABS Disposable Patient-Specific pressure pads can bedefeated by a cognitively aware person, a person with only a few moments of lucidity or anuncooperative person. Properly assess each individual before the TABS mobility monitor isused.Visual monitoring by caregivers is required. TABS Disposable Patient-Specific pressurepads may not be suitable for all high risk persons; restraints may be required for somepeople.A 9V alkaline battery must always be installed for proper operation of the TABS monitoringsystem. The battery must be installed for the low battery alert to sound when the battery islow and to act as a battery back-up in the event of power loss on the TABS monitor.An intermittent "chirp" indicates a low battery. Replace the battery immediately. Use only9V alkaline batteries. The TABS monitor does not recharge batteries.Resident weight may affect proper operation. TABS pressure pad models 26000, 26100,26120, 26550, and 26560 are not recommended for persons weighing less than 60 lbs.Models 26500 and 26501 below mattress pads are not recommended for persons weigingless than 100lbs.Test your pressure pads and TABS monitor before each use. Make sure your TABS mobility monitor is working properly. Do no use the 14-day Disposable Patient-Specific padfor more than 14 days. If the pressure pads are no longer working discard themimmediately.Be certain that your protocols direct staff to log the 14-day ‘Date Put In Use’ date in theblank provided on the pad itself AND in the resident’s chart. If the pad is used on morethan one resident, the original ‘Date Put In Use’ date must be transferred from chart tochart.If the cord is unplugged from the monitor and the alarm options have been set to nursecall only, the TABS monitor reverts to a local alarm. The nurse call interface cord must beplugged into the nurse call system at all times.2
CAUTIONUse care when connecting or disconnecting the TABS monitor to the nurse call system.Gently remove or connect plugs. Pulling on the cord may damage it and result in systemfailure.Connect only pressure pads to the jack on the right and connect only nurse call interfacecords to the jack on the left on the bottom of the monitor. An alarm will sound if either itemis connected to the incorrect jack. Failure to connect a pressure pad or a nurse call cord tothe proper jack will cause improper operation of the monitor.The TABS Disposable Patient-Specific pressure pads are designed to withstand normalwear and tear for a period of 14-days. Beyond this time, the pad may fail and fail withoutwarning due to prolonged use and other factors, e.g. bending, exposure to moisture,punctures, repeated cord pulls, connector damage, etc.Do not immerse in liquid or use the pad if it has been immersed in liquid. Discard the padimmediately if exposed to liquids.Keep the pressure pads flat at all times. If the pressure pad is folded it may not functionproperly. Do not use the pressure pad if it has been folded.TABS Disposable Patient-Specific pressure pads are designed for use with TABS monitors only. Do not substitute any other fall monitoring devices.Do not open the TABS case for any reason, or remove the four screws that hold the casetogether. The case is sealed and if the seal is broken, the warranty will be voided.Use only the Dual Lock fastener or screws that came with your shipment to mount themonitor brackets. Non-conforming fasteners may hinder the device's effectiveness.Use only the power supply that is shipped with the monitor by Stanley-Senior Technologies.Failure to do so may cause improper operation or damage to the TABS monitor.Do not use modular T-connectors. If modular T-connectors are used, the device will notoperate properly.3
Check your shipmentYou should have: One TABS mobility monitor One 9V battery Four #4 x 1" long sheet metal screws Four #4-8 plastic wall anchors One 2" x 21/2" piece of Dual Lock fastenerModel # 25222 includes the following: One wall bracketModel # 25223 includes the following: One wire bracketOptional items: Nurse call interface cord TABS pressure pads 12VDC power supply Wheelchair bracketTABSmobility monitor4Wall mount bracket(Model 25222)Wire bracket(Model 25223)
How the TABS mobility monitor works (Models 25222 and25223)Your TABS monitor, when used with a TABS pad, is designed to helpreduce the risk of falls by alerting caregivers when a patient or residentis leaving a bed, chair, or wheelchair. Operation is simple. Mount themonitor on a wall using the wall bracket or on a headboard using thebed bracket. When the resident’s weight is removed from the pressurepad the alarm will sound. To reset the monitor press the RESET buttonor position the patient back on the pad. (Because TABS products areused in both hospitals and long term care settings, the terms “patient”and “resident” will be used interchangeably throughout the manual.)Reset ButtonThe TABS monitor has four distinct alarm tones. In addition, you canopt to have the alarm be silent at the bed, as long as the TABS unit isconnected to your facility’s nurse call system. Alarm options aredetermined by the position of rocker switches in the batterycompartment. The monitor also has audio recording capability. Finally,the TABS monitor is designed for dual monitoring, i.e. you can use apressure pad and a nurse call cord at the same time.Low battery alertThe TABS monitor is equipped with a "low battery alert" (anintermittent chirping sound) which reminds you to replace the batteryimmediately. Listen for the alert each time you use or test your monitor.If you hear the low battery alert, replace the battery immediately.The TABS monitor must have a functional 9v alkaline battery tooperate. A plug-in power supply can be used to extend the life of thebattery. The low battery alert will sound when a weak 9V battery isinstalled or when no battery is installed even when the plug-in powersupply is used. The TABS monitor will not function without afunctional 9V alkaline battery installed.5
Installing the wall bracket (Model 25222)TABS monitors should be mounted on a surface that is smooth andflat. The TABS wall bracket can be mounted with screws or with DualLock fastener. Choose the method that is appropriate for yourparticular environment. See "A word about Dual Lock fastener."Mounting the bracket with screws:You will need: level pencil drill with 3/16" bit hammer Phillips screwdriver1.2.3.4.5.6Use the level to position the bracket straight on the mountingsurface. Be sure to leave enough room above the bracket forremoval of the monitor.Use the bracket as a template and pencil in the screw holepositions.Drill the anchor holes with a 3/16" bit.Hammer in the plastic wall anchors until they are flush with themounting surface.Align the holes in the bracket to the holes you have drilled andattach the bracket using four of the 4 x 1" screws.
Mounting the bracket with Dual Lock fastener1.2.3.Clean the surface with rubbing alcohol and clean rag. Let it drythoroughly before beginning your installation. Use the level toposition the bracket straight on the mounting surface. Be sure toleave enough room above the bracket for removal of the monitorPeel off the film on the back ofthe 21/2" piece of Dual Lock fastener. Press the fastenerfirmly to the wall.Line up the piece of DualLock fastener on theheadboard with the two pieceson the bracket (Figure 1).Fasten them together byRecessedDual Lock areasfirmly pressing. You willfastenerhear a "click" when the DualLock fastener is properlyFigure 1mounted.A word about Dual Lock fastenerAccording to the manufacturer, if Dual Lock fastener is used properlyit can withstand up to 1,000 closures before replacement is necessary.Inspect each piece of Dual Lock fastener regularly and replace eachpiece at the first sign of wear.A piece of film covers the adhesive on the backof each piece of Dual Lock fastener (Figures 2and 3). The adhesive is very strong; – it wasmanufactured for one mount only so never reusea piece of Dual Lock fastener. If you remove apiece of Dual Lock fastener from the mountingsurface or bracket, replace it with a new piece ofDual Lock fastener.Figure 2To remove Dual Lock fastener:The adhesive on Dual Lock fastener bonds wellenough to the mounting surface that there is apossibility it may damage your wall when youremove it. Gently grab a corner of the fastenerand ease your fingers under it. Roll the DualLock fastener slowly off the mounting surface.Figure 37
Inserting and removing the monitorAfter the bracket has been mounted and your alarm options have beenset, insert your TABS monitor into the bracket.1. Slide the monitor into the bracket. The rails on the back of themonitor fit into the slots on the plate. When you slide the twotogether, you will hear a "click" when it is properly locked into place.The front of the bracket should face the resident.2. Check to make sure the monitor is securely in place by pulling itgently upward.To remove the monitor1. Gently press the release lever on the bottom of the wall bracket withone hand toward the mounting surface.2. While pushing the release lever with one hand, slide the monitor upout of the wall bracket.Deterring removal of the TABS monitor from the bracketIn the event the TABS monitor is removed from the slide lock bracketor tampered with by residents or other non-authorized persons, you maywish to make it more difficult to remove the TABS monitor from thebracket. This can be accomplished by breaking off the lower portion ofthe release tab. Once the release tab has been removed, a pen orsimilarly shaped object carried by staff will need to be inserted into therelease catch before you can slide the TABS monitor out of the bracket.1. If the bracket has already been installed, remove it from the wall.2. Firmly hold the upper portion of the release tab with one hand.3. The release tab is scored with a mark (Figure 4). Carefullyposition pliers along the lower side of the score mark.4. Bend the tab backward until it breaks off (Figure 5).PliersScore Mark8Figure 4Figure 5
Installing the wire bracket (Model 25223)To attach the bracket to the TABS monitor, position the bracket so thatone of the hooks clips over the bottom of one of the rails on thebackside of the monitor. By pulling on the top end of the bracket, it willclip over the top of the rail. Do the same on the other side of themonitor. You can then place the monitor over the back of a chair. Seealso Figure 6.Slide wire bracketover rails asshownFigure 6Wheelchair and door applicationsYour TABS mobility monitor can also be used to monitor a person in awheelchair or to monitor an interior door. Contact your local distributoror call TABS Customer Service at 800-824-2996 to obtain theWheelchair Bracket Assembly, Easy-Clip Wheel Chair Bracket, or theDoor Mount Kit.9
Installing the batteryWARNINGDo not pull on the battery snap wires when installing and removingbatteries. Use care when removing and installing your battery to preventany damage to the system that may result in injury or death to theperson in your care.USE 9V ALKALINE BATTERIES ONLY when replacing batteries. Failureto do so may affect the operation of the low battery alert, which couldresult in injury or death to a person in your care.DO NOT USE RECHARGEABLE BATTERIES. THE TABS MONITOR DOESNOT RECHARGE BATTERIES.Your TABS monitor is shipped without the battery in place.To insert the battery:1. Remove the battery cover (Figure 7).2. Lift the battery snap gently as you attach the battery to the snap.Do not pull on the wires.3. The battery compartment was designed to hold the battery snugly inplace. Replace the battery so that the battery snap wires are out ofsight on the bottom of the compartment.4. Replace the battery cover.5. Test the monitor by applying pressure to (for 3 seconds) andreleasing pressure from the TABS pad in the manner in which youwill use it with your patient or resident. The alarm will sound. See"Troubleshooting" if your alarm fails to sound.Figure 710
Connecting optional plug-in power supplyThere is a red indicator light on the front of the TABS monitorindicating power is being supplied by the plug-in power supply (Figure8). A 9V alkaline battery needs to be installed at all times even whileusing the plug-in power supply. This will provide a back-up if ACpower is interrupted. A low battery indicator will alarm if the batterypower falls below safety requirements.Insert plug-in power supply into power supply jack on left side ofmonitor (Figure 8). The red indicator light on the front of the case willbe on when the monitor is connected to the plug-in power supply.Use only the power supply that is shipped with the monitor by StanleySenior Technologies. Failure to do so may cause improper operation ordamage to the TABS monitor.RED INDICATORLIGHTINSERT POWERSUPPLY HEREFigure 811
Alarm optionsAll options are set by adjusting a rowof four rocker switches under thebattery cover (Figure 9). To setoptions, remove the battery cover.Follow the diagrams below(Figure 10) for each option you select.When your options are set, replace thebattery cover and test the monitor.LightMicrophoneBatteryThe position of the number 1 andnumber 2 switches determines thetone. The number 3 switch turns thelocal alarm on and off (use only withnurse call interface). The number 4switch is for voice mode.Figure 9Use a ballpoint pen to move the switches.Option 2Option 1Standard alarmRepeated fast beepOption 4Option 3High-pitched steady beep Low-pitched steady beepFigure 1012Rocker switchesBlackrecordbutton
Local alarm on/offWARNINGIf the nurse call interface cord is unplugged from the monitor and thealarm options have been set to nurse call only, the TABS monitorreverts to a local alarm. The nurse call interface cord must be pluggedinto the nurse call system at all times.Before each use and periodically during the day, check the cord tomake sure it is securely in place. Failure to do so may result in injury ordeath to a person in your care.If you are using the nurse call interface cord, you can set your TABS monitor for a local alarm and nurse call alarm (Figure 11, Option A) ornurse call alarm only (Figure 11, Option B). The nurse call interfacecord must be in place in the TABS monitor to make these selections.If the cord is detached from the monitor, the monitor will automaticallyrevert to the local alarm mode. To set the monitor in nurse call onlymode, move the number 3 rocker switch to the right position.Option AOption BLocal alarm andNurse callLocal alarm offNurse call onlyFigure 1113
Voice alarmYour TABS monitor (Figure 12) has audio recording capability. Youcan record a message up to 10 seconds in length.To record a voice message:1. Remove the battery cover.2. Push down the black RECORD button and hold it down until youare finished recording. The light will be on during this timeindicating the monitor is recording (Figure 12).3. Hold the monitor 8" - 12" from your mouth and record yourmessage. Speak slowly and enunciate your words.4. Replace the battery cover.5. When you have finished recording, review your message by applyingpressure (for 3 seconds) to, then releasing pressure from the TABS pad in the manner in which you will use it with your patient orresident. Your message should be easily understood and heard. If it isnot, re-record by following Steps 1 through 3.Note: By rapidly removing and re-applying pressure to chair or bedpads while connected to the TABS mobility monitors model #25222or 25223, may cause the monitor to bypass the voice alert and godirectly to sounding the audible alarm.LightMicrophoneRocker switchesBlackrecordbuttonBattery compartmentFigure 1214
Voice options (Figure 13) To silence the local alarm without voice message, push switches 3 &4 to the right. The nurse call cord must be connected (Option A). For local alarm without voice message, push switch 3 to the left andswitch 4 to the right (Option B). For local alarm with voice message, move both switches 3 and 4 tothe left (Option C). If you want the voice message to repeat itself, move the number 3rocker switch to the right and the number 4 rocker switch to the left(Option D). The nurse call cord must be connected for the messageto repeat.Option ALocal and voice message off(nurse call cord connected)Option BVoice message offOption CVoice and localalarm onOption DRepeated voice message(nurse call connected)Figure 13Testing the TABS monitorWARNINGTest your TABS mobility monitor and pressure pad before each use toensure that it is working properly. Failure to do so may result in injuryor death to a person in your care.1. Before each use, test your TABS mobility monitor.2. Test the system by pressing firmly on the pressure pad. The monitorwill “chirp” when weight is first applied to the pad to indicate themonitor is armed. After applying constant pressure for at least 3seconds, remove the pressure and the alarm will sound. Reset thealarm by pressing the RESET button on the TABS monitor. Formore instructions on how to use the pads, refer to sections“Instructions for chair pressure pad use” and “Instructions forbed pressure pad use” for your pad type.15
How the TABS 14-day Disposable Patient-Specific pressure pads workWARNINGThe TABS Disposable Patient-Specific pressure pads were designed towithstand normal wear and tear for a period of 14 days. Do not usebeyond this period. Beyond this period, the pad may fail and failwithout warning due to prolonged use and other factors, e.g. bending,exposure to moisture, punctures, repeated cord pulls, connectordamage, etc.Be certain that your protocols direct staff to log the “DATE PUT IN USE”in the blank provided on the pad itself AND in the resident’s chart. If thepad is used on more than one resident, the original removal date mustbe transferred from chart to chart.The TABS monitoring system is designed to alert caregivers whensomeone is leaving a bed, chair or wheelchair. The TABS DisposablePatient-Specific 14-day pad is placed on a bed, chair or wheelchairaccording to the instructions included with the pad. The cord isconnected to the TABS monitor. See “Alarm Options” in this manualto set the desired alarm option.TABS pads are designed for use with TABS monitors only. Do notsubstitute any other fall monitoring devices. TABS pads are the onlypressure pads that can be used with the TABS monitor.The TABS monitor is "non-latching." The alarm will stop if the residentreturns to the bed or chair. The alarm is quickly and easily reset bypressing the reset button or reapplying pressure to the pressure pad.The TABS monitor has a built-in jack so that a pressure pad can beused along with a nurse call interface cord.16
Instructions for chair pressure pad use1. Place the pressure pad in the center of the chair seat. The side of thepressure pad with the cord on it should be at the back of the chairseat (Figure 14). Do not place the cord on top of or underneath thepressure pad.2. Plug the TABS pressure pad cord into the right jack on the bottomof the TABS monitor (Figure 15). An alarm will sound if a pad isplugged into the nurse call (left) jack and weight is applied to thepad.Note: For the timed chair pad model 26120, the timer will begincounting down when plugged into a monitor for the first time. Thetimer will only activate when used with models 25022, 25023,25025, 25222, or 25223.3. The monitor will “chirp” when weight is first applied to the pad toindicate the monitor is armed. Test the system by pressing firmly onthe pressure pad for 3 seconds. When you remove the pressure, thealarm will sound. Reset the alarm by pressing the RESET button onthe TABS monitor.4. Place the resident on the pressure pad. The pressure pad should becentered under the resident’s body.5. When the resident leaves the pressure pad, the alarm will sound.6. You can reset the alarm by pressing the reset button on the front ofthe monitor or by replacing the weight back on the pad.Pressure pad onchair seatinsert cord hereCord extendsout the backFigure 14Figure 1517
Instructions for bed pressure pad useWARNINGResident weight may affect proper operation. TABS pressure padmodels 26000, 26100, 26120, 26550, and 26560 are not recommendedfor persons weighing less than 60 lbs. Models 26500 and 26501 belowmattress pads are not recommended for persons weiging less than100lbs.1. The TABS Disposable Patient-Specific pad is designed for single patientuse. Once your patient has left the facility, dispose of the pad. For infectioncontrol purposes during the patient’s stay, however, the pad can bedisinfected with most common cleaners.2. Place the pressure pad across the width of the mattress.3. Position the pressure pads so that the resident’s buttocks will be over the topof the pad.4. Put the bed sheets over the top of the bed pad. Note: Use of a mattressoverlay or bed pad may affect the proper operation of the bed pressure pad.Follow test procedure found in the section “Testing the TABS monitor.”5. Plug the bed pressure pad cord into the right jack on the bottom of theTABS monitor (Figure 16). An alarm will sound if a pad is plugged intothe nurse call (left) jack and weight is applied to the pad.Note: For the timed bed pad model 26560, the timer will begin countingdown when plugged into a monitor for the first time. The timer will onlyactivate when used with models 25022, 25023, 25025, 25222, or 25223.6. Run the cord along the mattress and bed frame. Be careful not to get thecords in the way of any moving parts on the bed. Otherwise, the movingparts could sever or entangle the cord and prevent it from working.7. Mount the TABS mobility monitor on the headboard or wall. Refer to“Installing your TABS monitoring system” in this manual for moredetailed information on mounting the monitor. If you use the metal bracket,remember to place the TABS monitor facing the wall, away from thepatient.8. The monitor will “chirp” when weight is first applied to the pad to indicatethe monitor is armed. Test the system by pressing firmly on the pressure padfor 3 seconds. When you remove the pressure, the alarm must sound. Resetthe alarm.9. Have the resident lie normally on the mattress. The resident’s body weightactivates the system.10. The alarm must sound when the resident’s body weight is removed from thepressure pad.11. You can reset the alarm by pressing the reset button on the front of themonitor or by replacing the weight back on the pad.18
insert cord hereFigure 16MattressAlternatelocationNormal pressurepad locationFigure 1719
Testing the systemTest the TABS monitoring system before each use and inspect thepressure pads and TABS monitor regularly to make sure they are notdamaged. Test the pressure pads by pressing firmly on the pressure padfor 3 seconds. When you remove the pressure, the alarm will sound.Reset the alarm using the reset button on the monitor or by positioningthe patient back on the pad.Maintaining the TABS mobility monitor Clean soiled areas on the monitor and bracket with a damp rag andmild detergent. . The Dual Lock fastener may be cleaned with most standard medicalvirucidal disinfectant. Spray the disinfectant on the Dual Lock fastener and allow it to dry thoroughly. If necessary, a toothbrushmay be used to gently scrub the "mushrooms." Inspect your TABS monitor and all components including DualLock fastener and the wall bracket regularly. If there are any signsof wear or damage, replace the component immediately. Call yourTABS Representative at 800-824-2996 if you do not already havereplacement parts on hand. Replace the battery as soon as the low battery alert sounds.Cleaning the pressure pad Clean soiled areas of cord and pressure pad with a clean cloth andwater or a vinyl-tolerant solution. Do not immerse pressure pad in liquid of any kind.20
Troubleshooting pressure padsIf the alarm does not sound when the resident leaves the chair or bed: Check the TABS monitor. Are you using a 9V alkaline battery andhas it been installed properly? Is the battery still “good”? If not,remove the battery and install a new 9V alkaline battery followingthe instructions in this manual. Check the cord. Is it connected to the TABS monitor and is theconnection secure? If not, connect the cord properly. Is the resident under 60 pounds? The TABS pads are not designedfor residents weighing less then 60 lbs. Is the resident sitting properly on the pressure pad? If not, repositionthe resident or the pressure pad so that the pad is centered under theresident’s body. Is the pressure pad connected to the jack on the right side of themonitor. If not, reconnect the pad plug to the proper jack on themonitor.If the alarm sounds when the resident has not left the bed or chair: Check to see that a fresh 9V alkaline battery is being used. If not,replace it. Check to see that the pressure pad cord is attached to the TABS monitor. Check to see that the pressure pad is positioned correctly under thepatient.If the alarm sounds periodically: Check the battery. The sound you hear may be the
How the TABS mobility monitor works (Models 25222 and 25223) Your TABS monitor, when used with a TABS pad, is designed to help reduce the risk of falls by alerting caregivers when a patient or resident is leaving a bed, chair, or wheelchair. Operation is simple. Mount the monitor on a wall using the wall bracket or on a headboard using .