Transcription
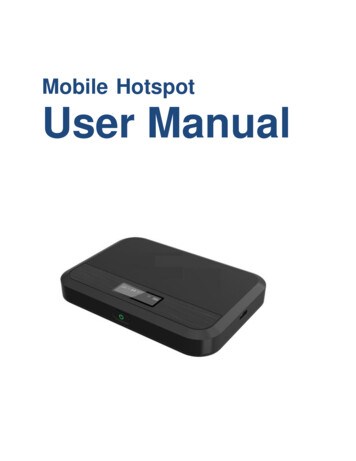
AT&T Mobile Hotspot Elevate 4GUser Guide2400154Rev 2
PrefaceImportantNoticeDue to the nature of wireless communications, transmission and reception of datacan never be guaranteed. Data may be delayed, corrupted (i.e., have errors) or betotally lost. Although significant delays or losses of data are rare when wirelessdevices such as the AT&T Mobile Hotspot Elevate 4G are used in a normalmanner with a well-constructed network, the AT&T Mobile Hotspot Elevate 4Gshould not be used in situations where failure to transmit or receive data couldresult in damage of any kind to the user or any other party, including but notlimited to personal injury, death, or loss of property. Sierra Wireless accepts noresponsibility for damages of any kind resulting from delays or errors in datatransmitted or received using the AT&T Mobile Hotspot Elevate 4G, or for failureof the AT&T Mobile Hotspot Elevate 4G to transmit or receive such data.Safety andHazardsDo not operate the AT&T Mobile Hotspot Elevate 4G in areas where blasting is inprogress, where explosive atmospheres may be present, near medicalequipment, near life support equipment, or any equipment which may besusceptible to any form of radio interference. In such areas, the AT&T MobileHotspot Elevate 4G MUST BE POWERED OFF. The AT&T Mobile HotspotElevate 4G can transmit signals that could interfere with this equipment.Do not operate the AT&T Mobile Hotspot Elevate 4G in any aircraft, whether theaircraft is on the ground or in flight. In aircraft, the AT&T Mobile Hotspot Elevate4G MUST BE POWERED OFF. When operating, the AT&T Mobile HotspotElevate 4G can transmit signals that could interfere with various onboardsystems.The driver or operator of any vehicle should not operate the AT&T Mobile HotspotElevate 4G while in control of a vehicle. Doing so will detract from the driver oroperator's control and operation of that vehicle. In some states and provinces,operating such communications devices while in control of a vehicle is an offence.Limitation ofLiabilityThe information in this manual is subject to change without notice and does notrepresent a commitment on the part of Sierra Wireless. SIERRA WIRELESS ANDITS AFFILIATES SPECIFICALLY DISCLAIM LIABILITY FOR ANY AND ALLDIRECT, INDIRECT, SPECIAL, GENERAL, INCIDENTAL, CONSEQUENTIAL,PUNITIVE OR EXEMPLARY DAMAGES INCLUDING, BUT NOT LIMITED TO,LOSS OF PROFITS OR REVENUE OR ANTICIPATED PROFITS OR REVENUEARISING OUT OF THE USE OR INABILITY TO USE ANY SIERRA WIRELESSPRODUCT, EVEN IF SIERRA WIRELESS AND/OR ITS AFFILIATES HAS BEENADVISED OF THE POSSIBILITY OF SUCH DAMAGES OR THEY AREFORESEEABLE OR FOR CLAIMS BY ANY THIRD PARTY.Notwithstanding the foregoing, in no event shall Sierra Wireless and/or itsaffiliates aggregate liability arising under or in connection with the Sierra Wirelessproduct, regardless of the number of events, occurrences, or claims giving rise toliability, be in excess of the price paid by the purchaser for the Sierra Wirelessproduct.Rev 2 Mar.123
PrefacePatentsThis product may contain technology developed by or for Sierra Wireless Inc. Thisproduct includes technology licensed from QUALCOMM . This product ismanufactured or sold by Sierra Wireless Inc. or its affiliates under one or morepatents licensed from InterDigital Group.Copyright 2012 Sierra Wireless. All rights reserved.TrademarksSierra Wireless , and the Sierra Wireless logo are trademarks of SierraWireless. LTE is a trademark of ETSI, AT&T, the AT&T logo and all other AT&Tmarks contained herein ar trademarks of AT&T Intellectual Property and/or AT&Taffiliated companies. All other marks contained herein are the property of theirrespective owners.MiniUPnPdCopyright (c) 2006-2011, Thomas BERNARD. All rights reserved.Redistribution and use in source and binary forms, with or without modification,are permitted provided that the following conditions are met:· Redistributions of source code must retain the above copyright notice,this list of conditions and the following disclaimer.· Redistributions in binary form must reproduce the above copyright notice,this list of conditions and the following disclaimer in the documentationand/or other materials provided with the distribution.· The name of the author may not be used to endorse or promote productsderived from this software without specific prior written permission.THIS SOFTWARE IS PROVIDED BY THE COPYRIGHT HOLDERS ANDCONTRIBUTORS "AS IS" AND ANY EXPRESS OR IMPLIED WARRANTIES,INCLUDING, BUT NOT LIMITED TO, THE IMPLIED WARRANTIES OFMERCHANTABILITY AND FITNESS FOR A PARTICULAR PURPOSE AREDISCLAIMED. IN NO EVENT SHALL THE COPYRIGHT OWNER ORCONTRIBUTORS BE LIABLE FOR ANY DIRECT, INDIRECT, INCIDENTAL,SPECIAL, EXEMPLARY, OR CONSEQUENTIAL DAMAGES (INCLUDING, BUTNOT LIMITED TO, PROCUREMENT OF SUBSTITUTE GOODS OR SERVICES;LOSS OF USE, DATA, OR PROFITS; OR BUSINESS INTERRUPTION)HOWEVER CAUSED AND ON ANY THEORY OF LIABILITY, WHETHER INCONTRACT, STRICT LIABILITY, OR TORT (INCLUDING NEGLIGENCE OROTHERWISE) ARISING IN ANY WAY OUT OF THE USE OF THIS SOFTWARE,EVEN IF ADVISED OF THE POSSIBILITY OF SUCH DAMAGE.Rev 2 Mar.124
ContentsGet Started . . . . . . . . . . . . . . . . . . . . . . . . . . . . . . . . . . . . . . . . . . . . . . . . . . . . .8Know Your Device . . . . . . . . . . . . . . . . . . . . . . . . . . . . . . . . . . . . . . . . . . . . . 8Manage your device and settings . . . . . . . . . . . . . . . . . . . . . . . . . . . . . . .8Power Button . . . . . . . . . . . . . . . . . . . . . . . . . . . . . . . . . . . . . . . . . . . . . . .9Mute Switch . . . . . . . . . . . . . . . . . . . . . . . . . . . . . . . . . . . . . . . . . . . . . . . .9LCD . . . . . . . . . . . . . . . . . . . . . . . . . . . . . . . . . . . . . . . . . . . . . . . . . . . . . .9Power LED . . . . . . . . . . . . . . . . . . . . . . . . . . . . . . . . . . . . . . . . . . . . . . . . 12Included Accessories . . . . . . . . . . . . . . . . . . . . . . . . . . . . . . . . . . . . . . . . 12Optional Accessories . . . . . . . . . . . . . . . . . . . . . . . . . . . . . . . . . . . . . . . . 12Power Sources . . . . . . . . . . . . . . . . . . . . . . . . . . . . . . . . . . . . . . . . . . . . . 12Additional LCD screens . . . . . . . . . . . . . . . . . . . . . . . . . . . . . . . . . . . . . . . . 13Set Up and Connect to the Internet . . . . . . . . . . . . . . . . . . . . . . . . . . . . . . . 13Connect to the Internet . . . . . . . . . . . . . . . . . . . . . . . . . . . . . . . . . . . . . .14AirCard Watcher App for Smartphones and Tablets . . . . . . . . . . . . . . . . 15Homepage . . . . . . . . . . . . . . . . . . . . . . . . . . . . . . . . . . . . . . . . . . . . . . . 15Security Credentials . . . . . . . . . . . . . . . . . . . . . . . . . . . . . . . . . . . . . . . . . 17Use Your Mobile Hotspot . . . . . . . . . . . . . . . . . . . . . . . . . . . . . . . . . . . . . . . . . 18Set Auto Connect Options . . . . . . . . . . . . . . . . . . . . . . . . . . . . . . . . . . . . . . 18View Data Usage . . . . . . . . . . . . . . . . . . . . . . . . . . . . . . . . . . . . . . . . . . . . . 19Enable / Disable Wi-Fi . . . . . . . . . . . . . . . . . . . . . . . . . . . . . . . . . . . . . . . . . 20View / Block Connected Users . . . . . . . . . . . . . . . . . . . . . . . . . . . . . . . . . . . 20Add a Wireless Device to your Wi-Fi Network . . . . . . . . . . . . . . . . . . . . . . . 21View SMS Messages and Alerts . . . . . . . . . . . . . . . . . . . . . . . . . . . . . . . . . 23Use the GPS Feature . . . . . . . . . . . . . . . . . . . . . . . . . . . . . . . . . . . . . . . . . . 24Battery Settings . . . . . . . . . . . . . . . . . . . . . . . . . . . . . . . . . . . . . . . . . . . . . . 25Extend Battery Life . . . . . . . . . . . . . . . . . . . . . . . . . . . . . . . . . . . . . . . . . .25Set Audio Alerts . . . . . . . . . . . . . . . . . . . . . . . . . . . . . . . . . . . . . . . . . . . . . . 27Change Device Security Settings. . . . . . . . . . . . . . . . . . . . . . . . . . . . . . . . . 28View Details About Your Mobile Hotspot . . . . . . . . . . . . . . . . . . . . . . . . . . . 29Rev 2 Mar.125
ContentsUse the microSD Card to Share Files over Wi-Fi. . . . . . . . . . . . . . . . . . . . . 29Before you Begin . . . . . . . . . . . . . . . . . . . . . . . . . . . . . . . . . . . . . . . . . . . 30Share or Access Files over Wi-Fi . . . . . . . . . . . . . . . . . . . . . . . . . . . . . . . 31Recharge the Battery . . . . . . . . . . . . . . . . . . . . . . . . . . . . . . . . . . . . . . . . . . 33Update the Firmware . . . . . . . . . . . . . . . . . . . . . . . . . . . . . . . . . . . . . . . . . . 34Replace the SIM Card . . . . . . . . . . . . . . . . . . . . . . . . . . . . . . . . . . . . . . . . . 36Advanced Settings . . . . . . . . . . . . . . . . . . . . . . . . . . . . . . . . . . . . . . . . . . . . . . 38Do not Automatically Install Driver for USB Tethering . . . . . . . . . . . . . . . . . 38Export / Import Router Options. . . . . . . . . . . . . . . . . . . . . . . . . . . . . . . . . . . 39Set Display Options . . . . . . . . . . . . . . . . . . . . . . . . . . . . . . . . . . . . . . . . . . . 39Set Audio Alerts . . . . . . . . . . . . . . . . . . . . . . . . . . . . . . . . . . . . . . . . . . . . . . 40View and Save Device Information . . . . . . . . . . . . . . . . . . . . . . . . . . . . . . . 41View WAN Information . . . . . . . . . . . . . . . . . . . . . . . . . . . . . . . . . . . . . . . . . 42Set Connection Preferences . . . . . . . . . . . . . . . . . . . . . . . . . . . . . . . . . . . . 43Enable SIM Security. . . . . . . . . . . . . . . . . . . . . . . . . . . . . . . . . . . . . . . . . . . 44View Wi-Fi Status and List of Connected Devices . . . . . . . . . . . . . . . . . . . . 45Set Wi-Fi Network Options . . . . . . . . . . . . . . . . . . . . . . . . . . . . . . . . . . . . . . 45Set Wi-Fi Security Options . . . . . . . . . . . . . . . . . . . . . . . . . . . . . . . . . . . . . . 46Set MAC Filter Mode . . . . . . . . . . . . . . . . . . . . . . . . . . . . . . . . . . . . . . . . . . 47Enable Port Forwarding . . . . . . . . . . . . . . . . . . . . . . . . . . . . . . . . . . . . . . . . 48Enable Port Filtering. . . . . . . . . . . . . . . . . . . . . . . . . . . . . . . . . . . . . . . . . . . 48Enable VPN Passthrough. . . . . . . . . . . . . . . . . . . . . . . . . . . . . . . . . . . . . . . 49Enable DMZ . . . . . . . . . . . . . . . . . . . . . . . . . . . . . . . . . . . . . . . . . . . . . . . . . 50Enable Universal Plug and Play . . . . . . . . . . . . . . . . . . . . . . . . . . . . . . . . . . 51Set Router LAN Options. . . . . . . . . . . . . . . . . . . . . . . . . . . . . . . . . . . . . . . . 51Frequently Asked Questions . . . . . . . . . . . . . . . . . . . . . . . . . . . . . . . . . . . . . . 53Troubleshooting . . . . . . . . . . . . . . . . . . . . . . . . . . . . . . . . . . . . . . . . . . . . . . . . 56Reset the Mobile Hotspot . . . . . . . . . . . . . . . . . . . . . . . . . . . . . . . . . . . . . . . 58Rev 2 Mar.126
ContentsAlerts . . . . . . . . . . . . . . . . . . . . . . . . . . . . . . . . . . . . . . . . . . . . . . . . . . . . . . 60Specifications . . . . . . . . . . . . . . . . . . . . . . . . . . . . . . . . . . . . . . . . . . . . . . . . . . 63Mechanical Specifications . . . . . . . . . . . . . . . . . . . . . . . . . . . . . . . . . . . . . . 63Environmental Specifications . . . . . . . . . . . . . . . . . . . . . . . . . . . . . . . . . . . . 63Regulatory and Safety Information . . . . . . . . . . . . . . . . . . . . . . . . . . . . . . . . . 64Notice . . . . . . . . . . . . . . . . . . . . . . . . . . . . . . . . . . . . . . . . . . . . . . . . . . . . . . 64Safety and Hazards . . . . . . . . . . . . . . . . . . . . . . . . . . . . . . . . . . . . . . . . . . . 64Regulatory Information for North America . . . . . . . . . . . . . . . . . . . . . . . . . . 65Index . . . . . . . . . . . . . . . . . . . . . . . . . . . . . . . . . . . . . . . . . . . . . . . . . . . . . . . . . 67Rev 2 Mar.127
11: Get StartedThis chapter provides an overview of the AT&T Mobile Hotspot Elevate 4G* features,and instructions on how to set up your mobile hotspot and connect to the Internet.Know Your DeviceYour mobile hotspot enables you to create a Wi-Fi access point anywhere in the AT&Tcoverage area. You can use that Wi-Fi access point to connect your laptop and otherWi-Fi capable devices to AT&T’s mobile broadband network and connect to theInternet.You can also use your mobile hotspot in tethered mode by connecting it to your laptopwith the USB cable to access the Internet.LCDMute switchPower buttonManage your device and settingsYou can manage your device and change settings using: The device LCD (see page 9) The Homepage (see page 15) AirCard Watcher App for Smartphones and Tablets (see page 15)*. * Limited 4G LTE availability in select markets. 4G speeds delivered by HSPA (withenhanced backhaul) and LTE, where available. Compatible 4G device and data planrequired. LTE is a trademark of ETSI. Learn more at att.com/network.Rev 2 Mar.128
Get StartedPower ButtonDesired resultActionTurn mobile hotspot onPress and hold the power button for a few seconds.Turn mobile hotspot offPress and hold the power button for a few seconds.Wake up LCD screenPress and quickly release the power button.View additional LCDscreensPress the power button.Respond to prompts onthe LCD screenDouble-press the power button when prompted to do so bythe LCD screen. (This is used to confirm an action.)Mute SwitchThe mobile hotspot automatically beeps when the battery is low, when youreceive a message, etc. To turn these beeps off, move the mute switch so the redrectangle is visible. On the homepage, http://att.elevate, you can customize yourhotspot to beep when specific changes in status occur. For more information, seeSet Audio Alerts on page 27.LCDAs well as providing setup information (Wi-Fi SSID (Network Name) and Wi-FiKey) the mobile hotspot Main LCD screen displays: Instructions during setup Status messages such as “Searching for network”, “Connected”, etc. Status icons (See Icons on the LCD Screen on page 10 for details.) Data usage meter Network name Error messages (See Alerts on page 60 for troubleshooting suggestions.)Press the power button to cycle through the following additional screens: Wi-Fi Protected Setup (WPS) instructions — a fast, easy way to connectWPS-enabled devices to your Wi-Fi network Web Interface Messages / Alerts About ElevateTo personalize the mobile hotspot and change the settings, connect to AT&T’smobile broadband network and go to the homepage (http://att.elevate).Rev 2 Mar.129
Get StartedIcons on the LCD ScreenThe icons on the LCD screen indicate the status of the mobilehotspot.Home ScreenMessagesNetwork activity indicator View at http://att.elevateWi-FiNetwork indicator Wi-Fi on/offGPSSignal strength Number of connected devicesStatus iconsBatteryAT&TSSIDWi-Fi KeySSID: Elevate-AD9BWi-Fi Key: 12345678Pressto scrollPress power oncefor additional screensData usageTo access the Wi-Fi Protected Setup (WPS) screen, press the power button.IconIndicatesSignal strengthThe more bars, the stronger the RF signal.No signal.Rev 2 Mar.1210
Get StartedIconIndicatesThe type of network available.* 4G LTE — LTE4G — HSPA, HSPA E — EDGEG — GPRSIf the Network icon has a white background, the hotspot is connected tothe network.If the Network icon has a black background, service is available, but thehotspot is not connected to the network.For network connection instructions, see Set Up and Connect to theInternet on page 13. Your 4G LTE wireless device will indicate which of AT&T’s wireless networks you areconnected to. A network indicator does not necessarily mean that you will experience anyparticular upload or download data speeds. 4G LTE: Connected to AT&T’s 4G LTE network. 4G*: Connected to AT&T’s HSPA network. AT&T’s HSPA network is capable of delivering4G speeds when combined with enhanced backhaul. 4G availability is increasing withongoing backhaul deployment. E: Connected to AT&T’s EDGE/2G network Actual data upload and download speeds depend on various factors, including the device,network utilization, file characteristics, terrain, etc. Learn more at -terms.jsp, your AT&T Wireless Customer Agreement, Section 3.2Where and How Does AT&T Service Work?*AT&T’s HSPA network can deliver 4G speeds when combined with enhanced backhaul.Your wireless device can’t distinguish between HSPA cell sites with enhanced backhaul andthose without. Enhanced backhaul not available everywhere. Learn more at att.com/network.Network activityA solid white icon indicates network activity: Up-arrow indicates data being uploaded to the network Down-arrow indicates data being downloaded from the networkA white outlined arrow indicates no network activityMessagesYou have messages from AT&T or alerts (generated by the device) thatindicate a change in the device’s status. To view your messages and / oralerts, go to the homepage (http://att.elevate) and click the Messagesicon.GPSWhen the needle on the GPS icon flashes, the mobile hotspot is tryingto obtain a satellite fix or is tracking a location.Rev 2 Mar.1211
Get StartedIconIndicatesWi-FiThe number beside the Wi-Fi icon shows the number of users (devices)connected to your Wi-Fi network.Wi-Fi radio is disabled or in standby mode.To adjust the standby mode timer, see Extend Battery Life on page 25. For information on enabling Wi-Fi, see page 56 — The Wi-Fi radio isdisabled icon appears on the LCD screen.Battery statusIndicates the charge status of the battery4 bars — 80 – 100%1 bar — 10 – 29%Battery outline (no bars) — 0 – 9% Recharge immediately.Battery charging.No battery. The mobile hotspot is powered on and connected to the AC charger.The battery is charging through a USB connection.Power LEDThe blue LED on the top of the mobile hotspot flashes: Slowly to indicate that it is powered on Quickly when the firmware is being updatedIncluded Accessories Micro USB cable — Used mainly for recharging the battery, although you canalso use it to tether the mobile hotspot to your computer AC adapter — Used with the USB cable to recharge the battery or to powerthe mobile hotspot from a wall socketFor more information, see Recharge the Battery on page 33.Optional AccessoriesAdditional accessories are available from ult.aspx.Power SourcesYou can power your mobile hotspot from: Rev 2 Mar.12Rechargable battery included with the mobile hotspot12
Get Started USB port on your computer Wall socket using the AC adapter and USB cableAdditional LCD screensNewPress the power button ( ) to scroll through additional LCD screens:WPS Setup(1/4)Double-click thebutton toactivate Wi-Fi Protected Setup.(2/4)Personalize at:http://att.elevateDefault admin login is:You will have 2 minutes toconnect a WPS-enableddevice.MessagesWeb Interfaceattadmin(3/4)0 - Unread text messages0 - AlertsTo read messages go to:http://att.elevateAbout Elevate(4/4)Wireless Number:(555) 456-7890Tutorials: att.com/tutorialsSupport: 800-331-0500IMEI: 012301000123456ICCID: 89012304567801112301Ver: SW19200H 3.05.07.00APSet Up and Connect to the InternetInstall the Battery1. Insert the battery as shown in the illustration. Ensure that the gold contactson the battery are lined up with the gold contacts on the device.BatteryGold contactsDefaultsecurity credentialsRev 2 Mar.1213
Get Started2. Replace the back cover.Note: The battery comes partially-charged and ready to go. You do not need to charge itfully unless you wish to. When the battery needs recharge, follow the instructions inRecharge the Battery on page 33.Connect to the InternetNote: Your mobile hotspot does not need to be connected to the computer with the USBcable to connect to the Internet. The USB cable is used mainly for recharging the battery.(If you want to connect to the Internet with the mobile hotspot tethered to the laptop usingthe USB cable, see Tethered mode on page 14 before connecting for the first time.)To connect to the Internet:1. Turn on the mobile hotspot. Press and hold the power button for a few seconds.The first time you connect a computer to the mobile hotspot network, the LCDscreen displays the message “Connect your computer to Wi-Fi network”. TheWi-Fi SSID (Network Name) and the Wi-Fi Key are shown on the LCD screen.Note: The LCD screen may go into sleep mode to save power. To wake up the LCDscreen, press and quickly release the power button.2. Connect your computer or other device to your Wi-Fi network.a. On your computer, view the list of available Wi-Fi networks.b. Select the Wi-Fi SSID (Network Name) displayed on the mobile hotspotLCD screen, and connect to it.c. When prompted, enter your Wi-Fi Key as it appears on the mobile hotspotLCD screen.3. Launch your browser to surf the Internet.Optional: To personalize your mobile hotspot go to http://att.elevate.Note: To make changes to the mobile hotspot settings on the homepage, you must first login as Administrator. Type attadmin in the Admin Login box.Tethered mode*The first time you use your mobile hotspot in tethered mode (connected to acomputer using the USB cable):1. Ensure that the mobile hotspot is powered off.2. Use the USB cable to connect the mobile hotspot to your computer.*. * Enterprise variant available with microSD and WPS functionality disabled and drivers supporting tethering removed.Rev 2 Mar.1214
Get StartedThe mobile hotspot automatically powers on and installs the necessary driver.3. Once the driver is installed, you can surf the net or go to the homepage http://att.elevate to customize your mobile hotspot.AirCard Watcher App for Smartphones andTabletsDownload the complimentary AirCard Watcher app fromwww.sierrawireless.com/AirCardApps. Use this app to viewyour connection, settings, and data usage from yoursmartphone or tablet. To manage all hotspot settings, go tothe homepage http://att.elevate.HomepageYour mobile hotspot comes configured, perfectly secure and ready to use, but ifyou want to change the security settings, the Wi-Fi SSID (Network Name) andother settings, go to your mobile hotspot’s homepage.The homepage URL (http://att.elevate) is shown on the LCD during setup. Youcan also find it in the Quick Start Guide that came with your mobile hotspot.To make changes to the settings on the homepage, you must be logged in asAdministrator (default Admin Login is attadmin).Rev 2 Mar.1215
Get StartedAdmin loginStatus and settingsVirtual image of the devicePower offConnect / DisconnectYou can view some information about the device without being logged in asAdministrator, but to view detailed information and to change any settings and usesome features, you must be logged in as Administrator.To log in as Administrator:1. Place your cursor in the Admin Login box and type attadmin (the defaultAdmin Login).2. Click OK.Once you are logged in as Administrator, you can view detailed information andchange mobile hotspot settings, such as:Rev 2 Mar.12 Change the SSID, Wi-Fi Key, Admin Login, and Wi-Fi encryption Set autoconnect options Set GPS options Use GPS to track or map your location and find nearby amenities Set battery options View data usage Set audio alerts Change advanced settings such as security settings and router options16
Get StartedSecurity CredentialsTwo passwords are associated with the mobile hotspot:Rev 2 Mar.12 Wi-Fi Key — Used to connect your computer or other Wi-Fi device to yourmobile hotspot network. This Key is unique to your device. It is displayed onthe main mobile hotspot LCD screen. If the screen is blank (a power-savingfeature), press and quickly release the power button to view the informationon the screen. The default Wi-Fi Key is also printed on a label under thebattery. Admin Login — Used to log into the homepage as Administrator. You must belogged in as Administrator to use certain features and to make changes toyour mobile hotspot settings. The default Admin Login, attadmin, is printedon a label under the battery. The Admin Login can be 5–31 characters.17
22: Use Your Mobile HotspotThis chapter provides information on how to use your mobile hotspot.Note: To change settings you need to be logged in as Administrator. See Set Up and Connectto the Internet on page 13.Set Auto Connect OptionsBy default, the mobile hotspot automatically connects to AT&T’s mobile broadbandnetwork. You can change this feature so that the mobile hotspot automaticallyconnects to another network when you are roaming, or to never auto connect.To select the auto connect options:1. On the Mobile Hotspot Homepage, log in as Administrator.2. Click the Signal Strength icon ().3. If desired, under Network Technology, select the desired option from the dropdown menu.Note: For most users, it’s best to leave the default setting (Auto). When this option is selected,your mobile hotspot connects to the fastest service available. If you change this setting, themobile hotspot will not be able to connect if the option you choose is not available. Forexample, if you select 4G LTE from the drop-down menu and you are in an area where there isno 4G LTE network available, the mobile hotspot will not be able to connect to a mobilebroadband network until you change this setting.4. Under Auto Connect & Roaming, select the desired option:· Always auto connect — The mobile hotspot automatically attempts to connect tothe mobile broadband network when powered on. You may incur additionalroaming charges if you are outside of the AT&T coverage area.Rev 2 Mar.1218
Use Your Mobile Hotspot· Always auto connect except when roaming — The mobile hotspot automatically attempts to connect only to AT&T’s mobile broadband network whenpowered on (default).· Never auto connect — The mobile hotspot will not attempt to automaticallyconnect to the mobile broadband network when powered on.If you choose this option, press the power button and follow the instructionson the LCD screen to connect, or go to the homepage (http://att.elevate)and click Connect. See page 13 for more information.5. Click Save. (Save button appears once you make a selection.)View Data UsageYou can view an estimate of your data usage (not accurate for billing purposes)on the homepage and on the LCD screen.On the LCD screen:AT&TSSID: Elevate-AD9BWi-Fi Key: 12345678Pressto scrollData usage On the homepage:1. Go to the homepage and log in as Administrator.2. Click the Data Usage icon () on the left side of the screen.3. The bar graph shows your data usage.The billing cycle (typically a month) is available on your bill.Rev 2 Mar.1219
Use Your Mobile HotspotEnable / Disable Wi-FiBy default, Wi-Fi is enabled, but if your place of business does not allow Wi-Fi orfor any reason you want to disable Wi-Fi and use the mobile hotspot only intethered mode, the mobile hotspot gives you that option.To enable / disable your Wi-Fi network:1. On the Mobile Hotspot Homepage, log in as Administrator.2. Click the Wi-Fi icon ().3. Under Settings, select the desired option.4. Click Save. (Save button appears once you make a selection.)View / Block Connected UsersTo view a list of devices connected to your mobile hotspot and block undesiredusers:1. On the Mobile Hotspot Homepage, log in as Administrator.2. Click the Wi-Fi icon (Rev 2 Mar.12).20
Use Your Mobile HotspotIf you notice a user or Wi-Fi device that you do not recognize, you can block thatdevice from connecting to your Wi-Fi network.To block a user (or device):1. Select the box beside the device in the Block column.2. Click Save. (Save button appears once you make a selection.)To unblock a user and allow that device access to your network, see Set MACFilter Mode on page 47.Add a Wireless Device to your Wi-FiNetworkYou can connect up to five wireless devices such as smartphones, laptops,tablets, digital cameras, printers, gaming consoles, and digital picture frames toyour mobile hotspot network.You can use the Mobile Hotspot Homepage or the device LCD screen (press thepower button to view WPS* instructions) to add additional wireless devices toyour Wi-Fi network.From the Mobile Hotspot HomepageTo add devices using the Mobile Hotspot Homepage:1. On the Mobile Hotspot Homepage, log in as Administrator.2. Click the Wi-Fi icon ().3. Click the Add Device button.*. * Enterprise variant available with microSD and WPS functionality disabled and drivers supporting tethering removed.Rev 2 Mar.1221
Use Your Mobile Hotspot4. Select WPS— For WPS-enabled Wi-Fi devices or Manual — For any Wi-Fi deviceIf you choose the WPS button method:a. Click the Connect button.b. Within 2 minutes, press the WPS button on the wireless device you wantto connect.Your mobile hotspot and the wireless device will communicate and establishthe connection.If you choose WPS PIN method, you’ll be asked to enter a PIN to connect toyour Wi-Fi network.If you choose the Manual option:a. Open the Wi-Fi menu on the device you want to connect and view the listof available networks.b. Select the mobile hotspot SSID (Wi-Fi network name) displayed on theLCD screen (e.g. Elevate-xxx).c. Select Connect and enter the Wi-Fi Key displayed on the LCD screen.From the Mobile Hotspot LCDYou can also connect using the LCD screen without going to the homepage.To connect a wireless device using the device LCD:WPS Method1. On your mobile hotspot, press the power button to view the WPS Setupscreen.2. Press the power button again to enable WPS.3. Within 2 minutes, press the WPS button on the wireless device you want toconnect.Rev 2 Mar.1222
Use Your Mobile HotspotYour mobile hotspot and the wireless device will communicate and establish theconnection.Manually1. On your wireless device, view the list of available Wi-Fi networks.2. Connect to the network that corresponds to your mobile hot
Hotspot Elevate 4G MUST BE POWERED OFF. The AT&T Mobile Hotspot Elevate 4G can transmit signals that could interfere with this equipment. Do not operate the AT&T Mobile Hotspot Elevate 4G in any aircraft, whether the aircraft is on the ground or in flight. In aircraft, the AT&T Mobile Hotspot Elevate 4G MUST BE POWERED OFF. When operating, the .