Transcription
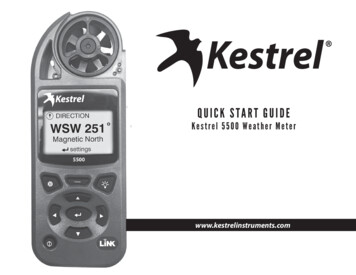
Q U I C K S TA R T G U I D EKestrel 5500 Weather Meterwww.kestrelinstruments.com
!CAUTIONYour Kestrel Weather/Environmental Meter is designed to provide accuratemeasurement of current conditions only. Depending on your location andenvironment, conditions may change rapidly.Rapid temperature and humidity changes (i.e., moving your meter from indoors to outdoors) may cause inaccurate readings oftemperature and humidity as well as all readings that rely on either of these values. Before relying on readings from your Kestrel Meter, besure to either a) force air flow over the sensors by waving or slinging your meter through the air; or b) wait until your unit’s readings havestabilized, indicating it has equilibrated to its new environment.To maximize the accuracy and reliability of your readings: Ensure that your Kestrel Meter is in good repair and within factory calibration. Take readings frequently and carefully according to the guidelines above. Allow your meter’s readings to stabilize after significant changes in temperature or humidity (i.e., changing location from indoorsto outdoors). Allow a margin of safety for changing conditions and reading errors (2-3% of reading is recommended).Use care and good judgment when referring to your Kestrel Meter to make any decisions regarding safety,health or property protection.!WARNINGTo reduce the risk of injury or death to persons, read and follow these guidelines!Your Kestrel Weather/Environmental Weather Meter may provide one or more of these measurements relating to estimation of danger ofinjury to people or animals from heat or cold: Heat Stress Index, Wind Chill Index, Wet Bulb Globe Temperature (“WBGT”), Thermal WorkLimit (“TWL”). Note that guidance tables based on these values are based on typical physiological response. Certain individuals or animalsmay be more susceptible to harm relating to environmental conditions and require additional precautions. For example, very young orelderly individuals, individuals with asthma, and individuals who have not become acclimatized to hot conditions are likely to be moreprone to heat injury. BATTERIESWe recommend that ONLY Lithium AA batteriesbe used in your Kestrel Weather/EnvironmentalMeter to provide the widest operatingtemperature range and to avoid damage causedby leaking lead-acid batteries. If you must useconventional AA batteries, please do not storeyour Kestrel Meter with the batteries in place.Damage caused by battery corrosion is notcovered under warranty.WARNING: Lithium is a toxic substance andingestion may cause serious injury or death. Keeplithium batteries out of the reach of children. Ifswallowed, immediately seek medical help. Havedoctor phone 24-hour hotline at (202) 625-3333,call collect if necessary. Dispose of batteriesproperly and according to local regulations. Donot puncture or burn batteries. If the batterycompartment does not close securely, stop usingthe product and keep it away from children.This Quick Start Guide contains only the information youneed to get started using your Kestrel meter. For a fulluser manual with in-depth explanations of these topics,FAQ’s, chat and e-mail support, visitwww.kestrelinstruments.com.CONTACT US AT(800) 784-4221 Toll Free North America(610) 447-1555Email: support@kestrelinstruments.comFacebook: Fb.com/KestrelMetersTwitter: @KestrelWeatherKnow yourself and the individuals and items you are responsible for.Where appropriate, seek the guidance of a medical professional.Know what to do in the event of heat or cold injury and be prepared with supplies.In the case of heat illness, remember the rule – “Cool first, transport second.” An inexpensive ice bath can mean the differencebetween life and death.Your Kestrel Weather/Environmental Meter is not a medical device. It is only one source of information andmust be employed with care and good judgment.23
CONTENTSMEASUREMENTSMeasurements And Features. 5Getting To Know Your Kestrel. ronmental5200HSTButtons. 8Wind Speed Air Speed(mph fpm Bft m/s km/h kt) Kestrel Options Menu. 8Temperature ( F C) Kestrel Menu Navigation. 9Wind Chill ( F C) Weather Mode Screen. 10Relative Humidity (%) Heat Stress Index ( F C) Dewpoint Temp ( F C) Wet Bulb Temp ( F C) Station Pressure (inHg hPA psi mb) Barometric Pressure (inHg hPA psi mb) Altitude(m ft ) Density Altitude (m ft) Wind Direction (Cardinal Points, Degrees) oCrosswind(mph fpm Bft m/s km/h kt) oHeadwind Tailwind(mph fpm Bft m/s km/h kt) oGetting Started. 11Additional Settings . 11Altimeter And Barometer. 12Using Min/Avg/Max. 13Connecting To Devices Using Link. 13Creating, Viewing, & Exporting Data Logs. 15Weather Glossary. 17Impeller Replacement. 18Warranty Certificate. 19o optional45
GETTING TO KNOW YOUR cingProfessionalMoisture Content Humidity Ratio (Grains) (gpp, g/kg) Air Density (lb/ft3, kg/m3) Relative Air Density (RAD) (%) Evaporation Rate (lb/ft2/hr, kg/m2/hr) Volume Air Flow (%) Delta T ( F C) NSORWet Blub Globe Temperature (WBGT) ( F C) Thermal Work Limit (TWL) ( F C) Globe Temperature ( F C) Naturally Aspirated Wet Bulb Temp ( F C)FEATURES50005100Racingo EnvironmentalLiNK Connectivity & Kestrel LiNK Mobile AppN/ABacklit Display switchable white orNight-Vision preserving redN/A5200BACKFRONTProfessional5500Weather5400oooo SERIAL /EXITSELECTHSTIMPELLER COVERHUMIDITY SENSORAA BATTERY (1)(Lithium recommended)CAPTUREBACKLIGHTBATTERY DOORDATA TRANSFERPORTSCROLL/ADJUSTLANYARDATTACHMENTBATTERY DOOR LATCHPOWERo optional67
KESTREL OPTIONS MENUBUTTONSButton8NameFunctionPOWERTurns Kestrel on and off.Press for on, hold for twoseconds to turn off.OPTIONS/EXITEnter the main Optionsmenu or exit a menu.SELECTAccess Settings on anymeasurement screen orselect a menu option toenter its submenu or confirma task.UP/DOWNScroll up and down throughmeasurement screens ormenus. Adjust values whenentering text in namemenus.LEFT/RIGHTScroll options left andright. Adjust values incombo menus and settingsubmenus.CAPTUREIn Weather Mode, manuallycapture all environmentalvalues.BACKLIGHTTurn backlight on or off.(Also turns off automaticallyafter one minute.)Most system-wide and weather setup options are accessedfrom the main Options menu by pressing the buttonfrom any Weather Measurement Screen or the mainTargeting Screen. BLUETOOTH»» Bluetooth On/Off»» Conct DATA PORT MEMORY OPTIONS»» Clear Log»» Auto Store»» Store Rate»» Overwrite GRAPH SCALE DISPLAY»» Auto Shutdown»» Contrast»» Backlight SYSTEM»» Time & Date»» Compass Cal»» Measurements»» Units»» Lang»» Batt»» Factory Restore ABOUT»» Version»» LegalKESTREL MENU NAVIGATIONTYPES OF MENU ITEMS»Tasks are executed by highlighting the field and pressing Select.»The presence of a submenu is indicated by a “ ” following a field.» Highlight the field and press Select to enter a submenu.» Adjust a setting by pressing left or right.» An arrow indicates there are additional fields off screen.» Adjust the value of a Combo Field by pressing left or right.» Enter the Combo Field sub menu by pressing select.» Navigation buttons indicate available actions on the current screen.» Locked values are either driven by another value or cannot be edited onthe current screen.» Locked values may have submenus which are entered by pressing select.9
WEATHER MODE SCREENSGETTING STARTEDMORE MEASUREMENTSMeasurement& IconGraph of Stored Data LogUnitsData Point Scroll BarData Point ValueData Point Time StampCurrent Measurement ScreenSELECT to enter settingsPressmenu for that measurement.Min Ave Max ScreenSELECT to start, stopPressand clear the Min/Avg/Maxtracking.Data Graph ScreenSELECT to enterPressthe Data Log Detail Screen toview logged data points.Data Points ScreenPress LEFT/RIGHT to scroll throughdata points. Press OPTIONS to exitData Log Details Screen.MORE MEASUREMENTS»» TheUP/DOWN buttons navigate between all weathermeasurements set to “On” in Options Measurements.LEFT/RIGHT buttons scroll between the three»» Thedisplay screens for the measurement.10»» The OPTIONS button exits the settings submenuand Data Log Detail Screen.1. INSTALL BATTERY. Slide the battery door latch and opendoor. Insert the provided AA lithium battery as indicatedby the label. Replace the battery door, ensuring it “clicks”fully into place.2. POWER ON KESTREL. Press to power on Kestrel.3. ENTER OPTIONS MENU. Press to enter the OptionsMenu.4. CALIBRATE THE COMPASS. Scroll to and select System.Scroll to and select Compass Cal. Follow the on-screeninstructions:»»Place the base of the Kestrel on a flatsurface at least 3 feet from any largemetal objects.»»Start the calibration routine. Rotate theKestrel around its vertical axis 3 times,keeping the unit as vertical as possible3x and taking approximately 10 secondsper full rotation. You may need torestart the routine a few times untilyou get the timing correct.Note: Note: When taking compass readings, keep the Kestrel as vertical aspossible for maximum accuracy.3.4.5.6.7.8.5. EXIT OPTIONS MENU.ADDITIONAL SETTINGSAll additional settings are accessed from the options menu1. SET AUTO STORE RATE. Scroll to and select MemoryOptions. Scroll to Auto Store and ensure it is set to ON.Scroll to Store Rate and adjust to desired frequency ofautomatic weather data logging.2. SET OVERWRITE.9.Scroll to and select Memory Options. Scroll to Overwriteand set to On to allow the data log to wrap once full and toOFF to stop logging when full.SET GRAPH SCALE. Scroll to and select Graph Scale. Scrollto and select the desired measurement type. Adjust theSet High and Set Low values to bound the desired displayvalues.SET AUTO SHUTDOWN. Scroll to and select Display. Scrollto Auto Shtdwn and choose a time window after which theKestrel will shut down without any button presses.SET BACK LIGHT COLOR. Scroll to and select Display.Scroll to Backlight and set to either White or Red. White isvery bright and ideal for any dim light use. Red is reducedbrightness and a wavelength selected to preserve adaptednight vision for true dark operations.SET DATE AND TIME. Scroll to and select System. Scroll toand select Time & Date. Adjust the time and date.TURN ON/OFF MEASUREMENT SCREENS. Scroll to andselect System. Scroll to and select Measurements. Setmeasurement screens to either On or Off as desired.SET UNITS. Scroll to and select System. Scroll to and selectUnits. To change all units select Global, then set Global toImperial or Metric, and then scroll to Apply and select Go.To set units individually, scroll to each measurement type inthe Units submenu and set to the desired units. Units canalso be set in the Settings menu for each measurement.SET LANGUAGE. Scroll to and select Lang. Adjust to desiredlanguage: English, Deutsche, Francais, Espanol.11
ALTIMETER AND BAROMETERThe Kestrel employs a stable, accurate pressure sensor tomeasure station pressure, the unadjusted air pressure inyour location.»» To use your Kestrel to measure barometric pressure(station pressure adjusted for local elevation), youmust enter a correct reference value for your altitude.Accurate barometric readings require that no elevationchanges be made while taking measurements.»» To use your Kestrel to measure altitude changes(changes in station pressure associated with changesin elevation), you must enter a correct referencevalue for your starting barometric pressure. Accuratealtitude readings depend on stable, weather relatedbarometric air pressure while measurements are taken.»» Synched values between the Altitude and Barometermeasurement screens allow reference value updateson either screen to automatically update referencevalues on the other.Note! You cannot use your Kestrel as a barometer and altimetersimultaneously.12USING MIN/ AVG/ MAXSETTING REFERENCE VALUES ON BAROMEASUREMENT SCREEN:»» Scroll to the Baro measurement screen andselect Settings.»» Adjust either the Altitude or the BarometricPressure value to a local, known value obtainedfrom a mapping reference, GPS, or accurateweather station in the same location.SETTING REFERENCE VALUES ON ALTITUDEMEASUREMENT SCREEN:»» Scroll to the ALTITUDE measurement screenand select Settings.»» Adjust either the Altitude or the BarometricPressure value to a local, known value obtainedfrom a mapping reference, GPS, or accurateweather station in the same location.Note! You should enter new reference values wheneveryou are using the Altimeter or Barometer functions andyour location or the weather conditions have changed.Pressing the right scroll button from any CurrentMeasurement Screen will open the Min/Avg/Max Screen.The capture process is linked for all measurement screens,capturing Min/Avg/Max values on one measurementscreen will capture Min/Avg/Max values over the sametime period for all measurements. Each new Min/Avg/Maxcapture overwrites the previously captured value from allmeasurements.CAPTURING MIN/AVG/MAX VALUES:»» Scroll to the Min/Avg/Max Screen of the desiredmeasurement. This can be done by scrolling right fromthe desired Current Measurement Screen or scrollingvertically from another measurement’s Min/Avg/MaxScreen.»» Press Select to Start a new Min/Avg/Max capture.»» Press Select to Stop the capture time period and viewMin, Avg, and Max values.»» Press Select to Clear the Min/Avg/Max values.MEASURING DIRECTION»» The Kestrel’s compass is intended for measuring winddirection. The Kestrel must be held vertically with theback of the unit pointed towards the direction to bedetermined.»» Using a Kestrel Vane mount adjusted to level willprovide the most accurate wind and directionmeasurements.CONNECTING TO DEVICES USING LINKIf your Kestrel is marked LiNK on the bottom front label,it can be connected wirelessly to other LiNK-compatibledevices. LiNK is powered by Bluetooth Smart , also knownas Bluetooth LE, which is available in most iOS devicesreleased after 2014 and Android devices released after2015, as well as in a USB Dongle available from Kestrelthat supports connectivity to Windows and Mac OSdevices. LiNK-enabled Kestrel units can connect to mobiledevices running Kestrel LiNK to install firmware updates.LiNK-enabled units can can be run wirelessly to computersusing the Kestrel Dongle.CONNECTING TO A COMPUTER, MOBILE PHONE ORTABLET:»» On your phone or tablet, follow the links atwww.kestrelinstruments.com to locate Kestrel LiNKfor iOS or Android in the App or Play store and installon your mobile device.OR»» On your computer, follow the links atwww.kestrelinstruments.com and install on yourcomputer. Insert your Kestrel USB Dongle (availableseparately) into an open USB port.»» On the Kestrel, open the Options Menu and selectBluetooth. Set Bluetooth to On.»» On your Kestrel select Conct from the BluetoothOptions menu and set to PC/Mobile. In PC/Mobilemode, the Kestrel’s Status will change to Available,indicating that it is available for pairing with acomputer or mobile device.13
CREATING, VIEWING, & EXPORTING DATA LOGS»» Ensure the computer or mobile device issearching and in range. When Status changesfrom Available to Connected, the pairing isactive and your Kestrel is ready to communicate.CONNECTING TO A NEW LINK-COMPATIBLEDEVICE:»» Follow directions for your LiNK-compatibleDevice to power it on and put it in pairing mode.»» On the Kestrel, open the Options Menu andselect Bluetooth. Set Bluetooth to On.»» Set Conct to Device.»» Scroll to Name and select New, then wait for thelist of available devices in range to populate.»» Select a device from the available list. Onceconnected, the settings menu for that devicewill open, allowing you to manage the device’ssettings.»» Exit to the Bluetooth menu. Status shouldindicate Connected, meaning the pairing isactive and your Kestrel is ready to communicate.CONNECTING TO/ADJUSTING A PREVIOUSLYPAIRED LINK-COMPATIBLE DEVICE:»» Follow the directions for connecting to a newdevice except instead of selecting New in theName field, scroll left or right to find the desireddevice.14»» Status will change to Searching. If the device is inrange and in active pairing mode, a connection willbe made and Searching will change to Connected,indicating that the pairing is active and your Kestrelis ready to communicate.BLUETOOTH CONNECTION INDICATOR:»» When connected to any LiNK compatible device, aicon will appear in the in the upper right.»» If the paired device goes to sleep or if theconnection is lost, the icon may disappear butwaking the device up or returning within rangeshould automatically reestablish the connection andthe icon should reappear.Note! LiNK range is typically 100 ft/30M line of sight. Shorterdistances should be expected if there are obstacles such aswalls or metal enclosures. Range is also impacted by thesignal strength of the other device.CONNECTING TO COMPUTERS USING USB CABLE:All Kestrel 5 Series units can connect to a computer viathe Data Transfer Port using the USB Data Transfer Cableavailable separately. Kestrel LiNK software is availablefor Windows and Mac for downloading logged weather.data and installing firmware updates.In addition to taking live measurements, your Kestrel 5Series weather meter is a powerful data logger. The Kestrelwill automatically create a time stamped data log of allmeasurements at the logging interval you set. Additional logpoints can also be captured manually. Logged data can beaccessed four ways:»» Viewed on the Kestrel Meter on the Data Graph Screen andData Log Detail Screens.»» Exported to an iOS or Android mobile device using theKestrel LiNK mobile apps available in the App Store andGoogle Play Store. Requires a Kestrel LiNK-enabled meterand a compatible Bluetooth Smart/LE devices.»» Exported to a PC or Mac using Kestrel LiNK software and aKestrel USB Dongle (available separately). Requires a KestrelLiNK-enabled meter»» Exported to your Windows or Mac computer using KestrelLiNK software and a Kestrel USB Data Transfer Cable(available separately). All 5 Series Kestrel meters can connectto Kestrel LiNK using a Kestrel USB Data Transfer Cable.TURNING ON AND ADJUSTING AUTOMATIC DATA LOGGING:»» In the main Options menu, scroll to and select MemoryOptions. Scroll to and select Auto Store and set to ON.Scroll to Store Rate and adjust to desired frequency ofautomatic weather data logging.»» In the Memory Options sub menu scroll to Overwrite andset to On to allow the data log to wrap once full and Off tostop logging when full.»» When Auto Store is set to On, the Kestrel unit willautomatically begin logging at the rate set inStore Rate.MANUAL DATA LOGGING:»» Individual data points can be added to the log atany time by pressing the Capture button.»» Manual capture simply adds every measurementto the data log at the capture time/date.VIEWING LOGGED DATA ON THE KESTREL METER:»» Scroll to the Graph Data Screen of the desiredmeasurement. This can be done by scrolling rightfrom the desired Current Measurement Screen orscrolling vertically from another measurement’sGraph Data Screen.»» A graph of the most recently logged data pointswill be displayed and continue to grow at theselected store rate.»» To view individual data log points, or to viewgraph data older than what is shown in the GraphData Screen, press Select to open the Data LogDetail Screen. Scrolling left or right will move thebar highlighting individual data points. Log valuesare shown in the upper left and the time stamp isshown along the bottom. Press Exit to return tothe Graph Data Screen.»» To change the resolution of the graph, scroll toand select Graph Scale in the Options menu.Scroll to and select the desired measurement15
WEATHER GLOSSARYtype. Adjust the Set High and Set Low values tobound the desired display values.EXPORTING DATA LOGS TO A MOBILE DEVICE:»» Follow the links at www.kestrelinstruments.comto locate Kestrel LiNK in the App or Play store andinstall on your mobile device.»» Follow the directions in the Kestrel LiNK app andin the section of this manual titled Pairing with aComputer, Mobile Phone or Tablet: to connect themobile device to the Kestrel.»» The Kestrel’s new logged data will automatically beadded to the app’s log whenever the devices areconnected.»» To export logged data to a .csv file for furtheranalysis, go to the Stats page of the app or theManage Data Logs screen on the Manage page.»» Hit the Export Data button. Choose a method forexporting the data and follow the in-app promptsto send.EXPORTING DATA LOGS TO A COMPUTER:»» Follow the links at www.kestrelinstruments.comto download Kestrel LiNK to a PC or Mac computer.Install.Use one of the following two methods to connectyour Kestrel to your computer.161. Connect your LiNK-enabled Kestrel Meter toyour computer wirelessly:»» Purchase a Kestrel LiNK Dongle and install inyour computer’s USB port.»» Follow the instructions in the “Pairing with aComputer, Mobile Phone or Tablet” section of thismanual along with the Kestrel LiNK program to pairthe Kestrel and your computer.2. Connect your Kestrel 5 Series Meter to yourcomputer using a Kestrel USB Data Transfer Cable:»» Purchase a Kestrel USB Data Transfer Cable.»» In the main Options menu, scroll to and select DataPort and set to On.»» Insert the USB Data Transfer Cable into an open USBport and the Data Transfer Port on the back of theKestrel unit.Once connected»» Follow the directions in the Kestrel LiNK program toconfirm the connection.»» In the Kestrel LiNK software, choose a data log from theLogs window and click on the Export to File button.»» Choose a file export directory on your computer andclick on the Ok button.DIRECTION – Compass heading in true or magneticWIND SPD – Wind Speed is the measurement of the windpassing through the impeller. For greatest accuracy, point theback of the Kestrel directly into the wind.CROSWND – Crosswind uses the internal compass and a userselected heading to calculate the crosswind component ofthe full wind.HEADWND – Headwind uses the internal compass and auser selected heading or target direction to calculate theheadwind component of the full wind.TEMP – Ambient Temperature is the temperature measuredat the thermistor. For best results, ensure the thermistoris not exposed to direct sunlight and is exposed to goodairflow.CHILL – Wind Chill is a calculated value of the perceivedtemperature based on temperature and wind speed.HUMIDITY – Relative Humidity is the amount of moisturecurrently held by the air as a percentage of the total possiblemoisture that the air could hold.HEAT INDEX – Heat Index is a calculated value of theperceived temperature based on temperature and relativehumidity.DEW POINT – Dew Point is the temperature atwhich water vapor will begin to condense out ofthe air.WET BULB – Wet Bulb is the lowest temperaturethat can be reached in the existing environment bycooling through evaporation. Wet Bulb is alwaysequal to or lower than ambient temperature.BARO – Barometric Pressure is the local station(or absolute) pressure adjusted to mean pressure.An accurate reading depends on a correct altitudeinput and unchanging altitude while measuring.ALTITUDE – Altitude is the vertical distanceassociated with given atmospheric pressure.An accurate reading depends on correct initialbarometric pressure input and stable barometricpressure while measuring.STATION – Station Pressure (Absolute Pressure)is the pressure exerted by the atmosphere at thelocation.DENS ALT – Density Altitude is the altitude atwhich the density of the theoretical standardatmospheric conditions (ISA) would match theactual local air density.17
5-YEAR LIMITED PRODUCT WARRANTYIMPELLER REPLACEMENT ress only the sides of the impeller when removing and insertingPto avoid damaging the precision hub bearing. [ Figure 1] .»» P ress FIRMLY on the impeller module to remove it.»» Insert the new impeller so the side that has thesmall triangle (close to the perimeter) faces thefront of the Kestrel when installed.Figure 1»»Orient one “arm” of the module straight up .[ Figure 2]. The impeller can be pushed in fromeither side.Figure 2WARRANTY CERTIFICATEYour Kestrel Weather/Environmental Meter is warrantied to be free of defects in materials and workmanship for a periodof FIVE YEARS from the date of its first consumer purchase. NK will repair or replace any defective meter or part whennotified within the warranty period, and will return the meter via domestic ground shipping or NK’s choice of methodof international shipping at no charge. The following are excluded from warranty coverage: damage due to improperuse or neglect (including corrosion); damage caused by severe or excessive impact, damage caused by failed or leakingbatteries, crushing or mechanical harm; modifications or attempted repairs by someone other than an authorizedNK repair agent; impeller failure not caused by a manufacturing defect; normal usage wear and failed batteries.Measurement accuracy is warranted to be within the specifications on the supplied Certificate of Conformity includingspecified drift since date of manufacture. If no warranty registration or proof of purchase is provided, the warranty periodwill be measured from the meter’s date of manufacture.Except for the warranties set forth herein, NK disclaims all other warranties, expressed, implied or statutory,including, but not limited to, the implied warranties of merchantability or fitness for a particular purpose.Any implied warranties that may be imposed by applicable law are limited to the term of this warranty. In noevent shall NK be liable for any incidental, special or consequential damages, including, but not limited to,loss of business, loss of profits, loss of data or use, whether in an action in contract or tort or based on a warranty,arising out of or in connection with the use or recalibration, performance of an NK product, even if NK has beenadvised of the possibility of such damages. You agree that repair, and (upon availability) replacement,as applicable, is your sole and exclusive remedy with respect to any breach of the NKLimited Warranty set forth herein.All product liability and warranty options are governed exclusively by the lawsof the Commonwealth of Pennsylvania.1819
Kestrel Weather and Environmental Meters aredesigned and manufactured in the USAByNIELSEN-KELLERMAN21 Creek Circle, Boothwyn, PA 19061Phone: (610) 447-1555Fax: (610) 447-1577Web: NKhome.comEmail: info@NKhome.comPlease register your Kestrel Meter at www.kestrelinstruments.com20319039 0 15.10.16
7. TURN ON/OFF MEASUREMENT SCREENS. Scroll to and select System. Scroll to and select Measurements. Set measurement screens to either On or Off as desired. 8. SET UNITS. Scroll to and select System. Scroll to and select Units. To change all units select Global, then set Global to Imperial or Metric, and then scroll to Apply and select Go.