Transcription
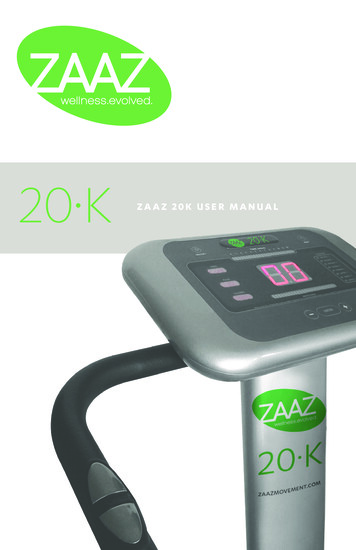
15 KZAAZ 15K USER MANUAL
Thank you for purchasing the ZAAZ 15K. Please read thisinstruction manual carefully before operating this machine.Please pay attention to the important safety warnings and keepthis manual for future use.
SAFETY GUIDEWhen using this machine basic precautions should always be followed including the following:DANGERTo reduce the risk of electric shock: Always unplug this machine from the electrical outletimmediately after using and before cleaning.WARNING To reduce the risk of burns, fire, electric shock, or injury to persons:ContentsS A FE T Y G U I D E 5A S S E MB LY I NS TR U C TI O NS 6T rouble S hooting 8service and maintenance8PA RT S 9O PE R AT I O N 1 0B O DY FAT VA LU E R E F E R E NC E11E X E R C IS E G U I D E 1 2PR E -S E T P R O G R A M S 1 2C H O O S IN G TH E R I G HT S P E ED13IN T E N S IT Y 1 3R est 1 3S T R E N G TH E N 14S tretch 1 5M A S S AGE 1 5S PE C IFIC ATI O NS 1 7Contraindications to vibration171. The machine should never be left unattended when plugged in. Unplug from outlet when not in use,and before putting on or taking off parts.2. Do not operate with blanket or pillow. Excessive heating can occur and cause fire, electric shock, orinjury to persons.3. Supervision is necessary when this machine is used near children, or by or near invalids or disabledpersons.4. Use this machine only for its intended use as described in this manual. Do not use attachments notrecommended by T-Zone.5. Never operate this machine if it has a damaged cord or plug, if it is not working properly, if it hasbeen dropped or damaged, or dropped into water. Call the T-Zone service number for examinationand repair.6. Do not pull on or use the power cord as a handle.7. Keep the cord away from heated surfaces.8. Never operate the machine with the air openings blocked. Keep the air openings free of lint, hair,and the like.9. Never drop or insert any object into any opening.10. Do not use outdoors. The machine is intended for home and indoor use.11. Do not operate where aerosol (spray) products are being used or where oxygen is beingadministered.12. To disconnect, press the console OFF switch, turn the power switch off, then remove plug fromoutlet.13. The machine must be kept on level ground.14. Do not use with wet hands or near water.15. Do not move the machine if the power is on.16. Do not use this machine within one hour of meals.17. Do not use this machine for more than 12 minutes per session, unless following an appropriateprogram.18. There have not been enough studies done on the effects of Whole Body Vibration on children.However since weight training is not supported for kids as their bodies are still developing, we donot recommend Whole Body Vibration for children. Children and pets should always be supervisedwhen around Vibration Technology machines.19. Do not use the machine if you have a pacemaker, an implant, are pregnant or have an existingmedical condition. Please consult your physician first. More information on contraindications islisted on page 13.20. If you feel any distress or soreness abandon your exercise immediately.21. Should your machine malfunction, disconnect it from your power source and call our servicenumber, listed on page 3. Do not attempt any repairs yourself.ZAAZ STUDIOS USER MANUAL5
ASSEMBLY INSTRUCTIONSThis advanced design is ergonomically designed and maintains a high level of reliability and smoothnoiseless functionality.Packaging: Retain all packing materials for your 15K until you are certain you have all components.Components: The ZAAZ 15K components include the Vibration unit, post, console, handlebars,tool kit, power cord and User’s Manual.1. Remove all packaging.3. Connect the cable to the base.5. Unscrew the 4 screws on both sides of thebase, (2 at the front and 2 at the back).NOTETighten all screws only 3 or 4 turns at first.Tighten the screws until snug (not over-tight)when assembly is finished.7. Put the left long handlebar onto the top ofthe post. Attach loosely with the long bolt byfirst feeding the bolt through the hole in thetop of the arm and then lining it up with thehole in the top of the post. Connect bottom ofleft arm to the base. Tighten the screws loosely.Then assemble the right handlebar the sameway. Tighten the top bolts and bottom screwssnugly.8. Attach the 3 cables from the underside of theconsole to the 2 from the curved handles andthe 1 from the centre of the post.9. Remove the screws from the underside of theconsole and attach to the top of the post. Asyou attach to the post, feed the cable down thecentre of the post so you don’t pinch the wireswhen you tighten the screws.10. Tighten all screws and bolts snugly.11. To use the body fat measurement function,remove the protective plastic film from thesensors on the handles.12. Connect the plug to the power outlet, andpress the red switch on the back of the base toturn on the machine.13. Connect the plug to the power outlet, andpress the red switch on the back of the base toturn on the machine.NOTERe-Tightening of screws and bolts may berequired every 3-6 months, depending on use.2. At the top of the post, insert the cablethrough the small hole in the middle so it protrudes out both ends. Grip the top of the cableand don’t let it fall into the post.4. Affix the post to the base with the 4 bolts,using the screwdriver provided or a 12 mmsocket wrench.6. Starting with the left handlebar, connectand screw the handle pieces (A and B) with theplastic connector (C). Then connect piece D tothe plastic connector. Put the two handlebarsonto the end tubes simultaneously.ZAAZ STUDIOS USER MANUAL6ZAAZ STUDIOS USER MANUAL7
Trouble ShootingITEM1FAILURENOISE WHILE OPERATINGPARTSNo.SOLUTIONCHECK THE 4 ADJUSTABLE FEET & ENSURETHE MACHINE IS LEVEL, CHECK & TIGHTENANY LOOSE PARTS2NO SCREEN DISPLAYENSURE THE MACHINE IS PLUGGED IN ANDTURNED ON3POWER ON BUT 10K WILLNOT STARTPUSH THE ON BUTTON AND SELECT SPEED4FAT CHECKER DOES NOTFUNCTIONFAT CHECKER DOES NOT FUNCTIONservice and maintenanceCareful maintenance not only helps you stay safe but extends the life of your machine. Please followthese basic guidelines: Check and retighten screws when required. Keep away from exposed areas and excessive heat. Clean the machine with a soft cloth after use. Switch off the ZAAZ 15K when not in use.For service, call: Canada: 416 285 6055Please refer to the back cover of this booklet for further information on your warranty.The machine must be grounded. If it should malfunction or break down, grounding provides a path ofleast resistance for electric current to reduce the risk of electric shock. The machine is equipped with acord having an equipment-grounding conductor and a grounding plug. This plug must be plugged intoan appropriate outlet that is properly installed and grounded in accordance with all local codes andordinances.Quantity1base12left support poles23left curved handle14post15right support poles26right curved handle17console18console pulse cable29console post cable110handle bolts211centre post cable112handle pulse cable213console screws314elbow bracket screws415support pole screws816spring washers817post elbow brackets218post bolts415K FEATURES Ergonomic design Three LED screens- displays time, speed andbody fat 8 Pre-set programs Built-in body fat monitor 70 speed adjustments, appropriate for differentfitness levels, including strength excercises andmassage Overload protection High performance monitorDANGER – Improper connection of the equipment-grounding conductor can result in a risk ofelectric shock. Check with a qualified electrician or serviceman if you are in doubt as to whether themachine is properly grounded. Do not modify the plug provided with the machine – if it will not fit theoutlet; have a proper outlet installed by a qualifiedelectrician.This product is for use on a nominal 120-V circuit and looks like theplug illustrate. Make sure that the machine is connected to an outlethaving the same configuration as the plug. No adapter should be used.ZAAZ STUDIOS USER MANUALPart8ZAAZ STUDIOS USER MANUAL9
Pre -set T imeOPERATION1. To operate in the Manual Mode for less than 10 minutes, press the “TIME” button initially (insteadof “ON”), then use the SPEED arrows to select the number of minutes. We recommend changing yourposition after 30 seconds, unless following a specified program. 2. Press “ON” to confirm your timeselection. The speed can then be adjusted by pressing the SPEED arrows once the timer has started.B U T TO N A ND CO NS O LE DE SCRI P TI ONProgram/Body Fat ScreenTIME SCREENPROGRAMAUTOSCANP rogramsTIMESPEED1. Press the “AUTO SCAN” button if you want to shift from the Manual Mode to Pre-set AutomaticMode (including the 8 pre-set programs P1 – P8) or the Body Fat Monitor Mode. The screen willdisplay 88-P1- -P8-1 in sequence: 88 represents the Manual Mode and “1” represents Body FatMonitor Mode.2. Press the “AUTO SCAN” button continually until the screen displays your selection.3. P1 – P8 are pre-set programs so the speed cannot be modified.4. In the Body Fat Monitor Mode, if you press the “TIME” button, you can input your personal detailsusing the SPEED arrows.5. Select your gender first, “1” is male and “2” is female.6. Next set your age by pressing the “TIME” button. The default is 20 years.7. Now set your height in metres using the “TIME” button. The default is 170 cm.8. Finally set your weight in kilograms, also using the “TIME” button. The default is 70 kg.9. After all settings are complete, push the “TIME” button again and the screen will now display “---”.Hold both “Body Fat Sensors” with your hands and the screen will display your Body Fat Value.HEALTH CENTERAlways consult with a certi ed medical professional before embarking on this or any exercise program.AUTOPROGRAMAUTOSCANSCANONONProgram AutoscanTIMESPEEDSpeedOFFOFFTimeOFF/ON: Press to start or stop the machinePROGRAM AUTOSCAN: Displays the Program Mode or Body Fat ValueSPEED: Displays the speed of the vibrating PlatformTIME: Displays the exercise time remaining on the machineOPERATING INSTRUCTIONSTo reduce the risk of electric shock, the machine has a polarized plug (one blade is wider than theother). This plug will fit in a polarized outlet only one way. If the plug does not fit fully in the outlet,reverse the plug. If it still does not fit, contact a qualified electrician to install the proper outlet. Do notchange the plug in any way.The warning below is on the base of the machine:KEEP CHILDREN OFF!WARNING – Pinch Point!Do not place fingers, toes or any other object near the Vibration Pad edge while in motion!BODY FAT VALUE REFERENCEFEMALE 1717-27 27MALE 1414-23 23M anual Mode ( 10 minute time )1. Press the “ON” button to power the machine.2. Select desired speed level using the SPEED up and down arrows.3. Keep knees slightly bent, with feet wide apart.4. Refer to exercise chart for optional positions.ZAAZ STUDIOS USER MANUAL10ZAAZ STUDIOS USER MANUAL11
PRE-SET PROGRAMSIf you hold the pencil firmly, you are doing a pelvic tilt. A pelvic tilt activates the three muscles of thepelvic girdle or pelvic sling or muscles of core stability. Rotating the body while in this position helpscore stability, flexibility and balance.These programs are great for exercise and massage. Each speed is designed to change every minute,as indicated in the table 060CHOOSING THE RIGHT 0502520101016204040The following speeds are a recommendation only and would depend on your state of health and physical condition. To enable good balance, your feet should be equally distanced from the center axis withknees slightly bent.1515254316203040 LOWER SPEEDLower speeds are ideal for posture and strength exercises. MIDDLE AND HIGHER SPEEDSMiddle speeds are for weight training and stretching. HIGHER SPEEDSHigher speeds are for massage and muscle relaxation.NOTEINTENSITYThese programs run for 10 minutes but we suggest you build up your session time gradually. This is important as your body may need time tobecome conditioned to Vibration therapy. Please consult your health care Practitioner before trying any new exercise program.EXERCISE GUIDEHOW A N D W H Y TO S TA NDAll you have to do to get benefits from the machine is stand in a comfortable straight position. However, if you want to strengthen certain muscles, just add a few changes as follows:Stand tall with your tummy and behind tucked in (pelvic tilt). Keep your muscles firm (contracted) you can do this by pretending you are holding a pencil between your bum cheeks! This position willkeep you standing straight with muscles tight. Remember to keep your shoulders back and away fromthe ears too. You can gain a significant amount of benefits by just standing in this position.There are two ways of holding the knees, slightly bent and straight. If you are doing weights or stressexercises, then the knees should be slightly bent to protect your back muscles. What bent kneesdo is cushion or soften the vibration. However, if you want the vibration to go through your body asstrongly as possible, then your knees should be straight.For strengthStart at 30 second s for each position; up to 10 minutes total exercise time per session; 3 times perweek (alternate with day’s rest).For M assageJust try it for yourself - feel your lower back and shoulders when the knees are bent and compare towhen the knees are locked, and you will be able to judge for yourself. The amplitude of the plate makesa very gentle stress on the joint.In this case, for a standing static position, the knees should ideally be straight. This straight knee position allows more muscle reactions through out the body. Do this only if it feels right for you. If youneed a break, soften your knees.ZAAZ STUDI
Thank you for purchasing the ZAAZ 15K. Please read this instruction manual carefully before operating this machine. Please pay attention to the important safety warnings and keep
