Transcription
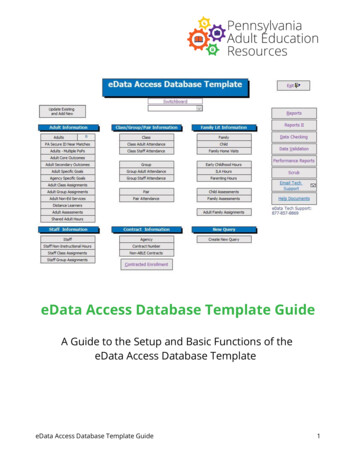
MS Access Scheduler Database TemplateDocumentationIntroductionThe MS Access Scheduler Database Template provides you with a complete tool for managing resourcesaccording to a schedule. Those resources can be doctors, dentists, therapists, beauticians, hair stylists, beautysalons, lawyers, practice booths, meeting rooms . . . The resources are in relation with customers (orpatients, equipment ). In addition it manages a security system (Login and password) for each user of yourdatabase and a report manager. It also includes a handy parameters manager to store all sorts of data and afunction to retrieve them. In the next section we will see in details all the sections of this database.Security systemWhen opening the database, a form will appear so you can enter a login and password. There is already aadmin user in this database with the password being 1234. If you check the “change name and/or password”box, the system will ask you to modify your name and/or password after clicking the OK button.If you want to create more users and/or groups, open the security manager and then you can create users andgroups.
Now to learn to use the security system in the code, open the “Security” module.You need the three following tables: tblSecurityGroupe and tblSecurityUser and tblParameterIn the table tblParameter, you need to set the parameter "Security" to true. You can do this by opening thefrmParameters form or directly in the table.There are two levels of security that can be implemented in the system. The first level is automated. All youhave to do is enter the permission for each group. Every permission is represented by a letter in the grouptab as shown above. So enter the letter corresponding to the access level.The second level of security (for targeted security) is optional and needs to be coded in the software usingVBAHere are the objects involve to implement the second security level in your project:You need to insert the line of code: CurrentUserID in then "On Open" event of each form you want toimplement second level securityAfter you can insert the fowllowing code and do what is needed depending on the group so it would looklike that:CurrentUserIDIf pubCurrentGroup "" ThenSelect Case pubCurrentGroupCase "Admins"Case "Group1”The following lines of code are typical exemples of the way you want a software to behaveMe.AllowAdditions False Not allowing addition for the current formMe.AllowEdits True Allowing edition for the current formMe.AllowDeletions False Not allowing deletion for the current formMe.NoCheque.Locked True Locking a control so you can’t modify itMe.NoCheque.Enabled False Desabling a control so it is not accessible but it is visibleMe.NoCheque.Visible False Make a control invisible to the end userCase "Group2"
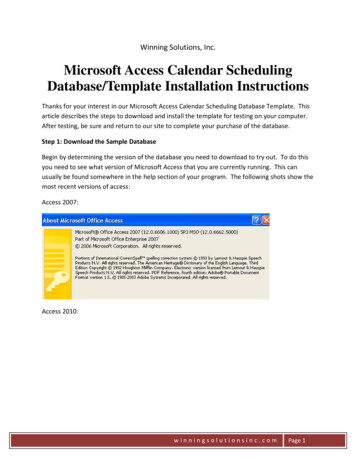
Case ElseCancel TrueDoCmd.Close acForm, me.NameEnd SelectEnd IfThe main formThe main form display all the information about a customer and it also serves as a navigation menu. Thebuttons in the bottom of the forms give you access at all the data needed to operate the system. Alwaysremind that the main form is locked by default even if you have the permission to edit it. Since it serve as aswitchboard this locking system is use to prevent unwanted editing of Customer data. To enable you to editdata you have to open the padlock (bottom right of the form). After navigating between customers, the formwill lock itself automatically. So use the padlock before editing data. You can disable the padlock functionby opening the Parameter form and un-check the “Padlock On” parameter. This way the padlock will alwaysremain open.The rolodex in the left part allows you to navigate between customers. In the Global Search field on top ofthe form, you can type in a string of character and then press enter. This will display every customer thatcontains this string in the First name or Last name.The resource form
The resource manager allows you to enter and manage information about resources (in the present casedoctors but it could be therapists, hair stylists, dentists, beauty salons, lawyers, meeting rooms ) . Thetask summary displays all the appointment for the selected resource. By enabling the done control, theselected line will be removed from the task summary window.To create a new resource simply click on the “New” button.The scheduler form
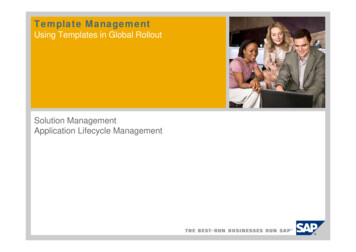
The scheduler form gives you a monthly and weekly overview of the tasks to do for a specific resource. Youcan select the resource on the upper left corner of the windows or you can click on the button "All" todisplay the appointments for all resources. You then can navigate to different month (or the different week)with the navigation buttons. If you want to dig into a detail view just right-click on an item to open the dailyview form or the detail schedule form. In the weekly view you also can can move an appointment to adifferent location by simply draging and droping an appointment. You can use the "Cut apt." and "Pasteapt." buttons in the upper left corner of the weekly view window to move an appointment to a differentweek. First select the appointment to move, then click the "Cut apt." button, then select a new place for theappointment and then click the "Paste apt." button. In the weekly view, if you display appointments for allresources and two resources or more have the same starting time, only one appointment will be display butwith a star before the description so you can know there is another appointment under. When you display allresources appointment at once you can't edit them. You have to select a resource first if you want to edit,add or drag and drop an appointment.The daily view form
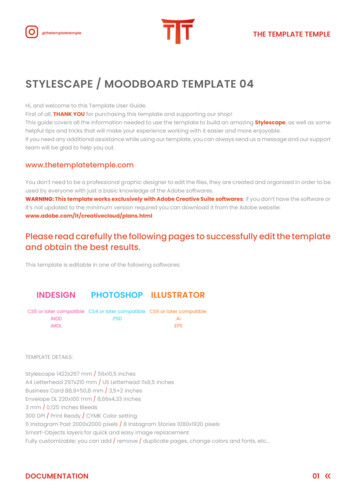
The daily view forms show you the specific schedule for that day and that resource. Right-click on a coloredtime line to open the detail for that event. Right-click on a white time line to open the detail daily form andcreate a new event. You also can move an appointment to a different time frame. To do that you can simplydrag and drop an appointment. With the Print button, you can print the daily schedule.
The detail schedule form
The detail daily form show’s you the event in detail. When you create a new event, select the frequency inwhich you want to see that event occur. If you want the events to be created on weekend, check the Eventson weekend’s control. You can delete that specific event with the Delete button. Note that only one eventwill be deleted even if the Daily, Weekly or Monthly option is checked. You can select a different date forthe ending of the appointment.The report managerThere are 2 tabs on the report manager. Some reports are pre-defines and you can just explore them byclicking on the selected button. The buttons that are filled with “ ” can be assigned to any new reports youcreate. Next is the appointment list.
The Master formThis form is where all the drop-down data is stored. Just select a form in the left part of the windows. Youcan customize this form and add new groups of data to it. Just go in design mode and explore the way it’sdone. It’s very straight forward and easy to customize.
The image manager (with the Image option Scheduler version)The image manager helps you manage a set of images linked to a customer. To access it, click on theimage button at the bottom of the main form or in the application ribbon.The image manager opens on a window with a main image and a subform with additional images. Toperform an action on an image, use the context menu (right-click) directly on an image field.When an image has been added you can always left-click on it to open a zoom window of it.The images are saved externally in the images folder (that must exist in the same folder then the backenddatabase (TemplateData.accdb))The context menu give you access to the following task:Copy: Copies the current image to the clipboard.Paste: Pastes an image from the clipboard (if available), replacing the current image.Load: Loads a new image from the filesystem.Save As : Save the current image to a file.Rotate/Mirror: Supports rotating the image in multiples of 90 degrees, or horizontal and vertical mirroring.Delete: Deletes/clears the current image.
Zoom In: Zooms in to the center of the image by a factor of 2.Zoom Out: Zooms out by a factor of 2.Zoom to Fit: Zooms the image to fit entirely inside the area of the control.Zoom to Width: Zooms to fit the width of the image inside the control.Zoom to Height: Zooms to fit the height of the image inside the control.Image Info: Shows or Hides the Image Info window, which displays image and EXIF information.The Parameters ManagerOn opening of the parameter manager form, the "General parameters" are displayed. You can select theparameter category with the buttons at the top of the window.This form is devided in four sections. The “General”, “Email”, “Scheduler” and “Security”. The top sectionof the “General” tab is for parameters that are set to a true/false. The bottom section is used for parametersthat require the entry of a numeric or string value. The function GetPref can be use to retrieve a parameter.Here is an example of how to use this function:Me.ProgramVersion GetPref("Program version")
The “Email” tab shows the parameters involved in the "Send without Outlook" method. To enter yoursettings, ask your IT support desk OR open your Outlook and check your main account settings. Note thatyou have to install a com object used to manage the email manager. To do that simply launch the utility“smtp component.exe” provided with this template.
The “Scheduler” tab is used to set the calendar parameters according to the type of business you want tomanage with this software. The Scheduler scale as well as the start and end time are very importantparameters that have to be set prior to entering the first appointment in the database. You can also set thecolors that will be used in the scheduler. You also can activate the two following parameters:Multi-Resources for one customer ON: When activate this function enables you to assign more than oneresource to a customer for a same time frameMulti-Users conflict module ON: When activate this function will lock a time frame for a resourcebetween the time a time frame is selected and the appointment is saved to prevent conflicts. Activate thisparameter only if multiple computers will create appointments.
The “Security” tab simply allows you to enable or disable securityThe Link Manager
The link manager enables you to connect to a different set of data. Remember that your system consist oftwo files:1- Scheduler.mdb (or Scheduler.mde which is compile) is the front end of the system containing thequery’s, forms, reports and modules2- Scheduler Data.mdb is the database itself containing all your customers and other infos.This setup is ideal in a network environment so more then one computer (each computer having a copy ofScheduler.mde that is link to the file Scheduler Data.mdb somewhere on the server)What is the difference between Template.mdb and Template.mde ?Answer: Scheduler.mde is a compile version of Scheduler.mdb. This version is faster an more stable thenan mdb file. Every time you make a change to Scheduler.mdb you should create an mde version for theproduction environment.How do you create a mde file ?Answer: Tools – Database utility – Create an mde fileHow do you link a new table you’ve create ?Answer: File – External data – Link tables – Choose the back end database, select the table and click OKThe Company Info form
This form simply allows you to enter all the information about your company. This info could be printed infutur reports.
MS Access Scheduler Database Template Documentation Introduction The MS Access Scheduler Database Template provides you with a complete tool for managing resources . The main form display all the information about a customer and it also serves as a navigation menu. The buttons in the bottom of the forms give you access at all the data needed .