Transcription
Creating Interactive Videowith CamtasiaAudioSCORM QuizzesPowerPoint and Screen ShotsUsing Camtasia Studio Version 6.0.2 to Make Recordings,Center for Teaching and Learning Muskegon Community Collegev1.2: 2009 Page 1
Camtasia Studio 6.0.2http://www.techsmith.com/camtasia.asp (free trial download)Table of ContentsCreate a Folder for your Project . 2Let's Begin . 2Creating Your Movie . 9Creating a Zip File for Your Camtasia Presentation . 16Uploading Your Zip File to Blackboard . 17Creating a Flash Quiz . 18Quick Note on Deleting Pieces of your Video . 20Using SCORM . 21Uploading Your SCORM Presentation to Blackboard . 24Using the Record PowerPoint feature . 29Camtasia Recording Guidelines for Teaching . 31Assumptions:You have a PowerPoint presentation created or a screen ready to record.You have Camtasia Studio 6.0.2.You have audio equipment ready and set to go.Create a Folder for your ProjectRight click in an area on your flash drive and create a New Folder.Give it a name you will recognize—it will contain all files for this Camtasia project.Let's Begin1.Open your PowerPoint presentation or your screen you wish to record.2.Start Camtasia Studio. You will see this entry screen: The first time you use Camtasia on aspecific computer, I recommend that you click on the "Record Voice Narration" button.Using Camtasia Studio Version 6.0.2 to Make Recordings,Center for Teaching and Learning Muskegon Community Collegev1.2: 2009 Page 2
3.You will see this screen where you can test out your audio.4.Click the "Finished" button when all is OK.5.Click Record the screen—upper left section of window.Using Camtasia Studio Version 6.0.2 to Make Recordings,Center for Teaching and Learning Muskegon Community Collegev1.2: 2009 Page 3
6.You should see this floatable toolbar:7.You can switch to your PowerPoint file or screen at this time (if it doesn't come upautomatically).8.Let's look quickly at each menu and see what you might want to change:Capture—notice when you want to begin recording, you can use the F9 function key in lieu of the "rec"button. You can also record Camera, if you wish.Effects—notice you can choose to include cursor sounds—you can also choose to hide or highlight thecursor.Tools—if you click on Tools and Options, you will see this window: Notice you have the option ofchanging the file format for the project to .avi. Right now, .camrec is the default extension.Using Camtasia Studio Version 6.0.2 to Make Recordings,Center for Teaching and Learning Muskegon Community Collegev1.2: 2009 Page 4
9.You may want to define your recording area, especially if you are recording something otherthan PowerPoint. To do this, click the Custom button followed by "Select" and define yourrecording area.10.Let's click the Full Screen screen as the recording area so that we can record it in presentationmode—this might be the way to go if you have links within your presentation or animationand/or transitions that you actually want to use during the recording. You should see markersaround your entire screen.11.Click to run the PowerPoint show so it is in presentation mode.Using Camtasia Studio Version 6.0.2 to Make Recordings,Center for Teaching and Learning Muskegon Community Collegev1.2: 2009 Page 5
12.When ready, click the red "Rec" button. The screen will give you a countdown of 3 – 2 – 1.13.Start talking.14.Be sure to move from slide to slide and complete the narration with the respective slide. Note:you may have to click twice to advance the first slide. Notice you can click F10 to stop or youcan pause at any time and RESUME.15.At the bottom of your preview, you will see this toolbar:16.Click the "Edit" button, and you will be prompted to save your recording. MAKE SURE YOUSAVE TO THE FILE FOLDER YOU CREATED AT THE BEGINNING.17.After saving, you will be taken back to Camtasia Studio and see this initial dialog box:18.You could accept the defaults by clicking OK. However, we suggest this:Using Camtasia Studio Version 6.0.2 to Make Recordings,Center for Teaching and Learning Muskegon Community Collegev1.2: 2009 Page 6
19.Change to "Custom"—type in Width such as "800," click "Keep aspect ratio" so that the Height isproportional, and click "Change the video dimensions." See below.20.Click OK.21.This is where you will see your Camtasia clip on the time line at the bottom of the window. Youcan add other clips, transitions, interactive quizzes, and do editing. See "Adding a Flash Quiz" ina later next section.22.You should also see the preview window where you can click to Play your video and make notesof what you might want to cut.23.If you wish to use slide transitions, there are a variety of options available by clickingTRANSITIONS. You will click the TRANSITIONS link in the Edit menu to see the screen below. Youcan double click any item to see a preview. Once you decide which you want to use, you willdrag it to the storyboard at the bottom over the big arrow between clips. You cannot insert atransition within one clip.Using Camtasia Studio Version 6.0.2 to Make Recordings,Center for Teaching and Learning Muskegon Community Collegev1.2: 2009 Page 7
Using Camtasia Studio Version 6.0.2 to Make Recordings,Center for Teaching and Learning Muskegon Community Collegev1.2: 2009 Page 8
Creating Your Movie1.From the left side of your Camtasia window, click "Produce Video as " under the Producesection (or click the 'Produce Video As" button from the toolbar).2.The Production Wizard will begin and you will see the first screen—click "Next."Using Camtasia Studio Version 6.0.2 to Make Recordings,Center for Teaching and Learning Muskegon Community Collegev1.2: 2009 Page 9
3.Click "Next" and you will see this screen:Using Camtasia Studio Version 6.0.2 to Make Recordings,Center for Teaching and Learning Muskegon Community Collegev1.2: 2009 Page 10
4.Click "Next" to accept defaults, and you will see this screen:Using Camtasia Studio Version 6.0.2 to Make Recordings,Center for Teaching and Learning Muskegon Community Collegev1.2: 2009 Page 11
5.6.Click "Flash Options" and see this screen: Verify that the "Key frame every:" to 5 seconds.Note: If you using version 6.0.0, you will see a different window without the key frame setting.You can also change "Background Color" of your presentation. If you change the backgroundcolor it adds a color bar at the top and bottom of the screen to fill the dimensions. Otherwise, itwill default to black.Click OK and you will see this screen.Using Camtasia Studio Version 6.0.2 to Make Recordings,Center for Teaching and Learning Muskegon Community Collegev1.2: 2009 Page 12
7.Make sure the “Embed Video into HTML” is checked.See "USING SCORM" in a later section.8.If you like, you can add a watermark to your presentation—either the Camtasia default logoshown under "Preview" or use a picture of your own. You can choose where to have it located.To do this, check "Include watermark."Using Camtasia Studio Version 6.0.2 to Make Recordings,Center for Teaching and Learning Muskegon Community Collegev1.2: 2009 Page 13
9.Under "Video Info," click the "Options" button. You will see this screen where you can click theAuthor tab and fill in appropriate information.10.Click OK.11.At the next screen, be sure to name your file and send it to the file folder you created for theproject:Using Camtasia Studio Version 6.0.2 to Make Recordings,Center for Teaching and Learning Muskegon Community Collegev1.2: 2009 Page 14
12.Click "Finish."13.You will see a screen with recommended production settings. Click "Finish."14.The next screen will show you the progress of the rendering of the video. This may take a while,depending on the length and the amount of narration.15.When that is finished, you will see the final screen:Using Camtasia Studio Version 6.0.2 to Make Recordings,Center for Teaching and Learning Muskegon Community Collegev1.2: 2009 Page 15
16.Click "Finish."17.Your entire project is not yet saved—you can do that now from Camtasia Studio if you wish orgo right to the Uploading of the zip file to Blackboard.Creating a Zip File for Your Camtasia Presentation1.Go to your folder for this project:If you used SCORM, a zip file with the name of your production may already be there. If you didnot, follow the next 3 steps.2.Open the folder inside the folder.3.You will see a host of files created by Camtasia. Select them, right click and Send to compressedzip file. Make sure your original PowerPoint or screen that you recorded or the .camproj is notone of these files.Using Camtasia Studio Version 6.0.2 to Make Recordings,Center for Teaching and Learning Muskegon Community Collegev1.2: 2009 Page 16
4.Another file will be added called xxxxx.zip. This is the file you will be uploading to Blackboard.You may rename the zip file if you like, as long as you keep the .zip extension.Uploading Your Zip File to Blackboard1. Log in to Blackboard into the Control Panel. Choose the location where you want the file to bepresented, or click "Edit" from the area in your course where you want to add your zip file.2. Click ITEM, add a title (required), and description or instructions if needed.3. In the Options area of the ITEM, browse to find the zip file for your Camtasia presentation.4. Add a name for the participants to click on (such as "Click Once to Start").5. Choose "UNPACKAGE THE FILE from the dropdown menu next to "Special Action."6. Click SUBMIT to go to the next screen.7. You will be presented with a list of the files. Start with the filename ending in .html8. Click Submit to load your movie to your Blackboard site.Using Camtasia Studio Version 6.0.2 to Make Recordings,Center for Teaching and Learning Muskegon Community Collegev1.2: 2009 Page 17
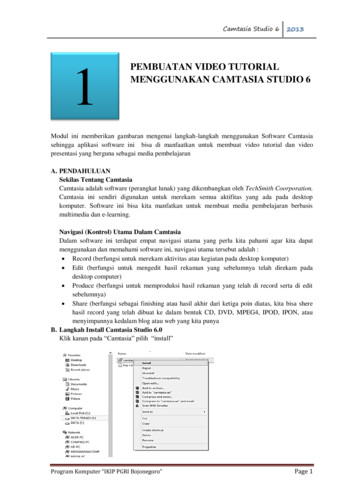
Creating a Flash Quiz1.Make sure you are positioned on the time line so that your quiz appears at the correct place. Ifyou are positioned at the beginning of the timeline, you can simply drag the quiz marker to theend of the timeline after building the quiz. See below.2.Click on "Flash Quiz and Survey" from the Task List. See below.3.From the next screen, click "Add Quiz "Using Camtasia Studio Version 6.0.2 to Make Recordings,Center for Teaching and Learning Muskegon Community Collegev1.2: 2009 Page 18
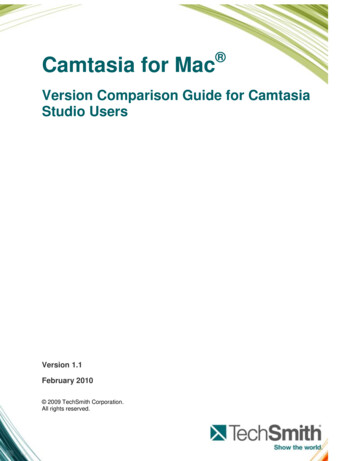
4.Give the quiz a name.5.Choose the type of question and click OK.6.Begin adding questions and typing in answers.Using Camtasia Studio Version 6.0.2 to Make Recordings,Center for Teaching and Learning Muskegon Community Collegev1.2: 2009 Page 19
7.After each question, click OK. When finished with all questions, click the "Finished" button.Quick Note on Deleting Pieces of your VideoThis takes some practice. What has worked well is to preview the video from the Camtasia Studiowindow and watch the time line numbers. Make a note of the "space" you want to delete. Drag acrossthat space, right click and choose "Cut Selection." UNDO works!Using Camtasia Studio Version 6.0.2 to Make Recordings,Center for Teaching and Learning Muskegon Community Collegev1.2: 2009 Page 20
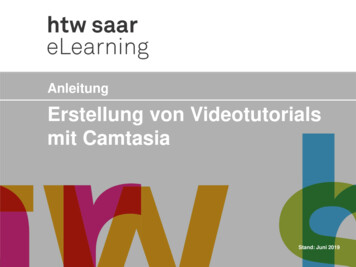
Using SCORMApplying SCORM in your Camtasia presentations will allow you to construct quizzes or surveys withfeedback and have the results synced with Blackboard 8 Grade Center.1.Produce your movie—when you get to this screen, click the "Options" button next to "Quiz andSurvey Reporting" shown below.Using Camtasia Studio Version 6.0.2 to Make Recordings,Center for Teaching and Learning Muskegon Community Collegev1.2: 2009 Page 21
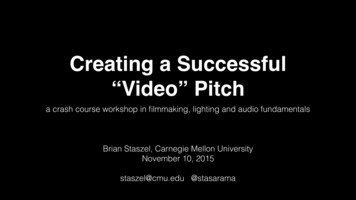
2.You will see this screen. Make sure "Report score using SCORM" is checked and click the"SCORM Options" button below.3.You will see this screen. Make sure Version 2004 is chosen and "Produce both zip file andunzipped files" is checked. Also, give your Lesson Information a "Title." Click OK and OK again.4.You will see this final screen. Click Next.Using Camtasia Studio Version 6.0.2 to Make Recordings,Center for Teaching and Learning Muskegon Community Collegev1.2: 2009 Page 22
5.You will see the screen where you must name your presentation and send to the correct filefolder. Also note that all files have been zipped for you. Click Finish.Using Camtasia Studio Version 6.0.2 to Make Recordings,Center for Teaching and Learning Muskegon Community Collegev1.2: 2009 Page 23
6.Your project will now go through the rendering process, which will take a few minutes.Remember, you files have been automatically zipped.Uploading Your SCORM Presentation to Blackboard1.Launch Blackboard.2.Go to the area where you want your zip file to reside.Using Camtasia Studio Version 6.0.2 to Make Recordings,Center for Teaching and Learning Muskegon Community Collegev1.2: 2009 Page 24
3.Click "SCORM CONTENT" from the drop down list and click "Go." See below:4.You will see the following screen. Give your content a title; then Browse for the zip file. It isimpo
Using Camtasia Studio Version 6.0.2 to Make Recordings, Center for Teaching and Learning Muskegon Community College v1.2: 2009 Page 20 7. After each question, click OK. When finished with all questions, click the "Finished" button. Quick Note on Deleting Pieces of your Video This takes some practice. What has worked well is to preview the video from the Camtasia Studio . Using Camtasia File Size: 1MBPage Count: 31