Transcription
Lesson 10: PowerPoint Presentations Beyond the Basics10POWERPOINT BEYOND THE BASICSMaking interactive, non-linear slide showsand enhancing formattingLEARNING OUTCOMESIn the first PowerPoint tutorial you learned how to create and save a new presentation (theScreenbeans slide show). You saw a sample slide show (The Tudor Monarchs). You learned howto prepare an outline, you typed text for each slide, added clip art, and set timings. You added aneffect to enhance the slide transition, you selected a color scheme, and may have even created anew background effect. You changed the printer settings so that you can print out handoutsrather than just individual slides of your shows.For many classrooms and for most K-12 students, what you learned in chapter 8 is just fine.But, if you're ready to take the next step and learn some more advanced skills with PowerPoint,or if you teach computer-savvy students who want more challenging skills to master, thischapter's for you.Most PowerPoint presentations you see in school or at work are what are called linearpresentations. That is, each slide is designed to proceed one slide right after another. The firstslide transitions to the second, which transitions to the third, and so forth. For many educationaltasks, this is fine.But, what if.What if you want your students to create an interactive story, where, for example, youngerkids could read about a dragon on Slide One, then choose, on Slide Two, any one of threepossible places that the dragon could go? By clicking on the word "desert," the show wouldmove to a slide describing what happens to the dragon in the desert. If the student clicks theword "forest," another slide appears with another ending. The learner thus participates, not bysimply clicking on slide after slide in one, linear direction, but by making choices that affectwhat slide comes next, thus making the presentation interactive and non-linear.309
ESSENTIAL MICROSOFT OFFICE 2010: Tutorials for TeachersCopyright Bernard John Poole, Lorrie Jackson, 2010. All rights reservedA more common application of non-linear PowerPoint presentations is when reviewingknowledge—for what you might call interactive Drill & Practice. This lesson will teach you howto do that. Teachers (and even older students) can create quizzes using PowerPoint. In these slideshows, students are asked questions and then click on what they think is the answer. If theanswer is correct, the show moves to the next question. If the student answers incorrectly, theshow moves the student back to re-answer the question or, if the question is of the True/Falsevariety, explains why the answer was incorrect before moving them on to the next step in theshow.The movement from one slide to another is not one-way, not linear, but rather non-linear, thepathway through the show determined by the student's interaction with it.In this tutorial you will be introduced to the basics of non-linear interactive PowerPoint slideshows, along with some more advanced formatting and impact-enhancing tools. Amongst theskills you will learn are: Using hidden slides, Action Buttons, and hyperlinks Formatting and enhancing graphics Inserting sounds, clip art, movies, and hyperlinks (including E-mail links)A caveat before you begin:If you have not completed the tutorial in Chapter 9 but feel fairly comfortable with the basics ofPowerPoint, feel free to tackle this chapter. If you are not sure you know the basics ofPowerPoint, however, skim Chapter 9 to make sure you're ready to begin. Good luck!10.1 ADDING ACTION BUTTONS AND HIDDEN SLIDES TO ANEXISTING PRESENTATIONAction buttonsFor the sake of uniformity, you are going to work with a version of the Screenbeans presentationcreated specially for this tutorial.In the PowerPoint File menu click on OpenNavigate on your disk to the Work Files for Office 2010 folder PowerPointFiles folder, then double click on the file Problems and Solutions to open itAction Buttons allow you to control the sequencing of the slides in a slide show. They also allowyou to go to slides that would otherwise be hidden from the user’s view and passed over whenthe slide show is running. You will learn about such Hidden Slides in the next section of thistutorial.Action Buttons also can be used to direct the user back to a previous slide, or forward to thenext slide, or to go directly to the first or last slide, or anywhere in between. Later in this tutorialyou will learn about other PowerPoint tools that can be used to call up a movie clip or someother kind of multimedia document.You're going to put Action Buttons on each of the slides in the Problems and Solutionspresentation. These action buttons will make it easy for the user to go back to the previous slideor forward to the next slide, and so forth. The first slide will have just one Action Button—to goto the next slide. The last slide will have two Actions Buttons, one to go to the previous slide and310
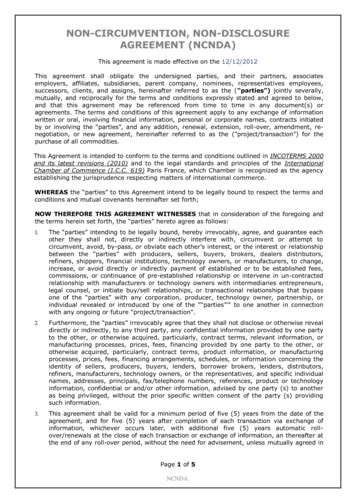
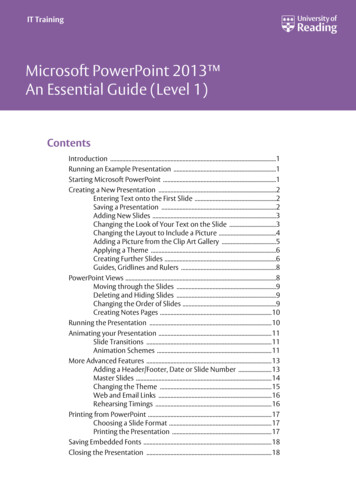
Lesson 10: PowerPoint Presentations Beyond the Basicsanother to go back to the beginning of the slide show (Home). Every other slide will have anAction Button to go to the previous slide, an Action Button to go to the next slide, and an ActionButton to go to the first (Home) slide in the presentation.Fig. 10.1 shows you how the Title slide will look after you've added the Action Button.Fig. 10.1 The Action Button on the Title slideOK, here goes. To use Action Buttons you must be in the Normal view so you can work onindividual slides.In the Slide View toolbar (lower right of your PowerPoint window—Fig.10.2) click on Normal viewFig. 10.2 The Slide View toolbar311
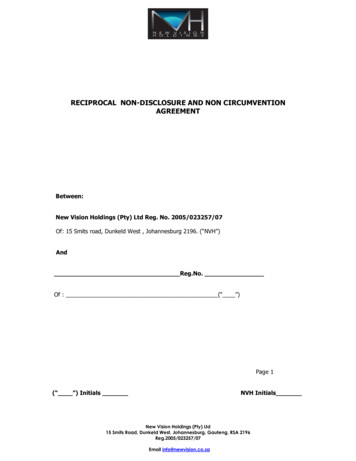
ESSENTIAL MICROSOFT OFFICE 2010: Tutorials for TeachersCopyright Bernard John Poole, Lorrie Jackson, 2010. All rights reservedThen, in the left hand frame of the PowerPoint window, click on Slide #1 (theTitle slide)In the Insert Ribbon Illustrations Group, then click on the Shapes icon toshow the selection of Shapes you can use in Office 2010 (Fig. 10.3)Action button forthe Forward orNext SlideFig. 10.3 The Office 2010 Shapes menu showing the Actions buttonsFrom the Shapes Action Buttons panel (Fig. 10.3 above), click on theAction Button for the Forward or Next slideNow, without clicking, roll the mouse cursor down over the large version ofthe slide on the right of the PowerPoint window and notice that the arrowpointer changes from a pointer to a cross hair ( )Position the cross hair in the lower right corner of the slide (where you seethe Action button in Fig. 10.1 on the previous page), and hold down the leftmouse button and drag to create a box about a half inch square (lookagain at the Action button in Fig. 10.1), then let go of the mouse buttonYou can adjust the size of an action button any time you want by clicking on it and dragging onthe handles around it.If the button you have created looks too large or too small to you, go aheadnow and click on it, grab one of the handles and adjust the size to yoursatisfaction312
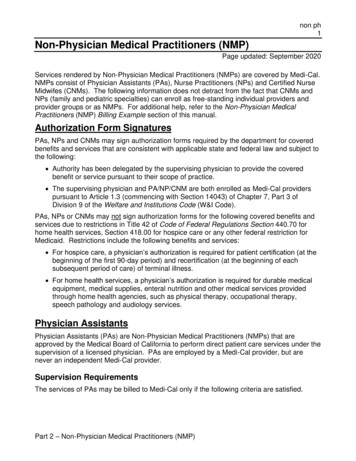
Lesson 10: PowerPoint Presentations Beyond the BasicsPowerPoint displays the Action Settings dialog box (Fig. 10.4).Click on this down arrow tosee the menu of soundsClick in this box toPlay a sound when theuser clicks on theAction ButtonFig. 10.4 The Action Settings dialog box(If you don’t see the Action Settings dialog box, right click on the ActionButton and, from the pop up context menu, select Edit Hyperlink )You want the Action Button to go from the Title slide to the Next Slide, which is the defaultsetting in the Hyperlink to: box, but before you click on OK, let’s opt to play a sound which theusers will hear when they click on the Action button (Fig. 10.4 above)Click to put a check mark (tick) in the box next to Play sound: then click onthe down arrow at the end of the Play Sound box and, from the menu ofsounds, select ArrowNow click on OKYou should now see a professional-looking Action Button. We’ll test it shortly. If you ran theslide show right away and clicked on the button, it would advance you to the next slide with thewhoosh sound of an arrow for good measure. You’re going to put this same button on the nextseven slides, so you need to copy it so you can paste it onto the next slide (Slide #2)Make sure you still have the handles around the Action button (just click onthe button to get the handles), then press ctrl-C to copy the Action button tothe clipboardYou're going to put three action buttons on each of the next seven slides—one to go back to theprevious slide, another to go forward to the next slide, and a third to go back to the beginning ofthe slide show.313
ESSENTIAL MICROSOFT OFFICE 2010: Tutorials for TeachersCopyright Bernard John Poole, Lorrie Jackson, 2010. All rights reservedClick (in the left hand pane) on Slide #2, and immediately press ctrl-V topaste the copy of the Action button from the first slide onto Slide #2Next, in the Insert Ribbon Illustrations Group click on the Shapes iconFrom the Action Buttons panel (Fig. 10.3 on page 315), select the ActionButton for Back or Previous slideSlide the cursor down to the lower left corner of the slide and drag to drawan Action Button in the lower left corner (Fig. 10.5)Fig. 10.5 Position the Back or Previous Action button in the lower left corner of the slideYou want this second Action Button to go from the second slide to the Previous Slide, which isthe default hyperlink, but before you click on OK, let’s opt to play a different sound for the usersto hear when they click on the Previous Slide Action button.Click to put a check mark (tick) in the box next to Play sound: then click onthe down arrow at the end of the Play Sound box and, from the menu ofsounds, select BreezeNow click on OKYou should now see another professional-looking Action Button. If you ran the slide show rightaway and clicked on the button, it would take you back to the previous slide with the sighingsound of a breeze.Finally on Slide #2, in the Insert Ribbon Illustrations Group, select theShapes menu and locate the Action Buttons panel314
Lesson 10: PowerPoint Presentations Beyond the BasicsIn the Action Buttons panel click the Action Button for the Home slide (itlooks like a little house), and once again, on the slide itself, drag to draw anAction Button in the lower center of the slide (Fig. 10.6)Fig. 10.6 The Home Action buttonYou want the Action Button to go to the Home Slide (the First slide in the show), which is thedefault hyperlink in the Action Settings dialog box, but before you click on OK you need to havePowerPoint play yet another different sound.Click to put a check mark (tick) in the box next to Play sound: then click onthe down arrow at the end of the Play Sound box and, from the menu ofsounds, select ChimeNow click on OKSlide #2 should now look something like Fig. 10.6 above.Copying the Action buttons to the other slidesOnce you have created a set of buttons for a slide, if you need to do the same on other slides inthe presentation, all you have to do is copy and paste them. This is a lot quicker than recreatingthem on each succeeding slide and it is very simple to do.Hold down the Shift key on the keyboard, then click on each of the newbuttons on the Confusion slide so that all three buttons are selectedPress ctrl-c on the keyboard to copy them to the clipboardClick in the left hand frame on the thumbnail for slide #3 and press ctrl-v topaste the buttons onto the third slideNotice that the buttons are pasted into the exact same place on the next slide.Now go to each of the remaining six (6) slides in the presentation and dothe same315
ESSENTIAL MICROSOFT OFFICE 2010: Tutorials for TeachersCopyright Bernard John Poole, Lorrie Jackson, 2010. All rights reservedBetter save your work to this pointThe Problems and Solutions presentation is missing one final slide—the Acknowledgementsslide, which should accompany any presentation where you use information or audio-visualmaterial that is not your own. Adding a new slide to a presentation is easy.First, you want the Acknowledgements slide to be that last slide in the show,so, in the left hand frame, use the mouse to click immediately after thethumbnail for Slide #9 (you’ll see a dark grey bar flashing on and off toindicate that this is where the new slide will go)Now, on the keyboard, hold down the Ctrl key and, at the same time, pressthe letter ‘m’ (Ctrl-m), or, in the Slides Group of the Home Ribbon, click onthe New Slide buttonThe layout for the new slide will be the same as the other slides in the show, namely a TwoContent layout. For the Acknowledgements slide it will be best if it is a Title and Content slidelayout.In the Home Ribbon Slides Group, click on the Layout option to bringdown the Layout menuIn the Layout menu, select the layout Title and ContentThe buttons are slightly different on this last slide. You still want the Action Button to go back tothe previous slide, and you need the one that returns you to the beginning—the Home ActionButton. But you don’t need a button to go to the next slide.You’ve just pasted the three Action buttons onto each of the previous 7 slides, so the buttonsare still available on the clipboard for you to paste onto the new last slideOn Slide #10, the last slide in the show, hit ctrl-V to paste the three Actionbuttons here, tooNow, click anywhere on the slide to deselect the three action buttons, thenclick on the Action button in the lower right corner (the Next Action Button)to select it alone, and hit the Del(ete) key to remove it from the slideNext, click where you see “Click to add title,” and in the Title box typeAcknowledgementsFinally, click in the large box below the Title box to add text and, by way ofAcknowledgements, type the following (centered) on the last slide:Screenbeans courtesy of Microsoft CorporationText courtesy of Bernie PooleYou don’t want the bullets with the text, so, in the Home Ribbon Paragraph Group, click on the Bulleted List tool to toggle the bullets off (orselect None from th
again at the Action button in Fig. 10.1), then let go of the mouse button You can adjust the size of an action button any time you want by clicking on it and dragging on the handles around it. If the button you have created looks too large or too small to you, go ahead now and click on it, grab one of the handles and adjust the size to your