Transcription
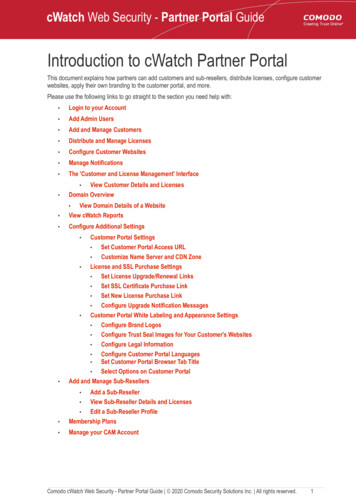
cWatch Web Security - Partner Portal GuideIntroduction to cWatch Partner PortalThis document explains how partners can add customers and sub-resellers, distribute licenses, configure customerwebsites, apply their own branding to the customer portal, and more.Please use the following links to go straight to the section you need help with: Login to your Account Add Admin Users Add and Manage Customers Distribute and Manage Licenses Configure Customer Websites Manage Notifications The 'Customer and License Management' Interface View Customer Details and LicensesDomain Overview View Domain Details of a WebsiteView cWatch Reports Configure Additional Settings Customer Portal Settings Set Customer Portal Access URL Customize Name Server and CDN Zone License and SSL Purchase Settings Set License Upgrade/Renewal Links Set SSL Certificate Purchase Link Set New License Purchase Link Configure Upgrade Notification Messages Customer Portal White Labeling and Appearance Settings Configure Brand Logos Configure Trust Seal Images for Your Customer's Websites Configure Legal Information Configure Customer Portal Languages Set Customer Portal Browser Tab Title Select Options on Customer PortalAdd and Manage Sub-Resellers Add a Sub-Reseller View Sub-Reseller Details and Licenses Edit a Sub-Reseller ProfileMembership Plans Manage your CAM Account Comodo cWatch Web Security - Partner Portal Guide 2020 Comodo Security Solutions Inc. All rights reserved.1
cWatch Web Security - Partner Portal GuideLogin to your Account Visit https://partner.cwatch.comodo.com/#/login Login - Enter your Comodo partner account credentials and click 'Login'Click 'Forgot your password?' to reset your password. You will be redirected tohttps://accounts.comodo.com/account/forget password. Complete the password resetprocedure.Don't have an account - Become a Comodo partner / reseller and enjoy discounts from selling Comodoproducts to your customers. Click 'Sign Up' and complete the partner enrollment procedure create account Add Admin Users This section explains how to add fellow admins to the partner portal and assign them permissions. You can skip this section if you do not want to add additional admins.Add an admin Login to the cWatch partner portal Click the user icon at the top-right and select 'Users':Comodo cWatch Web Security - Partner Portal Guide 2020 Comodo Security Solutions Inc. All rights reserved.2
cWatch Web Security - Partner Portal Guide This opens a list of existing admins Click the 'add user' icon - This opens the admin config screen:Comodo cWatch Web Security - Partner Portal Guide 2020 Comodo Security Solutions Inc. All rights reserved.3
cWatch Web Security - Partner Portal Guide Specify the new admin's name, email address and contact details Create and confirm a password for the admin Use the permission switches to enable or disable specific privilegesClick 'Add' You need to communicate the password to the user. They can login to the portal at https://partner.cwatch.comodo.com/#/login with their email address andpassword. We strongly recommend new admins change their password after first login. Permissions - click the following links for explanations on each privilege:Add a customerImport CustomerAdd a siteImport SiteDeactivate LicenseSend activation mails to customersDistribute Paid LicenseUpdate License Auto-RenewalDistribute Trial / Free LicenseUpgrade license / Put license into useExport to CSVGet and update 'Click to Buy' linksComodo cWatch Web Security - Partner Portal Guide 2020 Comodo Security Solutions Inc. All rights reserved.4
cWatch Web Security - Partner Portal GuideCustomer Portal Login asGet and update SSL linkCreate 'Malware removal request'Edit your profileManage SSLPurge cacheSet FTP/sFTP and enable scannerRemove SiteManage NotificationsSet cache settingsManage ReportsEdit a user Click the user icon at top-right and select 'Users' Place your mouse over a user row Click the 'Manage' button that appears in the 'Action' column:The user profile screen opens:Comodo cWatch Web Security - Partner Portal Guide 2020 Comodo Security Solutions Inc. All rights reserved.5
cWatch Web Security - Partner Portal Guide Edit the details of the user as required. Note - The email address of the user is not editable. Click 'Update' to save your changesRemove a user Click the user icon at top-right and select 'Users' Place your mouse over a user row Click the 'Manage' button that appears in the 'Action' column:The user profile screen opens as shown above: Click 'Delete User'A confirmation screen appears:Comodo cWatch Web Security - Partner Portal Guide 2020 Comodo Security Solutions Inc. All rights reserved.6
cWatch Web Security - Partner Portal Guide Enter the email address of the user and click 'Delete'The user is removed from the partner portal. All data associated with the user is also deleted.Add and Manage Customers This section explains how to add customers to the cWatch partner portal. Afterwards, you can distribute licenses to them and activate cWatch protection on their sites. You can add customers one at a time, or import them in bulk from a CSV file.Please use the following links to learn more: Add a single customer Import customers from a CSV file The 'Customer and License Management' interface View customer details and licensesAdd a single customer Login to the cWatch partner portal Open the 'Customer and License Management' tab:Comodo cWatch Web Security - Partner Portal Guide 2020 Comodo Security Solutions Inc. All rights reserved.7
cWatch Web Security - Partner Portal Guide Click theicon in the actions menuOR Click the menu button at top-right and select 'Add Customer'Comodo cWatch Web Security - Partner Portal Guide 2020 Comodo Security Solutions Inc. All rights reserved.8
cWatch Web Security - Partner Portal Guide Enter the new customer's name, email address and country Select the language used in the cWatch portal when this customer logs in. Notifications sent to thecustomer will also use this language. Enable 'Add Another' if you want to add multiple customers Click 'Add' to save your customers.The customer screen lets you view and manage customers, send account activation emails, reset passwords,distribute licenses, add sites, and more.Import customers from a CSV fileYou can add multiple customers by importing them from a comma separated values (CSV) file. Create a .csv file using a text editor or spreadsheet application Each line of the csv should contain five, separated values:First name Surname Email address Two letter country code Two letter language codeExample: Jack,Potts,jack.potts@jacksgreatpots.com,FR,fr No spaces after the commas. All fields are mandatory. The file should not contain column headers. Each line should contain a single customer.Open the 'Customer and License Management' tab Click the 'Import Customers' button Click 'Select CSV file', browse to the file you just created and upload it. You customers will be imported to cWatch. Import users in cWatch: Login to the cWatch partner portal Open the 'Customer and License Management' tab Click the 'Import Customers' iconon the top-menuOR Click the menu icon at top-right and choose 'Import Customers' from the optionsComodo cWatch Web Security - Partner Portal Guide 2020 Comodo Security Solutions Inc. All rights reserved.9
cWatch Web Security - Partner Portal Guide Click 'Select CSV file' and browse to your saved CSV. Click 'Open'The customers will be imported to cWatch. Open the 'Customer and License Management' screen to view andmanage them.Distribute and Manage Licenses This section explains how you can distribute paid and trial licenses to customers. The cost of paid licenses will be deducted from your account by Comodo. It is your responsibility to chargeand collect fees from your customers by whichever method you prefer. You can deposit funds to buy licenses in Comodo Accounts Manager (CAM). Login athttps://accounts.comodo.com. See Manage your CAM Account for more.cWatch sends an account activation email to the customer when you distribute their first license to them. You can edit automatic mails in 'Notifications' 'Account Activation Mail' 'Settings'. Manually send an activation mail instead - Click 'Customer and License Management' select acustomer from the list click the email icon. See Send Account Activation Email if you need more help with this.You can distribute only one license at a time. The license distribution process is similar for both cWatch Security and cWatch Backup licenses. You can deactivate licenses that are not required for a customer. Comodo cWatch Web Security - Partner Portal Guide 2020 Comodo Security Solutions Inc. All rights reserved.10
cWatch Web Security - Partner Portal GuidePlease use the following links to learn more: Distribute a License Send Account Activation Email Deactivate Customer LicensesDistribute a license Open the 'Customer and License Management' tab Select the customer to whom you want to distribute a license. Click the chain link iconin the actions menuOR Click the menu button at top-right and select 'Distribute License' Select the license type, term and quantity of licenses you want to distribute. License - Available licenses: Starter Starter Paid with Trial WAF Starter BasicComodo cWatch Web Security - Partner Portal Guide 2020 Comodo Security Solutions Inc. All rights reserved.11
cWatch Web Security - Partner Portal Guide ProPro Paid with TrialPro Trial 30 DaysPro Trial 60 DaysPremiumPremium Paid with TrialPremium Trial 30 DaysPremium Trial 60 DaysBackup SmallBackup MediumBackup LargeNuCDN ProNuCDN PremiumNuDNS ProNuDNS PremiumMulti pack (5 / 10 domains) in a single license for Starter, Pro and PremiumNote: The following licenses will auto-upgrade to the paid version at the end of the 30 day trial: Starter Paid with Trial Pro Paid with Trial Premium Paid with TrialYou can upgrade other trial licenses to paid licenses in the customer details interface. See Upgrade a License in View Customer Details and Licenses for help with this. Comodo recommends using a 'Premium Trial 30' license so that the customer gets the full cWatchexperience. See Membership Plans to view the various features that each license unlocks for thecustomer.Auto-Renewal - Applies only to paid licenses. Comodo will automatically issue a replacementlicense when the original expires. The cost of the license will be deducted from your accountfunds. You can change the auto-renewal setting of a license at anytime.Comodo cWatch Web Security - Partner Portal Guide 2020 Comodo Security Solutions Inc. All rights reserved.12
cWatch Web Security - Partner Portal Guide See Enable or disable auto-renewal of customer licenses in The 'Customer and LicenseManagement' Interface for more details. Terms - Choose the validity period of the license. The terms available depend on the license type. Quantity - The number of licenses. The field is pre-populated with '1' and is not editable.Click 'Next' The license confirmation is shown. Click 'Back' to change license details if required. Click 'Submit'. cWatch will generate a license key and send an order confirmation mail to the customer. The customer will also receive an account activation mail if this is their first license. The mail contains a link Comodo cWatch Web Security - Partner Portal Guide 2020 Comodo Security Solutions Inc. All rights reserved.13
cWatch Web Security - Partner Portal Guideto login at https://login.cwatch.comodo.com/login and finish registration. You can send or re-send the activation email at any time:Click 'Customer and License Management' select a customer from the list Click the email icon You can see the status of the mail in the 'Customer and license Management interface' 'AccountActivation Email' column. See Send Account Activation Email if you need more help with this.You can also send password reset mails to the customer. See 'Send Password Reset Mail' if you needmore help with this. Manually send an account activation email Open the 'Customer and License Management' tab Select the customer to whom you want to send the activation email Click the notification mail iconin the actions menuOR Click the menu button at top-right and select 'Send Email'A confirmation is shown. Click 'Submit'Comodo cWatch Web Security - Partner Portal Guide 2020 Comodo Security Solutions Inc. All rights reserved.14
cWatch Web Security - Partner Portal GuideThe activation email is sent.Deactivate a Customer License You can deactivate licenses that you no longer require. Deactivated licenses are removed from your account and invalidated. You cannot reuse the license on any other website. Open the 'Customer and License Management' tab Select the customer whose license you want to deactivate Click the broken chain iconin the actions menuOR Click the menu button at top-right and select 'Deactivate License':Comodo cWatch Web Security - Partner Portal Guide 2020 Comodo Security Solutions Inc. All rights reserved.15
cWatch Web Security - Partner Portal Guide Select all licenses you want to remove and click 'Deactivate'Comodo cWatch Web Security - Partner Portal Guide 2020 Comodo Security Solutions Inc. All rights reserved.16
cWatch Web Security - Partner Portal GuideThe licenses are invalidated and cannot be associated with customer websites.Configure Customer Websites This section explains how you can add a customer's website to cWatch. After adding a site, your customer needs to configure their DNS to route traffic through cWatch. They alsoneed to upload the cWatch agent to enable malware scans. Each domain requires one license. Please make sure you have enough licenses to cover the domains youwant to protect.There are three ways you can add customer websites to cWatch: Use the wizard Import from CSV From the 'Customer Details' interfaceAdd websites using the wizard The 'Add Sites' wizard lets you create new sites in cWatch and associate them with licenses. Open the 'Customer and License Management' tab Select the customer for whom you want to add the site Click the 'Add Sites' iconin the actions menuOR Click the menu button at top-right and select 'Add Sites'This starts the wizard:Comodo cWatch Web Security - Partner Portal Guide 2020 Comodo Security Solutions Inc. All rights reserved.17
cWatch Web Security - Partner Portal GuideStep 1 - Define Sites Domain - Enter the website URL without http/https at the start. E.g. - example.com orsubdomain.example.com. License - Select the customer license you would like to apply to the site DNS Service - The options available are: No DNS - Add a website but don't use Comodo DNS. DNS must be setup later by you, or thecustomer, in order to enable cWatch protection.Initiate DNS - Retrieves the DNS records of the website then implements these records in cWatch(dnsByComodo service). Your customer now only needs to point their name servers to cWatch inorder to enable the service. This saves your customer the step of adding CNAME and A records tocWatch for each of their sites.Comodo cWatch Web Security - Partner Portal Guide 2020 Comodo Security Solutions Inc. All rights reserved.18
cWatch Web Security - Partner Portal GuideInitiate DNS and Auto SSL - Configures DNS as explained above and also provides the customera with with a free SSL certificate. The process first checks if the customer's name servers arepointing to dnsByComodo. After verification, cWatch generates a key pair, requests the certificate,creates a CNAME DNS record on dnsbyComodo, validates the domain, collects the certificate andinstalls it on cWatch edge servers. The certificate will encrypt traffic between the CDN servers and the website's visitors. It will notsecure the connection between the customer's server (where the site is hosted) and the CDN(where the customer's site is cached).Click 'Next' Step 2 - Submit Review the website and license parameters and settings Click 'Back' to change settings, if required Click 'Submit'Step 3 - FinalizationComodo cWatch Web Security - Partner Portal Guide 2020 Comodo Security Solutions Inc. All rights reserved.19
cWatch Web Security - Partner Portal Guide Click 'Close'cWatch protection is enabled on the site once provisioning is complete. You can see the progress in the 'SiteProvisioning' column of the customer details screen: Open the 'Customer and License Management' tab Click on the row of a customer whose details you want to view The site integration status is displayed in the Site Provisioning column under 'Licenses'. See View Customer Details and Licenses for more details. You can add a website backup license once the site is provisioned. See Associate backup license to awebsite in View Customer Details and Licenses for help with this.Import Customer Websites from a CSV file You can add multiple websites by importing from a comma separated values (CSV) file.Create CSV FileThere are two ways to do this: Create a new CSV file Download template from cWatch and modify itCreate a new CSV file Create a .csv file using a text editor or spreadsheet application Each line of the csv should contain five, separated values:Email address of the customer Domain name License key Initiate DNS Auto SSLExample: bd632bc-81b4-4ca0-b187-8c78901a194f,true,falseNo spaces after the commas. All fields are mandatory. The file should not contain column headers and each line should contain a single customer.Get a customer's license keys Open the 'Customer and License Management' tab Click on a customer to open their details screen Click 'Download' below 'Licenses' to download a list of their license keysDownload and modify a template Open the 'Customer and License Management' tabComodo cWatch Web Security - Partner Portal Guide 2020 Comodo Security Solutions Inc. All rights reserved.20
cWatch Web Security - Partner Portal Guide Click the 'Import Sites' iconOR Click the menu icon at top-right and choose 'Import Sites' from the options Click 'Export Template CSV' at the bottom of the 'Import Sites' screen The export file is a list of your customers and their license keys:Comodo cWatch Web Security - Partner Portal Guide 2020 Comodo Security Solutions Inc. All rights reserved.21
cWatch Web Security - Partner Portal Guide Delete all rows that you don't need. Keep the rows with customers/licenses for whom you want to add sites. Enter the domain you want to add for the customer in column B Edit the 'Initiate DNS' and 'Auto SSL' columns as required. Save the CSV fileImport websites from a CSV file Open the 'Customer and License Management' tab Click the 'Import Sites' iconOR Click the menu icon at top-right and choose 'Import Sites'The 'Import Sites' wizard starts:Comodo cWatch Web Security - Partner Portal Guide 2020 Comodo Security Solutions Inc. All rights reserved.22
cWatch Web Security - Partner Portal Guide Click 'Select CSV File', browse to the file you want to import and click 'Open' Domain details will be fetched from the file and shown in the interface as follows:Comodo cWatch Web Security - Partner Portal Guide 2020 Comodo Security Solutions Inc. All rights reserved.23
cWatch Web Security - Partner Portal Guide Click 'Submit' to import the information into cWatch Click 'Close' to finish the wizard.The process may take a few minutes. You can view import status in the 'Customer Details' screen:Comodo cWatch Web Security - Partner Portal Guide 2020 Comodo Security Solutions Inc. All rights reserved.24
cWatch Web Security - Partner Portal Guide See View Customer Details and Licenses if you need help with this screen. You can associate backup license to the site once provisioning is complete. See Associate backuplicense to a website in View Customer Details and Licenses for help with this.Manage NotificationsThis section explains how to configure your outgoing mail server and cWatch system emails. System emails includeaccount activation mails, license issuance mails and malware notifications. Click the 'Notifications' tab: Click the buttons at upper-right to switch between support notifications, email settings, and the notificationeditor. Support Ticket Notification – Choose whether your customers receive notifications aboutmalware removal operationsEmail Settings - Configure outgoing mail servers and the accounts used to send notifications.See Configure Email Server Settings for more on this.Notifications - Edit email templates, select the sender mail account, and specify recipients. SeeConfigure Notification Templates and Recipients for more on this.Comodo cWatch Web Security - Partner Portal Guide 2020 Comodo Security Solutions Inc. All rights reserved.25
cWatch Web Security - Partner Portal GuideSupport Ticket Notification Settings A support ticket is created when Comodo technicians are engaged to remove malware from a customerwebsite. cWatch can notify your customers when a support agent comments on a ticket about their site. Forexample, “Malware removal complete on www.example.com”. You can enable or disable these notifications as per your preference. Click the 'Notifications' tab then 'Support Ticket Notification' Support Ticket Notification – If enabled, your customers receive email notifications when a support agentresponds to a malware removal request.Notification emails are in English, as this is the common language used by our support team. No otherlanguage is available.Click 'Save' to apply your changes. Email Server Settings This section lets you set up your outgoing mail server, and the accounts through which cWatch emails aresent. Click 'Notifications' in the top-menu Click ‘Notifications’ or ‘Support ticket notification’ on the right, until the ‘Email Settings’ link appears. Click the 'Email Settings' link This opens a list of existing accounts which can send notifications:Comodo cWatch Web Security - Partner Portal Guide 2020 Comodo Security Solutions Inc. All rights reserved.26
cWatch Web Security - Partner Portal GuideAdd a new sender account Click the ' ' button at top-left Complete all fields in the 'Add Sender' screen: From Email - The account from which the notification is sent. This address appears in the 'From'field of the notification mail.Host Name - Enter the hostname or IP address of your SMTP serverUser Name / Password - The login details of the sender accountPort - The port number your mail server uses for outgoing mail. This is port 587 if you useStartTLS, or port 25 if you don’t.StartTLS - Enable if your mail server supports opportunistic encryption via StartTLS. StartTLS is acommand, issued by an email client, which upgrades insecure connections between the client andthe server to a secure connection.Visit this site to find out if your mail server supports StartTLS - https://starttls-everywhere.org/Enable SSL - Select if your mail server uses an SSL/TLS certificate to secure the connectionbetween the server and the recipient.Click 'Save' cWatch checks your mail server settings and, if valid, adds the account to the list of senders. You can now sendcWatch notifications through this account.Update a sender email account Click the 'Notifications' tab Click ‘Notifications’ or ‘Support ticket notification’ on the right, until the ‘Email Settings’ link appears. Click the 'Email Settings' link Mouse-over the row of an email account user Click the pencil icon that appears in the 'Action' columnComodo cWatch Web Security - Partner Portal Guide 2020 Comodo Security Solutions Inc. All rights reserved.27
cWatch Web Security - Partner Portal Guide Edit the details as required and click 'Save' The fields in the form are explained above.Remove a sender email account Click the 'Notifications' tab Click ‘Notifications’ or ‘Support ticket notification’ on the right, until the ‘Email Settings’ link appears. Click the 'Email Settings' link Mouse-over the row of an email account user Click the trash-can icon that appears in the 'Action' column:Comodo cWatch Web Security - Partner Portal Guide 2020 Comodo Security Solutions Inc. All rights reserved.28
cWatch Web Security - Partner Portal Guide Enter the email address of the sender account for confirmation Click 'Delete' to remove the accountNote: You cannot remove sender accounts which are currently associated with a notification mail.To remove the account from notification mails: Click ‘Notifications’ in the top-menu Click the ‘Notifications’ link on the upper-right If you can’t see it, click ‘Email Settings’ or ‘Support ticket notification’ to make it appear.Click the ‘Settings’ link in the ‘Action’ column of a notification Change the account in the ‘From’ field Click ‘Save’ Repeat for all other notifications which use this account You can then delete the email account if required. See Configure Notification Templates and Recipients formore help with this.Configure Notification Templates and RecipientscWatch can send the following types of notification: Account activation email - Sent when you issue a license to a customer for the first time. The mailcontains an activation link which allows them to complete the account setup process. Distribute License - Sent to provision a new license to a customer. Malware Found - Sent to customers when malware is identified on their site. License Expired - Sent to customers when the cWatch security license on their site expires. The mailcontains a link for the customer to renew. OWASP Vulnerability Found - Sent to customers when a threat on the OWASP list is found on their site. Backup Completed - Sent to customers when a backup of their website has just finished. Backup License Expired - Sent to customers when their cWatch backup license expires. The mailcontains a link for the customer to renew. Reset Password - Sent to customers who request a password reset by clicking ‘Forgot Password’ on thelogin page. You can also send password reset mails from the 'Customer and License Management' page.The mail contains a link for the customer to create a new password.You can implement different settings per mail type: The content and language The sender account The recipientsConfigure notification mails Click 'Notifications' in the top-menu Click the ‘Notifications’ link on the upper-right If you can’t see it, click ‘Email Settings’ or ‘Support ticket notification’ to make it appear.Comodo cWatch Web Security - Partner Portal Guide 2020 Comodo Security Solutions Inc. All rights reserved.29
cWatch Web Security - Partner Portal GuideNotifications - Columns and ControlsColumn HeaderDescriptionNameThe event for which the notification is sentEnabledSwitch the notification on or offLanguageThe language used in the mailActionConfigure the content, sender email address and recipients for the notification. SeeConfigure a notification email for more details.Filter and Search Options: The fields at top-right let you filter/search notifications: Select your filter category from the 'Type' drop-downSelect your search criteria in the 'Value' filedThe table shows five notifications per page. Use the number buttons at bottom-right to choose how many notifications are shown per pageUse the page numbers at the bottom left to navigate through the pagesComodo cWatch Web Security - Partner Portal Guide 2020 Comodo Security Solutions Inc. All rights reserved.30
cWatch Web Security - Partner Portal GuideConfigure notification emails Click on an event to configure the notification mail. Notification templates are available in English, German, Dutch, French, Italian and Spanish. Mails are sentin the language that the customer selects for their portal. Hover your mouse over the row of a notification to reveal the 'Settings' button in the 'Action' column andclick it The 'Notification Settings' wizard starts: Use the switch at the top-left to enable or disable the notificationFrom - Select the email account from which the notification has to be sent to the recipientsSubject - Edit the Subject line of the notification mailEmail Template - Edit the content of the email displayed in the rich text editor. You can use thecontrols at the top to format the textInsert Variable - Variables are items like username, domain name, last scan date etc. The actualvalue is dynamically inserted in the mail. Place your cursor where you want the variable to go thenselect an item from the ‘Insert Variable’ drop-down.Notify users - Select whether or not the email is to be sent to all admin usersComodo cWatch Web Security - Partner Portal Guide 2020 Comodo Security Solutions Inc. All rights reserved.31
cWatch Web Security - Partner Portal Guide Notify customers - Select whether or not the email is sent to the customerNotify account owner - Select whether or not the notification is sent to the primary account holderof your partner accountSubscriber email - Optional. Enter the email address of an external recipient. Place your mouse over the field and click the ' ' icon that appears to add additional recipients Place your mouse over the field and click the trash can icon that appears to remove arecipientRevert to Default - Click to reset the notification mail template to default contentClick 'Preview And Save' A preview of the full email content is shown:Comodo cWatch Web Security - Partner Portal Guide 2020 Comodo Security Solutions Inc. All rights reserved.32
cWatch Web Security - Partner Portal Guide Click 'Back' to make any changes, if required Click 'Save' for your changes to take effectAfter saving, you can test the notification works in the following screen:Comodo cWatch Web Security - Partner Portal Guide 2020 Comodo Security Solution
cWatch Web Security - Partner Portal Guide Edit the details of the user as required. Note - The email address of the user is not editable. Click 'Update' to save your changes Remove a user Click the user icon at top-right and select 'Users' Place your mouse over a user row Click the 'Manage' button that appears in the 'Action' column: The user profile screen opens as shown .
