Transcription
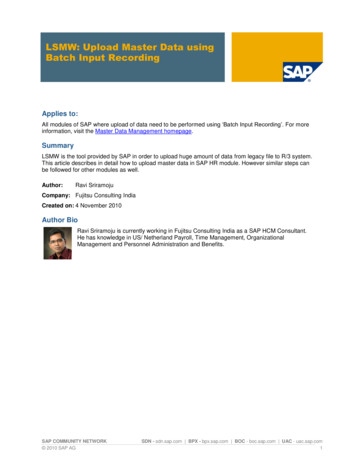
Banner HR TrainingEPAF Upload File Management and ProcessingPurposeCreate EPAF transactions using the MS Excel EPAF UPLOAD TEMPLATEs, FileZilla and the EPAF Upload [NZPELOD] to complete thefollowing tasks:1. Accessing, Saving and Updating the MS Excel EPAF UPLOAD TEMPLATE2. Entering Required Data3. Saving the MS Excel Worksheet with a .csv File Format4. Using FileZilla to copy the .csv file to the FTS production file server5. Using NZPELOD to Create EPAFs from the .csv file.1. Accessing, Saving and Updating the MS Excel EPAF UPLOAD TEMPLATEs1.1Accessing and Saving an EPAF UPLOAD TEMPLATEOPEN the appropriate EPAF UPLOAD TEMPLATE located mSAVE the MS Excel file in a directory used by your department.FILE Name The suggested file naming convention is: epaf mm dd yy xxxxxxxxwhere xxxxxxxx could be your user name, BSC name, or anything meaningful to your department.1.2Updating the MS Excel EPAF UPLOAD fileColumns and Rows The first row of the worksheet must only contain column names. Column names are case sensitive. Optional columns have column names highlighted in White. Required columns have column names highlighted in Yellow.If a required column is missing the file will not be processed. You can add your own columns to the worksheet.Each of your column names should be unique and have the word USER in it (e.g. USER Total).Blank column names are not allowed. Column names defined in the EPAF UPLOAD TEMPLATE must not be changed.If a predefined column name is changed NZPELOD will not know how to process it. Columns can be arranged in any order. A new row is needed for each job record. All rows, EXCEPT the first row containing column names, can be sorted in any order. All data entered into date columns must be entered in the format: DD-MMM-YYYY [01-JAN-2011]EPAF Upload File Management and ProcessingPage 1 of 10
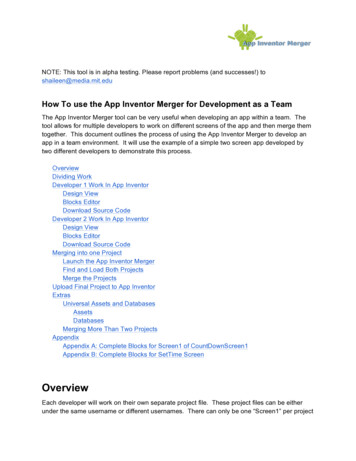
Banner HR Training EPAF Upload File Management and ProcessingCRITICAL! If cutting and pasting from another spreadsheet make sure to Paste Special - Values OnlyThis preserves the correct format of critical columns.Page 2 of 10
Banner HR Training2. Entering Data2.1OPEN the appropriate EPAF UPLOAD pdf cheat sheet located m2.2Entering Data The EPAF UPLOAD pdf cheat sheet provides information on the data fields used to create the EPAFtransaction.2.3Entering Required Each type of EPAF will have columns which contain key data and are therefore required.Data If any key data is missing or is invalid the job record(s) will not be processed.EPAF Upload File Management and ProcessingPage 3 of 10
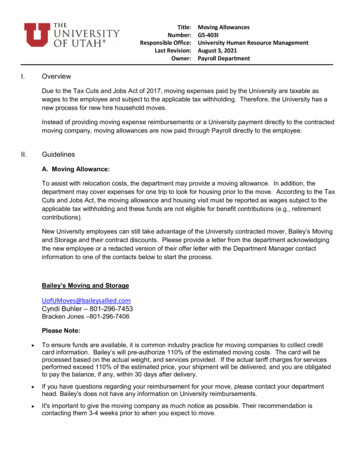
Banner HR Training3. Saving the MS Excel Worksheet with a .csv File FormatSave the MS Excel file as a .csv file only after all jobs have been entered and the file is complete.File DirectorySave the .csv in the same department directory as the MS Excel file.File NamingThe .csv file name must adhere to the following naming conventions:Conventions Begin with epaf Be all lowercase. Never contain blank spaces. Never contain special characters such as *, %, or #,or ‐. Can contain the following characters (a‐z, 1‐9, , . )Suggestedepaf mm dd yy xxxxxxxx.csvFile Namewhere xxxxxxxx could be your user name, BSC name, or anything meaningful to your department.Save as .csv FileCLICK the Microsoft Office Button.CLICK Save As.Save in: SELECT the desired directory.File name: TYPE the file name.Save as type: SELECT CSV (Comma delimited) (*.csv) from the drop down list.CLICK Save.EXIT Excel and do not save changes to .csv file when prompted.Managing the .csv fileOnce you save the .csv file NEVER open it in Excel. (Can be opened in Notepad if needed for NEVER open .csv file.troubleshooting.)Always make corrections to your original MS Excel file and then re‐save it as a .csv file. Make corrections tooriginal MS Excel file.If you are replacing an existing .csv file, when you go to save the .csv file make sure to overwrite it by Replacing an existingdouble clicking the existing .csv file name in the Save in: window. This will insure that you are using.csv filethe same file name.You will receive the following warning: The file epaf mm dd yy xxxxxxxx.csv already exists. Do youwant to replace the existing file?CLICK Yes to replace the existing file which will save it with the same name. Creating a new .csv file If you are saving a different .csv file, make sure to save it with a different name than the first file.EPAF Upload File Management and ProcessingPage 4 of 10
Banner HR Training4. Using FileZilla to copy the .csv file to the FTS production file server.4.1Access the FTS File Sharing ServerDownloading FileZillaThese instructions assume the application FileZilla [SSH SECURE File Transfer Client] has already beeninstalled on your computer and the FTS connection has already been established.The FileZilla application and instructions for Using FileZilla with FTS are available at:http://www.usnhgateway.org/soft.htmlAccess FTS ServerAccess your dropofffolderEPAF Upload File Management and ProcessingSTART FileZilla.SELECT File from the menu bar.SELECT Site Manager.CLICK FTS.ENTER your User: and Account: info if it isn’t already displayed.ENTER your password.CLICK Connect.In the Remote Site: window pane [MIDDLE RIGHT] you will see /fts/ already entered. DOUBLE CLICK thefolders listed in the Filename column until you reach the last folder as defined for your group:GSC HR:/fts/gsc/fis/user dropoff/usnhfsKSC HR:/fts/ksc/hrs/user dropoff/hrPSU HR:/fts/psc/hrs/user dropoff/hrUNH AA:/fts/fis/user dropoff/aabscUNH COLA:/fts/fis/user dropoff/colabscUNH COLSA:/fts/fis/user dropoff/colsabscUNH Central Admin: /fts/fis/user dropoff/ctradmbscUNH CEPS:/fts/fis/user dropoff/cepsbscUNH HHS:/fts/fis/user dropoff/chhsbscUNH HR:/fts/hrs/user dropoff/hr/UNH WSBE:/fts/fis/user dropoff/wsbebscUSNH HR:/fts/usnh/user dropoff/hrPage 5 of 10
Banner HR Training4.2Copy the .csv file to the FTS dropoff folder In the FileZilla Local Site: window pane [MIDDLE LEFT], DOUBLE CLICK on the folders listed in the Filename column until youreach the departmental directory containing the .csv file you want to copy to your FTS dropoff folder. If you are replacing an existing file make sure you use the same name when copying the .csv file to FTS. If you use adifferent file name two separate files will exist in your dropoff folder and the NZPELOD process will process both files.Exit FileZillaEPAF Upload File Management and ProcessingPage 6 of 10
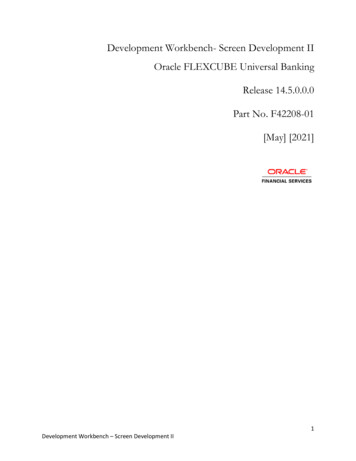
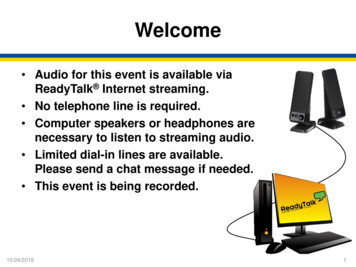
Banner HR Training5. Using NZPELOD to Create EPAFs from the .csv file.5.1Log into VPN.5.2Log into Banner HR.5.3Have the Originator sited in the file review NTRROUT values for the Approval Category sited in the file.These values will be used to define the routing on the EPAFs created.5.4Note: At least one entry must exist on NTRROUT for the Approval Category with an action of ‘Approve’. Even if the approvalcategory does not normally require an approval, this must be setup to use the approval category via the upload tool. The approvercan be the same as the originator; the only requirement is that someone looks at it online prior to it being applied.Run NZPELOD.In the Go To field on the Banner main menu type NZPELOD and PRESS Enter.USE Next Block to get to the Printer Control block. Confirm the Printer: field is set to DATABASE.USE Next Block to get to the Parameter Values block.Define Parameter 01 – Audit or Commit‘A’ AuditIndicatorWhen the process is run in this mode it will generate error reports butWILL NOT create EPAFs for user approval and completion.‘C’ CommitWhen the process is run in this mode it will generate error reports andWILL create EPAFs for user approval and completion.ALWAYS run the process in A – Audit mode first.Always run the process in Audit mode first to check for any errors, both inthe errs.lis file and the epaf.lis files. (NOTE: Warnings in the epaf.lis file areOK.)Use the Values drop down list to select the mode. DOUBLE CLICK the modeto select it from the list.USE Next Record to navigate to the next parameter value.Define Parameter 02 – Campus/BSC nameParameter 02 is used to select the Campus/BSC name.Always use the Values drop down list to select the Campus/BSC name.DOUBLE CLICK the Campus or BSC name to select it from the list.EPAF Upload File Management and ProcessingPage 7 of 10
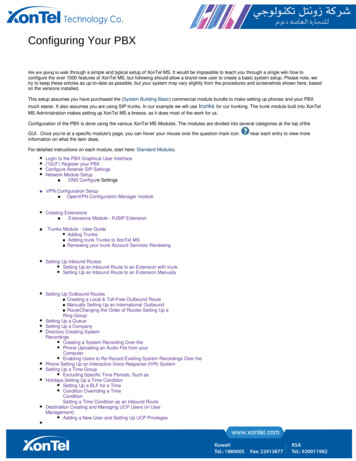
Banner HR TrainingSubmit/Run NZPELODEPAF Upload File Management and ProcessingUSE Next Block to get to the Submission block.CLICK the save Icon to submit/run the NZPELOD process.The process may take a few minutes to run.WRITE DOWN the process number displayed in the BOTTOM LEFT cornerof the Banner window.You will use this number to select the appropriate output for review.Page 8 of 10
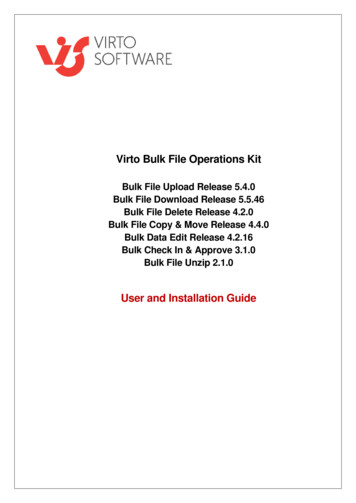
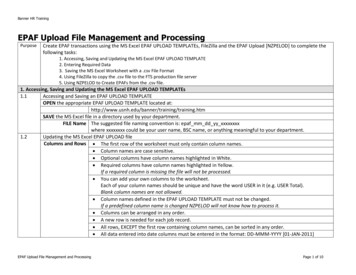
Banner HR TrainingReview Output ReportsView a ReportPrint a Reportnzpelod ######.logEPAF Upload File Management and ProcessingSELECT Options menu.SELECT Review Output [GJIREVO].File Name: CLICK the drop down arrow to view the output reports.You should see the following three Output File names associated with###### being your process number: nzpelod ###### errs.lisThis report lists all the errors that will stop a row from being convertedinto an EPAF. nzpelod ###### epaf.lisThis report lists EPAFs created with Warnings and/or Errors. nzpelod ######.logThis report is a log of the processing and provides files selected andrecord counts.DOUBLE CLICK the report you want to view.To print the report:a. SELECT Options menu.b. SELECT Show Document (Save and Print File) option.c. CLICK Yes on the message displayed.d. CLICK on File menu in the browser window.e. CLICK Print.The log file has several pieces of valuable information:BANUIDBanner HR User name of user who ran NZPELOD.bscThe BSC for which the csv file was uploaded.Load fileThe file name and path of the file loaded.14 lines loadedThe number of lines loaded including header.Page 9 of 10
Banner HR Trainingnzpelod ###### errs.lisnzpelod ###### epaf.lisEPAF Upload File Management and ProcessingThe report lists all the errors that will stop a row from becoming an EPAF.On the report you can find: The csv file name being processed. The record/row number being processed in the csv file. Error messages explaining why a record was not processed.Corrections: If NZPELOD was run in AUDIT mode the corrections should be made inthe Excel document. If NZPELOD was run in COMMIT mode the EPAF will need to beentered through the BANNER form NOAEPAF.The report lists the EPAF transactions that where created and any EPAFtrapping errors.The record will have a status of “P” (Pending) or “W” (Waiting if errors areidentified).On the report you can find: The csv file name being processed. The record/row number being processed in the csv file. Error or Warning messages that may need to be corrected. Transaction # The Banner transaction number which can be used inNOAEPAF to make any corrections.If NZPELOD was run in AUDIT mode . corrections should be made in theExcel document and a new .csv file created.If NZPELOD was run in COMMIT mode corrections will need to be madethrough the BANNER form NOAEPAF.Page 10 of 10
ALWAYS run the process in A - Audit mode first. Always run the process in Audit mode first to check for any errors, both in the errs.lis file and the epaf.lis files. (NOTE: Warnings in the epaf.lis file are OK.) Use the Values drop down list to select the mode. DOUBLE CLICK the mode to select it from the list.