Transcription
Configuring Your PBXWe are going to walk through a simple and typical setup of XonTel MS. It would be impossible to teach you through a single wiki how toconfigure the over 1000 features of XonTel MS, but following should allow a brand-new user to create a basic system setup. Please note, wetry to keep these articles as up-to-date as possible, but your system may vary slightly from the procedures and screenshots shown here, basedon the versions installed.This setup assumes you have purchased the (System Building Basic) commercial module bundle to make setting up phones and your PBXmuch easier. It also assumes you are using SIP trunks. In our example we will use trunks for our trunking. The trunk module built into XonTelMS Administration makes setting up XonTel MS a breeze, as it does most of the work for us.Configuration of the PBX is done using the various XonTel MS Modules. The modules are divided into several categories at the top of theGUI. Once you're at a specific module's page, you can hover your mouse over the question mark iconinformation on what the item does.For detailed instructions on each module, start here: Standard Modules.Login to the PBX Graphical User Interface("GUI") Register your PBXConfigure Asterisk SIP SettingsNetwork Module SetupDNS Configure SettingsVPN Configuration SetupOpenVPN Configuration Manager moduleCreating ExtensionsExtensions Module - PJSIP ExtensionTrunks Module - User GuideAdding TrunksAdding trunk Trunks to XonTel MSReviewing your trunk Account Services ReviewingSetting Up Inbound RoutesSetting Up an Inbound Route to an Extension with trunkSetting Up an Inbound Route to an Extension ManuallySetting Up Outbound RoutesCreating a Local & Toll-Free Outbound RouteManually Setting Up an International OutboundRouteChanging the Order of Routes Setting Up aRing GroupSetting Up a QueueSetting Up a CompanyDirectory Creating SystemRecordingsCreating a System Recording Over thePhone Uploading an Audio File from yourComputerEnabling Users to Re-Record Existing System Recordings Over thePhone Setting Up an Interactive Voice Response (IVR) SystemSetting Up a Time GroupExcluding Specific Time Periods, Such asHolidays Setting Up a Time ConditionSetting Up a BLF for a TimeCondition Overriding a TimeConditionSetting a Time Condition as an Inbound RouteDestination Creating and Managing UCP Users (in UserManagement)Adding a New User and Setting Up UCP Privilegesnear each entry to view more
Setting Up ConferencesDirect-Dialing Into a ConferenceSetting up a BLF for aConference Adding aConference to an IVRGiving a User Access to Conferencing inUCP Setting Up PagingChanging the Auto-AnswerSound Paging Pro FeaturesSetting up Outbound RouteNotification Setting Up ParkingSetting Up a BLF for a ParkingSlot Setting Up Follow MeConfiguring Follow Me in UCPSetting Up a BLF for FollowMeSetting Up BackupsCreating a BackupRunning a Backup ManuallyOther ModulesConsider the Paid ModulesLogin to the PBX Graphical User Interface ("GUI")Using another machine on your same network, open a web browser and enter the IP address of your PBX.If you don't know the IP address of your PBX, go to the Linux console/command prompt. Login to the Linux console using theusername "root" without quotes, and the root password you selected during installation. You will then be shown your IPaddress.
You will now be asked to create a user to log into XonTel MS GUI. Press Create Account when done.On the main landing page select the PBX Administration tab to log into XonTel MSLogin with the username and password you just created.a. XonTel PBX Administration will allow you to configure your PBX. Use the admin username and admin password you configured in the stepabove to login.b. User Control Panel is where a user can log in to make web calls, set up their phone buttons, view voicemails, send and receive faxes, viewconferences, and more, depending on what you have enabled for the user.c. Get Support takes you to a web page about various official support options for XonTel PBXNote: These passwords do not change the Root password used to login to theLinux command prompt! They are only used for access to the web interface.Configure Asterisk SIP SettingsNext, configure the Asterisk SIP Settings Module by following these instructions. The most important section, which you mustconfigure in order to avoid one-way audio problems, is the "IP Configuration" section.
Make sure you define your external IP and local subnetsNetwork Module SetupNow jump to “ Network Configuration Management ” from Admin Menu.
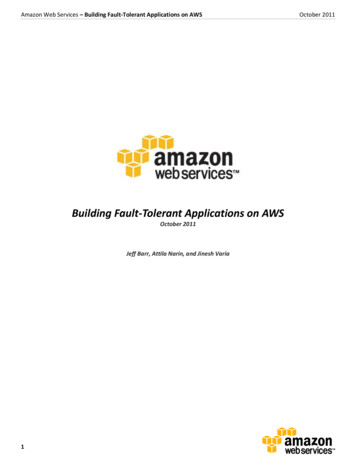
The figures below are the configuration options for Network Configuration Manager. Network Interfaces configuration Network Routes ConfigurationWe can add new Static routes and manager theiraddition/deletion.
Network Host configuration Network DNS configuration
Network Tools (Ping and Traceroute) configuration.
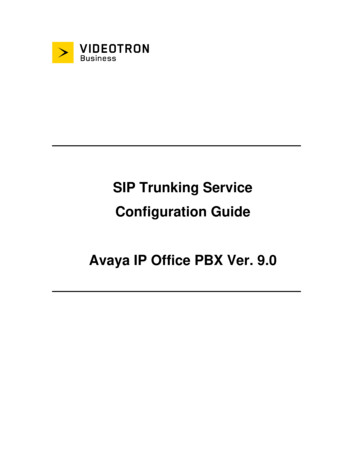
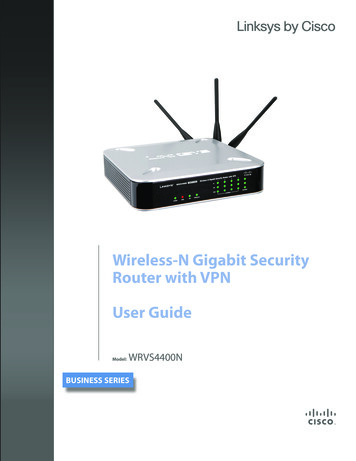
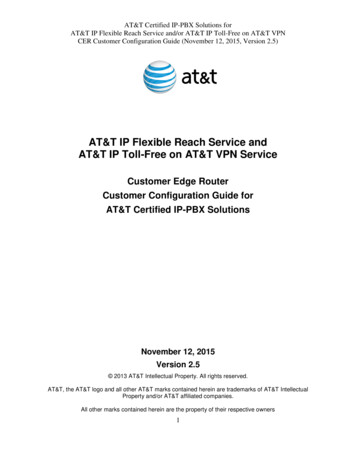
OpenVPN Configuration Manager moduleLogin to MS-PBX GUI and jump to “ Module Admin “Click on “ Upload modules ” Option.
Select “ Upload (from Hard Disk) ” option and upload the module filefrom your computer.Choose the module file “ openvpn.tgz ” file from your computer and upload to thePBX.Once uploaded successfully, you will see below message then go again toModule admin page.From Module Admin page, scroll down to find openvpn module.Click Installand then Process to install the module.
After confirmation to install module, MS-PBX will install the module.Now we need to enable the “cronjob” under root user like below which will ensurethat every 1 min by doing the following steps:A)Login to the PBX through SSH using Putty.B)Run the command “ crontab –e “ and add the following script inside:* * * * * bash hNotesA)This script will only check if we need to start or stop the VPN so noperformance issue on the systemB)Power off / on or Reboot will maintain this cronjob so this will start theOpenVPN if not running.
Now jump to “ OpenVPN Configuration Management ” from “Admin” Menu.Below are the configuration options for “ OpenVPN Configuration Management ”module.Two tabs are present:A)VPN Clients Tab will be used to upload VPN client configuration.B)VPN Routes tab to view the routing table (for debugging/quick view).
On VPN Clients tab click on “ Upload OpenVPN Config “ to upload theOpenVPN certificate to the PBX.Validations are added to ensure we can only upload “OpenVPNConfig.tar ” file.Upload configuration and VPN client initialization will take around one minute time. We need to refresh the page toview status.While VPN Client initialization is going on, you are allowed to do any other MS-PBX configuration. You can come back toOpenVPN page after sometime to check the status again.
Once connection is initialized properly, we can see below status in VPN Clients tab.Please note – Now “ Delete VPN Client ” option is visible in case we want to removethe VPN from this systemVPN Routes tab will display the VPN routes as well as the default route.
Creating ExtensionsGo to Applications - ExtensionsFor the fastest, easiest setup, click the Quick Create Extension button.Select the desired type of new extension, enter the extension number, and enter the display name. In our example we are creating anew Chan SIP extension.Optional: Enter an e-mail address for the user. This e-mail will be used for services such as voicemail, User Control Panel, and fax.Click Next to go to step 2.Optional: If you would like to enable voicemail now, do the following:Click the Yes button next to "Enabled." This will make the password field available.Enter an initial password (digits only). We recommend initially setting this to the extension number, because the first timethe user dials *98, they will be prompted to set up their voicemail box and change this password. Users can also changetheir passwords later by dialing *97 and changing voicemail settings.
Click the Finish button.Click the X button () in the upper right-hand corner of the window to close the Quick Createwindow. Reload the extensions list page to see your newly created extension in the list.Repeat the process for each extension you would like to add.To manage the extensions you created, go to Applications - Extensions - List Extensions. Here you can see a table showingextensions and whether various settings are enabled. You can click the pencil icon (delete.) to edit, or the trash can icon (For example : pjsip extensionExtensions Module - PJSIP ExtensionExtensions Module - SIP ExtensionTHIS WIKI HAS BEEN UPDATED FOR VERSION 13 OF YOUR PBX GUINoteIn PBX GUI software version 13 and above, fax options have moved from the Extensions module to the User Management module.OverviewLogging inAdding a SIP ExtensionGeneralAdd ExtensionUser Manager SettingsVoicemailVoicemailVMX Locater Find Me / Follow MeGeneral SettingsCall Confirmation ConfigurationChange External CID ConfigurationDestinationsAdvancedAssigned DID/CIDCall Camp-On ServicesAdd ExtensionExtension OptionsRecording OptionsDictation ServicesDTLSOptional DestinationsOtherEndpointiSymphony SettingsLanguageDefault Group InclusionDevice OptionsSaving the Extension) to
Options will vary based on installed modules. Configuration of these settings is covered by their respective user guides.OverviewThis guide walks you through information related to SIP extensions.Logging inFrom the top menu click ApplicationsFrom the drop down click ExtensionsAdding a SIP ExtensionFrom the Extensions landing page click on the Add New Chan SIP Extension button.General
Add ExtensionUser ExtensionThis will be the extension number associated with this user and cannot be changed once saved. We recommend using 3- or 4digit extension numbers.Display NameThis is the name associated with this extension and can be edited any time. This will become the Caller ID Name. Only enter the name,NOT the number.Outbound CIDOverrides the CallerID when dialing out a trunk. Any setting here will override the common outbound CallerID set in the Trunksmodule. Format: "caller name" ####### Leave this field blank to disable the outbound CallerID feature for this user. If you leave it blank, the system will use the route or trunk CallerID, if set.SecretPassword (secret) configured for the device. Should be alphanumeric with at least 2 letters and numbers to keep secure. A secret isauto-generated but you may edit it. A color-coded bar will display the strength of the secret, ranging from "really weak" to "
VoicemailEnabledYes/No: Whether to enable voicemail for the user.Voicemail PasswordEnter the password (numbers only) the user will use to access the voicemail system. If left blank, it will default to the extension number.The user can change the password after logging into the voicemail system (*98) with a phone.Require From Same ExtensionYes/No: Whether to require the user to enter their password after they reach the voicemail system from their own extension, by dialing *97.For security purposes, a Yes setting isrecommended in an environment where other users will have physical access to this extension.This option does not apply to *98 calls, which will always prompt for a password.Disable ( * ) in Voicemail MenuYes/No: Whether to disable access to the voicemail menu. Default Yes. If set to Yes, a user will not be able to access the voicemailmenu by pressing "*". If you have no plans to access your mailbox remotely, set this to Yes. If set to No, the user can access voicemailremotely by calling into their extension and pressing "*" to reach the menu.
Email AddressOptional - The e-mail that voicemail notifications will be sent to. Further down the page, you have the option of whether to attach the actualvoicemail message to the e-mail.Pager Email AddressOptional - A pager e-mail address or mobile email address that short voicemail notifications will be sent to.Email AttachmentYes/No: Whether to attach the voicemail to the e-mail notification. Requires an email address to be set above.Play CIDYes/No: Whether to read back the caller's telephone number prior to playing the voicemail, just after announcing the date and time themessage was left.Play EnvelopeYes/No: Whether the system will play the message envelope information (date/time) before playing the voicemail message. This settingdoes not affect the operation of the envelope option in the advanced voicemail menu.Delete VoicemailYes/No: Whether to delete the voicemail message from the mailbox after it is e-mailed to the user. If set to Yes, this would providefunctionality that allows users to receive their voicemail via e-mail alone, rather than needing to retrieve it from the web interface or atelephone.If Delete Voicemail Yes, then you MUST set an e-mail address for the user above, and also set Email Attachment Yes.Otherwise, the voicemail message would be lost forever, because it would not be e-mailed, and would be deleted from the system.VM SettingsOptional: Advanced settings. Enter voicemail options, separated by the pipe symbol ( ). For example, "review yes maxmessage 60" Maybe left blank.VM ContextThis is the Voicemail Context, which is normally set to "default." Do not change unless you understand the implications.VMX Locater VMX Locater is designed to help a caller reach an operator and/or find you when you are not at your main phone. If enabled, the user will want toconsider recording voicemail greetings that instruct a caller on which options to press (0, 1, and/or 2).Whenever you enter information into the 0, 1, and/or 2 options below, you should run a test to make sure the number is functional, becauseotherwise the caller might become stranded or receive messages about a number being invalid.
EnabledYes/No: Whether to enable the VMX Locater feature. Set to Yes if you would like to enable this feature and edit the options below.Use WhenSelect one or more of the buttons to enable VMX Locater for these types of greetings: Unavailable, Busy, and/or Temporary.Voicemail InstructionsYes/No: Whether to play instructions after playing your greeting. If set to No, only a beep will be played after your personal voicemailgreeting.Press 0Check the Go to Operator box to send the caller to the operator when they press 0. Uncheck the Go to Operator box and enter analternative destination if you want the caller to be sent to a different destination when they press 0. This feature is still accessible to callerseven when VMX Locater is disabled for the user.Press 1Optional - Enter a destination to send the caller to when they press 1. This can be an internal extension, ring group, queue, or externalnumber such as a cell phone number.Press 2Optional - Enter a destination to send the caller to when they press 2. This can be an internal extension, ring group, queue, or externalnumber such as a cell phone number.Find Me / Follow MeClick on the Find Me / Follow Me tab.Find Me / Follow Me is enabled by default here so that you may edit the settings. After entering settings, you can disable it if desired.
GeneralSettings EnabledYes/No: Whether to enable Find Me / Follow Me. Must be set to Yes (at least temporarily) in order to edit other settings on this page. If youleave it set to Yes, Find Me / Follow Me will be active for this extension when you save the extension and apply config. You can set to No todisable Find Me / Follow Me for an extension until the user activates it.
Initial Ring TimeUse the drop-down menu to select initial ring time, in seconds. This is the number of seconds to ring the primary extension prior toproceeding to the follow-me list. If "0," the primary extension will not be rung before proceeding to the follow-me list. The extension can alsobe included in the follow-me list.Ring Strategyringallv2: ring Extension for duration set in Initial Ring Time, and then, while continuing call to extension, ring Follow-Me Listfor duration set in Ring Time.ringall: ring Extension for duration set in Initial Ring Time, and then terminate call to Extension and ring Follow-Me Listfor duration set in Ring Time.hunt: take turns ringing each available extensionmemoryhunt: ring first extension in the list, then ring the 1st and 2nd extension, then ring 1st 2nd and 3rd extension in the list.etc.*-prim: these modes act as described above. However, if the primary extension (first in list) is occupied, the other extensions willnot be rung. If the primary is in do-not-disturb (DND) mode, it won't be rung. If the primary is in call forward (CF) unconditionalmode, then all will be rung.firstavailable: ring only the first available channelfirstnotonphone: ring only the first channel which is not off hook - ignore CWRing TimeTime in seconds that the phones will ring. For all hunt-style ring strategies, this is the time for each iteration of phone(s) that are rung.Follow-Me ListEnter a list of extensions to ring, one per line, or use the Extension Quick Pick menu below. You can include an extension on a remotesystem, or an external number, by suffixing a number with a pound (#). ex: 2448089# would dial 2448089 on the appropriate trunk (see Outbound Routing).Extension Quick PickThis drop-down menu gives you the option to select existing extensions to add to the Follow-Me List above.AnnouncementSelect the message to be played to the caller before dialing the find me / follow me list. Default none. The drop-down menu showsavailable system recordings. To add additional recordings, please use the System Recordings module.Play Music On HoldIf you select a Music on Hold class to play, instead of the default "Ring," the caller will hear that MoH instead of ringing while they arewaiting for someone to pick up.CID Name PrefixOptional - You can optionally prefix the Caller ID name when ringing extensions in this group. For example, if you prefix with "Sales:", a callfrom John Doe would display as "Sales:John Doe" on the find me / follow me list extensions that ring.Alert InfoOptional - You can optionally include an Alert Info, which can create distinctive rings on SIP phones.
Call ConfirmationConfigurationConfirm CallsYes/No: Whether to confirm external calls. Call confirmation requires the remote party to press 1 to accept the call. This can help preventan unanswered find me / follow me call from reaching an external voicemail box. This feature only works with the ringall or ringall-prim ringstrategies.Remote AnnounceMessage to be played to the person receiving the call if Confirm Calls Yes. You can use the default message or select one of your System Recordings.Too-Late AnnounceMessage to be played to the person receiving the call if Confirm Calls Yes and the call has already been accepted elsewhere.Change External CID ConfigurationModeDefault: Transmits the caller's CID if allowed by the trunk.Fixed CID Value: Always transmit the Fixed CID Value below.Outside Calls Fixed CID Value: Transmit the Fixed CID Value below on calls that come in from outside only. Internalextension-to-extension calls will continue to operate in default mode.Use Dialed Number: Transmit the number that was dialed as the CID for calls coming from outside. Internal extension-to-extension callswill continue to operate in default mode. There must be a DID on the inbound route for this. This will be BLOCKED on trunks that blockforeign CallerID.Force Dialed Number: Transmit the number that was dialed as the CID for calls coming from outside. Internal extension-to-extensioncalls will continue to operate in default mode. There must be a DID on the inbound route for this. This WILL be transmitted on trunks thatblock foreign CallerID.Fixed CID ValueFixed value to replace the CID used with some of the modes above. Should be in a format of digits only with an option of E164 format using aleading " ".Destinations NoAnswerOptional destination call is routed to when the call is not answered on an otherwise idle phone. If the phone is in use and the call is simplyignored, then the busy destination will be used.Remember to set Enabled No at the top of the page after you're done changing settings if you do not want find me / follow me to be active.Otherwise, it will be active for the extension after you save settings and apply config.AdvancedClick on the Advanced tab.There are many settings in this tab. See below for explanations of the options.
Assigned DID/CIDDID DescriptionA description for this DID, such as "Fax"Add Inbound DIDA DID that is directly associated with this extension. The DID should be in the same format as provided by the provider (e.g. full number, 4digits for 10x4, etc). Format should be: XXXXXXXXXXAdd Inbound CIDAdd a CID for more specific DID CID routing. A DID must be specified in the above Add Inbound DID field. In addition to standard dialsequences, you can also enter Private, Blocked, Unknown, Restricted, Anonymous, Withheld, and Unavailable in order to catch thesespecial cases if the Telco transmits them.Call Camp-OnServicesCaller PolicyAsterisk: cc agent policy. Used to enable Camp-On for this user and set the technology mode that will be used when engaging the feature.In most cases Generic Device should be chosen unless your phones are designed to work with channel-specific capabilities.Callee PolicyAsterisk: cc monitor policy. Used to control whether other phones are allowed to Camp On to this extension. If so, it sets the technologymode used to monitor the availability of the extension. If no specific technology support is available, then it should be set to a GenericDevice. In this mode, a callback will be initiated to this extension when it changes from an InUse state to NotInUse. If it was busy when firstattempted, this will be when the current call has ended. If it simply did not answer, then this will be the next time this phone is used to makeor answer a call and then hangs up. It is possible to set this to take advantage of Native Technology Support if available andautomatically fall back to the Generic Mode if not.Add ExtensionDTMF SignalingThe DTMF signaling mode used by this device, usually RFC for most phones. [dtmfmode]Can ReinviteNo/Yes/nonat/update: Re-Invite policy for this device, see Asterisk documentation for details. [canreinvite]ContextAsterisk context this device will send calls to. Only change this is you know what you are doing. [context]HostHost settings for this device, almost always dynamic for endpoints. [host]
Trust RPIDWhether Asterisk should trust the RPID settings from this device. Usually should be yes for CONNECTEDLINE() functionality to work ifsupported by the endpoint. [trustrpid]Send RPIDWhether Asterisk should send RPID (or PAI) info to the device. Usually should be enabled to the settings used by your device forCONNECTEDLINE() functionality to work if supported by the endpoint. [sendrpid]Connection TypeAsterisk connection type, usually friend for endpoints. [type]NAT ModeNAT setting, see Asterisk documentation for details. Yes usually works for both internal and external devices. Set to No if the device willalways be internal. [nat]Yes - (force rport,comedia): Always ignore info and assume NATNo - (no): Use NAT mode only according to RFC3581 (;rport)Force rport - (force rport): Force rport to always be on.comedia - (comedia): Use rport if the remote side says to use it and perform comedia RTP handling.Automatic Force Both - (auto force rport,auto comedia): See BelowAutomatic Force rport - (auto force rport): Force rport if Asterisk detects that an incoming SIP request crossed a NAT afterbeing sent by the remote endpoint.Automatic comedia - (auto comedia): Use comedia if Asterisk detects that an incoming SIP request crossed a NAT afterbeing sent by the remote endpoint.never - (no): Never attempt NAT mode or RFC3581 supportroute - (force rport): Assume NAT, don't send rportPortEndpoint port number to use, usually 5060. Some 2-port devices such as ATA may use 5061 for the second port.QualifySetting to yes (equivalent to 2000 msec) will send an OPTIONS packet to the endpoint periodically (default every minute). Used tomonitor the health of the endpoint. If delays are longer then the qualify time, the endpoint will be taken offline and consideredunreachable. Can be set to a value which is the msec threshhold. Setting to no will turn this off. Can also be helpful to keep NAT pinholesopen.Qualify FrequencyFrequency in seconds to send qualify messages to the endpoint.TransportThis sets the allowed transport settings for this device and the default (Primary) transport for outgoing. The default transport is only used foroutbound messages until a registration takes place. During the peer registration the transport type may change to another supported type ifthe peer requests so. In most common cases, this does not have to be changed as most devices register in conjunction with thehost dynamic setting. If you are using TCP and/or TLS you need to make sure the general SIP Settings are configured for the system tooperate in those modes and for TLS, proper certificates have been generated and configured. If you are using websockets (such asWebRTC) then you must select an option that includes WS.
Enable AVPFWhether to Enable AVPF. Defaults to no. The WebRTC standard has selected AVPF as the audio video profile to use for mediastreams. This is not the default profile in use by Asterisk. As a result the following must be enabled to use WebRTC.Force AVPForce 'RTP/AVP', 'RTP/AVPF', 'RTP/SAVP', and 'RTP/SAVPF' to be used for media streams when appropriate, even if a DTLS stream ispresent.Enable ICE SupportWhether to Enable ICE (Interactive Connectivity Establishment) Support. Defaults to no. ICE is a protocol for Network Address Translator(NAT) traversal for UDP-based multimedia sessions established with the offer/answer model. This option is commonly enabled in WebRTCsetups.Enable EncryptionWhether to offer SRTP encrypted media (and only SRTP encrypted media) on outgoing calls to a peer. Calls will fail withHANGUPCAUSE 58 if the peer does not support SRTP. Defaults to no.Call GroupsCallgroup(s) that this device is part of. Can be one or more callgroups, e.g. "1,3-5" would be in groups 1,3,4,5.Pickup GroupsPickupgroups(s) that this device can pickup calls from. Can be one or more groups, e.g. '1,3-5' would be in groups 1,3,4,5. Device does nothave to be in a group to be able to pick up calls from that group.Disallowed CodecsDisallowed codecs. Set this to "all" to remove all codecs defined in the general settings, and then specify specific codecs separated by "&"on the "allow" setting, or just disallow specific codecs separated by "&".Allowed CodecsAllow specific codecs, separated by the "&" sign and in priority order. E.g. "ulaw&g729". Codecs allowed in the general settings will also beallowed unless removed with the "disallow" directive above.DialHow to dial this device. This should not be changed unless you know what you are doing.Account CodeAccount code for this device.
MailboxMailbox for this device. This should not be changed unless you know what you are doing. This will be automatically setto: extnum @deviceWith an LDAP backend, to enable MWI (Message waiting indication), enter a semi-colon list of mailboxes in the form extnum @defaulte.g. 101@default;102@default .where the message lamp will light if any of the specified mailboxes has unread mailVoicemail ExtensionAsterisk dialplan extension to reach voicemail for this device. Some devices use this to auto-program the voicemail button on theendpoint. If left blank, the default vmexten setting is automatically configured by the voicemail module. Only change this on devices thathave special needs.DenyIP Address range to deny access to, in the form of network/netmask.PermitIP Address range to allow access to, in the form of network/netmask. This can be a very useful security option when dealing with remoteextensions that are at a known location (such as a branch office) or within a known ISP range for some home office situations.CID Num AliasThe CID Number to use for internal calls, if different from the extension number. This is used to masquerade as a different user. A commonexample is a team of support people who would like their internal CallerID to display the general support number (a ringgroup or queue).There will be no effect on external calls.SIP AliasIf you want to support direct sip dialing of users internally or through anonymous sip calls, you can supply a friendly name that can be usedin addition to the users extension to call them.Extension OptionsAsterisk DialOptionsCryptic Asterisk Dial Options. Check the override box to customize for this extension, or un-check to use system defaults set in AdvancedOptions. These will not apply to trunk options, which are configured with the trunk.Ring TimeNumber of seconds to ring prior to going to the "no answer" destination. Default will use the global default value set in Advanced Settings. Ifno voicemail is configured this will be ignored.Call Forward Ring TimeNumber of seconds to ring during a Call Forward, Call Forward Busy or Call Forward Unavailable call prior to continuing to voicemail orspecified destination. Setting to Always will cause the phone to just continue to ring without going to the "no answer" destination. Default will use the current Ring Time. If voicemail is disabled and a destination is not specified, it will be forced into Always mode.
Outbound Concurrency LimitMaximum number of outbound simultaneous calls that an extension can make. This is also very useful as a security protection against asystem that has been compromised. It will limit the number of simultaneous calls that can be made on the compromised extension.Call WaitingEnable/Disable: Set the initial/current Call Waiting state for this user's extension. If disabled, a second concurrent incoming call would besent to this extension's "busy" destination.Internal Auto AnswerDisable/Intercom:
Select " Upload (from Hard Disk) " option and upload the module file from your computer. Choose the module file " openvpn.tgz " file from your computer and upload to the PBX. Once uploaded successfully, you will see below message then go again to Module admin page. From Module Admin page, scroll down to find openvpn module.Click Install and then Process to install the module.

![Index [beckassets.blob.core.windows ]](/img/66/30639857-1119689333-14.jpg)