Transcription
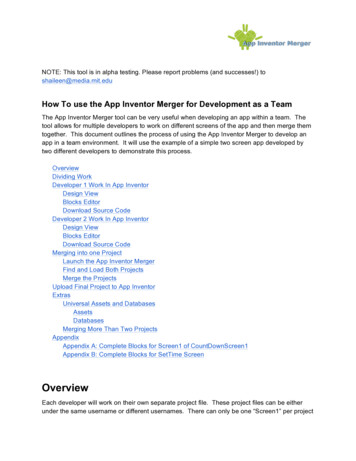
NOTE: This tool is in alpha testing. Please report problems (and successes!) toshaileen@media.mit.eduHow To use the App Inventor Merger for Development as a TeamThe App Inventor Merger tool can be very useful when developing an app within a team. Thetool allows for multiple developers to work on different screens of the app and then merge themtogether. This document outlines the process of using the App Inventor Merger to develop anapp in a team environment. It will use the example of a simple two screen app developed bytwo different developers to demonstrate this process.OverviewDividing WorkDeveloper 1 Work In App InventorDesign ViewBlocks EditorDownload Source CodeDeveloper 2 Work In App InventorDesign ViewBlocks EditorDownload Source CodeMerging into one ProjectLaunch the App Inventor MergerFind and Load Both ProjectsMerge the ProjectsUpload Final Project to App InventorExtrasUniversal Assets and DatabasesAssetsDatabasesMerging More Than Two ProjectsAppendixAppendix A: Complete Blocks for Screen1 of CountDownScreen1Appendix B: Complete Blocks for SetTime ScreenOverviewEach developer will work on their own separate project file. These project files can be eitherunder the same username or different usernames. There can only be one “Screen1” per project
and “Screen1” can not be renamed; therefore only the developer designing the first screen toappear on the app should populate “Screen1.” All other developers should leave “Screen1”blank and only develop additional screens.Developers can write code to call a screen they are not developing but they must know thename that has been assigned to that screen by its developer. Also, two differentdevelopers/screens can use the same database or asset but they must be named the same (formore details on this see the Universal Databases and Assets section below). Finally, no twodifferent screens or assets can have the same name. For these reasons it is important to decidebeforehand the name of each screen and a naming convention for assets that will insure nounwanted duplicates.Once separate projects are complete they can be merged together using the App InventorMerger.Dividing WorkWork should be divided by screens. Each screen should be assigned to a developer and thereshould be only one version of each screen to be merged into the final app. This document willfollow an example for which there are two screens and two developers working on an appnamed “CountDown.” The CountDown app will work like a timer. The first screen shows thetime counting down and allows the user to start, stop or reset the timer. From the first screen theuser can also switch to a second screen to set the amount of time to count down.Developer1 will work on the first screen and call it “Screen1”. Developer2 will work on thesecond screen and call it “SetTime”. The naming convention for assets will be the screen namefollowed by the asset name. There are no universal assets or databases. Screen1 will open theSetTime screen and when the SetTime screen is closed it will pass a number, representing thetotal number of seconds to countdown, to Screen1.Developer 1 Work In App InventorDeveloper1 will log into App Inventor using their account and create a new project called“CountDownScreen1.”Design ViewThe Design view for CountDownScreen1’s Screen1 is shown below in Figure 1. Note that theproject name, the screen name and assets follow the predetermined naming convention.
Figure 1: CountDownScreen1’s Screen1 Design ViewBlocks EditorDeveloper1 then creates the blocks needed for Screen1. These blocks included a block to openthe SetTime screen when the “Set Time” button is clicked and a block to handle when theSetTime screen is closed. Views of the SetTime.Click block and theScreen1.OtherScreenClosed block are shown in Figure 2 and 3 respectively. The complete setof blocks for Screen1 are shown in Appendix A.Figure 2: CountDownScreen1’s Screen1 SetTime.Click block
In the SetTime.Click block, Screen1 opens the SetTime screen. Note that the string assigned toscreenName must be exactly what was decided in advance as the name of the second screen.Figure 3: CountDownScreen1’s Screen1 OtherScreenClosed blockThe Screen1.OtherScreenClosed receives the number of seconds to countdown from theSetTime screen when the screen is closed and sets the startTimeInSeconds variable to it.Download Source CodeOnce Developer1 completes Screen1 they download the source code. This is done by going tothe My Projects view and checking the checkbox next to the CountDownScreen1 project. Thenclicking on the “More Actions” dropdown and selecting “Download Source”. In Figure 4 redarrows show how to select a project and where to click to download the project’s source.Figure 4: Steps to download CountDownScreen1 source
Developer 2 Work In App InventorDeveloper2 will log into App Inventor using their account and create a new project called“CountDownSetTime.”Design ViewThe Design view for CountDownSetTime’s Screen1 is shown below in Figure 5. The Screen1 isempty except for a button that takes you to the SetTime screen. This button is only forDeveloper2 to get to the SetTime screen during testing and debuging. This Screen1 will not bemerged into the final app.Figure 5: CountDownSetTime’s Screen1 Design ViewThe Design view for CountDownSetTime’s SetTime screen is shown below in Figure 6. Notethat the project name, the screen name and assets follow the predetermined naming convention.
Figure 6: CountDownSetTime’s SetTime screen Design ViewBlocks EditorDeveloper2 then creates the blocks needed for the SetTime screen. These blocks include ablock to send the number of seconds to countdown to Screen1 when the SetTime screen isclosed. This block is the ButtonDone.Click block shown in Figure 7. A complete set of blocks forthe SetTime screen are shown in Appendix B.
Figure 7: ButtonDone.Click block for CountDownSetTime’s SetTime screenDownload Source CodeDeveloper2 downloads the source for CountDownSetTime following the same steps Developer1followed to download the source for CountDownScreen1.Merging into one ProjectOnce both developers have downloaded the source code for their respective projects, the twoprojects can be merged into the final app using the following steps.Launch the App Inventor MergerIf not already done, downloaded the latest version of the App Inventor Merger. It can be found[TO BE DETERMINED]. App Inventor Merger downloads as a jar file which can be savedwherever is convienient. To launch the application simply double click on the jar file.Find and Load Both ProjectsThe main project will be CountDownScreen1 since Screen1 from this project will be the Screen1for the final app and the second project will be CountDownSetTime.Select the browse button for the main project.
A file browser window will appear. Find and select the CountDownScreen1.zip file, then clickOpen.The path for the project file will appear in the main project text box. Click the main project’sLoad button to load the project into the App Inventor Merger.A list of the main project’s assets and screens will appear in the lower left hand corner of thescreen and this means that the main project has been loaded into the App Inventor Merger.Click the browse button for the second project.
A file browser window will appear. Find and select the CountDownSetTime.zip file, then clickOpen. The path for the project file will appear in the second project text box. Click the secondproject’s Load button to load the project into the App Inventor Merger.A list of the second project’s assets and screens will appear in the lower right hand corner of thescreen and this means that the second project has been loaded into the App Inventor Merger.
Merge the ProjectsOnce two projects have been loaded a Merge button will appear between them.Check the boxes next to all of the screens and assets you wish to merge into the final app.In this case only one screen is being selected from each project but in other cases multiplescreens can be merged from the same project file. For this example all assets and screens areselected except Screen1 from the second project. Screen1 from the second project is grayedout since Screen1 from the main project is required and two screens with the same name canbe merged.Click Merge.
A save dialog window will appear. Browse to where you would like to save the project, enter theproject’s name and then click Save. The project will be saved as a zip file.In this example the project’s name will be CountDown and the file CountDown.zip will be savedon the desktop since that is the directory selected (although this file can be saved in anydirectory).A dialog box will appear letting you know that your projects have been successfully merged.There will now be a zip file on the desktop named CountDown.zip. The dialog box will also ask ifyou would like to merge another project. Since this example only has two developers workingon two different project files, there is no need to merge another project. Click No and confirmthat you want to close the merger. For more information about merging more than two projectsee the Merging More Than Two Projects section below.
Upload Final Project to App InventorThe zip file created by the App Inventor Merger is your new project file. This project file can beuploaded to App Inventor so that you have a complete project in App Inventor.To upload the file, launch App Inventor and go to the My Projects page. Click on the MoreActions dropdown and select Upload Source.The following dialog box will appear. Select Choose File. A file browsing window will appear.Find and select the zip file that was just created by the App Inventor Merger. For this exampleselect the CountDown.zip file located on the desktop and then click Open followed by OK.Your new project now appears in your list of projects and opens in the App Inventor window.ExtrasUniversal Assets and Databases
AssetsIf your app uses the same asset on multiple screens, then you can make that asset universal.This is done by giving it a name that does not follow the normal naming convention but insteadis repeated by all screens. When the projects are merged the universal asset will only need tobe selected from one of the projects.For example, imagine you have a logo, which is an image, that should appear at the top ofevery screen. Instead of having every developer name the logo something different(Screen1Logo, Screen2Logo ), as the naming convention would require, every developer cansimply name it Logo. When the projects are merged only check the Logo asset listed under themain project so that the asset is only loaded into the final app once but all the screens will beable to access it.DatabasesApps that use databases can be merged using the App Inventor Merger very easily. Differentdevelopers can even work on different screens, that use the same database, separately andthen merge them together at the end.The only requirement for merging screens that share a database is that the name assigned tothe database for each screen is the same. Once the projects are merged the same databasewill work for all the screens.Merging More Than Two ProjectsThe App Inventor Merger is still a very useful tool even if there are more than two developersworking on more than two project files. The process is exactly the same as the two developerprocess, described above, until the dialog box letting you know your project has beensuccessfully merged pops up (shown below).
When there were only two developers we selected no but for the case of more than twodevelopers select Yes since there are more projects to be merged. A new dialog box willappear asking if you would like to use the project you just created as the new main project.If you select No, the App Inventor Merger will restart with no projects loaded, the same as if youjust launched it. This would be used to merge two new projects together.If you select Yes, the App Inventor Merger will restart with the project you just created loaded asthe main project and the second project is blank (as shown in the picture below). This optioncan be used if you would like to merge a third project with the first two projects you previouslymerged.
AppendixAppendix A: Complete Blocks for Screen1 of CountDownScreen1
Appendix B: Complete Blocks for SetTime Screen
Upload Final Project to App Inventor The zip file created by the App Inventor Merger is your new project file. This project file can be uploaded to App Inventor so that you have a complete project in App Inventor. To upload the file, launch App Inventor and go to the My Projects page. Click on the More Actions dropdown and select Upload Source.


