Transcription
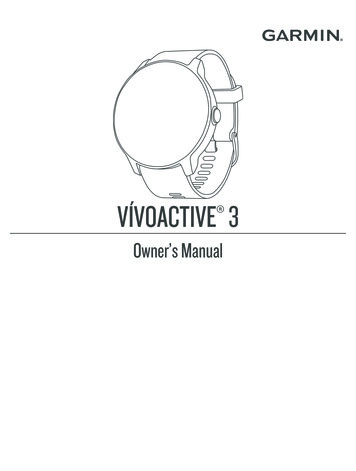
VÍVOACTIVE 3 Owner’s Manual
2017 Garmin Ltd. or its subsidiariesAll rights reserved. Under the copyright laws, this manual may not be copied, in whole or in part, without the written consent of Garmin. Garmin reserves the right to change orimprove its products and to make changes in the content of this manual without obligation to notify any person or organization of such changes or improvements. Go towww.garmin.com for current updates and supplemental information concerning the use of this product.Garmin , the Garmin logo, ANT , Auto Lap , Auto Pause , Edge , VIRB , and vívoactive are trademarks of Garmin Ltd. or its subsidiaries, registered in the USA and other countries.Garmin AutoShot , Connect IQ , Garmin Connect , Garmin Express , Garmin Golf , Garmin Move IQ , Garmin Pay , Side Swipe , tempe , and Varia are trademarks of GarminLtd. or its subsidiaries. These trademarks may not be used without the express permission of Garmin. Android is a trademark of Google, Inc. iPhone is a trademark of Apple Inc., registered in the U.S. and other countries. The BLUETOOTH word mark and logos are owned by theBluetooth SIG, Inc. and any use of such marks by Garmin is under license. Advanced heartbeat analytics by Firstbeat. The Cooper Institute , as well as any related trademarks, arethe property of The Cooper Institute. iOS is a registered trademark of Cisco Systems, Inc. used under license by Apple Inc. Other trademarks and trade names are those of theirrespective owners. This product is ANT certified. Visit www.thisisant.com/directory for a list of compatible products and apps. M/N: A03190IFETEL: 201701C08891
Table of ContentsIntroduction.1Device Overview. 1Touchscreen Tips. 2Locking and Unlocking theTouchscreen. 2Using the Controls Menu. 2Side Swipe Control Tips. 3Icons.3Smart Features. 4Pairing Your Smartphone. 4Connected Features. 4Phone Notifications.4Enabling BluetoothNotifications. 4Viewing Notifications. 5Receiving an Incoming PhoneCall. 5Managing Notifications. 5Turning Off the BluetoothSmartphone Connection. 5Using Do Not Disturb Mode. 5Finding Your Phone. 5Connect IQ Features. 6Downloading Connect IQ Features. 6Downloading Connect IQ FeaturesUsing Your Computer. 6Garmin Pay . 6Setting Up Your Garmin Pay Wallet. 6Paying for a Purchase Using YourWatch. 7Adding a Card to Your Garmin PayWallet. 7Managing Your Garmin Pay Cards. 7Changing Your Garmin PayPasscode. 8Heart Rate Features.8Wrist-based Heart Rate. 8Wearing the Device. 8Tips for Erratic Heart Rate Data. 8Viewing the Heart Rate Widget. 9Setting an Abnormal Heart RateAlert. 9Table of ContentsBroadcasting Heart Rate to GarminDevices. 9Turning Off the Wrist-based HeartRate Monitor. 10About Heart Rate Zones. 10Setting Your Heart Rate Zones. 10Heart Rate Zone Calculations. 10About VO2 Max. Estimates. 11Getting Your VO2 Max. Estimate. 11Activity Tracking. 11Auto Goal. 12Using the Move Alert. 12Sleep Tracking. 12Intensity Minutes. 12Earning Intensity Minutes. 13Garmin Move IQ . 13Activity Tracking Settings. 13Turning Off Activity Tracking. 13Menstrual Cycle Tracking. 13Widgets. 14Viewing Widgets. 14Customizing the Widget Loop. 15About My Day. 15Viewing the Weather Widget. 15Heart Rate Variability and StressLevel. 15Using the Stress Level Widget. 15VIRB Remote. 15Controlling a VIRB Action Camera. 16Music Controls. 16Controlling Music Playback. 16Apps and Activities.17Starting an Activity. 17Tips for Recording Activities. 17Stopping an Activity. 17Adding a Custom Activity. 17Adding or Removing a FavoriteActivity. 18Indoor Activities. 18Recording a Strength TrainingActivity. 18Calibrating the Treadmill Distance. 19Outdoor Activities. 19Going for a Run. 19i
Going for a Ride. 19Viewing Your Ski Runs. 20Going for a Pool Swim. 20Setting the Pool Size. 20Swim Terminology. 20Golfing. 20Downloading Golf Courses. 20Playing Golf. 21Hole Information. 21Changing the Pin Location. 22Viewing the Direction to the Pin. 22Viewing Layup and DoglegDistances. 22Viewing Hazards. 23Measuring a Shot with GarminAutoShot . 23Keeping Score. 24Setting the Scoring Method. 24Tracking Golf Statistics. 24Recording Golf Statistics. 24Viewing Your Shot History. 24Viewing Your Round Summary. 25Ending a Round. 25Golf Settings. 25Scoring Settings. 25Garmin Golf App. 25Training. 25Setting Up Your User Profile. 25Fitness Goals. 26Workouts. 26Starting a Workout. 26Using Garmin Connect TrainingPlans. 26Starting Today's Workout. 27Viewing Scheduled Workouts. 27Adaptive Training Plans. 27Personal Records. 27Viewing Your Personal Records. 27Restoring a Personal Record. 27Clearing a Personal Record. 28Clearing All Personal Records. 28Navigation. 28Saving Your Location. 28Deleting a Location. 28Navigating to a Saved Location. 29iiNavigating Back to Start. 29Stopping Navigation. 29Compass. 29Calibrating the Compass Manually. 29History. 30Using History. 30Viewing Your Time in Each Heart RateZone. 30Garmin Connect. 30Using the Garmin Connect App. 31Using Garmin Connect on YourComputer. 31Customizing Your Device. 32Changing the Watch Face.32Creating a Custom Watch Face. 32Customizing the Controls Menu. 32Activities and App Settings. 33Customizing the Data Screens. 33Alerts. 34Setting an Alert. 34Auto Lap. 35Marking Laps Using the AutoLap Feature. 35Turning On the Manual LapFunction. 35Using Auto Pause . 35Using Auto Scroll. 36Phone and Bluetooth Settings. 36System Settings. 36Time Settings. 36Time Zones. 37Setting the Time Manually. 37Setting the Alarm. 37Deleting an Alarm. 37Starting the Countdown Timer. 37Using the Stopwatch. 37Backlight Settings. 37Changing the Units of Measure. 37Garmin Connect Settings.38Device Settings on Your GarminConnect Account. 38User Settings on Your Garmin ConnectAccount. 39Wireless Sensors. 39Table of Contents
Pairing Your Wireless Sensors. 39Foot Pod. 39Calibrating Your Foot Pod.39Improving Foot Pod Calibration. 40Using an Optional Bike Speed orCadence Sensor. 40Calibrating Your Speed Sensor. 40Situational Awareness. 40tempe. 40Appendix. 46Data Fields. 46VO2 Max. Standard Ratings. 48Wheel Size and Circumference. 49Symbol Definitions. 50Device Information. 41Charging the Device. 41Product Updates. 41Updating the Software Using theGarmin Connect App. 41Updating the Software Using GarminExpress. 42Viewing Device Information. 42Viewing E-label Regulatory andCompliance Information. 42Specifications. 42Device Care. 42Cleaning the Device. 43Changing the Bands. 43Troubleshooting. 43Is my smartphone compatible with mydevice?. 43My phone will not connect to thedevice. 43My device is in the wrong language. 44My device does not display the correcttime. 44Maximizing Battery Life. 44Restarting the Device. 44Restoring All Default Settings. 44Acquiring Satellite Signals. 45Improving GPS Satellite Reception. 45Activity Tracking. 45My step count does not seemaccurate. 45The floors climbed amount does notseem accurate. 45Improving the Accuracy of IntensityMinutes and Calories. 45The temperature reading is notaccurate. 45Getting More Information. 46Table of Contentsiii
IntroductionWARNINGSee the Important Safety and Product Information guide in the product box for product warnings and otherimportant information.Always consult your physician before you begin or modify any exercise program.Device OverviewTouchscreen: Swipe up or down to scroll through widgets, features, and menus.Tap to select.Swipe right to go back to the previous screen.During an activity, swipe right to view the watch face and widgets.During an activity, double-tap to mark a new lap, start a new set of reps, or advance to the next stage of aworkout.Hold to view a menu of device settings and options for the current screen.Key: Hold to turn on the device.Hold to view the controls menu, including device power.Press to return to the watch face from any screen, except during an activity.During an activity, press to pause the activity.Side Swipe Control: Slide up or down along the textured area to scroll through widgets, data screens, andmenus.When a field with and - buttons appears, slide up or down to increase or decrease the value in the field.Introduction1
Touchscreen Tips Hold your finger on the touchscreen to view an options menu.Drag up or down to scroll through lists and menus.Swipe up or down to scroll quickly.Tap to select a button, a list item, or a menu item.From the watch face, swipe up or down to scroll through the widgets on the device.From a widget, tap to view additional widget screens, if available.During an activity, swipe up or down to view the next data screen.During an activity, swipe right to view the watch face and widgets, and swipe left to return to the activity datafields. Perform each menu selection as a separate action.Locking and Unlocking the TouchscreenYou can lock the touchscreen to prevent inadvertent screen touches.1 Hold the key.2 Select .The touchscreen locks and does not respond to touches until you unlock it.3 Hold the key to unlock the touchscreen.Using the Controls MenuThe controls menu contains customizable shortcuts, such as locking the touchscreen and turning the deviceoff.NOTE: You can add, reorder, and remove the shortcuts in the controls menu (Customizing the Controls Menu,page 32).1 From any screen, hold the key for 2 seconds.2 Select an option.2Introduction
Side Swipe Control TipsThe Side Swipe control is a touch-sensitive area on the side of the watch body, which allows you to scrollthrough lists and menus and adjust some field values without obscuring the touchscreen. This feature can helpyou to quickly navigate menus by using one finger to scroll and another to select items on the touchscreen. Slide up or down on the Side Swipe control to scroll through widgets, menus, and lists. When a field with and - buttons appears, such as volume or brightness, slide up or down to increase ordecrease the value in the field. Customize the scrolling direction of the Side Swipe control and the watch orientation in the system settings(System Settings, page 36).To operate the Side Swipe control using your thumb, you should wear the watch with the key facing towardyour wrist. To use your index finger, you should wear the watch with the key facing away from your wrist.IconsA flashing icon means the device is searching for a signal. A solid icon means the signal was found or thesensor is connected.GPS statusSmartphone connection statusHeart rate monitor statusFoot pod statusLiveTrack statusSpeed and cadence sensor statusVaria bike light statusVaria bike radar statustempe sensor statusVIRBVIRB camera status vívoactive 3 alarm statusIntroduction3
Smart FeaturesPairing Your SmartphoneTo set up the vívoactive 3 device, it must be paired directly through the Garmin Connect app, instead of fromthe Bluetooth settings on your smartphone.1 From the app store on your smartphone, install and open theGarmin Connect app.2 Select an option to enable pairing mode on your device: If this is the first time you are setting up your device, press the key to turn on the device. If you previously skipped the pairing process or paired your device with a different smartphone, hold thetouchscreen, and select Settings Phone Pair Phone to manually enter pairing mode.3 Select an option to add your device to your Garmin Connect account: If this is the first device you have paired with the Garmin Connect app, follow the on-screen instructions. If you have already paired another device with the Garmin Connect app, from the settings menu, selectGarmin Devices Add Device, and follow the on-screen instructions. Connected FeaturesConnected features are available for your vívoactive 3 device when you connect the device to a compatiblesmartphone using Bluetooth technology. Some features require you to install the Garmin Connect app on theconnected smartphone. Go to www.garmin.com/apps for more information.Phone notifications: Displays phone notifications and messages on your vívoactive 3 device.LiveTrack: Allows friends and family to follow your races and training activities in real time. You can invitefollowers using email or social media, allowing them to view your live data on a Garmin Connect trackingpage.Activity uploads to Garmin Connect: Automatically sends your activity to your Garmin Connect account as soonas you finish recording the activity.Connect IQ : Allows you to extend your device features with new watch faces, widgets, apps, and data fields.Software Updates: Allows you to update your device software.Weather: Allows you to view current weather conditions and weather forecasts.Bluetooth sensors: Allows you to connect Bluetooth compatible sensors, such as a heart rate monitor.Find my phone: Locates your lost smartphone that is paired with your vívoactive 3 device and currently withinrange.Find my device: Locates your lost vívoactive 3 device that is paired with your smarphone and currently withinrange.Phone NotificationsPhone notifications require a compatible smartphone to be in range and paired with the device. When yourphone receives messages, it sends notifications to your device.Enabling Bluetooth NotificationsBefore you can enable notifications, you must pair the vívoactive 3 device with a compatible smartphone(Pairing Your Smartphone, page 4).1 Hold the touchscreen.2 Select Settings Phone Notifications.3 Select During Activity to set preferences for notifications that appear when recording an activity.4 Select a notification preference.5 Select Not During Activity to set preferences for notifications that appear when in watch mode.6 Select a notification preference.7 Select Timeout.8 Select a timeout duration.4Smart Features
Viewing Notifications1234From the watch face, swipe to view the notifications widget.Select a notification.Scroll to read the full notification.Select an option: To act on the notification, select an action, such as Dismiss or Reply.The available actions depend on the type of notification and your phone operating system. When youdismiss a notification on your phone or the vívoactive 3 device, it no longer appears in the widget. To return to the notification list, swipe right.Receiving an Incoming Phone CallWhen you receive a phone call on your connected smartphone, the vívoactive 3 device displays the name orphone number of the caller. To accept the call, select .NOTE: To talk to the caller, you must use your connected smartphone. To decline the call, select . To decline the call and immediately send a text message reply, select , and select a message from the list.NOTE: This feature is available only if your device is connected to an Android smartphone.Managing NotificationsYou can use your compatible smartphone to manage notifications that appear on your vívoactive 3 device.Select an option: If you are using an iPhone device, go to the iOS notifications settings to select the items to show on thedevice. If you are using an Android smartphone, from the Garmin Connect app, select Settings Notifications. Turning Off the Bluetooth Smartphone ConnectionYou can turn off the Bluetooth smartphone connection from the controls menu.NOTE: You can add options to the controls menu (Customizing the Controls Menu, page 32).1 Hold the key to view the controls menu.2 Selectto turn off the Bluetooth smartphone connection on your vívoactive 3 device.Refer to the owner's manual for your mobile device to turn off Bluetooth technology on your mobile device.Using Do Not Disturb ModeYou can use do not disturb mode to turn off vibrations and the backlight for alerts and notifications. Forexample, you can use this mode while sleeping or watching a movie. To manually turn on or off do not disturb mode, hold the key, and select . To automatically turn on do not disturb mode during your sleep hours, open the device settings in the GarminConnect app, and select Sounds & Alerts Do Not Disturb During Sleep.Finding Your PhoneYou can use this feature to help locate a lost smartphone that is paired using Bluetooth wireless technology andcurrently within range.1 Hold the key.2 Select .Signal strength bars appear on the vívoactive 3 screen, and an audible alert sounds on your smartphone. Thebars increase as you move closer to your smartphone.3 Press the key to stop searching.Smart Features5
Connect IQ FeaturesYou can add Connect IQ features to your watch from Garmin and other providers using the Connect IQ website.You can customize your device with watch faces, data fields, widgets, and apps.Watch Faces: Allow you to customize the appearance of the clock.Data Fields: Allow you to download new data fields that present sensor, activity, and history data in new ways.You can add Connect IQ data fields to built-in features and pages.Widgets: Provide information at a glance, including sensor data and notifications.Apps: Add interactive features to your watch, such as new outdoor and fitness activity types. Downloading Connect IQ FeaturesBefore you can download features from the Connect IQ app, you must pair your vívoactive 3 device with yoursmartphone (Pairing Your Smartphone, page 4).1 From the app store on your smartphone, install and open the Connect IQ app.2 If necessary, select your device.3 Select a Connect IQ feature.4 Follow the on-screen instructions.Downloading Connect IQ Features Using Your Computer1234Connect the device to your computer using a USB cable.Go to apps.garmin.com, and sign in.Select a Connect IQ feature, and download it.Follow the on-screen instructions.Garmin Pay The Garmin Pay feature allows you to use your watch to pay for purchases in participating stores using credit ordebit cards from a participating financial institution.Setting Up Your Garmin Pay WalletYou can add one or more participating credit or debit cards to your Garmin Pay wallet. Go to garmin.com/garminpay/banks to find participating financial institutions.1 From the Garmin Connect app, selector.2 Select Garmin Pay Get Started.3 Follow the on-screen instructions.6Garmin Pay
Paying for a Purchase Using Your WatchBefore you can use your watch to pay for purchases, you must set up at least one payment card.You can use your watch to pay for purchases in a participating store.1 Hold the key.2 Select.3 Enter your four-digit passcode.NOTE: If you enter your passcode incorrectly three times, your wallet locks, and you must reset yourpasscode in the Garmin Connect app.Your most recently used payment card appears.4 If you have added multiple cards to your Garmin Pay wallet, swipe to change to another card (optional).5 Within 60 seconds, hold your watch near the payment reader, with the watch facing the reader.The watch vibrates and displays a check mark when it is finished communicating with the reader.6 If necessary, follow the instructions on the card reader to complete the transaction.TIP: After you successfully enter your passcode, you can make payments without a passcode for 24 hours whileyou continue to wear your watch. If you remove the watch from your wrist or disable heart rate monitoring, youmust enter the passcode again before making a payment.Adding a Card to Your Garmin Pay WalletYou can add up to 10 credit or debit cards to your Garmin Pay wallet.1 From the Garmin Connect app, selector.2 Select Garmin Pay Add Card.3 Follow the on-screen instructions.After the card is added, you can select the card on your watch when you make a payment.Managing Your Garmin Pay CardsYou can temporarily suspend or delete a card.NOTE: In some countries, participating financial institutions may restrict the Garmin Pay features.1 From the Garmin Connect app, selector.2 Select Garmin Pay.3 Select a card.4 Select an option: To temporarily suspend or unsuspend the card, select Suspend Card.The card must be active to make purchases using your vívoactive 3 device. To delete the card, select .Garmin Pay 7
Changing Your Garmin Pay PasscodeYou must know your current passcode to change it. If you forget your passcode, you must reset the Garmin Payfeature for your vívoactive 3 device, create a new passcode, and reenter your card information.1 From the vívoactive 3 device page in the Garmin Connect app, select Garmin Pay Change Passcode.2 Follow the on-screen instructions.The next time you pay using your vívoactive 3 device, you must enter the new passcode.Heart Rate FeaturesThe vívoactive 3 device has a wrist-based heart rate monitor and is also compatible with chest heart ratemonitors (sold separately). You can view heart rate data on the heart rate widget. If both wrist-based heart rateand chest heart rate data are available when you start an activity, your device uses the chest heart rate data.Wrist-based Heart RateWearing the Device Wear the device above your wrist bone.NOTE: The device should be snug but comfortable. For more accurate heart rate readings, the device shouldnot move while running or exercising.NOTE: The optical sensor is located on the back of the device. See Tips for Erratic Heart Rate Data, page 8 for more information about wrist-based heart rate. For more information about accuracy, go to garmin.com/ataccuracy. For more information about device wear and care, go to www.garmin.com/fitandcare.Tips for Erratic Heart Rate DataIf the heart rate data is erratic or does not appear, you can try these tips. Clean and dry your arm before putting on the device. Avoid wearing sunscreen, lotion, and insect repellent under the device. Avoid scratching the heart rate sensor on the back of the device. Wear the device above your wrist bone. The device should be snug but comfortable. Wait until theicon is solid before starting your activity. Warm up for 5 to 10 minutes and get a heart rate reading before starting your activity.NOTE: In cold environments, warm up indoors. Rinse the device with fresh water after each workout.8Heart Rate Features
Viewing the Heart Rate WidgetThe heart rate widget displays your current heart rate in beats per minute (bpm) and a graph of your heart rate.The graph shows your recent heart rate activity, high and low heart rate, and color-coded bars to indicate thetime spent in each heart rate zone (About Heart Rate Zones, page 10).1 From the watch face, swipe to view the heart rate widget.2 Tap the touchscreen to view your average resting heart rate (RHR) values for the last 7 days.Setting an Abnormal Heart Rate AlertYou can set the device to alert you when your heart rate exceeds a certain number of beats per minute (bpm)after a period of inactivity.1 Hold the touchscreen.2 Select Settings Heart Rate Abnormal HR Alert Alert Threshold.3 Select a heart rate threshold value.Each time you exceed the custom value, a message appears and the device vibrates.Broadcasting Heart Rate to Garmin DevicesYou can broadcast your heart rate data from your vívoactive 3 device and view it on paired Garmin devices. Forexample, you can broadcast your heart rate data to an Edge device while cycling, or to a VIRB action cameraduring an activity.NOTE: Broadcasting heart rate data decreases battery life.1 Hold the touchscreen.2 Select Settings Sensors & Accessories Heart Rate.3 Select an option: Select Broadcast In Activity to broadcast heart rate data during timed activities (Starting an Activity,page 17). Select Broadcast to start broadcasting heart rate data now.4 Pair your vívoactive 3 device with your Garmin ANT compatible device.NOTE: The pairing instructions differ for each Garmin compatible device. See your owner's manual. Heart Rate Features9
Turning Off the Wrist-based Heart Rate MonitorFor the vívoactive 3 device, the default value for the Heart Rate setting is Auto. The device automatically usesthe wrist-based heart rate monitor unless you pair a chest heart rate monitor to the device.NOTE: Disabling the wrist-based heart rate monitor also disables your VO2 max. estimate, intensity minutes,and the all-day stress feature.NOTE: Disabling the wrist-based heart rate monitor also disables the on-wrist detection feature for Garmin Paypayments, and you must enter a passcode before making each payment (Garmin Pay , page 6).1 Hold the touchscreen.2 Select Settings Sensors & Accessories Heart Rate Off.About Heart Rate ZonesMany athletes use heart rate zones to measure and increase their cardiovascular strength and improve theirlevel of fitness. A heart rate zone is a set range of heartbeats per minute. The five commonly accepted heartrate zones are numbered from 1 to 5 according to increasing intensity. Generally, heart rate zones arecalculated based on percentages of your maximum heart rate.Setting Your Heart Rate ZonesThe device uses your user profile information from the initial setup to determine your default heart rate zones.The device has separate heart rate zones for running and cycling. For the most accurate calorie data during youractivity, you
Touchscreen Tips Hold your finger on the touchscreen to view an options menu. Drag up or down to scroll through lists and menus. Swipe up or down to scroll quickly.