Transcription
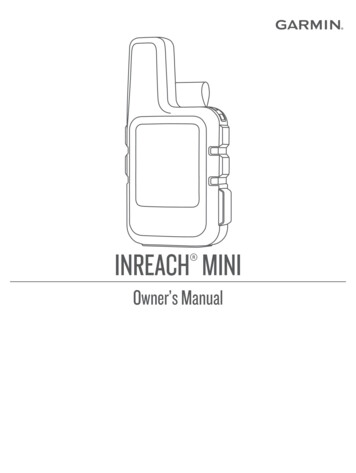
INREACH MINI Owner’s Manual
2019 Garmin Ltd. or its subsidiariesAll rights reserved. Under the copyright laws, this manual may not be copied, in whole or in part, without the written consent of Garmin. Garmin reserves the right to change or improve itsproducts and to make changes in the content of this manual without obligation to notify any person or organization of such changes or improvements. Go to www.garmin.com for current updatesand supplemental information concerning the use of this product.Garmin , the Garmin logo, ANT , fēnix , Earthmate , inReach , and TracBack are trademarks of Garmin Ltd. or its subsidiaries, registered in the USA and other countries. Garmin Explore andMapShare are trademarks of Garmin Ltd. or its subsidiaries. Powered by Garmin IERCC. These trademarks may not be used without the express permission of Garmin. The BLUETOOTH word mark and logos are owned by the Bluetooth SIG, Inc. and any use of such marks by Garmin is under license. Facebook and the Facebook logo are trademarks ofFacebook and its affiliate companies. Iridium is a registered trademark of Iridium Satellite LLC. TWITTER and the Twitter logo are trademarks of Twitter, Inc. or its affiliates. Other trademarksand trade names are those of their respective owners.
Table of ContentsViewing Data Use . 5Resetting the Data Use Counter . 5Getting Started. 1Customizing the Device. 5Device Overview . 1Keys . 1Turning On the Device . 1Status Icons . 1Viewing the Main Menu . 1Power Menu . 1Main Pages . 1Display Settings . 5Tracking Settings . 5Bluetooth Settings .5ANT Settings . 5Messages Settings . 5Sounds Settings .5Time Settings . 6Units Settings . 6Automatically Turning Off the Device . 6Changing the Device Language . 6Adding Owner Information . 6Bluetooth Connected Features . 1Pairing Your Mobile Device . 1Activating the Device . 1Iridium Satellite Network. 2Testing the Device . 2Syncing inReach Data. 2Messages . 2Sending a Preset Message . 2Sending a Text Message . 2Replying to a Message . 2Posting to Social Media . 2Checking for Messages . 2Viewing Message Details . 2Navigating to a Message Location . 2Deleting Messages . 3Contacts. 3Viewing a Contact . 3Deleting a Contact . 3SOS. 3Initiating an SOS Rescue . 3Sending a Custom SOS Message . 3Canceling an SOS Rescue . 3Device Information. 6Support and Updates . 6Attaching the Spine Mount Adapter . 6Attaching a Lanyard . 6Locking and Unlocking the Keys . 6Device Care . 6Cleaning the Device . 7Getting More Information . 7Troubleshooting . 7Maximizing Battery Life . 7Resetting the Device . 7Restoring All Default Settings . 7Viewing Device Information . 7My device is in the wrong language . 7Charging the Device . 7Saving Energy While Charging the Device . 7Specifications . 7Battery Information . 7Index. 8Tracking . 3Clearing the Track Log . 3Starting Tracking . 3Stopping Tracking . 3Sharing Your MapShare Web Page . 3Navigation . 4Acquiring GPS Satellite Signals . 4Routes . 4Navigating a Saved Route . 4Reversing a Route . 4Viewing Route Details . 4Deleting a Route . 4Waypoints . 4Creating a Waypoint . 4Navigating to a Waypoint . 4Editing a Waypoint . 4Deleting a Waypoint . 4Navigating Using TracBack . 4Stopping Navigation . 4Location . 4Viewing and Sharing Your Current Location . 4Compass . 4Weather. 4Adding a Weather Location . 4Setting the Weather Location . 4Requesting a Weather Forecast . 5Deleting a Weather Location . 5Remote Control.5Data Use and History. 5Table of Contentsi
Getting StartedWARNINGSee the Important Safety and Product Information guide in theproduct box for product warnings and other importantinformation.Device OverviewInternal Iridium antenna KeysMicro-USB port (under weather cap)SOS button (under protective cap)Power keyMounting screwKeysMain PagesThe main pages contain all the information you need to operateyour device. You can select or to scroll through the pages.Home page: Displays the date, time, and status icons (StatusIcons, page 1). It also displays tracking and weatherinformation when those features are in use. You can selectOK to open the main menu.Messages page: Enables you to send and receive textmessages (Messages, page 2).Mail Check page: Enables you to check for new messages(Checking for Messages, page 2).Tracking page: Allows you to start and stop tracking. Whiletracking, this page shows your distance traveled and averagespeed (Tracking, page 3).Location page: Displays your current GPS location andelevation (Location, page 4).Compass page: Displays your heading and speed when youare moving (Compass, page 4).Bluetooth page: Enables you to pair the inReach device with acompatible mobile device (Pairing Your Mobile Device,page 1).Weather page: Enables you to request weather forecasts(Weather, page 4).Bluetooth Connected FeaturesYour device has several Bluetooth connected features for yourcompatible smartphone or mobile device using the Earthmateapp. The Earthmate app allows you to use inReach featuressuch as maps, tracking, messaging, and SOS on your mobiledevice.Downloadable Features: View downloaded maps, aerialimagery, USGS quadrangle maps, and NOAA nautical chartson your mobile device. You should download maps andcharts before going on your trip.Sync: Earthmate syncs your device with yourexplore.garmin.com account, updating presets, waypoints,and routes.Messages: Allows you to read and write messages, and accessthe contacts list on your mobile device. Messages appear onboth devices.NOTE: You can have only one mobile device paired with yourinReach device at a time. Select to scroll through menus, pages, and settings.Select to cancel or return to the previous page.OK Select to choose an option or to acknowledge a message.From the home page, select to open the main menu.Select to turn the device on.Select to open the Power menu.Turning On the DeviceHoldBrightness: Adjusts the brightness of the screen.Mute Sounds: Mutes all device tones.Status IconsSending and receiving dataUnable to send and receive dataTracking enabledBluetooth technology connection status ANT technology enabled Extended tracking mode enabledCharging batteryCharging completeViewing the Main MenuFrom the home page, select OK to open the main menu.Power MenuThe Power menu displays the device battery life. It also allowsyou to adjust settings and turn off the device.From any page, select .Battery: Displays the current battery level.Lock Screen: Locks the touchscreen to prevent inadvertent keypresses.Turn Off: Turns off the device.Getting StartedPairing Your Mobile DeviceYou must pair your inReach device with your mobile device touse Bluetooth features.1 From the app store on your mobile device, install and openthe Earthmate app.Placethe inReach device and your mobile device within 3 m2(10 ft.) of each other.3 From the main menu, select Setup Bluetooth PairDevice.4 Follow the instructions in the Earthmate app to complete thepairing and setup process.After the devices are paired, they connect automatically whenthey are turned on and within range.Activating the DeviceBefore you can use your inReach Mini device, you must activateit.1
1 Create an account, and select a satellite subscription at2345explore.garmin.com.Turn on the device.Follow the on-screen instructions.When prompted, go outdoors to an open area with a clearview of the sky.Wait while the device communicates with the Iridium satellitenetwork.NOTE: It may take up to 20 minutes to activate your device.The device must send and receive several messages, whichtakes longer than sending a single message during regularuse.Iridium Satellite NetworkYour device requires a clear view of the sky to transmitmessages and track points over the Iridium satellite network.Without a clear view of the sky, your device attempts to send theinformation until it acquires satellite signals.TIP: For the best connection with satellites, attach the device toa backpack or to your upper body.Testing the DeviceYou should test the device outdoors before using it on a trip toensure your satellite subscription is active.From the main menu, select Utilities Test Service OK.Wait while the device sends a test message. When youreceive a confirmation message, your device is ready to use.Syncing inReach DataYou can sync data from your explore.garmin.com account. Afteryou make edits to your data, such as contacts, presetmessages, or quick text messages, you must sync them to yourdevice from explore.garmin.com.1 Go to explore.garmin.com.2 Select Plans & Devices.3 Next to your device, select Sync & Update.4 Follow the on-screen instructions.MessagesYour inReach Mini device sends and receives text messagesusing the Iridium satellite network. You can send messages toan SMS phone number, an email address, or another devicewith inReach technology. Each message you send includes yourlocation details.NOTE: A preset message includes predefined text withpredetermined recipients, and you must set it up on the GarminExplore website.Sending a Preset MessagePreset messages are messages that you created atexplore.garmin.com. Preset messages have predefined text andrecipients.1 From the main menu, select Send Preset.2 Choose a preset message, and select Send.TIP: You can select View Details to view the content andrecipient of the preset message.Sending a Text Message1 From the Messages page, select OK.2 Select New Message Select Contacts.23 Choose recipients from your contacts list, and select Done.4 Select an option: To start with a pre-written message, select Pick QuickText.NOTE: You can add and edit quick text messages on theGarmin Explore website. To write a custom message, select Write Message.NOTE: To select from the autocomplete options, begintyping a word, hold OK, and use and to scrollthrough the options.Whenyou have finished your message, select Send.5Replying to a Message1 From the Messages page, select OK.2 Select a conversation, and select Reply.3 Select an option: To start with a pre-written message, select Pick QuickText. To write a custom message, select Write Message.4 When you have finished your message, select Send.Posting to Social Media1 From the Messages page, select OK.2 Select New Message Select Contacts.3 Select one or more options: To post to your Facebook account, select . To post to your Twitter account, select . To post to your MapShare web page, select .4 Select Done.5 Select an option: Select Write Message to create a new message. Select Pick Quick Text to select a quick text message.6 Select Send.Checking for MessagesYour device listens for new messages at regular listen intervals.Satellites announce recently sent messages, and your devicereceives the message at the next listen interval. The device willlisten for 10 minutes after you send a message, and then againevery hour.NOTE: Your device must be in view of a satellite at the time ofthe listen to receive messages.You can force a check for messages by manually checking formessages, sending a message, or sending a track point. Duringa check, your device connects to satellites and receivesmessages waiting to be sent to your device.From the Mail Check page, select OK.Viewing Message Details1 From the Messages page, select OK.2 Select a conversation.3 Select a message, and select OK.Navigating to a Message LocationWhen you receive a message from another device with inReachtechnology, the message may include location information. Forthese messages, you can navigate to the location from whichthe message was sent.1 From the Messages page, select OK.2 Select a conversation with location information.3 Select a message.Iridium Satellite Network
4 Select OK Navigate.Sending a Custom SOS MessageDeleting Messages1 From the Messages page, select OK.2 Select a message.3 Select Delete Thread.ContactsYou can add contacts to the Garmin Explore website and syncthem to your device. Go to explore.garmin.com.Viewing a Contact1 From the main menu, select Utilities Contacts.2 Select a contact, and select View Details.Deleting a Contact1 From the main menu, select Utilities Contacts.2 Select a contact, and select Delete.SOSAfter pressing the SOS button to initiate an SOS rescue, youcan reply with a custom message using the SOS page.1 Select Reply to compose a custom SOS message.2 When you have finished your message, select Send.Your reply lets the emergency response service know that youare capable of interacting with them during the rescue.Canceling an SOS RescueIf you no longer need assistance, you can cancel an SOSrescue after it is sent to the emergency response service.1 Lift the protective cap, and hold the SOS button.2 Select Cancel SOS.3 When prompted to confirm your cancellation request, selectCancel SOS.Your device transmits the cancellation request. When youreceive a confirmation message from the emergencyresponse service, the device returns to normal operation.TrackingInitiating an SOS RescueTracking records your path. When you start tracking, yourdevice logs your location and updates the track line at thespecified log interval. Your device records track points andtransmits them over the satellite network at the specified sendinterval. You can view the total number of track points sent.TIP: You can adjust the tracking log interval and the trackingsend interval to maximize battery life (Tracking Settings,page 5).NOTE: When the tracking log storage is full, your deviceoverwrites older track points, but retains a lower-detail trackingline.NOTE: While in SOS mode, the device cannot be turned off.1 Lift the protective cap from the SOS button .Clearing the Track LogDuring an emergency, you can use your inReach Mini device tocontact the Garmin International Emergency ResponseCoordination Center (IERCC) to request help. Pressing the SOSbutton sends a message to the Garmin IERCC, and they notifythe appropriate emergency responders of your situation. Youcan communicate with the Garmin IERCC during youremergency while you wait for help to arrive. You should only usethe SOS function in a real emergency situation. Before you can clear the track log, you must begin tracking.1 From the Tracking page, select OK.2 Select Clear Log.The recorded track log is deleted.Starting TrackingFrom the Tracking page, select OK.Your track line and track points appear on your MapShare webpage for friends and family to follow your trip.Stopping Tracking2 Hold the SOS button.3 Wait for the SOS countdown.The device sends a default message to the emergencyresponse service with details about your location.4 Reply to the confirmation message from the emergencyresponse service.Your reply lets the emergency response service know thatyou are capable of interacting with them during the rescue. Ifyou do not reply, the emergency response service will stillinitiate a rescue.For the first 10 minutes of your rescue, an updated location issent to the emergency response service every minute. Toconserve battery power after the first 10 minutes, an updatedlocation is sent every 10 minutes when moving, and every 30minutes when stationary.Contacts1 From the Tracking page, select OK.2 Select Stop Tracking.Sharing Your MapShare Web PageBefore you can share a link to your MapShare web page withother people, you must enable MapShare on yourexplore.garmin.com account.1 From the Tracking page, select OK.2 Select Send Mapshare Select Contacts.3 Choose recipients from your contacts list, or enter arecipient's contact information.4 Select Send Mapshare.The system automatically adds text, including linkinformation, to the end of your message.3
NavigationAcquiring GPS Satellite SignalsBefore you can use GPS navigation features, you must acquiresatellite signals.When you turn on your navigation device, the GPS receivermust collect satellite data and establish the current location. Thetime required to acquire satellite signals varies based on severalfactors, including how far you are from the location where youlast used your navigation device, whether you have a clear viewof the sky, and how long it has been since you last used yournavigation device. The first time you turn on your navigationdevice, it may take several minutes to acquire satellite signals.1 Turn on the device.2 Wait while the device locates satellites.It may take up to 60 seconds to acquire satellite signals.3 If necessary, go to an open area, away from tall buildings andtrees.RoutesA route is a sequence of locations that leads you to your finaldestination. You can create and save routes atexplore.garmin.com.Navigating a Saved RouteStarting navigation updates your MapShare web page, and yourfriends and family can view the route you are navigating.1 From the main menu, select Navigate Routes.2 Select a route, and select Navigate.Reversing a RouteYou can switch the start and end points of your route to navigatethe route in reverse.1 From the main menu, select Navigate Routes.2 Select a route, and select Reverse Route.Viewing Route Details1 From the main menu, select Navigate Routes.2 Select a route.The route details appear, including the number of legs, routelength, and date created.Deleting a Route1 From the main menu, select Navigate Routes.2 Select a route, and select Delete.WaypointsWaypoints are locations you record and store in the device.Waypoints can mark where you are, where you are going, orwhere you have been. Creating or editing a waypoint updatesyour MapShare web page.Creating a WaypointYou can save your current location as a waypoint or createcustom waypoints.1 Choose an option: To mark your current location as a waypoint, select MarkWaypoint from the main menu. To create a custom waypoint, select Navigate Waypoints New Waypoint from the main menu.2 If necessary, edit the waypoint information.Navigating to a Waypoint1 From the main menu, select Navigate Waypoints.2 Select a waypoint, and select Navigate.4Editing a Waypoint1 From the main menu, select Navigate Waypoints.2 Select a waypoint, and select an option: To change the name of the waypoint, select Edit Name. To change the symbol representing the waypoint, selectEdit Symbol. To change the GPS coordinates of the waypoint, selectEdit Coordinates.3 Enter the new information, and select if necessary.Deleting a Waypoint1 From the main menu, select Navigate Waypoints.2 Select a waypoint, and select Delete.Navigating Using TracBack While recording, you can navigate back to the beginning of youractivity. This can be helpful when finding your way back to campor the trail head.From the main menu, select Navigate TracBack.Stopping Navigation1 From the navigation page, select OK.2 Select Stop Navigating.LocationYou can view your current GPS location and elevation from theLocation page. Each message you send includes a link to yourcurrent location. You can also send your location details as textwithin a message.Viewing and Sharing Your Current Location1 From the Location page, select OK.2 Select Share Location to send your location details as textwithin a message.CompassThe compass page shows your heading and speed when youare moving.WeatherYour inReach device can send a message to request basic,premium, or marine weather forecasts. You can receive weatherforecasts for your current location, a waypoint, or GPScoordinates. Weather forecasts incur data usage charges. Formore information, go to explore.garmin.com.Adding a Weather LocationYou can add waypoints as weather locations.1 From the Weather page, select OK.2 Select Change Location New Location.3 Select an option: To add an existing waypoint as a weather location, selecta waypoint. To create a new waypoint to add as a weather location,select New Waypoint.Setting the Weather Location1 From the Weather page, select OK.2 Select Change Location.3 Select a location.Navigation
Requesting a Weather ForecastFor best results, you should ensure your device has a clear viewof the sky when you request a weather forecast.1 From the Weather page, select OK.2 Select Update.3 If necessary, select a forecast type.NOTE: For best results, you should request a marineforecast for a location away from shore and over a large bodyof water.The device sends a request for the forecast. It may take severalminutes to receive the weather forecast data. After the devicefinishes downloading the data, you can view the forecast at anytime until all the information in the forecast has expired. You canalso update the forecast at any time.NOTE: Updating a forecast incurs data charges or additionalusage charges.Deleting a Weather LocationYou must set the weather location before you can delete it(Setting the Weather Location, page 4).1 From the Weather page, select OK.2 Select Remove.Remote ControlYou can access some inReach Mini features using anothercompatible device with ANT wireless technology, such as thefēnix watch. You can use remote control to view incomingmessages, send preset messages, start and stop tracking, andinitiate or cancel an SOS.NOTE: You must enable ANT before pairing your device(ANT Settings, page 5). Data Use and HistoryViewing Data UseYou can view the number of messages, preset messages, andtrack points sent during the current billing cycle. You can alsoview the details of your current data plan and check for dataplan updates. The data use counter resets automatically at thebeginning of each billing cycle.From the main menu, select Utilities Data Use.Resetting the Data Use CounterIf you are a professional customer, you can reset the data usecounter to monitor your usage.From the main menu, select Utilities Data Use ResetCounter.Customizing the DeviceDisplay SettingsFrom the main menu, select Setup Display.Brightness: Sets the backlight brightness.Timeout: Sets the length of time before the backlight turns off.Tracking SettingsFrom the main menu, select Setup Tracking.Send Interval: Sets the frequency at which the device records atrack point and transmits it over the satellite network whenyou are moving.Log Interval: Sets the frequency at which the device logs yourlocation and updates the track line in memory.Remote ControlAuto Track: Sets the device to start tracking when you turn onthe device.Ext. Tracking: Sets the device to enter sleep mode betweentrack points to maximize battery life. Sleep mode disablesBluetooth wireless technology, detailed track lines, andmessage checking.Stationary Interval: Sets the frequency at which the devicerecords a track point and transmits it over the satellitenetwork when you are not moving. This setting is onlyavailable for professional customers with a byte-basedsubscription plan.Burst Tracking: When tracking, sets the device to create andsend a detailed track line to provide the best approximation ofyour location. You can select the amount of data to use, andthe device will create as many track points as possible. Thissetting is only available for professional customers with abyte-based subscription plan.Bluetooth SettingsFrom the main menu, select Setup Bluetooth.Status: Enables Bluetooth wireless technology.Pair Device: Connects your device with a compatible Bluetoothenabled mobile device. This setting allows you to useBluetooth connected features using the Earthmate app.Forget Device: Removes the connected device from the list ofmobile devices to connect to. This option is available onlyafter the device has paired.Pair Again: Restarts the pairing process. This option isavailable only after the device has paired.ANT SettingsWhen enabled, ANT technology allows you to access someinReach Mini features using another compatible device (RemoteControl, page 5).From the main menu, select Setup ANT .Status: Turns ANT technology on or off.Verification: Enables user verification to communicate with awireless device.Device Number: The device number for the ANT channel.Verified Devices: Displays a list of verified devices that thisdevice can wirelessly connect to.Messages SettingsFrom the main menu, select Setup Messages.Ring Until Read: Sets the device to ring until you read a newmessage. This feature is helpful if you are in a noisyenvironment.Adaptive Mail Check: When this setting is enabled, the devicelistens more frequently for a reply to a sent message for tenminutes. If the recipient replies quickly, you can receive thereply before the next scheduled listen interval. This sett
predetermined recipients, and you must set it up on the Garmin Explore website. Sending a Preset Message. Preset messages are messages that you created at explore .garmin.com. Preset messages have predefined text and recipients. 1. From the main menu, select Se