Transcription
QuickBooks User ManualmindSCOPE Staffing and Recruiting Softwarewww.mindscope.comCURA Technical SupportEmail: cura support@mindscope.comPhone: 1.888.322.2362 ext 1
CURA QuickBooks SynchronizationTable of ContentsPreparing Your CURA Application for QuickBooks . 4Getting Started . 4Configuring Timesheet Pay Types . 4Installing the CURA QuickBooks Synchronization Tool . 7Setting Up Your PC For The Synchronization Tool .18Preparing Timesheets from CURA for QuickBooks. .30Timesheet Overview .30Preparing your Timesheets.30Finding Timesheets in the Candidates module: .30Filling out your Timesheet: Candidates Module .31Finding Timesheets in the Job Order Module: .33Filling out your Timesheet: Job Order Module .34Timesheets in The Tools Module .36Finding Timesheets in the Tools module .36Filling out your Timesheet: Tools Module .37Preparing QuickBooks for the Synchronization Tool .39QuickBooks Preferences .39Dates and Times in QuickBooks .40Payroll & Expenses .42Configuring and Running the CURA QuickBooks Synch Tool .47Opening the QuickBooks Synchronization Tool .47Using the QuickBooks Synchronization Tool .48Import Tab: Chart of Accounts .48Preferences Tab .52Import Tab: Payroll items .54Transferring Information from CURA to QuickBooks.56Main Tab .56CURA QuickBooks Synchronization Report & Report tab .59Accessing Transferred Information in QuickBooks .62Client/Customer Information in QuickBooks .62QuickBooks Customer Centre & Invoicing.632mindSCOPE Staffing and Recruiting Softwarewww.mindscope.com
CURA QuickBooks SynchronizationEmployee Information in QuickBooks .66Employee Centre in QuickBooks.67Viewing Employee Timesheets in QuickBooks .69Contact Us .723mindSCOPE Staffing and Recruiting Softwarewww.mindscope.com
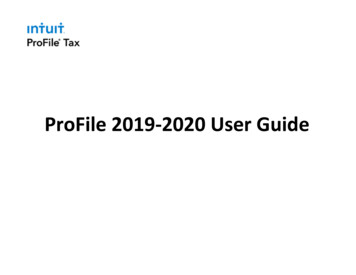
CURA QuickBooks SynchronizationPreparing Your CURA Application for QuickBooksIn order for CURA and QuickBooks to synchronize correctly, certain settings in both CURA andQuickBooks need to be adjusted to allow seamless communication between the twoapplications.Getting StartedNote: Have the Administrator password on hand if logged into a nonAdministrator user account.Configuring Timesheet Pay Types1. Go into the Tools Module found at the bottom left corner of your screen4mindSCOPE Staffing and Recruiting Softwarewww.mindscope.com
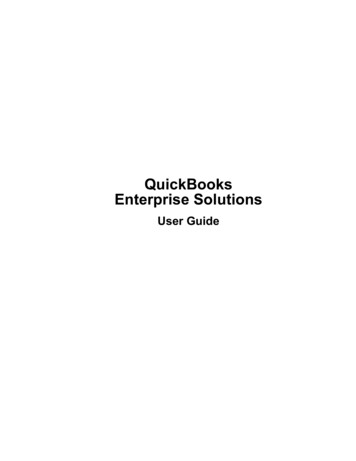
CURA QuickBooks Synchronization2. The first item that needs to be modified in CURA is the Timesheet settings. Scroll to thebottom of the Corporate Tables list and select Timesheet Pay Type5mindSCOPE Staffing and Recruiting Softwarewww.mindscope.com
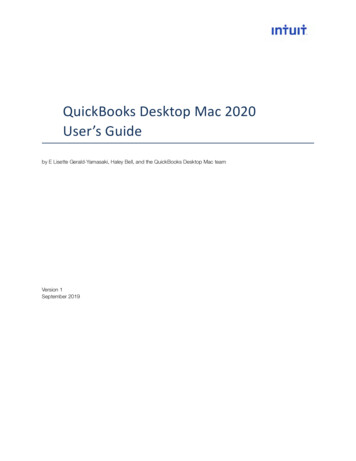
CURA QuickBooks Synchronization3. If your company pays employees any additional wages (such as bonuses) enter them inthe New Value typing field and click the Save button. If your company does not pay anyadditional wages, you can skip to the next section on page 7.4. If you wish to make your new pay type a flat rate, check the flat rate box next to the paytype you created.5. Add as many additional pay types as necessary for your business.6mindSCOPE Staffing and Recruiting Softwarewww.mindscope.com
CURA QuickBooks SynchronizationInstalling the CURA QuickBooks Synchronization Tool1. While still in the Tools Module scroll down the list until you find CURA QuickBooksSynchronization. Click on it to prompt the download window to pop-up.7mindSCOPE Staffing and Recruiting Softwarewww.mindscope.com
CURA QuickBooks Synchronization2. The CURA Synchronization download process is in 2 separate stages. It requires you todownload the QuickBooks Foundation Library and the CURA QuickBooksSynchronization Tool.To begin click “Please Click Here for your QBFC 10 download to begin”Note: This installation will only have to be performed once on your computer.8mindSCOPE Staffing and Recruiting Softwarewww.mindscope.com
CURA QuickBooks Synchronization3. A download window will open asking you if you want to run or save the file. Click onRun to start downloading and installing the tool immediately or click on Save to save thefile on your machine.4. A User Account Control window may pop up on your screen asking “Do you want toallow this app to make changes to your PC?” Click on the Yes button.9mindSCOPE Staffing and Recruiting Softwarewww.mindscope.com
CURA QuickBooks Synchronization5. The Installation process will begin.6. Click Finish to complete this part of the installation10mindSCOPE Staffing and Recruiting Softwarewww.mindscope.com
CURA QuickBooks Synchronization7. Navigate back to the CURA Quick Books Synchronization section in the tools module.Click on CURA Quick Books Synchronization. From here download the second file onthe right where it says “Please Click Here for your download V10 to begin”.11mindSCOPE Staffing and Recruiting Softwarewww.mindscope.com
CURA QuickBooks Synchronization8. A download window will pop-up asking you to Open, Save, and Save As a zip file.Select Open to start the download immediately. If you prefer to save the downloaded zipfile to your PC, then click Save or Save As.12mindSCOPE Staffing and Recruiting Softwarewww.mindscope.com
CURA QuickBooks Synchronization9. Once the zip window opens select both the CuraQBSynchronization.msi andsetup.exe files by holding the Ctrl key on your keyboard and clicking both files. Thendrag and drop the files onto your desktop.13mindSCOPE Staffing and Recruiting Softwarewww.mindscope.com
CURA QuickBooks Synchronization10. Once the files have been dragged onto your desktop right click on the setup file and clickRun as administrator. (If a security window asks if would like to run the application,select yes.)14mindSCOPE Staffing and Recruiting Softwarewww.mindscope.com
CURA QuickBooks Synchronization11. When the install wizard opens click Next to start the installation process.12. Select if you would like this tool installed for just your PC user account, or for all userswho use this PC. Then click Next15mindSCOPE Staffing and Recruiting Softwarewww.mindscope.com
CURA QuickBooks Synchronization13. The wizard will ask you to confirm the installation. To start installation, click on the NextButton. Click Next to proceed.14. Allow installation to run16mindSCOPE Staffing and Recruiting Softwarewww.mindscope.com
CURA QuickBooks Synchronization15. When complete click Close.17mindSCOPE Staffing and Recruiting Softwarewww.mindscope.com
CURA QuickBooks SynchronizationSetting Up Your PC For The Synchronization Tool1. Open your start menu and click on File Explorer.18mindSCOPE Staffing and Recruiting Softwarewww.mindscope.com
CURA QuickBooks Synchronization2. Click on This PC on the lefthand side pane.3. Double click on your computer’s (C:) drive19mindSCOPE Staffing and Recruiting Softwarewww.mindscope.com
CURA QuickBooks Synchronization4. Find the Program Files folder and double click on it to open it.5. Once in the Program Files folder right click in any empty space and click New, then clickFolder.20mindSCOPE Staffing and Recruiting Softwarewww.mindscope.com
CURA QuickBooks Synchronization6. Name that new folder Mindscope.7. Right click on the Mindscope folder and click Propertiess21mindSCOPE Staffing and Recruiting Softwarewww.mindscope.com
CURA QuickBooks Synchronization8. When the Properties window pops up navigate to the Security tab, and select the userprofile that you are currently using on your PC. Once you have selected your user profilename click Edit.Note: The name in the parenthesis next to Users will be unique to your PC and your PCLogin Name. Do not rename any usernames to match name listed in the above image.Consult your PC Administrator for help if needed.22mindSCOPE Staffing and Recruiting Softwarewww.mindscope.com
CURA QuickBooks Synchronization9. Find your group or user name from the list, and proceed to Permissions for Userssection and check the box for Full Control, Modify, and Write. When all three havebeen checked click Apply, then click OK.23mindSCOPE Staffing and Recruiting Softwarewww.mindscope.com
CURA QuickBooks Synchronization10. Click OK on the Mindscope Properties window.11. Navigate back to the Program files window. On the left hand pane of this window click backto your PC’s (C:) drive. (If you are using a 32-bit PC you can proceed to the next section onPage 2924mindSCOPE Staffing and Recruiting Softwarewww.mindscope.com
CURA QuickBooks Synchronization12. When back in your PC’s (C:) drive, double click on Program Files (x86) folder.13. Once the Program Files (x86) folder is open right click in any empty space and clickNew, then click Folder. Name that new folder Mindscope.25mindSCOPE Staffing and Recruiting Softwarewww.mindscope.com
CURA QuickBooks Synchronization14. Right click on the Mindscope folder and click Properties26mindSCOPE Staffing and Recruiting Softwarewww.mindscope.com
CURA QuickBooks Synchronization15. When the Properties window pops up navigate to the Security tab, and select the userprofile that you are currently using on your PC. Once you have selected your user nameclick Edit.Note: The name in the parenthesis next to Users will be unique to your PC and your PCLog-in Name. Do not rename any usernames to match name listed in the above image.Consult your PC Administrator for help if needed.27mindSCOPE Staffing and Recruiting Softwarewww.mindscope.com
CURA QuickBooks Synchronization16. Find your group or user name from the list, and proceed to Permissions for Userssection and check the box for Full Control, Modify, and Write. When all three havebeen checked click Apply, then click OK.28mindSCOPE Staffing and Recruiting Softwarewww.mindscope.com
CURA QuickBooks Synchronization17. Click OK on the Mindscope Properties window.Your PC is now set up to start the CURA QuickBooks Synchronization process!29mindSCOPE Staffing and Recruiting Softwarewww.mindscope.com
CURA QuickBooks SynchronizationPreparing Timesheets from CURA for QuickBooks.Timesheet OverviewQuickBooks is sent pay information from timesheets in Temporary and Contract Placementsfrom CURA. In order for pay information to be sent to QuickBooks correctly the timesheets inCURA need to be properly filled out and Approved. This is a 2 step process that is in place toensure the information is correct and verified.Preparing your TimesheetsTimesheets can be found in the Candidates, Job Order Module and Tools Module.Regardless of where you access them they all behave the same when it comes to filing themout and having them approved.Finding Timesheets in the Candidates module:1. navigate to a candidate’s summary page. From there click Schedule then clickTimesheet.30mindSCOPE Staffing and Recruiting Softwarewww.mindscope.com
CURA QuickBooks SynchronizationFilling out your Timesheet: Candidates Module1. Once the timesheet window has loaded up you have a few different options on how to fillout the time sheet.o If you want to narrow down which client the candidate is working for, start typingit in the Client Name field. The company name will populate after a few lettershave been typed in the field. A drop down menu will appear where you need toselect the name of the client you are looking for.o You can narrow down placements vie
QuickBooks User Manual mindSCOPE Staffing and Recruiting Software www.mindscope.com CURA Technical Support Email: cura_support@mindscope.com Phone: 1.888.322.2362 ext 1