Transcription
1Intuit Merchant Servicefor QuickBooksUser Guide
2Table of ContentsIntuit Merchant Services . 3About this Guide .3Chapter 1 Enable Credit Card Protection in QuickBooks. 4Overview .4Sign Up for Intuit Merchant Services . Error! Bookmark not defined.Enable QuickBooks Credit Card Protection .5Set Up Additional User Access.7Chapter 2 Linking QuickBooks to Intuit Merchant Services . 9Overview .9Link your Merchant Account to QuickBooks .9Chapter 3 Understand How QuickBooks Stores Credit Card Information . 11Overview .11Edit Customers Credit Information .11Chapter 4 Sales Transactions . 13Overview .13Process Debit and Credit Card Sales Transactions .13Receive a Payment Using a Credit or Debit Card .15Create and Apply Credit Memos (Refunds) .17Chapter 5 Depositing Payments . 20Overview .20Deposit Refunds or Negative Payments .22Chapter 6 Printing Receipts . 23Overview .23Set Up Receipt Printing .23Chapter 7 Authorize & Capture . 25Overview .25Authorize available funds .25Capture Authorized Funds for Payment .27Chapter 8 Audit Report for Payments . 29Overview .29Create Customer Credit Card Audit Trail Report .29Chapter 9 Merchant Service Reports . 31Overview .31View Online Merchant Reports .31
3Intuit Merchant ServicesAbout this GuideThe Intuit Merchant Service feature in QuickBooks is an exciting new way forQuickBooks users to receive funds faster, and manage their accounting moreeffectively.You are able to accept VISA, MasterCard, and American Express. If you have theoptional swipe terminal, you can also process debit cards. You will save time on dataentry because QuickBooks becomes your virtual terminal updating your accountingrecords real time as you process credit cards.This guide is a tool to help you get the most out of this new feature. Learn how to setup the Intuit Merchant Service feature, receive specific instruction for processingpayments on Sales Receipts, Credit Memos and Payments, and understand how IntuitMerchant Service speeds up reconciliation.You are required to make are several changes to existing features or use existingfeatures differently to aid in payment processing. We explain these changes in detailthroughout this guide.Intuit assumes readers of this guide have applied for the merchant card service, andhave an active merchant account.
4Chapter 1Enable Credit CardProtection in QuickBooksOverviewAfter receiving confirmation of your successful Merchant Services application, youmust enable your company file to use the service.In this chapter, you learn how to: Enable QuickBooks Credit Card Protection. Set up additional user passwordsGetting StartedOnce approved you will receive a welcome email with your merchant and terminal IDs,a link to create your login and a link to a PDF Quickstart card.
5Enable QuickBooks Credit Card ProtectionStep 1. Click the Company menu, and then click Customer Credit Card Protection.Step 2. Click Enable Protection.
6Step 3. Complete the Admin Name and Password Screen.If you have a password for QuickBooks, these next steps require you to change itin order to comply with the PCI DSS (Payment Card Industry Data SecurityStandard). If you don’t have a password for QuickBooks, after completing thesesteps, you are required to enter a password each time you log in to QuickBooks.Note: PCI DSS requires all passwords to be complex (strong) passwords for allusers with access to payment card numbers. A complex password is a minimumof seven characters; contains an uppercase letter and one number (for example,pA5sword); changed every 90 days; and if you wish, can be reused every thirdpassword.1. In the User Name field, type a name. The name “Admin” works as adefault, however you can choose a name of your choice.In the Password field, type a Password. It must be a complex password (bea minimum of seven characters and contain an uppercase letter and onenumber, for example, pA5sword.)2. Enter the password again in the Confirm Password field.3. Click the Challenge Question drop-down arrow, select a question, and thenenter an answer in the Challenge Answer field. The challenge question letsyou reset your password if you forget it.4. Click Next.Step 4. Click OK.
7Set Up Additional User AccessThe administrator selects who sees sensitive information in QuickBooks. If you haveemployees who use your QuickBooks data file, then you must set up or restrict accessfor each employee using the following steps.If you grant your employees’ access to sensitive information, QuickBooks requires themto create a complex password the next time they open your company data file.Step 1.Go to the Company menu; click Set Up Users and Passwords. Enter theadmin password when prompted.Step 2.Select either Edit or Add for the user who needs updating.Step 3.Click Next to open the Sales and Accounts Receivable window.
8Step 4.Select View complete customer credit card numbers and manage terminalIDs if you want this user to see customer credit card information.QuickBooks retains credit card information, selecting this option allows the user toaccess credit card information. To hide this information from the user you would clearthe View complete customer credit card numbers and manage terminal IDscheckbox.Note: The administrator selects who can see the sensitive information. If you restrictyour employees’ access to sensitive information, then they are not required to createa complex password.
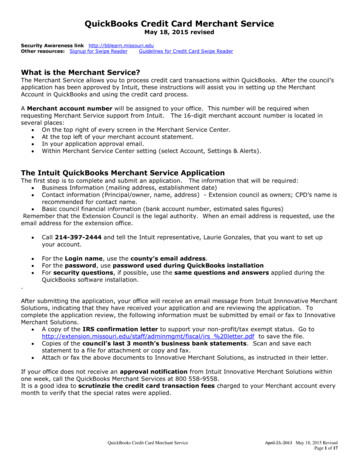
9Chapter 2Linking QuickBooks to IntuitMerchant ServiceOverviewNow that you’ve enabled QuickBooks, you need to link your QuickBooks company fileto Intuit Merchant Services.In this chapter, you learn how to: Link your QuickBooks company file to the Intuit Merchant Service AccountLink your Merchant Account to QuickBooksNote: Only the administrator can link to Intuit Merchant Services.Step 1.Click the Customers menu, and then click Add Credit Card Processing.Step 2.Click Link Merchant Account to Company File.
10Step 3.Enter the same email address and password that you used when youcreated your login for your Intuit Merchant Service application.Step 4.Click Login.
11Chapter 3Understand How QuickBooksStores Credit CardInformationOverviewQuickBooks saves preferred payment information, such as your customer’s credit cardnumber, in the Payment Info tab for the Customer. The credit card number is onlyvisible to users who have permission to see the card numbers. (You granted accesswhen you set up users in Chapter 1.).QuickBooks updates customer credit card information whenever you process apayment; however, you can also change this information manually. In this chapter, youlearn how to: Edit customer credit informationEdit Customers Credit InformationStep 1.Go to the Customers menu and click Customer Centre.Step 2.Select the customer you would like to add credit card information for andpress Ctrl-E.Step 3.Ensure the address information is complete, and then click the Payment Infotab.
12Step 4.On the Payment Info tab check that you have the card selected, and thatCredit Card No and Exp. Date is correct. You should also complete theName on card, Address and Postal Code fields. The credit card name mightbe different from the customer record. Having the correct name on thecredit card ensures the authenticity of the credit card.
13Chapter 4Sales TransactionsOverviewUse QuickBooks to record your credit and debit card sales transactions.In this chapter, you learn how to: Process credit and debit card sales transactions Apply a payment using a credit or debit card Create a refund (Credit Memo) using a credit cardProcess Debit and Credit Card Sales TransactionsIn QuickBooks, the Sales Receipt is a transaction for which you receive payment at thetime of sale.Step 1.Open and create the Sales Receipt as you normally would.Step 2.Click the Payment Method drop-down arrow and select the credit cardname, or Interac Debit. QuickBooks automatically selects the checkboxlabelled Process “Credit card” payment when saving and enables theSwipe Card option.Step 3.Click Swipe Card, or if you want to manually enter the credit cardinformation click Save & Close without swiping the card.
14Step 4.Verify or enter the address information. To help protect yourself againstfraud, Intuit Merchant Service recommends you enter all of your customer’scredit card information; however, only the Name, Credit Card Number,Postal/Zip Code, and Expiration Date fields are required.Alternatively, if you have a terminal you can choose to swipe the credit ordebit card rather than enter the credit card information.Note: QuickBooks updates and stores the customer’s credit cardinformation.Step 5.Step 6.Click Submit. QuickBooks processes the transaction.The Processed Payment Receipt window appears. You should print thisreceipt for your records and if your customer is present have him or her signit. You can also print a separate copy to give to your customer.
15Receive a Payment Using a Credit or Debit CardTo apply a payment using a credit or debit card, use the Receive Payments window inQuickBooks to record the customer’s payment and accurately update your balances.Step 1.Open the Receive Payments window; enter the balance the customer ispaying.Step 2.If applicable, select the invoices you want to apply the payment to.Step 3.Click the Payment Method drop-down arrow and select the credit cardname, or Interac Debit. QuickBooks automatically selects the checkboxlabelled Process “Credit card” payment when saving and enables theSwipe Card option.Step 4.Click Swipe Card, or if you want to manually enter the credit cardinformation click Save & Close without swiping the card.Step 5.Verify or enter the address information. To help protect yourself againstfraud, Intuit Merchant Service recommends you enter all of your customer’scredit card information; however, only the Name, Credit Card Number,Postal/Zip Code, and Expiration Date fields are required.
16Alternatively, if you have a terminal you can choose to swipe the credit ordebit card rather than enter the credit card information.Note: QuickBooks updates and stores the customer’s credit cardinformation.Step 6.Click Submit. QuickBooks processes the transaction.Step 7.The Processed Payment Receipt window appears. You should print thisreceipt for your records and if your customer is present have him or her signit. You can also print a separate copy to give to your customer.
17Create and Apply Credit Memos (Refunds)The merchant account processor includes return/refund transaction with the day'sdebit and credit card transactions deposited into your bank. QuickBooks, on the otherhand, records the return/refund transaction in your QuickBooks bank account as aseparate transaction. Be sure to keep this in mind when you reconcile your bankstatement.Step 1. Open the Create Credit Memos/Refunds window.Step 2. Click the CustomerJob drop-down list and choose the customer or job forwhich you are entering the return.Step 3. In the Item column, enter the name of the returned item.Step 4. Click Save & Close.
18Step 5. In the available credit window, select Give a refund.Step 6. In the Issue this refund via field, select the type of credit card you are usingfor the refund.Step 7. Select Process credit card refund when saving.Step 8. Click OK. QuickBooks goes online and process the credit memo as a refundStep 9. To process the refund, verify the customer and credit card information, andthen click Submit.
19Step 10. QuickBooks displays the Process Refund Receipt window. Here you c
a link to create your login and a link to a PDF Quickstart card. 5 Enable QuickBooks Credit Card Protection Step 1. Click the Company menu, and then click Customer Credit Card Protection. Step 2. Click Enable Protection. 6. Step 3. Complete the Admin Name and Password Screen. If you have a password for QuickBooks, these next steps require you to change it in order to comply with the PCI

