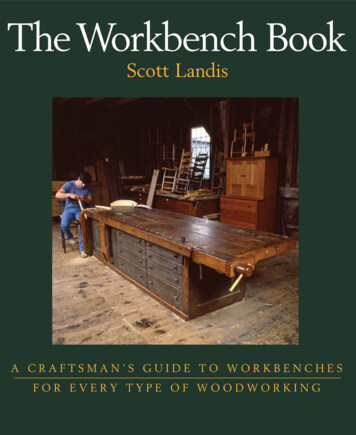
Transcription
2WORKBENCHHere is a good hacckinge stoccke;on this you may hewe and knocke.—Mystery Play of Noah's Ark, fifteenth century
23Ho w would you fit boards tightly together If you did not have awoodworking plane?You might use an adze or hatchet—first scribing the jointwith a compass or overlapping the boards and marking them.with a scratch awl. Or you might rub one of the surfaces with charcoaland then press it against the other. Then you would chop only themarked areas, repeating the process by trial and error until the surfaceswere perfectly fitted together.You could also fit them by repeatedly running a saw kerf down theimperfect junction. This would subtract from each surface only in theplaces where the boards were closely abutted. Where there were gaps,the saw would pass along without making any impression. When the sawteeth cut both surfaces along their whole lengths the two pieces should fitperfectly. A sawhorse or two would be all that you needed.The alternative to custom matching the serendipitous contours of theboards, each to the other, is to bring all surfaces to the one shape that willmatch any other like itself. You sacrifice individuality for the convenienceof this abstract constant. The solution, in both senses, is the plane.But, since the glory days of Rome, when the woodworking planeappeared, working with planes has meant working on a suitable bench—not just to provide a flat, elevated surface but to somehow hold the workso that both hands are free to use the plane. To enter the era of modernjoinery, you must have both planes and a bench to use them on.CLAVES A N D M O R T I C I N G STOOLSThe road from chopping block to joiner's bench has many stops alongthe way. Other woodworking operations besides planing need the work tobe held more solidly than under foot, knee, or derriere. Wooden shoemakers and pulley block makers both use augers and gouges in theirwork. And both use a heavy, four-legged bench called by the blockmakers, a clave. The strength of the clave is its simplicity. Basically, it isno more than a log with a big notch in the top where you place the work.Wedges driven between the work and the end walls of the notch lockeverything in place.Chairmakers use low, heavy benches to hold pieces as they shape themand cut the joints in them for assembly. The bench Illustrated in 1775 bythe French master woodturner Hulot is basically the same as those stillused by Windsor chair makers in England and by rural craftsmen inAppalachia. This bench differs from the clave in that the work is wedgedlengthwise between pegs set into the level top. It has the additionaladvantage of allowing the chairmaker to sit straddling the bench as heworks.Hulot's bench also accommodates the shaving of long pieces with adrawknife. The drawknife, like the plane, requires the free use of bothhands. Thus, as Joseph Moxon wrote in 1678, workmen "set one end[above]French sabot makers in Diderot'seighteenth-century Encyclopedic(1763)-[opposite The joiner's bench. Robert Watsonmaking a sash/br Anderson's forge.
24THE W O O D W R I G H T S W O R K B O O Kof their Work against their Breast, and the other against their Workbench, . . and so pressing the Work a little hard . . . keep it steady In itsPosition." The Hulot bench allows the worker to sit as he shaves, one endof the work set against the block on the end and the other against awooden breastplate. (This breastplate, incidentally, also served as thehead of the bit braces used to bore the holes for chair framing and wasregarded as something of a badge of office in English chairmakingdistricts.)[above]The ubiquitous chairmaker's framingbench, as shown by French woodturnerHulot in 1775.[below]The shaving horse in 1556 (Agricola,De Re Metaliicaj.SHAVING H O R S E SBreastplates and Botched benches are all right, but for true drawknifingpleasure, nothing beats the shaving horse. One of the earliest representations of this bench appears in the 1556 German metallurgy book byAgricola, De Re Metallica. Here, the craftsman is pictured using it toshave "fuzz-sticks" which will burn hot and fast down in the mines. Thisis hardly a sophisticated use of this device; yet perhaps it Is no accidentthat Agricola shows it in front of a shingle-covered structure. Holdingshingles for shaving Is Its traditional assignment, as in the 1845 American novel Margaret in which, amid a "pile of fresh, sweet-scented whiteshavings and splinters," sits "a draw-horse, on which Hash smooths andsquares his shingles."A shaving horse, or any bench, works well only if it fits the person whois using it. French woodworker Roubo, in his 1775 discussion of theshaving horse, relates how they must be made larger or smaller for thosewho are "plus grandes" or "'plus petits." They should be proportioned so
WORKBENCH25The horse in 1775 (Roubo, L'Art duMenuisierJ.
26T HE W O O D W R I G H T S W O R K B O O KVirginia shaving horse in the room whereStonewall Jackson died (photograph ca.1863).that "at the start of the stroke, your arms should be stretched, but notstiff, and at the end of the stroke, your body should always stay inbalance, and therefore, always in command."THE PLANING BENCHWhat's good for a drawknife Is not so good for a plane. The planingbench Is intended to support the work at a convenient height for planing,around 30 inches or so. But the basic units of joinery and cabinetmakingare boards—which are long, wide, and thin. What works to hold thenarrow face at the proper height will not do for the wide face. The basicjoiner's bench has two arenas of board holding, one on the front to workthe edges and one on the top to work the broad faces. The evolutionof the joiner's bench is essentially the increasing sophistication of themechanisms for holding the work in these two positions.HOLDFASTS A N D H O O K SEven the most basic bench, just four legs and a top, becomes wonderfullyversatile when provided with stops and holdfasts. The end of the boardthat you are planing simply needs to hit against something to keep it fromshooting off the end of the bench. On the top, this is usually a toothediron set into a wooden shaft running stiffly in a mortice through thebench top. Earlier stops were pounded directly into the bench top—even
W O R K B F . NC H27Hammering locks the holdfast in itsoversized hole in the bench top.Joiner's bench from Estonia uses leversrather than screws to operate Us two vises(after Viires, Woodworking in Estonia,1960).
28T H E W O O D W R I G H T'S W O R K B O O Ka big nail will do. This stop is customarily set through the left frontcorner of the bench, to accommodate the right-handed majority. No onecould mistake the meaning of a 1777 Virginia Gazette advertisementwhich described a runaway slave "named Harry, . . . by Trade a Cooperand Carpenter, when he works at a Bench, he works at the wrong end."The hook on the front needs a different configuration from the one ontop. This stop must act like a crevice to hold the board tight up againstthe front of the bench. The board must also be supported underneath bypegs which may be placed any of the vertical array of holes provided tosuit boards of differing widths. Because boards are different lengths aswell, these holes can be placed all along the bench front, or they may be asingle row on a vertical member which slides on tracks down the lengthof the bench.These holes on the front of the bench, and others in the top, may alsoserve as lodgements for that remarkable device, the holdfast. When thissimple L-shaped iron is set with its long arm loosely in a hole and theshort arm on the work, a single blow with the mallet will cause it tobecome cocked in the hole—as tight and secure as if it were bolted. Asingle strike on the back releases its grip. Its one disadvantage when usedon top of the bench is that it intrudes on the very surface which you wantto work. Small trouble when morticing, but always in the way of theplane.SCREW VISESThe bench illustrated by Moxon in 1678 is an ordinary hook and holdfast model, with the clumsy addition (obviously an afterthought) of adouble screw vise tacked on to the right front. As the ability to makewooden screws and the means to afford them grew in the eighteenthcentury, they slowly began to appear on workbenches. This represented areturn to the notch and wedge of the blockmaker's clave, except now thewedge was wrapped around a cylinder. The double screw front vise wasused on both of the large benches owned by the eighteenth-centurycabinetmaking family, the Dominys of Long Island. These beautifullysimple benches and some of the furniture produced on them may beseen today at the Winterthur Museum in Wilmington, Delaware.Two other types of front screw vises are the parallel bar type shown inPeter Nicholson's 1812 Mechanic's Companion (a remake of Moxon'sMechanick Exercises) and the vertical jaw vise illustrated by Roubo (andused on my own bench). Though written half a century earlier thanNicholson's, Roubo's book described an innovation that, in much of theworld, eventually became the standard on the woodworker's bench.
W O R K B E N C HT H E E N D VISE"Eventually" is the key word here. Over forty years later, in 1816,Roubo's countryman Bergeron would write that the end vise was still notcommon in Paris, even though "this ingenious device gives the advantageof enabling one to work on three faces of the clamped work." The endvise does this by pinching the board between two stops on the bench top,eliminating the intrusion of the holdfast. Bergeron also appreciated theopening of the end vise "to hold a piece perpendicularly. Cabinetmakersuse it for sawing sheets of veneer, straight and mitred tenons, and forclamping small pieces after gluing."These benches with end vises are commonly called "Germanbenches," because, according to Roubo, "either it was invented in Germany or, which is more likely, by the German cabinetmakers, which arenumerous in Paris." There are occasional assertions that this form wasknown in Germany as a "French bench" (in the sort of extra-nationalattribution usually reserved for social diseases). In any case, it has alwaysbeen more popular on the continent of Europe—and in melting-potAmerica—than in Britain.Roubo's German bench has the usual vise on the front, with an adjustable bottom strut to keep the jaws parallel on different sizes of work. Italso has an unusual second vise that slides in tracks. Its legs, which are29Moxon's bench from i6j8 (MechanickExercises).
30THE W O O D W R I G H T S W O R K B O O K[right]Nicholson's bench from his 1812Mechanic's Companion.IbelowJA copy of the Nicholson bench at theAnthony Hay shop in ColonialWittiamsburg.morticed only three-quarters of the way through the thickness of the top,are superior to those of common benches, which, he noted, are morticed"all the way through, because It is the custom."
W O R K B E N C H31[above]Roubo's "German" bench from the 17705carries the new vise on its rivhl end.[left]A sophisticated Moravian bench withcharacteristic tusk tenons at Old Salem,North Carolina.THE H A R D PLACEThe common thread in all of these benches is solidity. Energy expendedin deformations of the bench is wasted. You cannot work long or well at abench that flexes under the passage of the plane or that bounces underthe blows of the mallet. The big bench in the Domlny shop stands 2 9 2inches tall on 4 by 4 legs. The top, excluding the lo-inch-wide backshelf, measures 12 feet long, ijVi inches wide, and over 5 inches thick—a single piece of oak for generations of work.
32THE W O O D W R I G H T S W O R K B O O KTHE TOP"He that will a good bench win tnusisplit thick and hew thin."Enough history; now let's consider a bench for your own shop. Theancient bench top was a single massive timber. You can cut a big tree,hew it rectangular, and saw it in half, making two bench tops. The sawn,heart side of the timber goes up and the hewn surface goes down. Theheart face can be harder than the bark face, and the slight crowning thatwill happen as it seasons can be less troublesome than the hollow warping of the other face. Flaws, such as rotten knots, may determine whichface you must use. The benches in the Dominy shops are oak; manymakers use beech or elm, and hard maple or birch will also do well.If you are not equipped to cut or split the timber yourself, you mighthave a sawmill custom-cut a piece for you. Have them cut the log into apair of 4- or 5-inch thick tops and some 4 by 43 for the legs. Try to find amill that is small enough that someone can get a message to the sawyer tobreak his routine, yet big enough that it is actually engaged in cuttingwood.You may get lucky. I was out at the mill a while back and spotted a stackof 4-inch-thick red maple timbers with paraffin wax on the ends. Thebrothers that run this mill wouldn't any more put wax on the ends of theirtimbers than they would tie pink ribbons on their cant hooks. I asked oneof the brothers about this. He was more embarrassed than angry. Someboys from town had asked him to cut it for bench tops. He did, and theycame out and carefully waxed the ends of the timbers to keep mem fromchecking. The timbers had already begun to show signs of heavy warping, though, and they never came back to pick them up. This had beenmany months earlier, and the timbers had turned black and were on theverge of going bad. He offered them to me cheap and was glad to be ridof them.I brought them home, where the wax on the ends provided a goodhour's diversion for my four-year-old daughter, who found that it workedeasily with my planes and chisels. It takes about two years for a timber ofthis thickness to dry enough to hold still, but in the meantime you canstill get a lot of use out of it. Unless the tree was born to move, the minordistortions should be easily planed out as the wood settles down.B U I L D I N G UP A TOP[opposite]A bench top supported by a frame allaround can be made thinner than thoseon four legs.If you don't want to deal with a single heavy timber, you must build upthe top from smaller pieces. Use pieces of dried 2 by 4 hardwood andglue enough of them together, broad face to broad face, to give you thewidth you want. You can reinforce the final assemblage with long bolts ofthreaded rod. This makes a very stable top, and the process of building itup gives you opportunities to bury bolts or nuts within the top to helpanchor vises. The top for my paneled bench is built up of 2 by 4 piecesjoined with splines and glue. Lacking enough wood to do otherwise, I
W O R K B F. N C H33
T HE W O O D W R I G H T S W O R K B O O K34My Bench
W O R K B E N C H35Splined joints in my old bench top.joined them narrow face to narrow face and, consequently, it is only 2inches thick. As it is well supported by the frame that it sits on, it doesn'tflex.LEGSThe simplest benches (and often the best) have legs simply morticed intothe top. Not content with simple solutions, Roubo often showed a peculiar tenon and dovetail arrangement. The advantage of this joint is hardto see. The dovetail does keep die face of the legs flush with the front ofthe bench. And it adds a larger bearing surface and some additionalstiffness to the legs. He does say that when the bench gets old and dielegs loose, the tops of the mortices can be enlarged and wedges driven into retighten them. This relies on the strength of the mortice and tenon toresist racking of die rectangular form, ratiier than on the braced designof table legs. Like Roubo, Bergeron noted that the tenons on moresophisticated benches go only three-quarters of the way through die top;this is the case for the benches in the Dominy shop. Only on commonerbenches do the tenons protrude into die work surface.LEG JOINTSThe earliest benches stood on four independent legs with no connections between diem. When the legs are linked with rails to brace themand to support shelves and holding devices, three joints are commonly
36T HE W O O D W R I G H T S W O R K B O O K[left]Leg joint, "a la Roubo."used. First is the basic mortice and tenon—usually a simple affair, witheach joint offset so that they do not interfere with each other. If the benchhas a thinner top needing support on its front edge, it may be providedwith a skirt just under the top, as on a table. This means that both the endand the long side rails meet the comer posts at the same point. The twotenons meet inside the post and must be mitered on their ends to giveeach its maximum strength. Also, because the mortice is near the top endof the leg, strength can be retained by using a tenon with a diminishedhaunch. This will keep the end of the mortice closed but allow the tenonto prevent twisting across the full width of the board.[right]Haunched tenon joining skin rail to leg(cheap wood—expensive joint).FASTENERSWoodworking on the highest level solves its own problems with its ownmaterial. Joints that interlock timbers are superior to those that rely onfasteners such as nails. Yet economy has its virtues, and there are quickly
WORKBENCHcut, simple joints employing nuts and bolts to make a take-apart bench.Here, a shallow mortice and tenon is held in place by a bolt that reachesthrough the joint and engages a nut set Into a hole bored partiallythrough the tenoned piece. If you make this joint, remember that sinceyou will not have access to the nut in the wood, you must turn the bolthead to tighten the joint. (I mention this because I know a fellow whobought carriage bolts instead of common bolts. Carriage bolts haveround, unslotted heads with partially squared shanks to keep them fromturning in die wood. It was too late to return them, and so he went aheadand worried them tight with a pair of pliers, a chisel, and a hammer,working late into the night.)DRAWBORINGThe way people move about, you may well want to be able to take yourbench apart. When you peg through the joints, leave the pegs protruding37Nut sunk in the rail for bolting legs.
38T H E W O O D W RI G HT S W O R K B O O KRoubo's End ViseI made my bench with an end visethat uses a framed out-rigger to keepit tight in the track. It is similar to theone described by Roubo, but uses amanufactured bench screw and nut.The end vise detailed by Roubo in1771 measures about 14 inches longand 3l/z inches wide and Is as thick asthe bench. The six sides of the boxenclosing the screw are joined withtongues and grooves, rabbets, andmortice and tenon joints reinforcedwith glued pegs or screws. The coverpiece (B, fig. 7) must be fastened withscrews alone to allow access to the internal mechanism.The back piece (D) and the endpiece (F) are designed to keep thesliding box tight against the bench.Piece F (shown end-grain-on in figure 6) has an 8-inch tail which hooksover a retaining bar (G, figs. 6 and 7)on the underside of the bench top.The back piece (D, fig. 7) is langedto fit into a slot in the edge of thebench. This piece is also seen in figure 12. Figure 10 shows the side ofthe bench ready to receive the box,along with the retaining bar (G),The head of the box (E) also has aspecial function. As shown in figure8, it links the screw to the box so thatit will open when the screw is backedoff. Two keys of iron, copper, or veryhard wood ride in a groove turned inthe shank of the screw.In figure 8 you can also see that thenut for the wooden screw is actuallyan iron case filled with a soft metalcasting. This nut has a 6-ineh tailwhich is bolted into a mortice in theside of the bench. In the side view,figure 7, the nut is shown with its twobolts. Figure 9 shows a top view ofthe nut and its tail. (The followingchapter will show you how to makewooden nuts and screws for vises andother devices.)The opening through the nut forthe easting must be about % inchlarger than the diameter of the screw.Flare the opening on both ends anddrill holes in the four sides of the nutso that the casting will be held solidly.Take a length of screw similar to thatwhich you will use and coat it withfine clay mixed with glue. This coating gives the screw clearance andkeeps the heat of the casting fromscorching it.When the coating is dry, positionthe screw in the nut and mold clayaround it to prevent the molten metalfrom leaking out. Now, pour in thecasting material, which is composedof two parts lead with one part anti-mony. When the metal is cold, remove the screw and die nut is done.The iron catches (figs. 2 and 3) whichhold the work are about 3A inchsquare and about an inch longer thanthe thickness of the bench. A springon their side holds them at the properheight. One hook may be set in any ofthe holes which are cut every 4 inchesin a line i lh inches back from dieedge of the bench, lined up with themiddle of the screw. These holes arecut at an opposing angle to those inthe vise box, as you see in figure 6, sothe hooks stay tight and the boarddoesn't come loose.
WORKBENCH39
4oT HE W O O D W R I G H T SW O R K B O O KScribe around the key to lay out themortice for a tusk tenon.on the hidden side so that you can drive them out when you want to. Thepegs should be properly drawbored so that they pull the joint tight. Todrawbore the joints, first bore the peg hole through the cheeks of themortice without the tenon in place. Then put the tenon tight into thejoint and, using either the lead screw of the auger used to bore the holeor a scratch awl, mark the location of the peg hole on it. Now pull thejoint apart and bore the hole through the tenon, being sure to offset itabout V» inch toward the shoulder of the tenon.When you reassemble the joint, you can either drive the tapered pegstraight in or -use a polished steel "draught-nayle" to make the initialcompression. When you drive the peg, be sure that the underside of themorticed piece is well supported. I have seen beautiful work ruinedbecause the offset of the hole caused the peg to miss the hole on the farside and split off the cheek.TUSK T E N O NAnother pegging method is commonly used when the long rails passthrough the horizontal bar between the legs of one end. The usualpractice is to allow these tenons to pass through the end boards and holdthem with a tapered key. This is the tusk tenon used in teutonic work. Itis similar to the drawbored joint in that the tapered key pulls the jointtight. Be sure that the hole for the key extends back below the surface ofthe wood through which the tenon passes. Otherwise the peg will neverbe able to draw up the joint. (This is not done in Alabama, where thetusks-are-loosa.)
WORKBENCH 29 THE END VISE "Eventually" is the key word here. Over forty years later, in 1816, Roubo's countryman Bergeron would write that the end vise was still not common in Paris, even though "this ingenious device gives the advantage of enabling one to work on three faces of the clamped work." The end
