Transcription
Tremco TPO Installation Manual1
2
Table of ContentsProducts/SystemsSystem QualificationsEquipment GuidelinesApplicationsFlashings and DetailsInspection/Repairs3
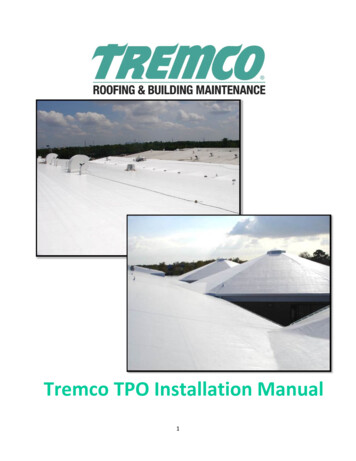
Products and SystemsNotes to installer:The Tremco Thermoplastic Polyolefin (TPO) Roof System is a Thermoplastic, high reflective, light‐weight, Energy Star and California Title 24 compliant roof system. The TPO Roof System can bemechanically attached, ballasted or fully adhered. This hand book should be used as a reference toprovide general application procedures and product information, and should not replace the projectspecification.For technical assistance, Tremco encourages the use of the Tremco Technical Service Group for projectstart‐ups, in‐progress inspections, and final project inspections. Tremco Technical Service personnel willconduct the final inspection utilizing the current manual, project specifications, and published Tremcostandards. In any case where a deviation from approved installation techniques becomes necessary dueto unforeseen job conditions, contact the Tremco Technical Department for approval prior to initiatingany changes.Tremco’s issuance of any product specific warranty on its TPO or other systems is conditioned on thecontractor meeting its responsibility to install the systems in accordance with Tremco’s publishedrecommendations and instructions, as well as good roofing practices.Specifications:The TPO roof system can be used in a wide variety of roof applications. As with any roofing installation,application requirements can change from project to project. The project specification is the primarydocument for directions as to the proper installation of the TPO roof system.Specifications for TPO roof systems may be obtained from your local Field Representative.Approved systems include, but are not limited to:‐Fully adhered‐Mechanically attached‐Ballasted‐Vegetated assemblies‐IRMA systems1
It is the responsibility of the installer to ensure the roof system is installed per specification and per localcodes. Failure to do so could result in non‐compliant roofing system.Materials:TPO Roll Weights Standard:45 mil / 78” x 100’150 lbs.60 mil / 78” x 100’195 lbs.80 mil / 78” x 75’200 lbs.45 mil / 120” x 100’230 lbs.60 mil / 120” x 100’300 lbs.80 mil / 120” x 75’308 lbs.TPO Fleece Back Roll Weights:45 mil / 76” x 90’146 lbs.60 mil /76” x 90’186 lbs.80 mil / 76” x 75’207 lbsTPO Perimeter Rolls:45 mil / 39” x 108’60 mil / 39” x 90’80 mil / 39” x 75’TPO Flashings:Available in 12” x 50’; 24” x 50’; 30” x 50’Full line of adhesives and accessories available.2
Material handling and storage:1. Deliver all materials and/or packages to the jobsite in the manufacturer’s original unopenedcontainers with legible labels. Protect material from moisture with tarpaulin (not plastic.)Remove shipping plastic to prevent moisture condensation.2. Always store TPO / TPO FB membrane on its side. Never store the membrane on end; to preventedge damage. Store and transport rolls in such a manner as to prevent bending of the innercore.3. Protect all materials from temperature extremes. Do not allow solvent containing materials tobe exposed to high temperatures, open flames, or sparks.4. Store liquid materials in their original undamaged containers in a clean, dry, protected location.Must be stored within the required storage temperatures.5. Conform to manufacturer’s recommendations and material handling and storage specifications.Be sure not to store rolls in such a manner as to exceed structural live loads. Place equipment ina manner to avoid permanent deflection of deck.6. Ensure all Federal, Provincial, State, and Local regulations are followed in application of this roofsystem. Store materials (rolls & liquids) on dunnage and not directly on the roof surface.7. Follow instructions on product label and MSDS for proper storage & handling.8. Avoid prolonged inhalation of vapors or contact with eyes and skin. See MSDS or label forinstructions. PROPERLY DISPOSE OF EMPTY CONTAINERS PROMPTLY AFTER USE.9. Deliver material in sufficient quantity to allow for continuity of work.10. Select and operate material handling equipment so as not to damage existing construction ornewly installed roofing.11. Provide continuous water protective covering for all materials which require protection againstthe weather. Protect material from moisture with tarpaulin (not plastic.)2
System QualificationsWarranty:The standard allowable warranty length for Tremco TPO is determined by the attachmentmethod and mil thickness of the membrane. Any deviation from these guidelines will requireprior approval from the Regional Manager, Market Manager and/or Tremco Technical Managerand the warranty department.WARRANTY (YEARS)MECHANICALLYATTACHEDBALLASTEDADHEREDHYBRID SYSTEM45 MIL101015N/A60 MIL101015N/A80 MIL151520N/A45 MILN/AN/A15N/A60 MILN/AN/A15N/A80 MILN/AN/A*N/A DENOTES NOT APPROVED SYSTEM20N/ATPOTPO FB2
Equipment GuidelinesHand Tools and Power Tools:For Installation of Insulation and Roof Membrane:To prevent work interruption, it is important to have all the necessary tools and equipment on the job‐site when you begin. Depending on the specific job requirements, certain special equipment may berequired, but the following basic equipment will be needed on all jobs for installation of the insulationand the roof membrane:Equipment to handle materials: Scissors Wire brush for welder tip cleaning Utility Knives Hammers Nail Aprons Screwdrivers #12 wire extension cords Trowels and spreaders for mastic Variable speed drills and/or hammer Caulking gun Brush/Roller Metal shears Power saw Hack saw/reciprocating saw Clean white cotton rags Approved cleaners or solvents Acetone,drills 1/8” x 125’ chalk line with blue chalk 100’ and 20’ tape measures Approved fasteners and stress plates Torque adjusting screw guns with bitsto match fasteners Lumber crayons for marking seams Chalk boxMethyl Ethyl Ketone (MEK) 3Broom
Hot air welding equipment: Generator(s) ‐ minimum of 220 volt, 30 amps, 7500 watts #10 power cord (up to 150’) with 3‐prong twist‐lock plugs Extra plugs, male and female Element; 4500 watts Metric Allen wrenches, metric open end wrenches, screwdriver for adjusting automatic welder(40mm nozzle 40mm 1.5”) Wire brush for cleaning hot air nozzle Lumber crayon for marking seams Neoprene roller for seams Seam probe2
ApplicationInspection of Surfaces:1. The general contractor and/or subcontractor shall be responsible for providing a smoothacceptable surface for the proper installation of the roof insulation membrane and specifiedcomponents on all new construction projects.2. The roofing contractor shall be responsible for the inspection of the deck surface as to suitabilityfor roofing and notify the general contractor and architect / owner of any defects that requirecorrection prior to roof application.3. Retrofits require the removal of all loose aggregate (gravel) by power brooming and/orvacuuming. Before performing a retrofit, a structural analysis and thermal scan should beperformed. Any and all work should comply with local building codes.4. Examine surfaces for inadequate anchorage, low areas that will not drain properly, foreignmaterial, ice, wet insulation, and unevenness or any other defect which would prevent theexecution and quality application of the membrane roofing as specified.5. Remove all asphalt, rust, paint and dirt at flashing areas and termination points where there willbe direct contact with the membrane, mastic or sealant.6. If the existing roof is coal tar pitch or has been repaired with cold tar pitch, a vapor retarder isrequired to prevent staining of the new membrane.7. DO NOT PROCEED WITH ANY PART OF THE APPLICATION UNTIL ALL DEFECTS ANDPREPARATION WORK HAVE BEEN CORRECTED AND COMPLETED.3
Wood Nailers:1. ACQ treated lumber, or equivalent, shall be used for all wood nailers and must conform to allFederal Standards / regulation.a. Use hot‐dip galvanized (ASTM A653 with a G90 or greater) or stainless steel fasteners.b. Do no use electro‐galvanized screws or nails.2. Install treated lumber at the same height as the insulation layer. Wood nailers shall be installedat all perimeters and penetrations as shown in the approved details. The surface under woodnailers shall be FREE OF ALL GRAVEL and shall be as even as possible. Where wood nailers areinstalled directly on the substrate, the substrate shall be carefully examined to confirm that theentire area provides a suitable fastening surface.All defects shall be repaired by theappropriate trade prior to installation.3. See fastener specification for approved fasteners and spacing.4
Installation of Insulation:1. Roof insulation shall be mechanically fastened or adhered in accordance with the roof insulationmanufacturer’s recommendations and must be approved by Tremco Inc. All insulation boardsmust be attached by a Factory Mutual/Tremco Inc. approved stress plate.2. Install roof insulation in parallel courses with tightly butted (1/8” gaps or less) and staggeredjoints (minimum 6”). Boards must be cut accurately to fit neatly around all penetrations. Smallpieces and scraps of insulation will not be allowed.3. Install no more insulation than can be covered during the same working day.4. Taper roof insulation to drain sumps using tapered edge strips. If insulation layer is 1 ½” or less,taper 12” from the drain bowl. If insulation thickness exceeds 1 ½”, taper 18” from the drainbowl. Mechanically fasten all tapers using two fasteners per board.5. At the end of each work day, provide a watertight cover (tarpaulin) on all unused insulation toavoid moisture penetration.6. Follow recommendations in Tremco’s insulation installation guide publication and fastenerrecommendation on next page.7. If more than 3” of rigid insulation is being installed, it must be installed in 2 or more layers.8. Refer to Tremco Inc.’s complete insulation instruction and requirements before proceeding withthe installation.5
Mechanically Attached Systems:1. For roof membrane fastening, stress plates shall be two inch (2 3/8”) O.D. barbed round,G‐90 hot dipped galvanized stress plates with a recessed .260” I.D. center hole assupplied by Tremco Inc. Fasteners shall be as listed on the current approved fastenerspecifications and as indicated on spec data sheet.2. All stress plates must set completely on the membrane allowing a minimum of ½” infrom the edge of the underlying membrane. Rolls are marked with an “X” for easylocation of fastener placement.3. Also allow a minimum of two inches from the edge of the stress plate to the edge of theoverlap‐ ping membrane to allow sufficient room to apply the automatic welded fieldseam.4. Insulation fasteners and stress plates shall be as listed on the current Approved FastenerSpecifications and as indicated on the Request for Warranty form. In most cases, it isrecommended that only plastic, locking stress plates be used for insulation fastenerassemblies.5. Ensure that the system is installed per Tremco Inc.’s recommendations or per FactoryMutual/3rd party testing lab requirements. If the fastening patterns are not specifiedwithin the project documents, contact the Tremco Field Representative or TremcoTechnical Department for design criteria.6. CONSULT THE PROJECT SPECIFICATIONS FOR APPROVED FASTENERS AND OTHERREQUIREMENTS.7. All field sheets incorporate 6” control lines for overlap and fastener placement.8. Start at the low point of the roof and position a perimeter (39'' or 991mm) roll of TPOroof membrane square with the roof edge. Avoid wrinkles. Reposition when necessary.9. Mechanically attach underlying sheet at the lap to the structural deck with fastenersand 2 3/8'' (60 mm) diameter barbed membrane plates spaced at 6'' (153 mm) oncenter (or as specified) down the entire lap with the disc centered 1‐1/8'' (29 mm) fromthe sheet edge.6
10. Overlap perimeter sheet at side lap: 4.5'' (114 mm) minimum. Overlap at end lap: 3” (76mm) minimum. Overlap field sheet 6” (153 mm) minimum. A minimum of twoperimeter sheets shall be installed, parallel to all exterior roof perimeters, includingparapet walls, expansion joints and other changes in the plane of the deck.COATED METAL EDGE DETAILNote: Refer to specifications for fastener spacing. Perimeter width is based on buildingheight and dimension. Refer to FM 1‐29 for perimeter width calculation. Width ofperimeter treatment shall be 10% of the building’s narrowest width or 40% of thebuilding eave height, whichever dimension is least. Tremco requires minimum 2 halfwidth perimeter sheets.7
Fully Adhered Systems:1. Surfaces receiving Bonding Adhesive must be clean, dry and free from oil, grease, or othercontaminants.2. Plan placement of the Roof Membrane System to insure that water will flow over or along, butnot against, membrane laps or side laps. (No back water seams).3. Mix Bonding Adhesive thoroughly before use.4. Application to horizontal surfaces using Fleece Back Membrane:a. Apply Bonding Adhesive to the substrate in full coverage and roll the membrane intoplace.b. Application rate will vary based upon substrate porosity. Refer to spec data pages andSingle Ply Adhesive Coverage Rates document for proper coverage rates.5. DO NOT ALLOW BONDING ADHESIVE TO FULLY DRY before rolling membrane into adhesive.Roll the membrane, using a 75# membrane roller or equivalent, into the adhesive to removewrinkles and assure positive contact with the substrate.6. Minimize foot traffic on freshly applied fleece‐back membrane until adhesive is fully cured.(Cure times will vary depending on ambient conditions)Application to horizontal surfaces using TPO Non Fleece‐Back Membrane ONLY:1. Position TPO Non‐Fleece Membrane in intended location and fold back onto membrane.2. Apply specified bonding adhesive to both the substrate and back of the membrane.3. Application rate will vary based upon substrate porosity. Refer to spec data pages and Single PlyAdhesive Coverage Rates document for proper coverage rates.4. Allow adhesive to partially dry to a tacky feel when touched with the backside of a dry fingerbefore bonding membrane to substrate.5. DO NOT ALLOW BONDING ADHESIVE TO FULLY DRY before rolling membrane into adhesive.Roll the membrane, using a 75# membrane roller or equivalent, into the adhesive to removewrinkles and assure positive contact with the substrate.8
Application to vertical surfaces using Fleece Back and Non‐Fleece Back Membrane:1. Position FB Flashing membrane in intended location and fold back onto field of roof.a. Flashing shall extend six inches (6”) (152 mm) onto the field of the roof from either thetoe of the cant (when cants are specified) or the horizontal ‐ vertical transition point, asappropriate.2. While either Fleece or Non‐Fleece membranes can be used as flashing membranes, Tremco Inc.recommends the use of non‐fleece back as the preferred flashing membrane to assure properoverlap for heat welding of vertical and horizontal flashing laps.3. Apply specified bonding adhesive to the back side of the flashing membrane and on thesubstrate (substrate only for fleece‐back membrane) in a full coverage and allow adhesive topartially dry to touch.4. Application rate will vary based upon substrate porosity. Refer to spec data pages and Single PlyAdhesive Coverage Rates document for proper coverage rates.5. Place the flashing membrane onto the vertical surface and pressure roll to assure positivecontact.6. Do not allow bonding adhesive to contaminate lap areas. Remove adhesive from lap area withan approved solvent.7. Heat weld overlap seams of flashing membrane to field membrane.8. Heat weld vertical flashing laps.a. If using fleece‐back flashing membrane: butt ends of flashing membrane and heat welda cover strip (6” min.) over the flashing end lap.Ballasted TPO System:1. Mechanically attach or adhere the membrane in the perimeter areas, using the requirednumber of perimeter rolls, as determined.2. Unless otherwise specified, minimum ballast coverage is 1000 lbs/SQ, using ASTM D 448‐98,number 4, 3/4” to 1 1/2” (19mm to 28mm). Gravel ballast shall be smooth, water worn, withrounded edges and corners.3. During installation of ballast, do not create piles on the roof deck.9
STAGGERED END LAP DETAIL:1. Offset staggered end laps a minimum of 5’ (1.5 meters). Overlap the previous course of fieldmembrane a minimum of 2” (51 mm).2. TPO FB Membrane: heat weld lap.3. All surfaces must be clean and dry.4. For heat welding, allow the hot air welder to warm up. Insert the nozzle tip of the hot air welderinto the seam area. Move nozzle at a steady speed along the seam area, immediately applyingpressure behind the air nozzle with a neoprene roller or weighted wheel to ensure positivecontact of the heated TPO FB Roof Membrane lap.5. Minimum width of all welded lap shall be 1.5” (38 mm).6. TPO FB Membrane: center TPO cover strip over the overlap area. Heat weld cover strip at laparea.7. Field test heat welded laps to assure proper construction. Perform field test after lap area coolsto ambient temperatures. Properly constructed laps will not separate at the lap interface whentested.CONTINUOUS END LAP DETAIL:1. Overlap the previous membrane course of field membrane a minimum of 2” (51 mm).2. TPO FB Membrane: heat weld lap.a. All surfaces must be clean and dry.b. For heat welding, allow the hot air welder to warm up. Insert the nozzle tip of thehot air welder into the seam area. Move nozzle at a steady speed along the seamarea, immediately applying pressure behind the air nozzle with a neoprene roller orweighted wheel to ensure positive contact of the heated TPO Roof Membrane lap.i. Minimum width of all welded lap shall be 1.5” (38 mm).3. TPO FB Membrane: center TPO cover strip over the overlap area.Heat weld cover strip at lap area.4. Field test heat welded laps to assure proper construction. Perform field test after lap areacools to ambient temperatures. Properly constructed laps will not separate at the lapinterface when tested.10
Welding:1. All field seams exceeding 10’ in length shall be welded with an approved automatic welder.2. All field seams must be clean and dry prior to initiating any field welding.3. Remove foreign materials from the seams (dirt, oils, etc.) with Acetone or approvedalternative. Use CLEAN WHITE COTTON CLOTHS and allow approximately five minutes forsolvents to dissipate before initiating the automatic welder.4. All welding shall be performed only by qualified personnel to ensure the continuity of the weld.5. All furnished seams shall exhibit a homogeneous bond a minimum of 1.5” in width.NOTE: The high temperatures generated by automatic and hand welding can cause injury. Careshould be taken to avoid personal contact with the welder tips, generated hot air and weldsites along the seam until they are cooled.Field test welded laps to assure proper construction. Perform field test after lap areacools to ambient temperatures. Properly welded laps will tear to expose the reinforcingscrim. If laps separate at the membrane to membrane interface, the weldingtemperatures are likely not hot enough.AUTOMATIC WELDING TIPS:‐Always make test welds to ensure proper tip alignment, heat setting and speed of thermal unitbefore starting field welding. The roof membrane must be clean and dry to insure a properweld. An acceptable weld exists when the top sheet will not separate from the bottom sheetwithout substrate destruction.‐Remember that changes in weather and air temperature may require a change in temperatureand / or setting on the welder.‐Always watch to make sure a small bead is flowing from the edge of the membrane beneath thepress wheel while welding.‐Align and guide the thermal welder to make sure the press wheel does not drift over the edge ofthe top membrane. Ensure that the edge of the top membrane does not creep up the insideshoulder of the welder nozzle.11
‐To prevent excessive weld distortion, allow 6” from the end of the roll to the point where thethermal unit is either started or stopped. Mark the area with a lumber crayon so it will bewelded by hand welding unit.‐Each time the welder tip is disengaged, be sure to clean it with a wire brush.WELDER CHECKLIST AND ADJUSTMENT:‐Perform the following steps prior to each day’s welding:‐Check for proper power supply‐Check gears and drive belt‐Make sure drive wheel is tight‐Make sure press wheel is free‐wheeling‐Tip placement: 40 mm back from center of press wheel‐Locked 1/8” above membrane, all the way inserted‐MAKE WELD TESTS EACH DAY!12
TROUBLE SHOOTING THE AUTOMATIC WELDER:ProblemCause/SolutionCause: excessive heat, voltage fluctuationScorching and / or charringSolution: decrease temperature or increase speed of unit, check yourpower source.Cause: insufficient heat, bad heating element, voltage fluctuation.Cold or Spotty WeldSolution: increase temperature or decrease speed, replace element,check power source.Scarring along seam edgePleating of the seamMembrane collecting onweld wheelCause: tip dragging or out of alignmentSolution: remove welder and realign tipCause: membrane not installed snug, press wheel not free‐wheelingSolution: free press wheel, pull slack out of membraneCause: tip out of alignment, excessive heat, unit driftingSolution: realign tip, adjust temperature, hold the unit to steady courseCause: insufficient power, voltage fluctuation, generator overloadUnit pulsatingSolution:increase power or decrease cord length, increase size ofgeneratorUnit JerkingCause: worn drive gears or belt, loose drive wheelSolution: replace worn parts, tighten drive wheelCause: loss of power, damaged unitDead UnitSolution: check all power connections, return unit to manufacturer forservicing13
Flashings and DetailsFLASHING – (MEMBRANE):Clean all vents, pipes, conduits, walls and stacks to bare metal. All protrusions must be properly securedto the roof deck. Remove and properly discard all lead, pipe and drain flashings. Flash all penetrationsaccording to approved details.1. Remove all cant strips and loose wall flashings.a. Cant strips are not required for Tremco Thermoplastic membranes, but are acceptablefor use.2. Flash all curbs, parapets and interior walls in strict accordance with approved Details.3. Tremco Inc. recommends the use of non‐fleece back as the preferred flashing membrane.4. All flashing shall be totally adhered to approved substrate with Bonding Adhesive or WhiteSheeting Bond applied in sufficient quantity to ensure total adhesion. If flashing is carried overthe top of a parapet, it is recommended that the top of the parapet receive a coat of mastic oran air seal to prevent wind from traveling beneath the membrane and potentially billowing theflashing.5. The base of all membrane flashing shall extend out on to the plane of the deck, beyond thewood nailer to a maximum width of 8”.6. Vertical flashing shall be terminated no less than 8” above the plane of the deck with approvedtermination bar or metal cap flashing.7. Vertical wall flashing terminations shall not exceed 30” without additional parallel horizontalrows of termination bars between the deck and the termination point of the flashing. Spacingbetween horizontal rows shall not exceed 24”.14
Acceptable Wall Flashing Adhesives:Bonding AdhesiveCoverage will vary depending on the surface porosity. Review current data page for specified coveragerate. Bonding Adhesive must be applied in full coverage to both the vertical substrate and back side offlashing membrane. TPA Bonding Adhesive and TPO/LV Bonding Adhesive may be used for wall flashingBonding Adhesive coverage will vary depending on substrate porosity.For wood surfaces:50‐60 sq. ft. per gallon/per sideFor concrete surfaces:40‐50 sq. ft. per gallon/per side* Refer to Spec Data’s for specific coverage rates.15
FLASHING (METAL):Thermoplastic coated metal is supplied in 4’ x 10’ pieces, 24 ga. galvanized with 20 mil Thermoplasticlaminated face.1. All perimeter edge details are to be fabricated from Coated Metal or an approved two‐ piecelocking metal fascia.2. Ensure all fascias are 4” lower than the bottom of the wood nailers.3. All flanged metal flashings must be fabricated from Coated Metal.4. Always maintain a minimum 1/4” gap between metal joints to allow for expansion andcontraction. Apply foil tape to joint to act as a bond breaker.5. Use 6” wide membrane strip welded over 1/4” gap between metal joints. This strip should beattached to wood nailer and allowed to be long enough to extend up face and across flange.16
PITCH PANS:1. Every effort shall be made to eliminate the need for pitch pans, including the removal of existingpans. Contact your local representative for specific design recommendations.2. In the event of no viable alternative, fabricate pitch pans from TPO coated Metal and installpitch pans in strict accordance with Tremco Thermoplastic Membrane details ensuring properattachment, maintaining a minimum 2” clearance around the penetration, with proper depth ofsealant.17
ROOF DRAINS:1. Flash all roof drains in strict accordance with roof drain detail. Replace any worn drain partsthat may cut the roofing membrane or prevent a watertight seal. Replace all drain bolts orclamps holding the clamping ring to the drain basin. Ensure all drain basins are free of debrisprior to leaving the roof after each day. Replace all broken drain domes.2. All drains must have approved clamping rings.3. Un‐reinforced Flashing Membrane must be used as a target flashing on the TPO FBmembrane.4. If a single width of unreinforced membrane is not wide enough to extend 6” passed thedrain bowl, switch to non‐fleece‐back material for drain target.5. A field weld must not pass under clamping ring.18
Typical Wall Flashing Detail19
Typical End Lap Detail20
Inspections and RepairsINSTALLATION OF MEMBRANE:‐It will be the responsibility of the roofing contractor to initiate a Q.C. program to govern allaspects of the installation of the new roof.‐The job foreman and the Tremco supervisor will be responsible for the daily execution of theQ.C. program which will include, but is not limited to, the inspection of all heat welding.‐If inconsistencies in the quality of the welds are found, all work shall cease until correctiveactions are taken to ensure the continuity of all field welds.TEMPORARY SEALS:‐At the end of each working day or the sign of rain, install a temporary watertight seal where theexposed edge of the completed new roofing terminates at the uncovered deck or old, existingroof surface.‐If the old roof surface is covered with slag, spud back 6” from where the membrane will befastened to the deck. Use a sufficient sized strip of TPO / TPO membrane to bridge the newmembrane and the roof deck.‐If using TPO membrane, the strip must be welded to the new roofing membrane and cementedto the cleaned roof deck.‐Prior to the commencement of work, remove all temporary seals if they will cause waterdamage and any exposed roof cement if used. (DO NOT TRACK ROOF MASTICSOR ASPHALTBASED PRODUCTS ONTO THE TPO ROOFING MEMBRANE).21
INSPECTION:The following pages describe areas that will attract the attention of the Tremco TechnicalRepresentative during the warranty final inspection. Checking for proper welds and compliance with thejob specifications will be their major concern. In general, they will be examining the roof to ensure thatthe contractor has executed the workmanship required to ensure the longevity of the system – not onlyfor the full term of the warranty coverage but also for as many years as the sys‐ tem has the potential toprovide. Unless the roof is “100%,” warranty must be withheld until all errors are corrected.22
Cleaning:1. Remove all heavy debris and clear drains and scuppers. Ensure that all drains and downspoutsare clear.2. Using a 2,500 PSI power washer, with or without a rotating head, wash all areas to loosen andremove dirt from the surface of the membrane.3. If dirt still resides on the surface of the roof, use a mild, biodegradable detergent and scrub padsto further loosen the dirt and lift it from the TPO surface. Ensure that the detergent usedcomplies with local codes and that, if run‐off is prohibited, that the water is captured andproperly disposed of.4. If detergent is used, rinse the surface of the roof to remove residual detergent. Again, ensurethat all runoff has been captured if necessary in your area.5. For areas that may still have residual and hard to remove contaminants on the surface, wipeareas with acetone and WHITE RAGS ONLY, then rinse.23
mechanically attached, ballasted or fully adhered. This hand book should be used as a reference to provide general application procedures and product information, and should not replace the proj