Transcription
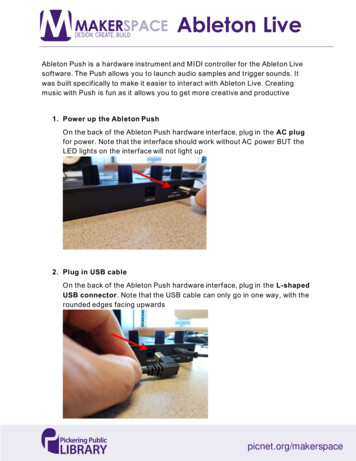
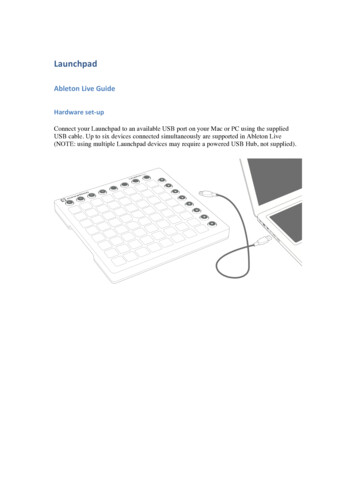
LaunchpadAbletonLiveGuideHardwareset- ‐upConnect your Launchpad to an available USB port on your Mac or PC using the suppliedUSB cable. Up to six devices connected simultaneously are supported in Ableton Live(NOTE: using multiple Launchpad devices may require a powered USB Hub, not supplied).
SettingupLaunchpadwithinAbletonLive1. Open Live’s Preferences from the Live menu in OS X, or the Options menu in Windows 2. Go to the MIDI/Sync tab and select the port that the Launchpad is connected to in the‘Input’ and ‘Output’ chooser at the top of window 3. Next select the ‘Launchpad MK2’preset from the ‘Control Surface’ chooser 4. Under MIDI Ports select both Track ‘On’ and Remote ‘On’ options for the inputs and theTrack ‘On’, Sync ‘On’ and Remote ‘On’ as shown above.
Productoverview:AbletonLiveTheSessionModeWhen Launchpad is chosen as an active control surface, a ring appears on the session view toindicate which section is currently controlled by the pad matrix. Pressing a clip launch padtriggers the clip in the corresponding clip slot in Live. Hitting an empty clip slot in a trackthat is not armed will stop the clip playing in this track. If the track is armed to record,pressing the button records a new clip.The directional arrows and the session button increase the scope of the eight-by-eight grid bynavigating the session view in scenes and tracks. You can also fire horizontal lines of clips(scenes) with the buttons on the right hand side of Launchpad.The buttons in the matrix light up in different colours so you know what’s going on: Clip Colour: When a slot in Live contains a clip, the pad on the Launchpad will reflect it’scolour.Pulsing GREEN: this clip is playingPulsing RED: this clip is recording
SessionOverviewThe Launchpad’s session overview lets you navigate through large Live sets quickly withoutlooking at your computer screen. Hold down the “session” button and the matrix zooms out toreveal an overview of your session view. In the session overview, each pad represents aneight-by-eight block of clips, giving you a matrix of 64 scenes by 64 tracks. In the sessionoverview, the colour coding is a little different:AMBER: Indicates the currently selected block of clips, which will be surrounded by the ringin the software.GREEN: There are clips playing in that block of clips (though that may not be the block ofclips selected).RED: There are no clips playing in that range. NO COLOUR: There are no tracks or scenes in that range.
UsermodesUser1: This mode can be used to play drum racks in Lives MIDI tracks (if no assignmentshave been made), or to freely assign the Launchpad buttons to any MIDI assignableparameter in Live.Notes played in User 1 mode will be sent/received on MIDI channel 6 by default. This can bechanged in the bootloader. Refer to the programmer’s reference manual for details on how todo this.User2: This mode can be used as a convenient place to access Max for Live presets (if nolearn assignments have been made), or to freely assign to any parameter in Live.Notes played in User 2 mode will be sent/received on MIDI channel 14 by default. This canbe changed in the bootloader. Refer to the programmer’s reference manual for details on howto do this.
MixerOverviewHitting the “mixer” button provides an overview of the main controls of Live. The top fourrows of pads indicate the status of track volume, track pan, as well as sends A and B, for eachtrack. These buttons act as ‘reset’ buttons for tracks in Ableton Live.The bottom four rows of pads provide direct access to controls for each track including: stop,track activator, solo and track arm. The bottom four buttons on the right provide additionalcontrol for each track:5. the “stop” button will stop all clips currently playing (Can be prevented by re-assigningfunction) 6. the “Mute” button will turn all tracks on (un-mute) 7. the “solo” button will un-solo all soloed tracks 8. the “arm” button will un-arm all armed tracks TheVolume/Pan/SendA/SendBpagesWhen mixer mode is active, press the vol/pan/sndA or sndB buttons to enter the volume, panor send pages where all eight pads of a column turn into a continuous track “faders” for theirrespective controls.
Setting)up)Launchpad)within)Ableton)Live)!!! 1. Open Live’s Preferences from the Live menu in OS X, or the Options menu in Windows ! 2. Go to the MIDI/Sync tab and select the port that the Launchpad is connected to in the ‘Input’ !and ‘Output’ chooser at the top of window ! 3. Next select the ‘Launchpad MK2’preset from the .File Size: 763KB